
Topic
This article explains how to activate the integration between NinjaOne and your Xero accounting tool.
Environment
- NinjaOne Integrations
- Xero
Description
Activate the Xero integration in NinjaOne to synchronize your invoices. Export invoices from NinjaOne Billing to Xero.
Index
Select a topic to learn more:
- Important Considerations
- Enable and Configure Settings for the Integration
- Configure Invoices for Xero in NinjaOne
- Manually Export Invoices
- Disconnect From Xero
- Import Tax Codes
- Import Products
- Generate Quotes
- Additional Resources
Important Considerations
Consider the following notes before proceeding:
- NinjaOne will not sync invoices that you created before activating the integration.
- You must update your agreements with the settings for the new integration, or they will not sync.
Enable and Configure Settings for the Integration
First, enable NinjaOne's Billing tool. Learn how to here: NinjaOne Billing: Getting Started with Professional Services Automation (PSA).
Then perform the following steps:
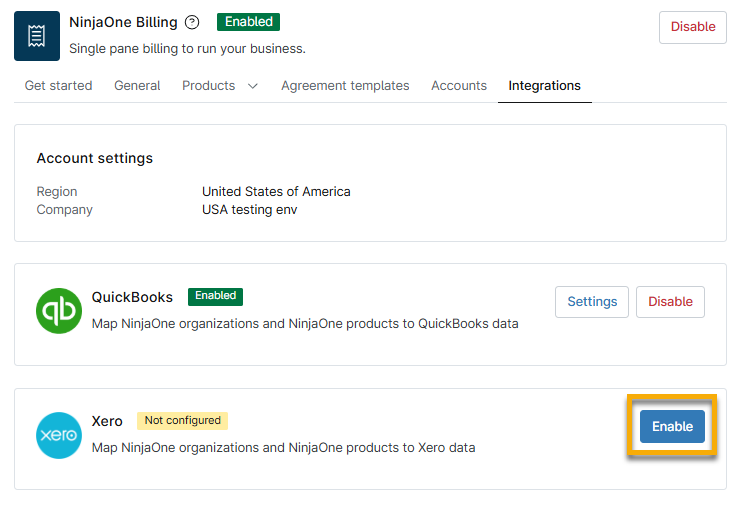
- Open the Integrations tab and click Enable in the Xero widget.
- Enter the credentials for your Xero account and click Log in.
- Follow the onscreen prompts to allow access and establish the connection.
- You will automatically return to NinjaOne with the Xero tenants configuration dialog displayed. Select a tenant from the drop-down menu. A tenant can also refer to the company or business where the products and invoices are stored.
- Click Apply.
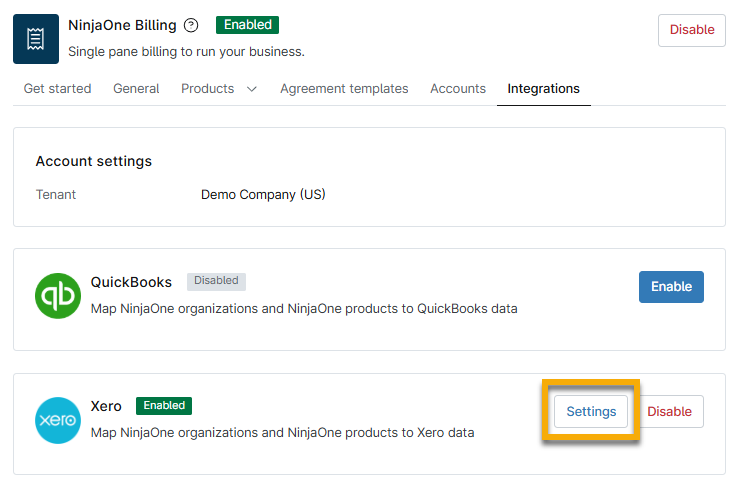
- From the NinjaOne Billing → Integrations page, click Settings in the Xero widget.
Map NinjaOne Organizations to Xero Customers
NinjaOne will attempt to automatically map the NinjaOne organization to the Xero customer (also referred to as a contact) by name. If automatic mapping fails, you can use the following steps to manually configure the mapping. To learn how to create a customer in Xero, refer to View and create transactions for contacts in Xero – Xero Central (external link).
- Open the Customers section and select the checkbox next to the organization name.
- Click Change mapping.
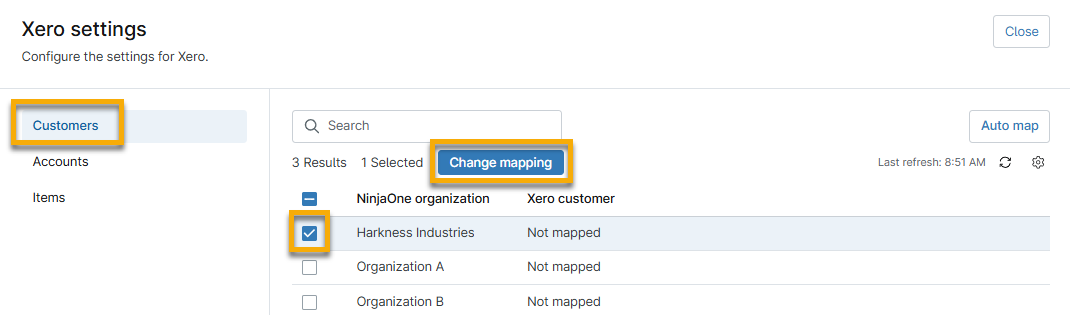
- Select the applicable option from the Xero customer drop-down menu.
- Click Update.
Map Accounts
To learn how to create an account in Xero, refer to Add, edit or delete an account – Xero Central (external link).
- Open the Accounts section and select the checkbox next to the organization name.
- Click Change mapping.
- Select the applicable option from the Xero account drop-down menu.
- Click Update.
Map Products and Items
Items are also referred to as products and services in Xero. To learn how to create items in Xero, refer to Set up inventory in Products & services support topic – Xero Central (external link).
- Open the Items section and select the checkbox next to the organization name.
- Click Change mapping.
- Select the applicable option from the Xero item drop-down menu.
- Click Update.
Configure Invoices for Xero in NinjaOne
Billing agreements allow you to bill a specific product or a group of products at a specified frequency and to establish rules for mapping time entries. Agreement templates build the core data for invoice creation.
When configuring Billing agreements, you can choose to automatically approve generated invoices and decide whether to sync them with a third-party accounting tool or mark them as completed if no tool is connected.
To learn more about creating agreements for invoices, refer to NinjaOne Billing: Agreement Services.
When you activate Xero in NinjaOne, the agreement configuration dialog will include an additional tab labeled Xero.
- In the Add agreement or Edit agreement dialog, select Xero.
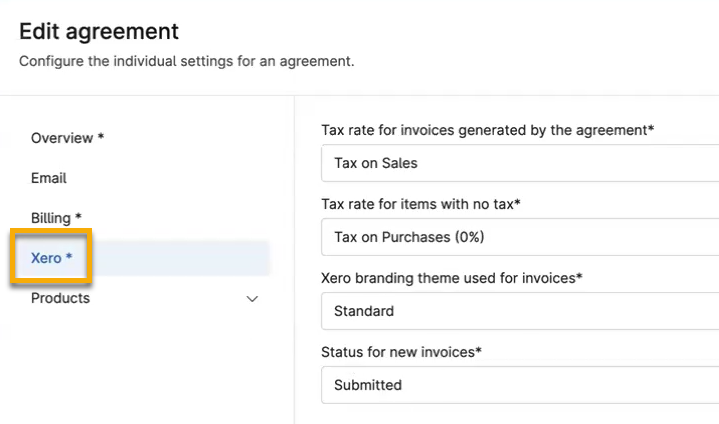
- Configure the data that you want NinjaOne to send to Xero.
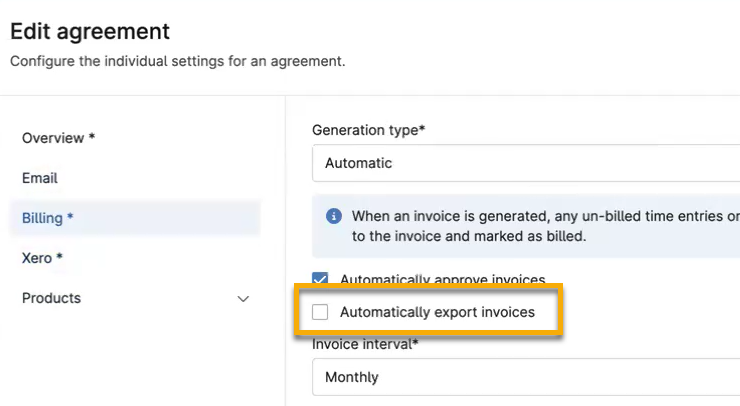
- Select Billing. The Xero integration adds an option to automatically export invoices from NinjaOne to Xero.
- Expand the Products tab. For Xero invoices, NinjaOne provides the following options when adding products:
| Product Type | Description |
|---|---|
| Time entries | Create a labor ticket time entry product for automated billing of ticket time entries. This includes time entries logged in NinjaOne Ticketing. These are calculated automatically and converted into line items on the invoice. For an in-depth explanation of creating these products, refer to NinjaOne Billing: How to Bill a Labor Ticket Time Entry Product. |
| Devices | Create a managed devices product for automated billing of device counts. This includes devices in NinjaOne that can be mapped to a line item. This will be calculated automatically. |
| Device backups | Create a managed device backup storage product for automated billing of device backups. Apply rules by role, group, or storage inclusion type. |
| End-users | Create a managed end-user product for automated billing based on end users in NinjaOne. You can include all or specific user roles. |
| Other | Create a custom product for tracking miscellaneous items (a group of products that do not fall into any of the other defined categories). This requires manual quantity updates. |
- Click Save when you finish configuring the agreement.
Manually Export Invoices
If you did not select the checkbox for Automatically export invoices when creating or editing the agreement, you must manually export them from the organization dashboard.
- On the organization dashboard, navigate to Finance → Invoices → Pending or Approved. If you did not select the checkbox to automatically approve the invoice, you must first approve it before you can export it.
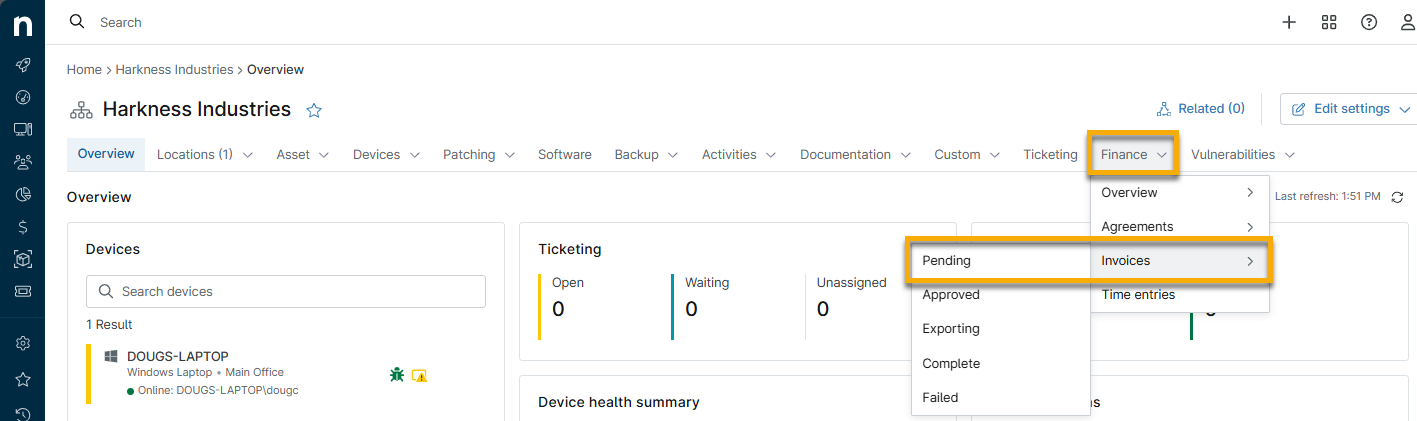
- For pending invoices, approve the invoice and then open the Approved invoices page.
- Select the checkbox next to the invoice number and then click Send.
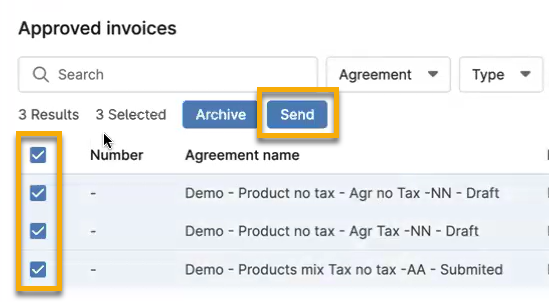
The invoices will move to the Finances → Invoices → Exporting page, and then to Complete. You can now view the invoice in your Xero account.
Disconnect From Xero
If the Disconnected banner appears in the Xero widget, it indicates an authorization error with Xero. This disconnection will occur if you do not convert to a paid account or if you are offboarding from your product. Disconnecting NinjaOne from Xero ensures that we do not access data beyond what is necessary for the integration, and also guarantees that we will only bill you while using the software.
Additional Resources
Refer to NinjaOne Billing: Resource Catalog to view all related articles.