Topic
This article explains how to sync your devices managed in NinjaOne to a domain-separated ServiceNow Configuration Management Database (CMDB).
Environment
- NinjaOne Integrations
- ServiceNow
Description
When you enable domain separation in ServiceNow, the outcome of synchronizing Configuration Items (CIs) can vary depending on how you configured the IRE.
NinjaOne uses the ServiceNow IRE, which supports two modes for domain-separated environments:
- Strict Mode (default)
- Platform Domain Separation Mode
For more information about these domains, refer to ServiceNow documentation on Visibility domains and Contains domains (external link).
If your goal is to create a singular, unique CI in a specific company or domain, you must switch to the IRE to Platform Domain Separation Mode.
Index
Select a category to learn more:
- Review the Identification and Reconciliation Engine Transform Map
- Validate the Import User Scope
- Enable Platform Domain Separation Mode
- Troubleshooting
- Additional Resources
Review the Identification and Reconciliation Engine Transform Map
When the NinjaOne import set data enters ServiceNow and is validated through the IRE, ServiceNow uses a transform map to direct the information.
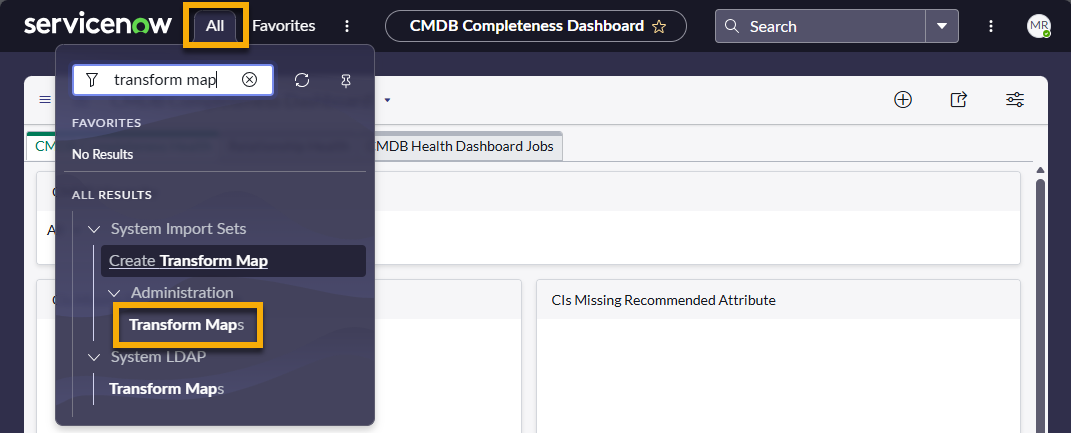
The Transform Maps page will contain a number of NinjaOne maps, which you can search for by name. Review the Order column; the map with the smallest number is designated as having the highest priority, and the greatest number indicates the lowest priority.
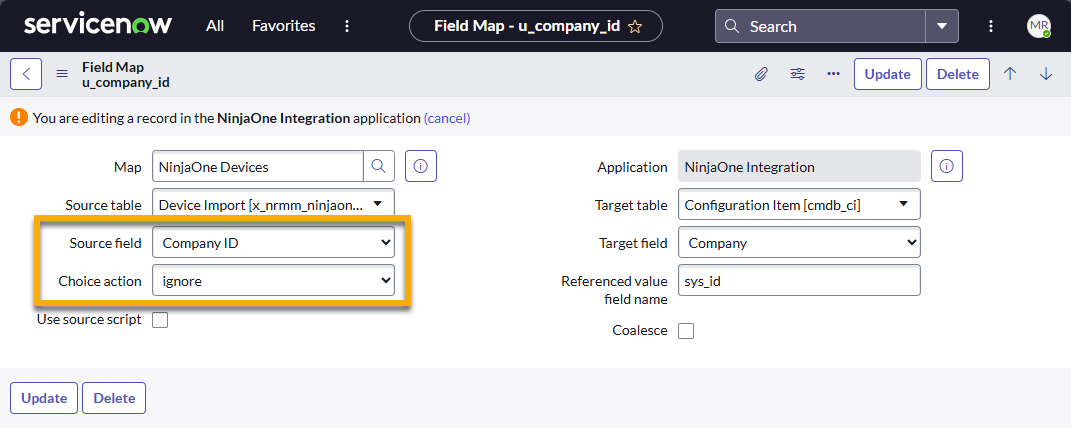
u_company_id → company, and set the Choice List Behavior to Ignore to avoid accidentally creating a new company. Recent updates from NinjaOne may eliminate the need to perform the following process; however, we recommend verifying the data to ensure correct mapping. - From the Transform Maps page, select NinjaOne Devices. Edit the page.
- In the Field Map tab, search for the u_company_id source field and verify that the Target field column reflects company. If this source field does not exist, click New to create it.
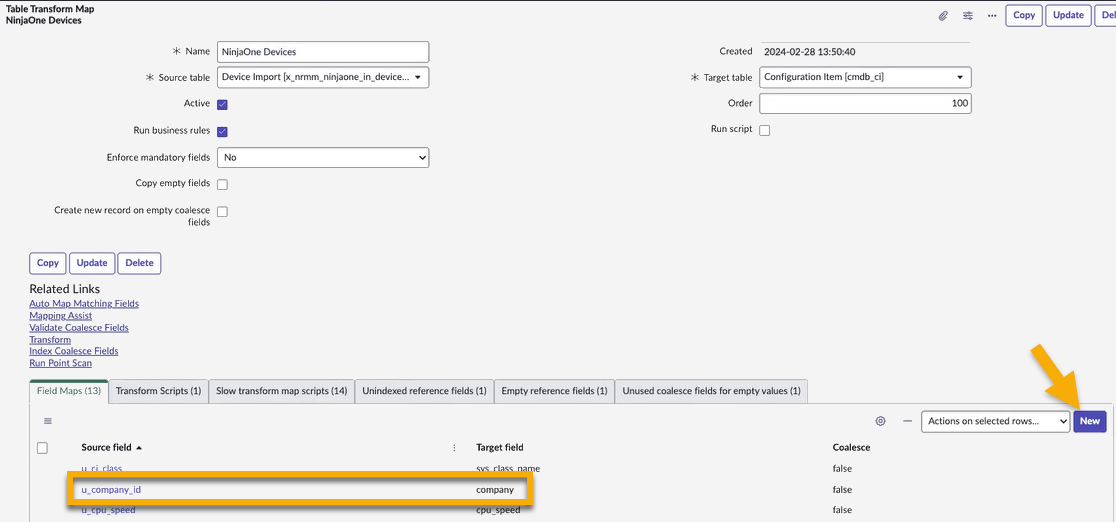
- Edit the record and select Company ID from the Source field drop-down menu. Select Company from the Target field drop-down menu.
- Select ignore from the Choice action drop-down menu. This will prevent ServiceNow from creating a new company if the ID does not exist.
- Click Update to save.
- Return to the Transform Maps page and select NinjaOne Computers.
- Repeat Steps 2 through 4.

Validate the Import User Scope
For NinjaOne's multi-tenancy features to connect with ServiceNow domain separation, you need a user in ServiceNow who can provide context for the application and has access to all domains, similar to a system administrator role in NinjaOne that can access all domains in a multi-tenancy environment.
To configure data imports for multi-tenancy environments, confirm that the Run As user for the NinjaOne scheduled import belongs to the global domain or a correctly managed parent or top-level domain. This ensures accessibility into child or secondary domains for CI upserts.
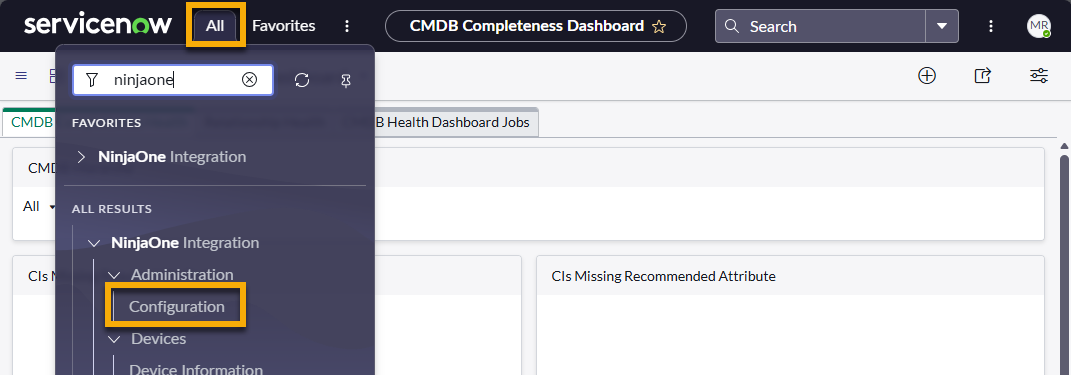
- From the CMDB Completeness Dashboard, open the All drop-down menu and select NinjaOne Integration → Configuration.
- Select NinjaOne Configuration Settings and open the Scheduled Import tab. Click the NinjaOne Devices Import entry.

- Edit the page and then open the record for the Run as user.

- Select the checkbox for Managed domain and select global for the Domain.

- Click Update to save.
Enable Platform Domain Separation Mode
Domain separation requires you to manually change the platform from Strict mode (which is set by default) to Platform Domain Separation mode. To do so, perform the following steps:
- Click the globe icon in the top right corner of the ServiceNow application and select Global for Application scope.

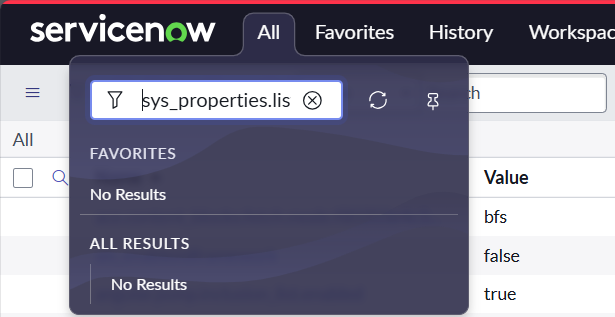
- Open the All menu and paste
sys_properties.listinto the search field. There will not be any results in the menu, but clicking Enter on your keyboard will take you to the System Properties dashboard.
- Update or create a property titled
glide.identification_engine.platform_domain_separation_enabled. - Ensure Application is set to Global.
- Select true | false from the Type drop-down menu.
- Type "true" into the Value field.

- Click Update to save or Submit to create the new system property.
With this setting enabled, the next import will create or update CIs only within the appropriate mapped domain and will no longer generate duplicates in sibling domains.
Troubleshooting
If you have completed the steps in this article and still experience issues connecting, duplication may be the cause. To resolve the issue, follow these steps:
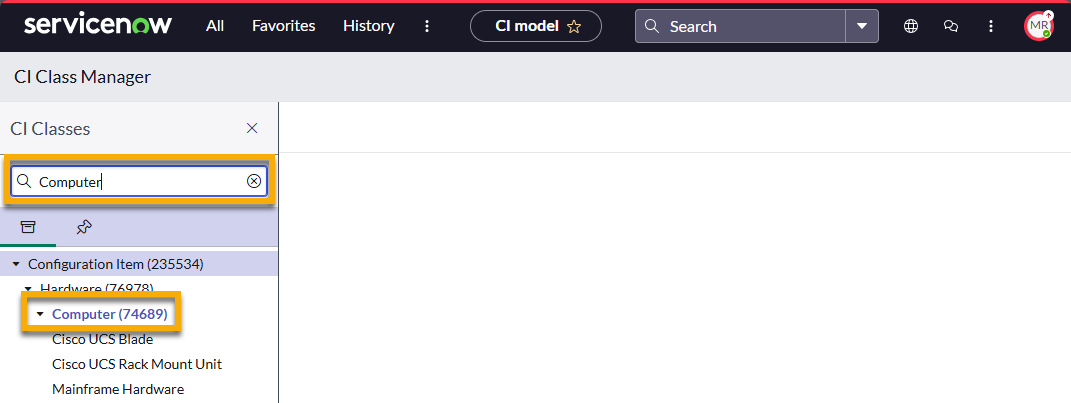
- Open the All menu and select CI Class Manager.
- Open the Hierarchy and search for "computer." Select the Computer configuration item.
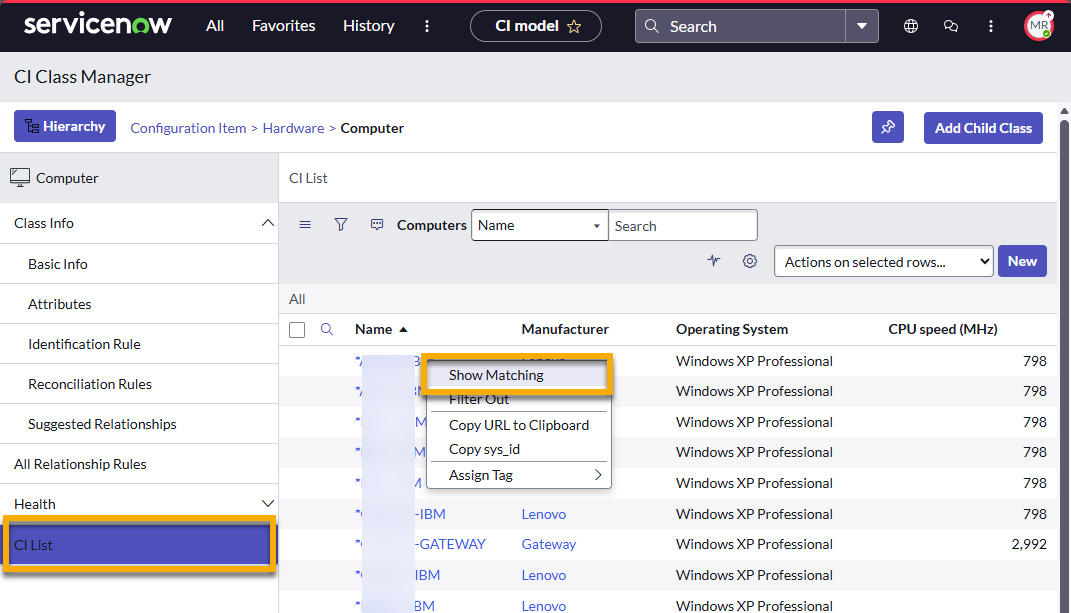
- Click CI List in the left side menu.
- To identify duplicate items, right-click the name and select Show Matching.
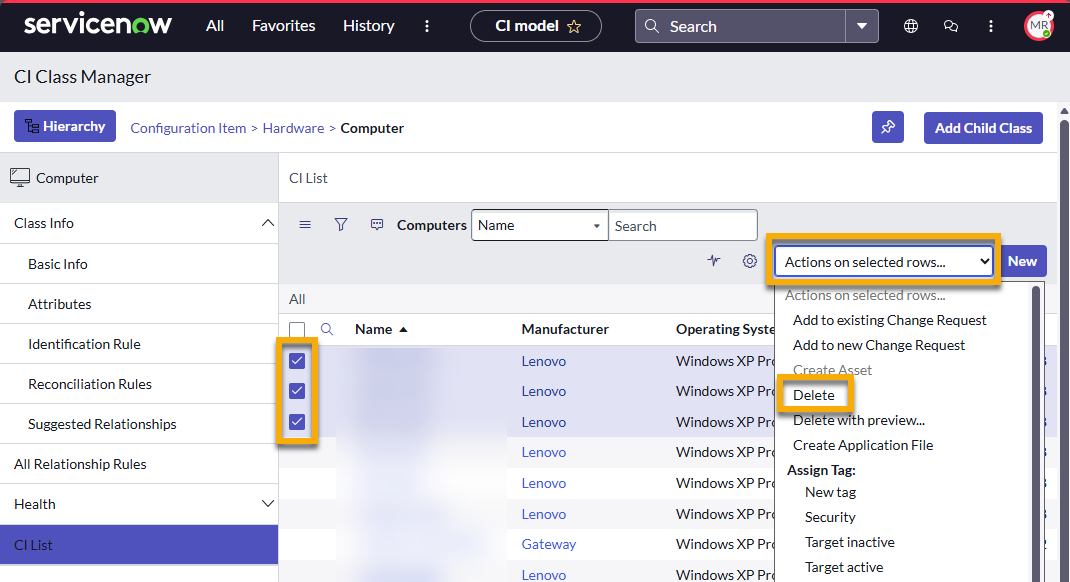
- Select the checkboxes for all duplicate entries and use the Actions on selected rows drop-down menu to delete them.
- If the issue persists, please contact NinjaOne Support.
Additional Resources
Refer to Integrations and Third-Party Apps: Resource Catalog to find more helpful guides for the NinjaOne and ServiceNow integration.