Topic
This article explains how to assign permissions to end users and technicians through roles.
If you would like to learn more about assigning permissions individually, rather than through a role, refer to NinjaOne Platform: Permission Settings for Technicians or NinjaOne Platform: Permission Settings for Technicians.
Environment
NinjaOne Platform
Description
NinjaOne allows administrators to create numerous permission templates, called "roles," that you can assign to both new and existing NinjaOne technicians or end users. You can use roles for a variety of use cases, including customer access, apprentices, audits, and third-party collaboration. These permissions determine their level of access to different features and functionality within NinjaOne. By default, administrators will have access to additional dashboard monitoring.
Select a category to learn more:
- Scope of Permissions
- Set up a New Role via a Template
- Managing Roles
- Assign a Role via the Account Configuration Page
- Remove a Member From a Role
- Example Permissions
- Additional Resources
Scope of Permissions
Give technicians access to:
- View, update, create, and delete system-level permissions.
- Create, view, update, and delete organizations.
- Manage secure fields, remote tools or access, and create devices.
- Create, view, update, and delete policies.
- Create new categories for the Automation Library and create and run scheduled tasks.
- Create, view, update, and delete ticket actions, boards, and permissions.
- Create, view, update, and delete knowledge base documentation and related items.
Give end users access to:
- Connect to selected features on enabled devices.
- Restore files from devices with backup enabled.
- View, update, and create tickets.
Set up a New Role via Template
Using a template is the easiest way to set up a new role. Templates are completely customizable, regardless of which one you select.
- Blank Template: This template has no pre-defined permissions set.
- Full Permissions Template: This template has all of the highest-level permissions pre-defined.
To create a new role from a template, perform the following steps:
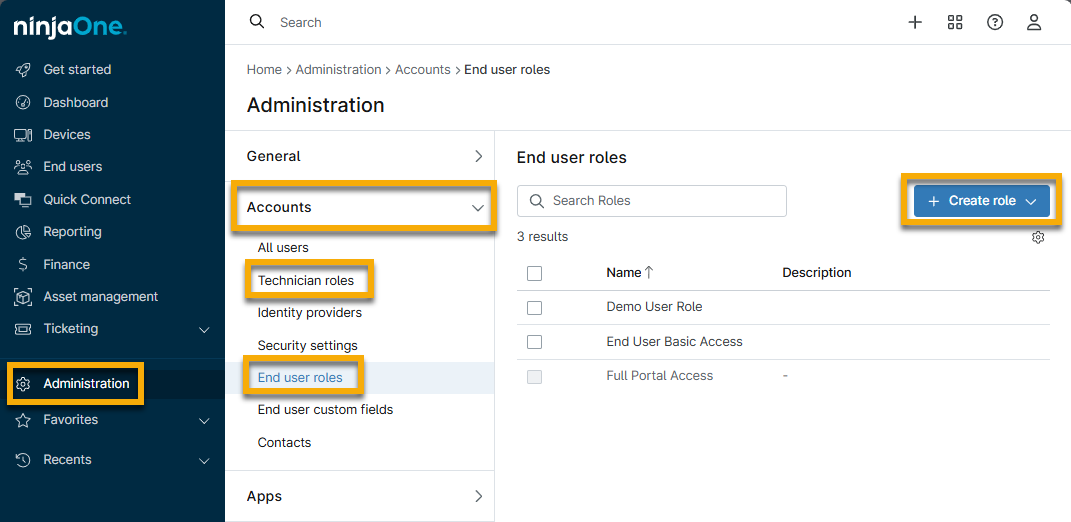
- To get started, navigate to Administration → Accounts and open the Technician roles or End users roles tab.
- Click Create Role and select either Blank Template or Full Permissions Template from the drop-down menu.
- Blank Template: Customize each permission. Doing so allows you to leave permissions deactivated or limited.
- Full Permissions Template: Create a template that has all permissions enabled at the highest level.
Creating a Blank Template
Select the Blank Template option from the Create role drop-down menu to customize each permission. Then, use the following instructions to configure it.
- The General section will be open by default. Provide a unique identifier in the Name field. Optionally, provide a summary of the role's purpose in the Description field.
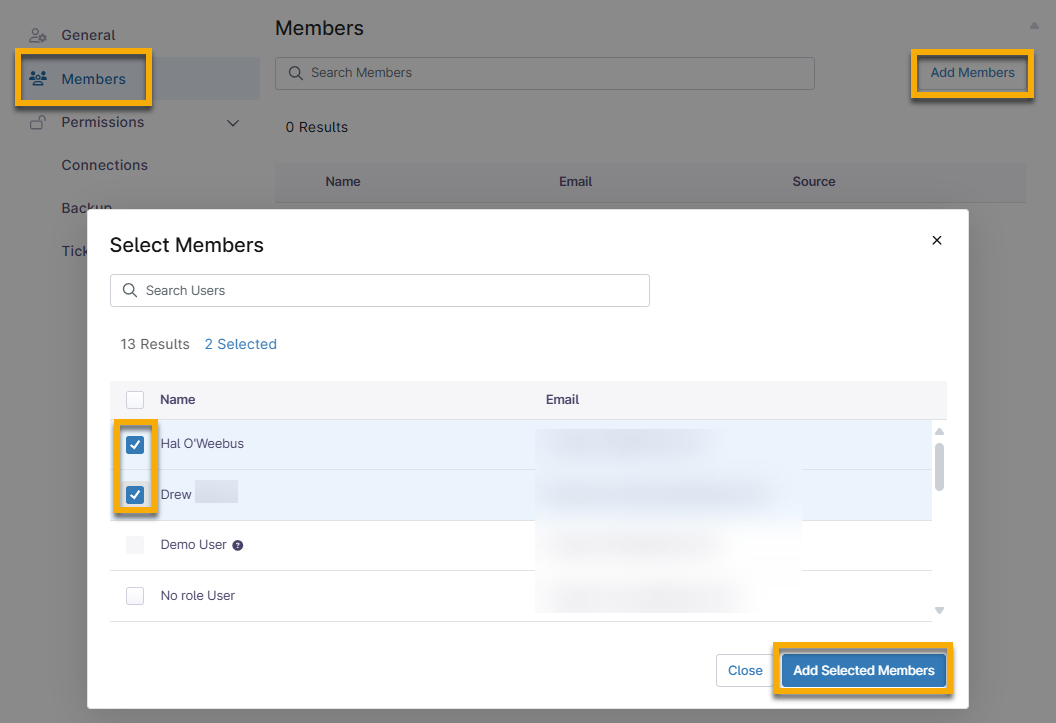
If there are existing accounts in NinjaOne that you want to add to this role, open the Members section and click Add Members. In the resulting modal, select the checkboxes next to the end users you want to add to this role, and then click Add Selected Members.
If you add a user to multiple roles, their permissions will default to the highest level of access amongst the assigned roles. For example, if a user is a member of a role that does not have remote access permissions and is also a member of a role that does have access permissions, NinjaOne will use the higher permission that grants access. The user will have remote access permissions.
Figure 2: Add members to a role (click to enlarge)
- In Permissions, click through each section to enable specific permissions. Refer to User Permissions: Permission Options for a description of each permission option.
Managing Roles
After you have created a role, select the checkbox next to the role name to review the following management options:
- Edit Selected Role: Open the role configuration page to update permissions or members.
- Copy Selected Role: Create a new role that copies the permissions from the selected role.
- Delete Selected Role(s): Remove the role from use.

Figure 3: Manage your roles
Assign a Role via the Account Configuration Page
As you create or edit roles, you can add an end user or technician from the Members section. You can also add one or more roles when you are creating or editing a technician or end user account.
To assign a role from the account configuration page, perform the following steps:
- Open the account configuration page for either a technician or end user.
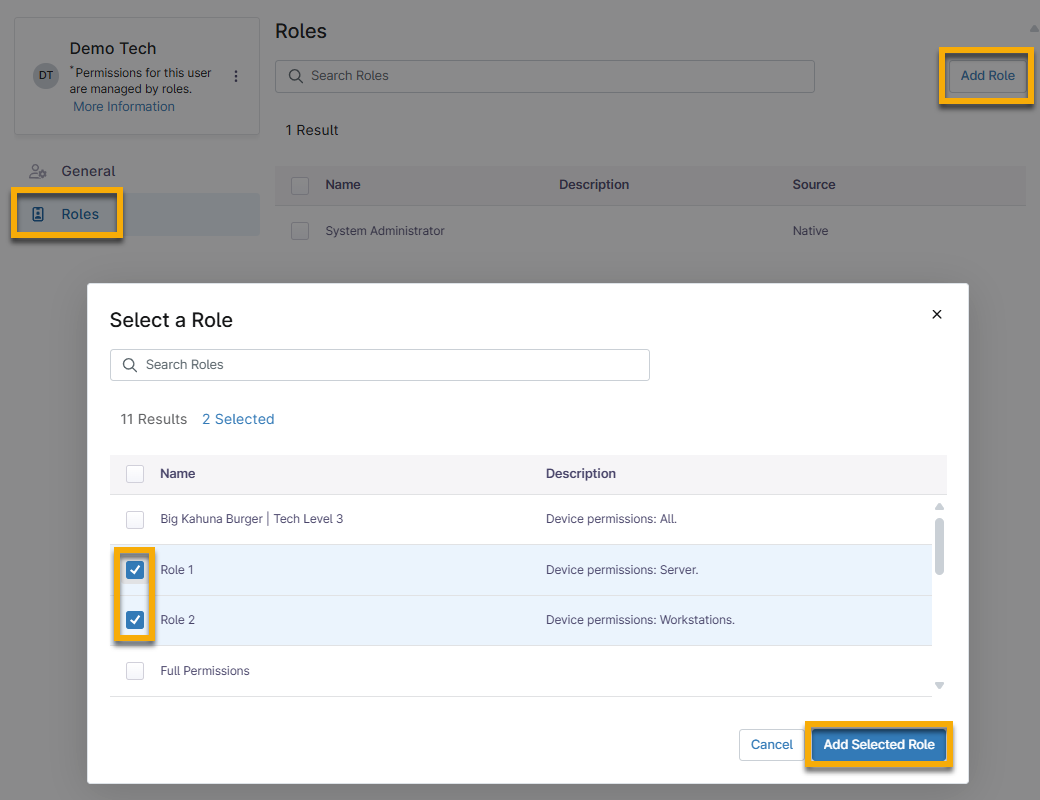
- Open the Roles section and click Add Role.
- In the resulting modal, select one or more roles by selecting the checkbox next to the role name, and then click Add Selected Role(s).
Figure 4: Assign a role from the account configuration page (click to enlarge)
Remove a Member From a Role
After you add members to a role, you can remove them from either the role or the individual account configuration page.
To remove a member from the role configuration page:
- Open the Members section.
- Select the checkbox next to the name of one or more members.
- Click Remove Selected Member(s).
- Click Confirm in the resulting modal.
- Click Save Changes.
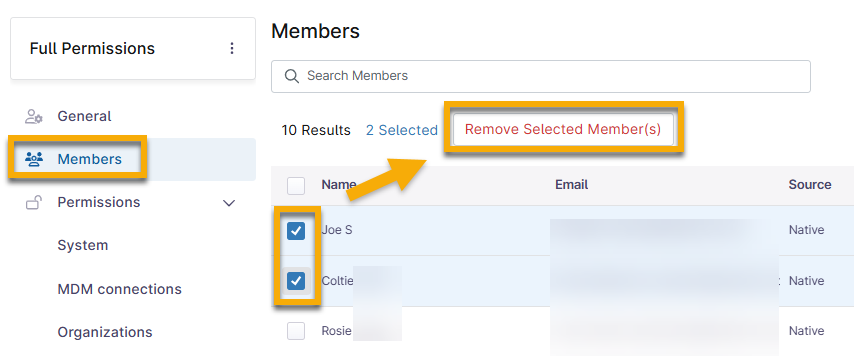
Figure 5: Remove members from a role
To remove a role from the account configuration page:
- Open the Roles section.
- Select the checkbox next to the name of one or more roles.
- Click Remove Selected Role.
- Click Save Changes.
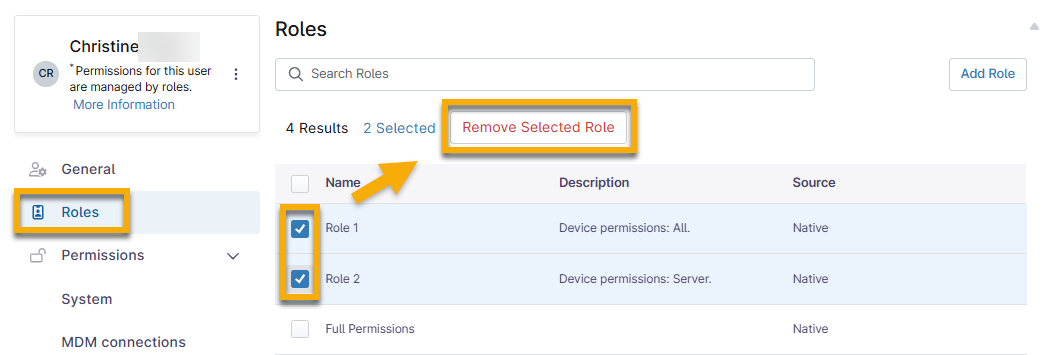
Figure 6: Remove roles from an account
Example Permissions
The following examples show common ways to manage user permissions for IT departments so you can limit access to only the functionality that your various IT departments need.
Select an example to learn more:
- Configure Separate Permissions for Different Technician Levels
- Configure Permissions for Users Who Need Ticketing or Reporting Information Only
- Business Unit Permissions: Limit Access by Department
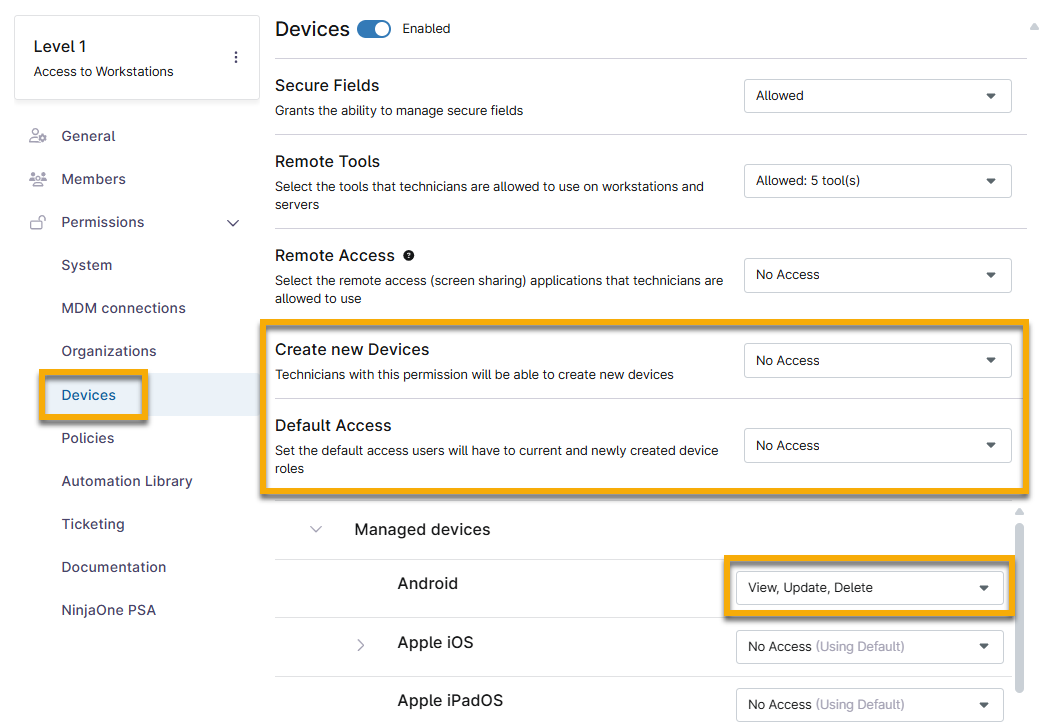
Configure Separate Permissions for Different Technician Levels
Set these permissions from the role configuration page in the Devices section. If you want to control access to specific device types, you must select "No Access" for Create New Devices and Default Access, and then select the necessary access level from the device type drop-down menu.
Figure 7: Set permissions for specific device types
The following list provides an example of how you can set permissions for different technician levels:
- Role "Level 1" has access to workstations.
- Role "Level 2" has access to servers.
- Role "Level 3" has access to network devices.
Configure Permissions for Users Who Need Ticketing or Reporting Information Only
Enable the Ticketing section and select the options from one or more drop-down menus. Enable the System section and select an option from the Manage Reports drop-down menu.
Business Unit Permissions: Limit Access by Department
Enable the Organizations section and select an option for Default Access to control permissions to all organizations.
If you want to permit access to only specific organizations, select No Access from the Create New Organizations and Default Access drop-down menus. Then, select the checkboxes next to the organizations and click Edit Permissions.
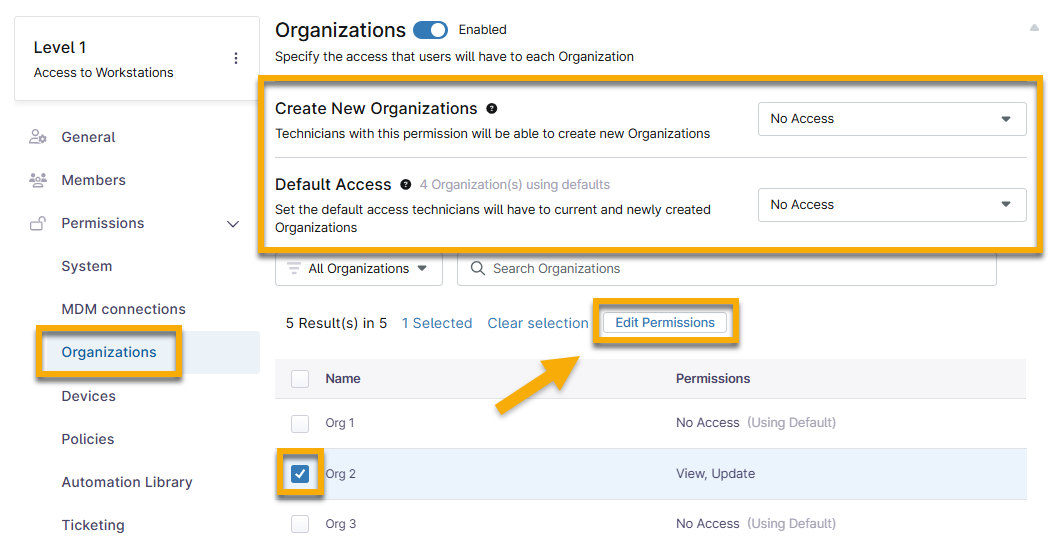
Figure 8: Set permissions for specific organizations
Additional Resources
Refer to the following resources to learn more about user management:
- Allow a technician to edit custom fields: Global Custom Fields
- User Management: Resource Catalog