
Topic
This article discusses using a network attached storage (NAS) device to store your device backups.
Environment
NinjaOne Device Backup
Description
You can configure network attached storage (NAS) to store image and file/folder local backups. This short video provides an overview of the process:
Refer to the following sections for more information about setting up NAS storage for your backups.
- Best Practices
- Network Storage Setup and Management
- Assigning Default Network Storage to Use with Backups
- Cloud Sync Failures
- Consistency Checks
- Additional Considerations
Best Practices
- You should secure NAS access with its own service account that you only use for the Network Storage credential for NinjaOne Device Backup.
- You should configure the NAS share for the above service account only, with no access to any other user account.
- Consider isolating the NAS behind VLAN or firewall access rules.
- Make sure you inactivate the Recycle Bin on the NAS to avoid storage bloat.
- For extra security, do not make the share visible to the network via the discovery search features.
- Always keep your NAS up to date.
- Do not keep your NAS open to the internet.
Network Storage Setup and Management
Setting up Network Storage
To set up network storage for your backups, follow these steps:
- From the NinjaOne dashboard, navigate to Administration → Organizations and select an organization.
- Open the Backup → Storage location tab and click + Add.
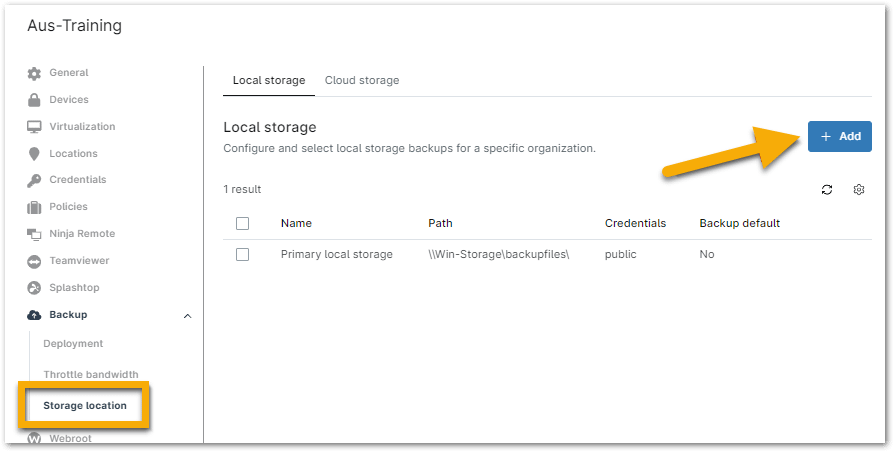
- Give the network storage a name.
- Enter the path to the storage.
- Select credentials from the organization's credential store or create new ones.
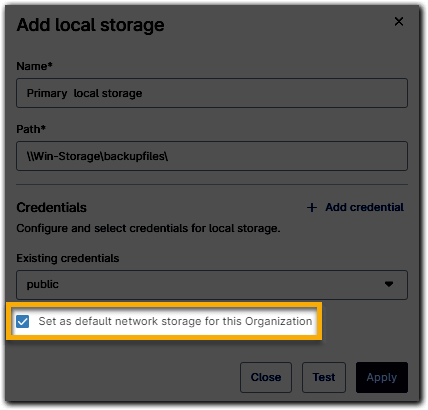
- To make network storage the default for the organization, check Set as default network storage for this organization. If this is the first time setup, NinjaOne will check this box by default.
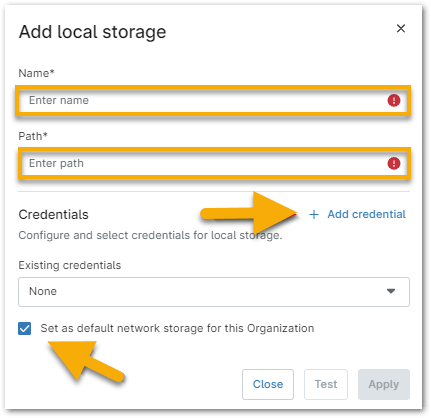
- To test the accessibility of the network storage, click Test. NinjaOne will then prompt you to select an online Microsoft Windows device to test.
- Click Start to begin the test.
- If the test passes, a green check mark will be listed next to all verification steps.
If the test fails, an X will indicate the failed stage.
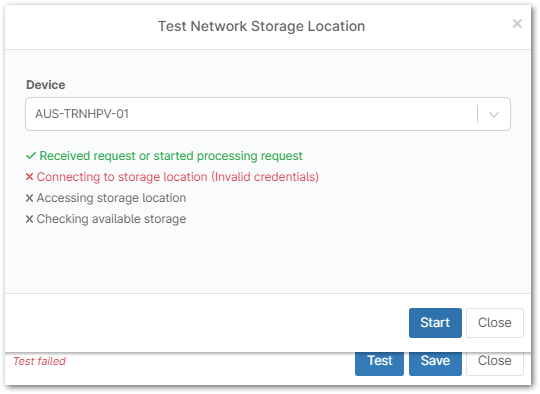
Figure 3: Test Network Storage Location (click to enlarge)
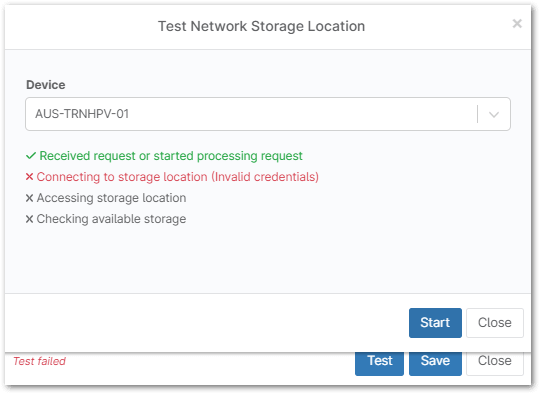
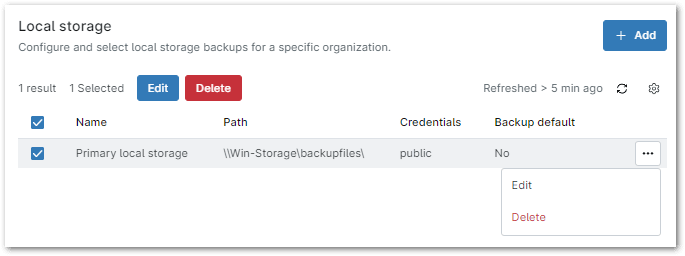
- Click Save. NinjaOne will list the storage location in the organization editor.
Edit or Delete Network Storage
Select the checkboxes next to the storage location or place your cursor over the row to reveal the actions menu.

Assigning Default Network Storage to Use with Backups
Organization Defaults
When you add a new network storage location in the organization editor for the first time, a checkbox will be automatically marked to set that network storage as the default for the organization. However, you can change this setting by following these steps:
- Use the steps in the section above to edit one of the storage locations.
Click the checkbox to change the default setting for organizational network storage location.
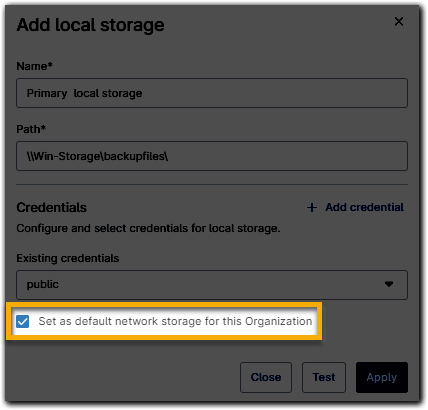
Figure 6: Set as default (click to enlarge)
Location Defaults
To adjust the default network storage per location:
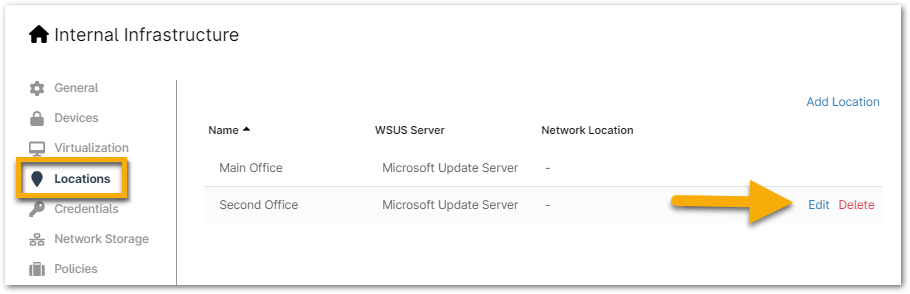
Open the Locations tab within the organization editor and place your cursor over the location whose network storage should be modified, then click Edit.
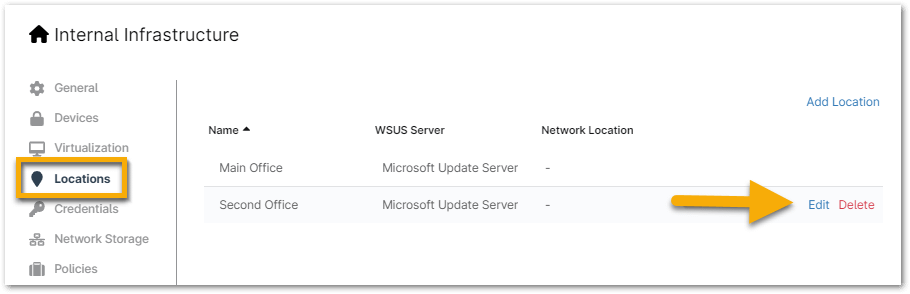
Figure 7: Locations (click to enlarge)
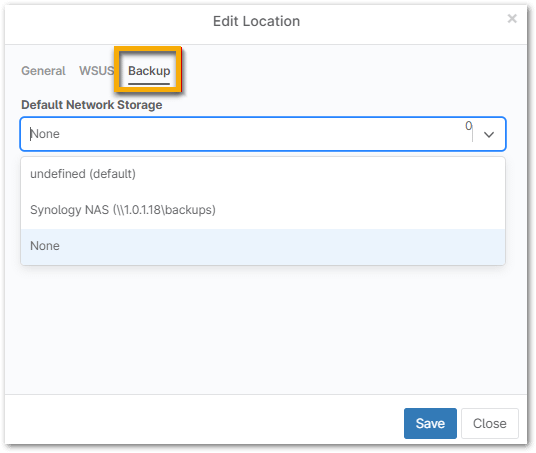
The Edit Location configuration dialog will appear.
- Open the Backup tab and select a default network storage option from the drop-down menu.
- Click Save.
Device Defaults
To adjust the default network storage per device, follow these steps::
- Navigate to the device dashboard and open the Settings tab.
In the NinjaOne Device Backup module, next to Network Storage, select Edit
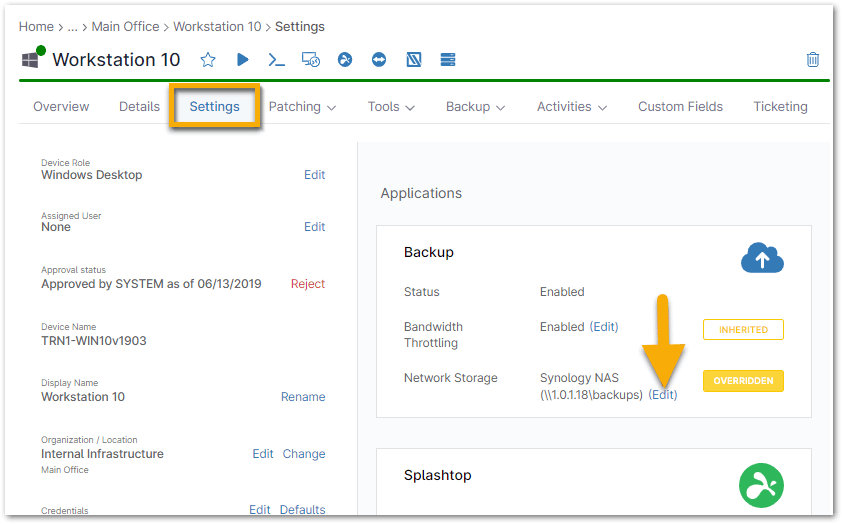
Figure 9: Network Storage (click to enlarge)
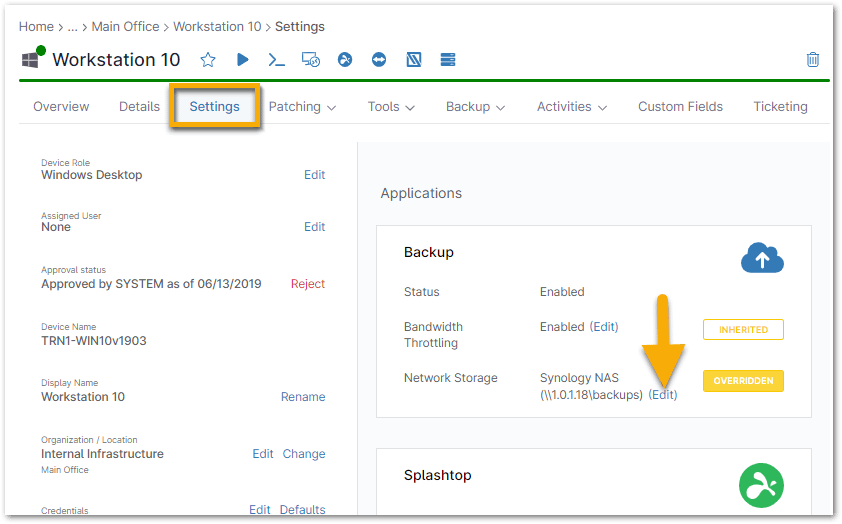
The Network Location editor dialog will appear.
- Choose a configured network storage location from the drop-down menu, then click Save.
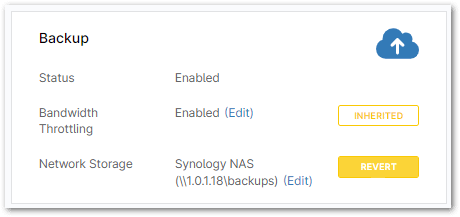
Revert to the configured organization/location settings at any time by hovering over the Overridden label and clicking Revert.
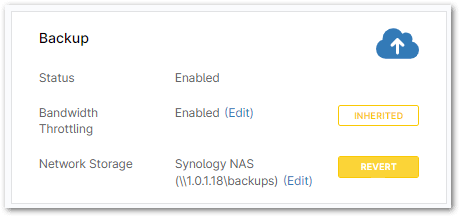
Figure 10: Revert (click to enlarge)
Cloud Sync Failures
When using a hybrid backup plan, data is first stored on the NAS and then synced to the cloud. However, if data fails to sync to the cloud, a device health entry is generated on the device dashboard.
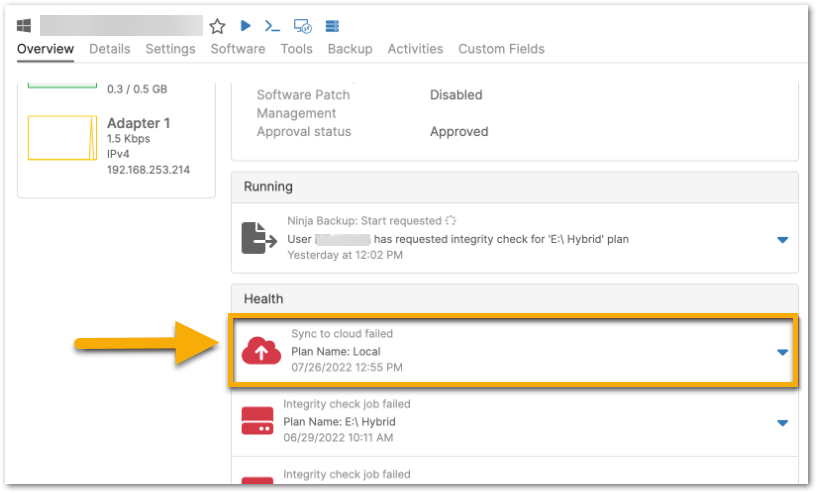
From this device health entry, you can click the drop-down arrow to retry the cloud sync.
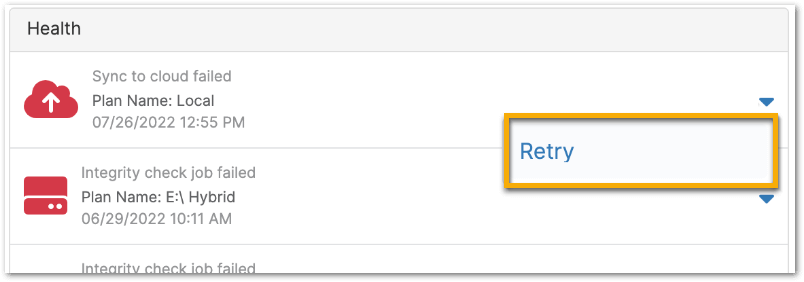
Cloud sync failures typically occur if the device goes offline when the data is syncing from the NAS to the cloud. Therefore, retrying the sync when the device is confirmed to be online will often resolve the issue. If you continue to experience problems with persistent cloud sync failures, open a ticket with our support team.
Consistency Checks
When using NAS to store backup data, NinjaOne Device Backup performs two different types of consistency checks.
- Pre-flight checks—before performing an incremental backup, the backup agent checks whether a full backup exists on the NAS.
- Integrity checks—checks run on demand to confirm that the data on the NAS matches the data in the database.
Both of these consistency checks are performed using a hash check, where an encoded version of the file is compared to the version of the file in the database.
For information about different errors that may be encountered during a consistency check, refer to NinjaOne Device Backup: Troubleshooting Error Codes.
Pre-flight Checks
NinjaOne will run a pre-flight check whenever it starts a backup job. If the pre-flight check fails, that backup job will fail, and an error will display indicating job failure due to the failed pre-flight check.
Integrity Checks
You can run Integrity checks on demand from the device page or from the Search tab.
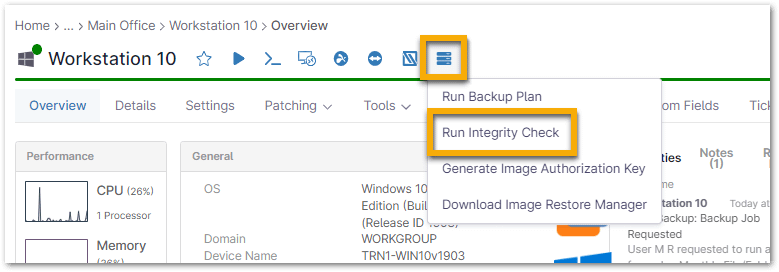
From the device page, move your cursor over the backup icon and select Run Integrity Check. This option is only available if the device is online.
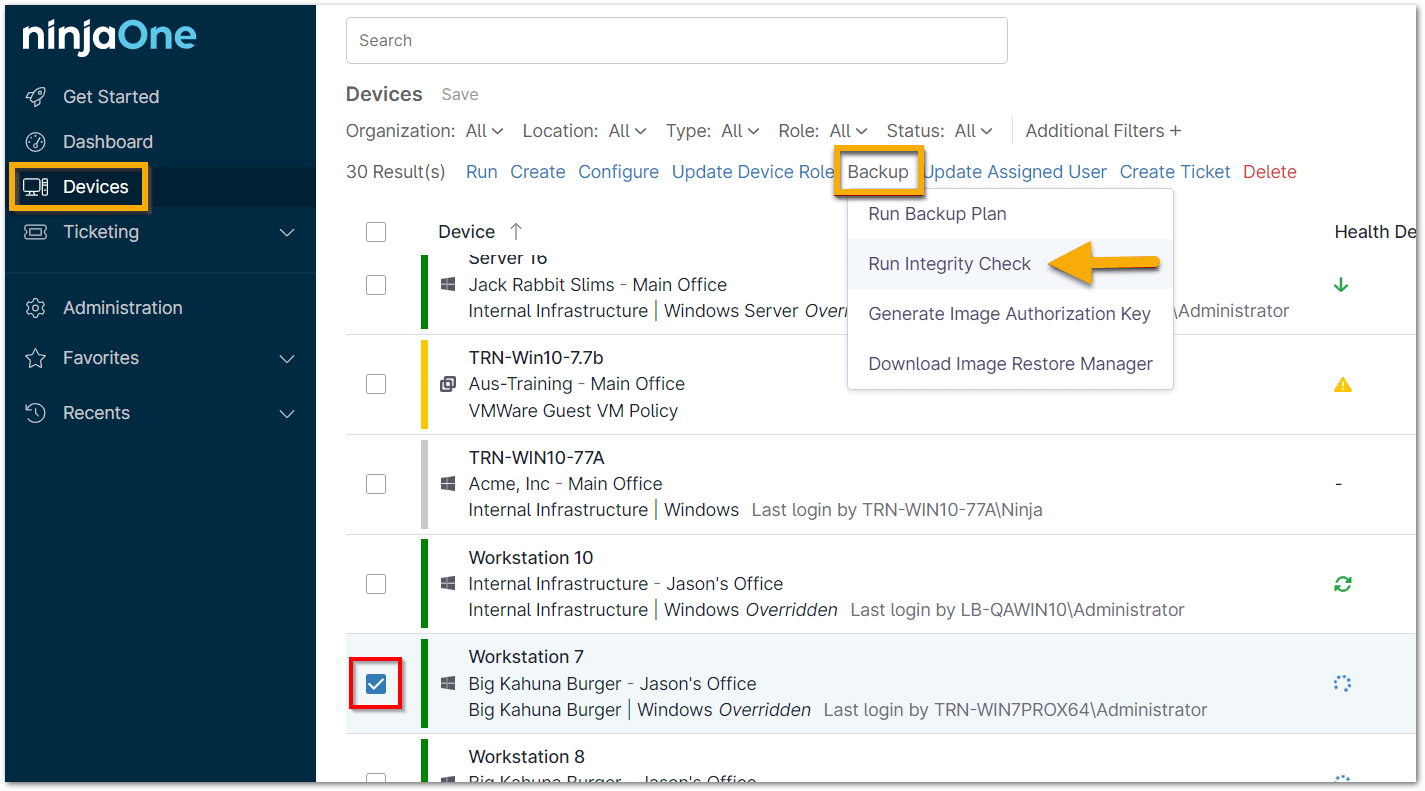
From the Search tab, check off the device in question and select Backup → Run Integrity Check. This option is only available if the device is online.
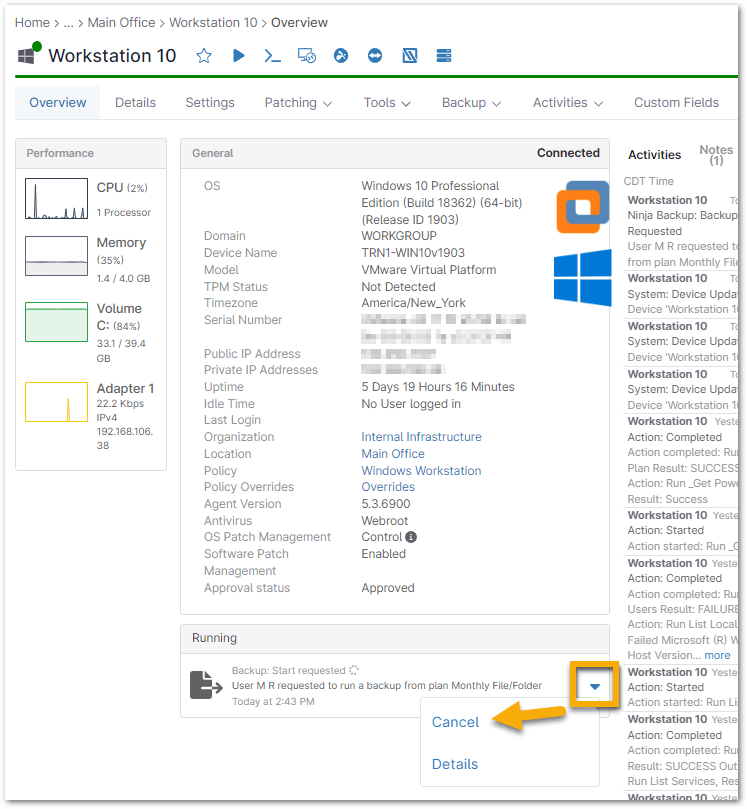
Once an integrity check has been triggered on a device, it displays as a running action on the device. You can cancel a running integrity check by clicking the downward-facing arrow in the events list for the action.
If the integrity check fails, NinjaOne generates a device health alert.
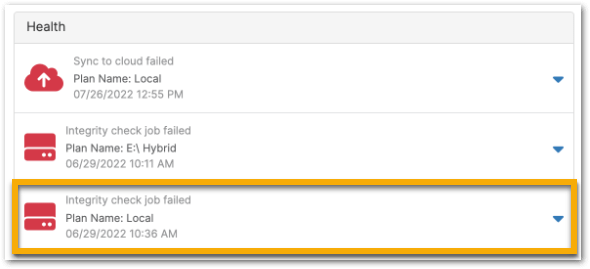
From the drop-down menu in the device health alert window, you will have options to Clear, Retry, or view Warnings.
The Warnings option opens a dialog with information about the specific errors causing the check to fail.
Additional Considerations
- Backup to local storage will complete with a warning if available disk space is less than five percent. or 500 GB; whichever number is lower.
- Backup to local storage will fail if available disk space is less than two percent, or 200 GB, whichever number is lower.
- You can manually clear failed integrity checks as described above. However, if you want to change the status that an integrity check failure will put your device in, you must configure this setting using Health Statuses.
- For hybrid plans, if you delete backup data from the NAS, a new backup plan will have to be created and run for NinjaOne to back up the data again.
- Data Integrity Check with API utilizes the existing integrity check function that is only available for Local or Hybrid plans to perform a data integrity check on the locally stored dataset.