Topic
This article provides information about the various permission options NinjaOne offers for end user accounts.
Environment
NinjaOne Platform
Description
You can use roles to set the same permissions for multiple technicians and end users. Refer to User Roles for more information. If you assign an end user to a role, you cannot view individual permission options. Instead, open the End User Roles or Technician Roles editors in the Accounts section to update these sections.
Select a category to learn more.
Important Considerations
You must activate the toggle switch at the beginning of each Permissions page to configure the settings.
By default, specific permissions will automatically update to provide recommended access levels after you enable the section. You can change the selection by choosing a new permission level from the drop-down menu.
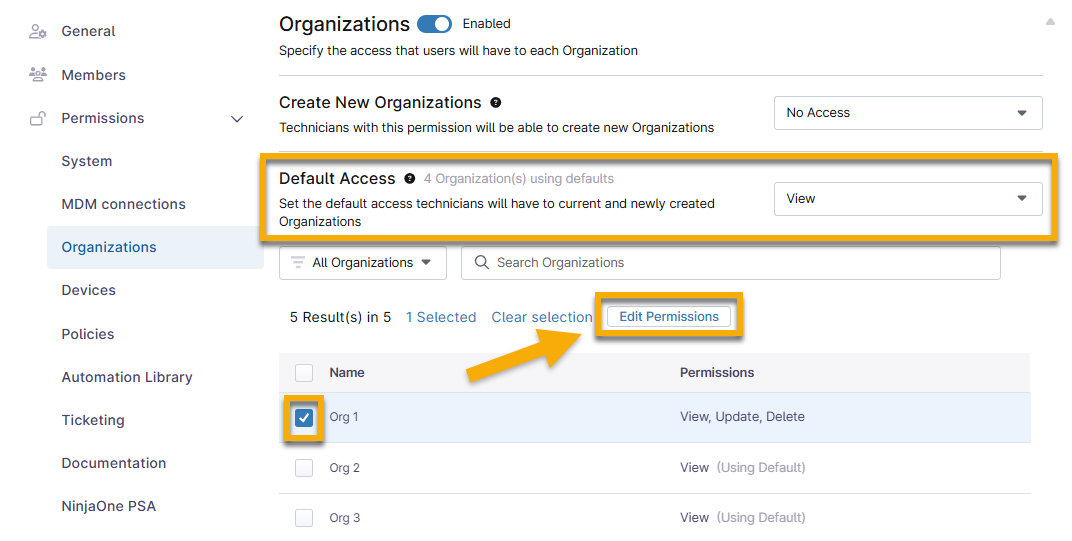
For some Permission sections, you can set Default Access, which determines the access level for all subsequent permissions within a category. For example, you can set the default access to all organizations to "View," but then change the access level for a single organization to "View, Update, Delete." To change the default access, select the checkbox next to the individual organization name and then click Edit Permissions.
Creating or Accessing Accounts
Access end user and technician accounts at Administration → Accounts → All users. For instructions to create a new user or technician account, refer to
Select a topic to learn more about it:
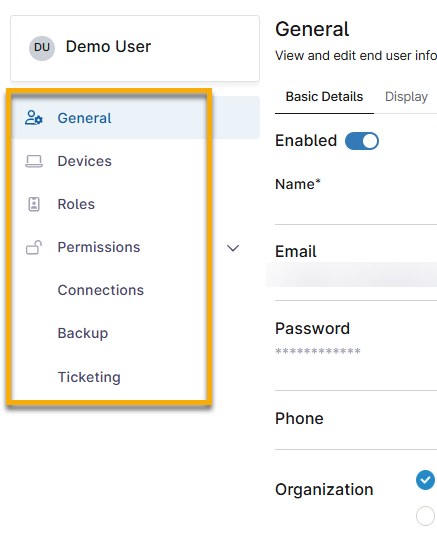
General
The General tab contains three subtabs:
- Basic Details:
| Field | Description |
|---|---|
| Enabled | The account is active, and the user can log in. Deactivating the account will lock the user out of NinjaOne but will not delete it, so that it can be reinstated at a later time. |
| Name | The end user's first and last name. |
| The invitation to log in to NinjaOne is sent to this account, and the end user will use this account for all future access to their portal. | |
| Password | Click Reset Password to resend the NinjaOne invitation. The end user will be prompted to create a new password. |
| Phone | If you select "SMS" in the Security tab, the end user's personal or work mobile number will be used to complete authentication. |
| Organization | This option provides access to view a specific organization or all organizations. You can either grant access to all organizations or to only one, but not a customized selection. |
- Display: Select the default language to display on the end user's portal.
- Security: Select the authentication type for the account:
- Native: Allow native authentication and turn off single sign-on (if configured).
- Single sign-on: Require single sign-on and turn off native authentication.

Devices
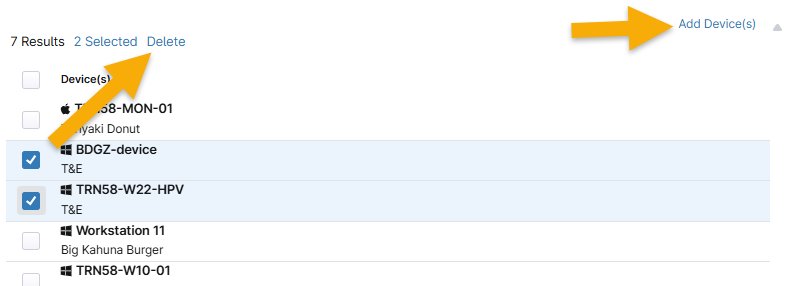
Click Add Device(s) to associate devices owned by a particular organization. You can add as many devices as necessary by selecting the checkbox next to the device name.
Roles
All currently configured roles display in this tab. You can search for roles by typing the name of a role into the search bar. Add new roles for the user by clicking Add Role in the top right corner of the page. Refer to
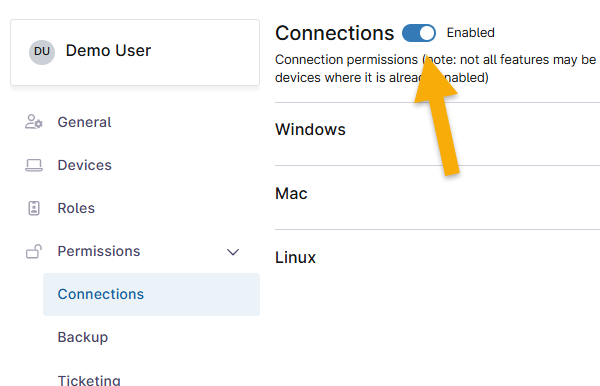
Permissions: Connections
Select which remote access tool has access to which operating systems.
Permissions: Backup
Allow users to restore files from devices when backup is enabled.
Permissions: Ticketing

Additional Resources
Refer to User Management: Resource Catalog to learn more about managing users and technicians in NinjaOne.