Topic
Learn how to configure and manage device roles in NinjaOne.
Environment
NinjaOne Endpoint Management
Description
Device roles enable you to create custom roles for devices, which then work in conjunction with policy assignments.
View additional tutorials in our video library.
Index
Select a category to learn more:
- Required Permissions to Modify Device Role Assignment
- Creating a Device Role
- Adding Custom Fields to a Device Role
- Assigning a Role to a Device
- Changing Device Roles
- Assigning Default Policies to Device Roles
- Additional Resources
Required Permissions to Modify Device Role Assignment
Note the following permission requirements for modifying device role assignment:
- Only system administrators can create, update, or delete device role configuration.
- Technicians with permissions activated to modify device roles can change role assignment for devices.
Creating a Device Role
To add a new device role, perform the following steps:
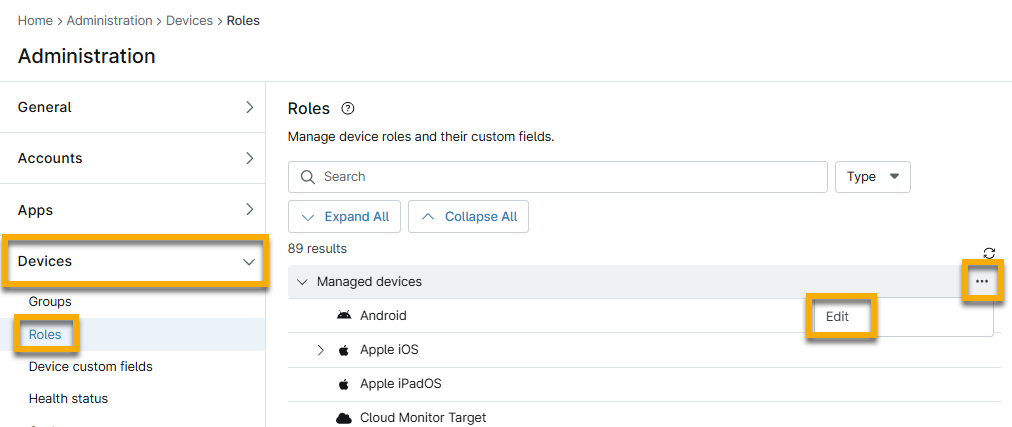
- Navigate to Administration → Devices → Roles. The Managed devices category will automatically expand. To learn more about unmanaged devices, refer to Working with Unmanaged or Unsupported Devices in NinjaOne (ITAM).
- Move your cursor over the device role within the hierarchy and click the ellipsis icon. Click Add to create a new role.
- You can continue to expand existing device roles and create subtypes (child roles) by clicking the angle bracket (>) icon. Subtypes inherit the properties defined for the device type.
- Name the new role (required) and add a description (optional), then click Add. Your new custom device role will now appear in the list of roles.
Adding Custom Fields to a Device Role
You can add custom fields to all device roles by editing the topmost level. To learn how to create custom fields, refer to Custom Field Setup.
- Navigate to Administration → Devices → Roles.
- Move your cursor over a device role, click the Action (ellipsis) icon, and select Edit.
If you add custom fields to a top-level Managed devices role, NinjaOne will display them in all child device roles.
A pin (or thumbtack) icon next to a tab or custom field name indicates that it has been added to a top-level device role. You cannot move, delete, or reorder this field from the inherited role. Refer to Custom Fields: Resource Catalog to learn more.
Creating and Adding Custom Fields
To learn how to assign custom fields to the device role, refer to the following table and Figure 6, below.
| Figure 6 Key | Description or Purpose |
|---|---|
| 1 | The Input fields tab is open by default and allows you to add custom fields to the device role. The Static elements tab allows you to add a description, separator, or title to format the custom fields. |
| 2 | The Filters icon helps you find specific custom field types. The Create input field icon (+) lets you create a new custom field. |
| 3 | Click the plus sign (+) next to the custom field that you want to assign to the device role. The custom fields will display in the order you selected them. |
| 4 | Switch tab views if you have more than one tab created. Each tab allows you to customize the list of custom fields; you can either add completely different custom fields to each tab or duplicate them. These tabs display on the device dashboard under the Custom tab. |
| 5 | Create, edit, hide, delete, or rearrange the order of your tabs. These tabs will extend to all unmanaged roles, but if you hide a tab it will only be hidden for that selected role. |
| 6 | The "inherited" tag indicates that the custom field was added at the top level. To remove an inherited custom field, you must edit the Managed devices or Unmanaged devices role level. |
| 7 | Move your cursor over the custom field to remove the assignment from the device role. It will return to the Input fields tab. You cannot remove inherited fields. |
Assigning a Role to a Device
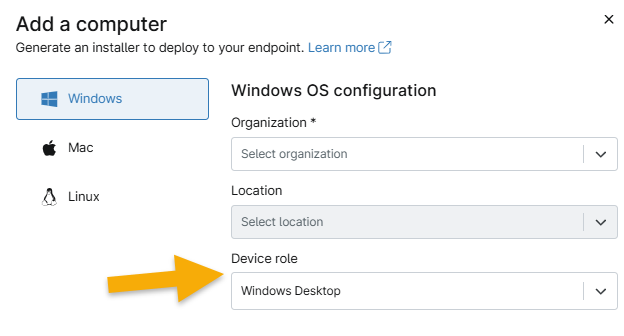
System administrators can enable advanced installer options to generate installers, automatically assigning devices to a specific role upon registration. When this setting is activated, an option to select a device role will be present when generating a Windows, macOS, or Linux installer.
If you select Auto as the device role option, or if you turn this setting off, NinjaOne automatically assigns devices to a role based on the following criteria:
- Windows: NinjaOne bases role assignment on the chassis type assigned to the device locally and the OS version.
- Mac: NinjaOne bases role assignment on the chassis type and whether the macOS Server app is installed.
- Linux: NinjaOne bases role assignment on the image's description as a server, as listed in the /etc/os-release file. Otherwise, NinjaOne will default to assigning all machines the Linux Desktop role.
Changing Device Roles
There are two different methods for changing roles:
- Navigate to the device dashboard and open the Settings tab. Then, click Edit where the currently configured device role is listed and select a new option when prompted.
- Navigate to the Devices tab, select the devices whose roles you want to change, and click Update Device Role.
Assigning Default Policies to Device Roles
Default policies determine what policy is assigned to a device when you add it to NinjaOne. However, you can always reassign a device to a different policy later.
- You cannot assign default policies to unmanaged device roles.
- You can select policies in Administration → Policies. For instructions, refer to Policies: Create a New Policy.
To assign default policies for an organization:
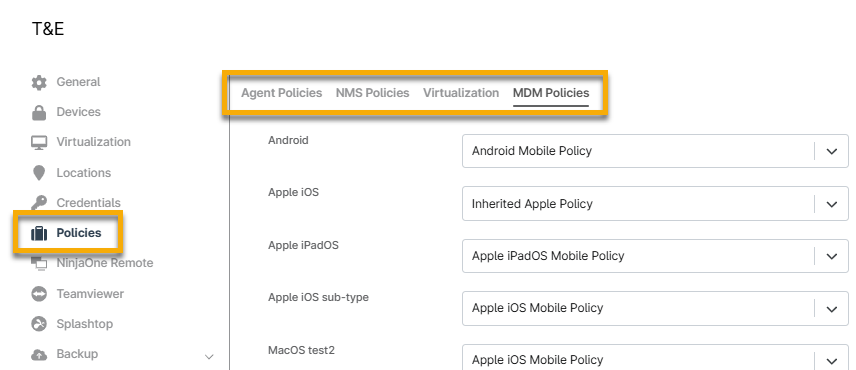
- Navigate to the configuration page for one of your organizations (Administration → Organizations) and select the Policies tab.
- Select your preferred default policies from the drop-down menu for each role. If you use NMS, VMware monitoring, or MDM with this organization, repeat this step for the roles in the NMS Policies, Virtualization, and MDM Policies tabs.
Additional Resources
Learn more about managing and enrolling devices in our Device Enrollment and Management: Resource Catalog. article.