Topic
This article discusses how to configure compound conditions in NinjaOne.
Environment
NinjaOne Endpoint Management
Description
Compound conditions allow administrators to combine multiple conditions for more precise device targeting and monitoring. This option offers the ability to apply or “stack” multiple conditions to define granular, precise conditions in which alerts trigger or the system takes action based on configurations.
You must set conditions at the policy level, which allows you to proactively monitor your systems with minimal configuration. When the created compound conditions meet the configured criteria, such as combining a custom field and a script result, the system can assign severity and priority levels, send notifications to specific recipients, run automations, or create a ticket. Learn more about policy-level conditions at NinjaOne Policies: Condition Configuration.
View additional tutorials in our video library.
Index
Select a category to learn more.
- How Compound Condition Configuration Works
- Technician Permissions for Compound Conditions
- Create a Compound Condition
- When to Trigger the Compound Condition
- Add Automations to a Compound Condition
- Apply Condition Settings to a Compound Condition
- Add Ticketing Rules and Notifications to a Compound Condition
- Additional Resources
How Compound Condition Configuration Works
When adding a compound condition, you can create the following types:
| Compound Condition Type | Description or Purpose |
|---|---|
| Script result condition | The script result condition lets you run an evaluation script on devices at specified intervals. The script's output will be matched against the criteria you specify in the condition. Note that criteria are case-sensitive, and the output will be analyzed for an exact match. |
| Custom fields | Add a custom field value that either meets all conditions or any condition specified. For example, if a custom field value must meet "ALL" conditions, it will not trigger if one or more of the provided conditions are not met. If a custom field value must meet "ANY" condition, it will trigger if at least one of the conditions is met. |
| Software | Select or add a software name that will trigger the condition if it exists or does not exist on the managed device. NinjaOne supports wildcards of "*" (asterisk) for software. For example, "*adobe" or "*firefox*". |
| Operating System | This condition triggers only when the device is running the specified operating system or group of operating systems. |
| Windows Service (Windows OS policies only) | Select or add a service that will trigger the condition if it exists or does not exist, is "up" or "down," disabled, or set as automatic on the managed device. Manually added services must be based on the service name, not the service display name. One wildcard of "*" (asterisk) is supported at the beginning or end of the service name. |
| Daemon (macOS and Linux policies only) | This condition allows you to trigger compound conditions based on the presence and state of daemons on the endpoint. You can manually enter the name of the daemon or select multiple daemons from a drop-down menu. One wildcard of "*" (asterisk) is supported at the beginning or end of the service name. |
| Process | This condition allows you to trigger compound conditions based on whether one or more processes are currently running. Wildcards of * are supported for process names. For example, *adobe or *firefox*. |
| File or Folder | This condition allows you to determine whether a specified file path or folder is present or missing. NinjaOne supports multiple wildcards within the string for either folder or file. |
| Windows role or feature (Windows OS policies only) | This condition allows you to detect whether a Windows role or feature was installed on the endpoint. |
You can add automations or configure notifications that will initiate when the compound condition triggers. Additionally, configure settings that automatically reset the condition after a specified amount of time or run the condition on a schedule.
The Compound Conditions section in the NinjaOne policy provides a search filter so you can find a specific condition based on name or status (enabled or disabled).
Technician Permissions for Compound Conditions
You must grant the technician permission to access and manage compound conditions. System administrators have access by default.
Technicians must have a minimum permission Default Access of "View, Update" for Policies in their account or role.
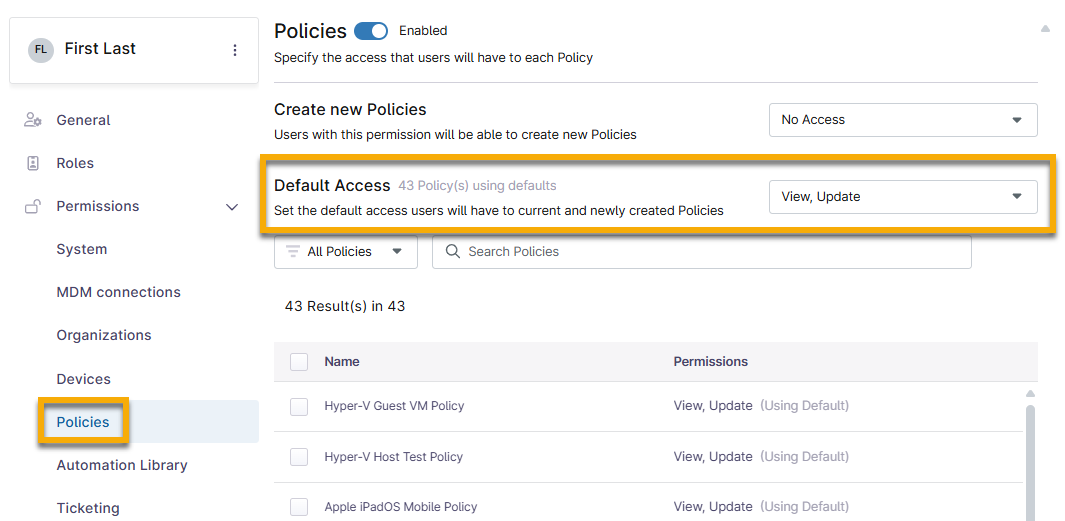
Figure 1: Default access permission for policies in NinjaOne (click to enlarge)
If the technician needs to be able to add custom fields as compound conditions, they must also have the permission for System → Device Administration set to "Allowed."
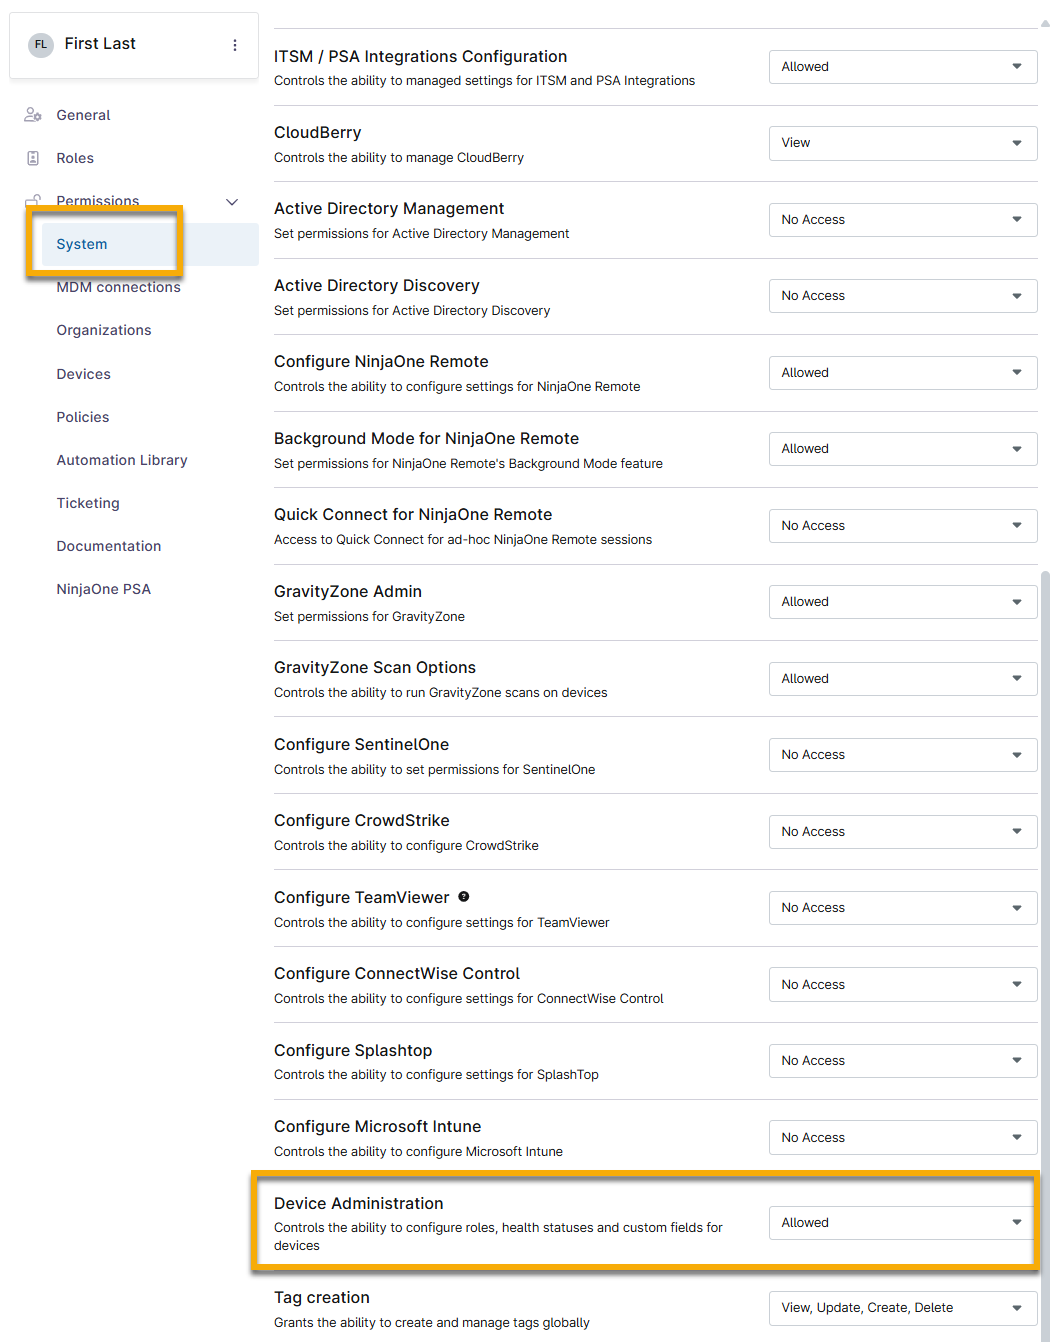
Figure 2: Access permission for custom fields in NinjaOne (click to enlarge)
To learn more about permissions, refer to User Permissions: Permission Options. To learn more about roles, refer to User Roles and Permissions.
Create a Compound Condition
To create a new compound condition, perform the following steps:
- In the NinjaOne console, navigate to Administration → Policies. Click the policy name and then open the Compound Conditions section.
- Click Add.
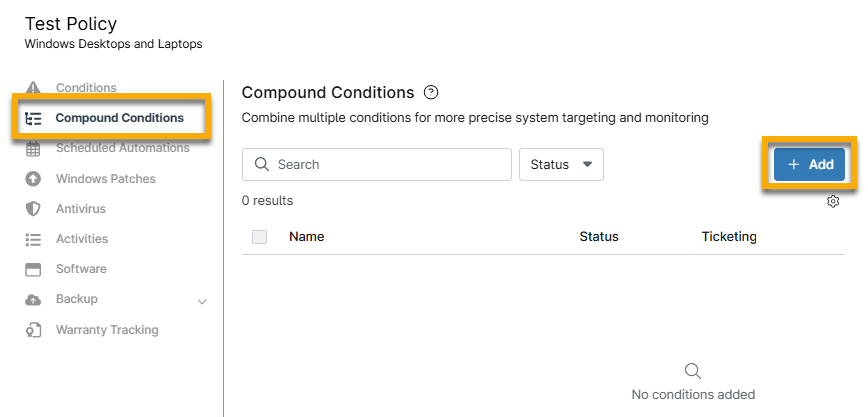
Figure 3: Add a new compound condition to a policy in NinjaOne
The Add a compound condition modal displays.
- The Conditions* section of the modal is open by default. Click Add condition and then select an option from the drop-down menu.
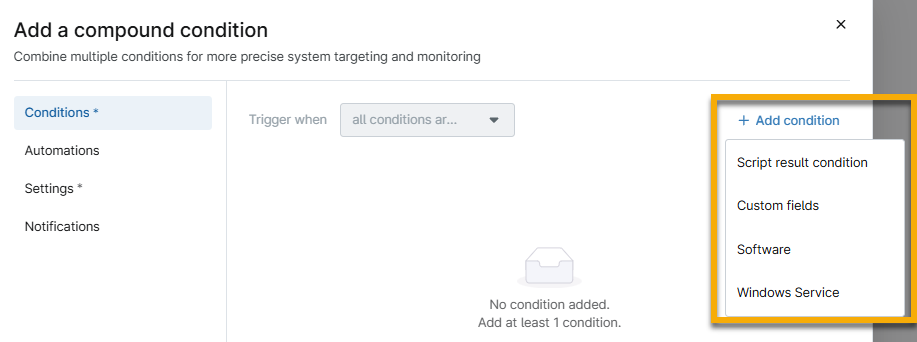
Figure 4: Select a compound condition type
- Depending on the condition type you select, your configuration options will vary. Refer to the following sections to find instructions specific to your compound condition type:
Create a Script Result Condition
To create a script result compound condition, perform the following steps:
- Select Script result condition from the Add condition drop-down menu. Select a custom script from the library.
- Next to Evaluation script, click Add. Select an evaluation script to run on devices at the interval specified in the compound condition setting.
- For Result code, select an option from the drop-down menu and then use the minus (-) and plus (+) sign buttons to create a threshold.
- In the context of a script result condition, a result code is a number that is returned when an application or script finishes running. This number indicates whether the execution was successful or if a problem occurred.
- For Timeout, use the minus (-) and plus (+) sign buttons to determine the amount of time the script is allowed to run. If the running duration hits the specified amount of time, the script will be forcibly terminated.
- For Output, select an option from the drop-down menu and then add text that is logically consistent with the selected probe script. The action must be related to the probe script validation and remediation action. The output of the script will be matched against the criteria you specify in the condition.
- Select the Include script output in final alert checkbox under this field to see the actual script results when the system alerts you. Any script output will be included in the final alert or activity note.
- In the context of a script result condition or any program that executes, output refers to the information that the script or application returns when it finishes running. This can include text, numbers, or structured data that indicate what the script performed or found during execution.
- Select the checkbox under Script error notification to send an error notification email to technicians if the result code meets the set criteria. Then, select the criteria that need to be met in the drop-down menu. Use the minus (-) and plus (+) sign buttons to set the threshold for the number of script errors.
- Example use of this field: If Script error notification is set to "not equal to" and "3," then the technician will receive an error if fewer or more than three errors are contained in the script.
- Click Apply.
Create a Custom Fields Condition
To create a custom field compound condition, perform the following steps:
- Select Custom fields from the Add condition drop-down menu.
- Next to Custom field value must meet ALL conditions or Custom field value must meet ANY conditions, click Add.
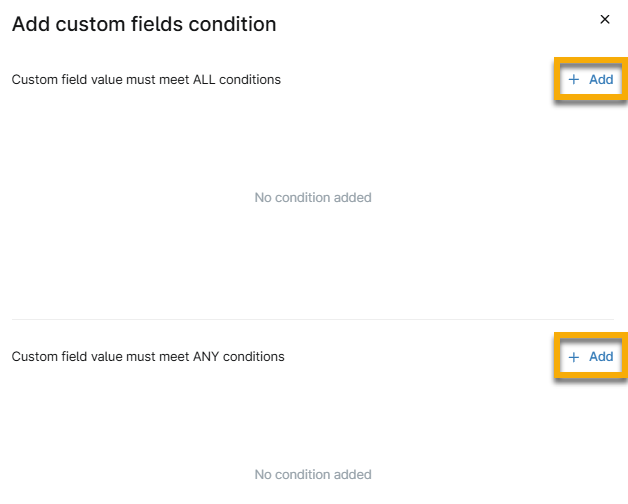
Figure 5: Add criteria for a custom field condition
- Two drop-down menus display when you click Add; select an option from each menu.
- Depending on your selection in the first drop-down menu, the criteria in the second drop-down menu will change, and additional data fields may be displayed. The resulting data fields depend on how you set up the custom field and the information it requires. To learn more about custom field setup, refer to Custom Field Setup.
- Click Add again to include more criteria.
- Click Apply.
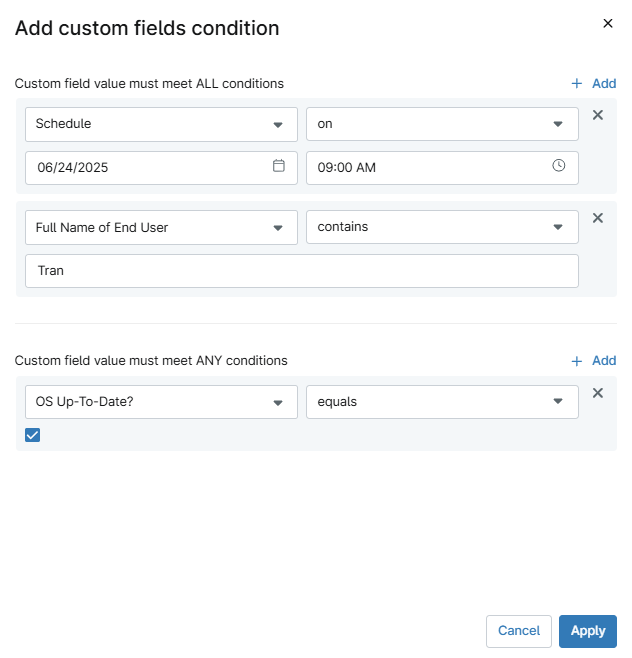
Figure 6: Example of a custom field condition (click to enlarge)
Create a Software Condition
To create a software compound condition, perform the following steps:
- Select Software from the Add condition drop-down menu.
- Select the software from the top drop-down menu or type the name of the software into this field. If you type in a name, click Enter on your keyboard to save it. You can select multiple software programs.
- Select the values that will trigger the condition under Trigger when.
- Click Apply.
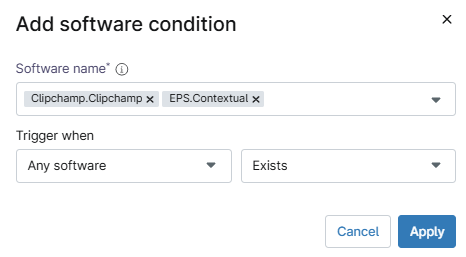
Figure 7: Example of a software condition
Create an Operating System Condition
To create an operating system compound condition, perform the following steps:
- Select Operating System from the Add condition drop-down menu.
- Select the value that will trigger for the specified OS. The OS can be present ("equal to" or "contains") or absent ("not equal to" or "does not contain") on the device. The "equal" values will match the full name of the OS, whereas the "contain" values will match part of the name (for example, "contains" or "does not contain" will trigger if an OS was misspelled or incomplete).
- In the Select or add an OS field, select or type an operating system. You may use an * before or after the operating system as a wildcard.
- Click Apply.
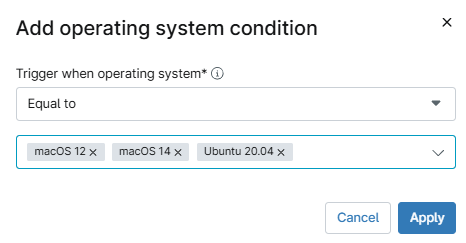
Figure 8: Example of an operating system condition
Create a Windows Service Condition
To create a Windows service compound condition, perform the following steps:
- Select Windows Service from the Add condition drop-down menu.
- Select the service(s) from the top drop-down menu or type the name of the service into this field. If you type in a name, click Enter on your keyboard to save it. You can select multiple services.
- Select the value that will trigger the condition under Trigger when.
- If you select "Up" or "Down" from the second Trigger when drop-down menu, this causes the Duration fields to populate the modal (refer to Figure 9 for illustration). Define the duration the service must remain in the selected state in order to trigger the condition.
- Click Apply.

Figure 9: Example of a Windows service condition
Create a Daemon Condition
To create a daemon compound condition, perform the following steps:
- Select Daemon from the Add condition drop-down menu.
- Type the name of the daemon into the Mac Daemons field. If you type in a name, click Enter on your keyboard to save it. You can select multiple services.
- Select the value that will trigger the condition under Trigger when.
- If you select "Up" or "Down" from the second Trigger when drop-down menu, this causes the Duration fields to populate the modal (refer to Figure 9 for illustration). Define the duration the service must remain in the selected state in order to trigger the condition.
- Click Apply.

Figure 10: Example of a daemon condition
Create a Process Condition
To create a daemon compound condition, perform the following steps:
- Select Process from the Add condition drop-down menu.
- Type the name of the daemon into the Process name field. Click Enter on your keyboard to save it. You can select multiple services.
- Select the value that will trigger the condition under Trigger when.
- Click Apply.

Figure 11: Example of a process condition
Create a Windows role or feature Condition
To create a daemon compound condition, perform the following steps:
- Select Daemon from the Add condition drop-down menu.
- From the Feature/Display name drop-down menu, select from the list of available roles and features. If the name of a role or feature is not listed, you can manually type it into the space; click Enter on your keyboard to save the entry.
- Select the value that will trigger the condition under Trigger when.
- Click Apply.
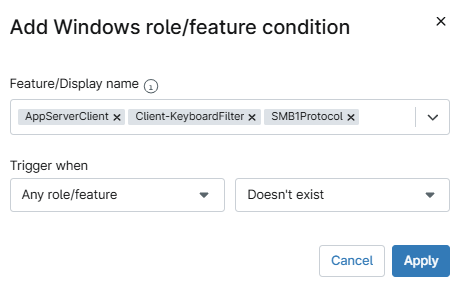
Figure 12: Example of a Windows role or feature condition
When to Trigger the Compound Condition
When adding multiple conditions to a compound condition, you'll see a Trigger When drop-down menu with two options:
- "Any Condition is True": Conditions will be evaluated sequentially from top to bottom. If, at any point, one or more conditions evaluate to true, the evaluation stops immediately, and all conditions are triggered. This prevents unnecessary checks on the endpoint, helping maintain performance.
- "All Conditions Are True": Conditions will be evaluated sequentially from top to bottom, and every condition must be met for the compound condition to trigger. If any condition fails during evaluation, the process stops immediately. Keep in mind that evaluating numerous or complex conditions frequently can impact performance.
Choosing one of these options requires the existence of at least two conditions.
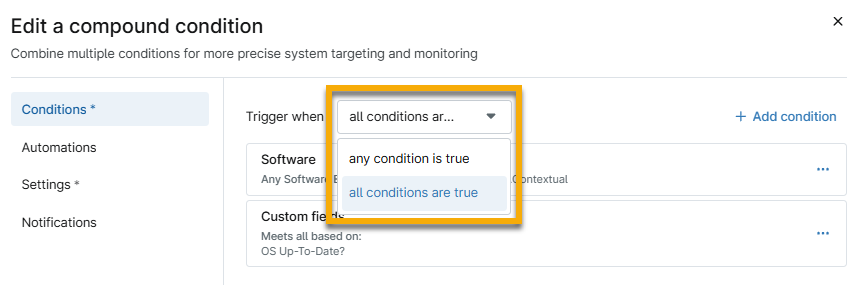
Figure 13: Options for triggering the compound condition
Add Automations to a Compound Condition
To add an automation to run when your compound condition is triggered, perform the following steps:
- Open the Automations tab within the configuration modal, and then click Add automation.
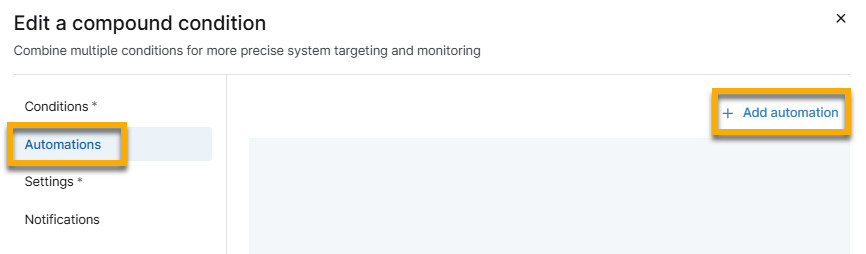
Figure 14: Add an automation to your compound condition
The Automation Library opens displaying a list of available automations.
- Locate and select your script using the filters at the top of the modal. Select additional automations as needed.
- Click Apply.
Apply Condition Settings to a Compound Condition
To apply additional condition settings, perform the following steps:
- Open the Settings tab within the compound condition configuration modal.
- Enter a name for your compound condition.
Use the following table to configure the fields.
Field Name Description or Purpose Auto Reset After The condition can be reused after the specified amount of time has passed. When no longer met The condition will be reset after the values are no longer met. Run Every The condition frequency will run during the specified time intervals. Trigger uptime The condition trigger will be active for the specified amount of time; this is the minimum uptime for the compound condition as it relates to the agent's system uptime. You can use this option to prevent alerts while a device is starting up its programs and services. - Click Apply.

Figure 15: Configure settings for your compound condition
Add Ticketing Rules and Notifications to a Compound Condition
To apply additional condition settings, perform the following steps:
- Open the Notifications tab within the configuration modal.
Use the following table to configure the fields.
Field Name Description or Purpose Severity The severity is the extent to which a defect can affect the software. It defines the impact that a given defect has on the system. Priority The priority defines the order in which we should resolve a defect. For example, you can use the priority to determine whether something should be fixed immediately or at a later time. Notify Technicians Select whether you want technicians to receive a notification when the condition is triggered. Notify on reset Select whether you want technicians to receive a notification when the condition is reset. You must configure the condition to reset in the Settings section for this option to perform as expected. Channels If you selected "Send notifications" from the Notify Technicians drop-down menu, you can select through which channels the technicians receive the notification.
For instructions on creating notification channels, refer to Notification Channels.Ticketing Rule This option allows you to create a ticket from the triggered condition. The ticketing options may vary or may not be available if PSA or NinjaOne Ticketing is not enabled with your system configuration. To learn more about ticketing in NinjaOne, refer to Ticketing: Resource Catalog. - Click Apply.
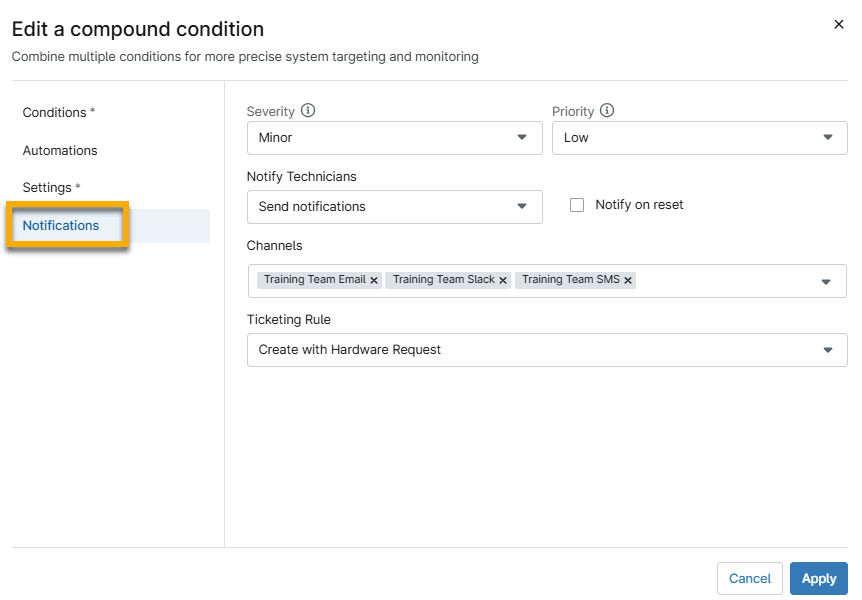
Figure 16: Configure notifications and ticketing rules for your compound condition
Additional Resources
Refer to the following resource to learn more about policies in NinjaOne: Policy Management: Resource Catalog.