Topic
This article explains how to create, assign, and manage system tags in NinjaOne.
Environment
NinjaOne Endpoint Management
Description
Use NinjaOne system tags to classify devices (including mobile endpoints) beyond the set of roles and custom fields. With tags, you can show the device in a device search, assign specific automation and additional conditions to it, and filter to devices with that tag.
Select a category to learn more:
- Give Technicians Permission to Create and Assign Tags
- Create a System Tag
- Assign a System Tag
- Merge or Delete Tags
- Using Tags With NinjaOne Ticketing
- Additional Resources
Give Technicians Permission to Create and Assign Tags
You must enable permissions on a technician's NinjaOne account to allow them to create and assign tags.
- To learn more about assigning permissions to individual technicians, refer to User Permissions: Permission Options.
- To learn more about assigning permissions to multiple technicians, refer to User Roles and Permissions.
On the technician account or role configuration page, select System and select the applicable access level from the drop-down menus for Tag Creation and Tag Assignment.
Technicians can have a combination of the following access levels:
- View (minimum level access)
- Create
- Update (edit or merge tags, delete assignments)
- Delete
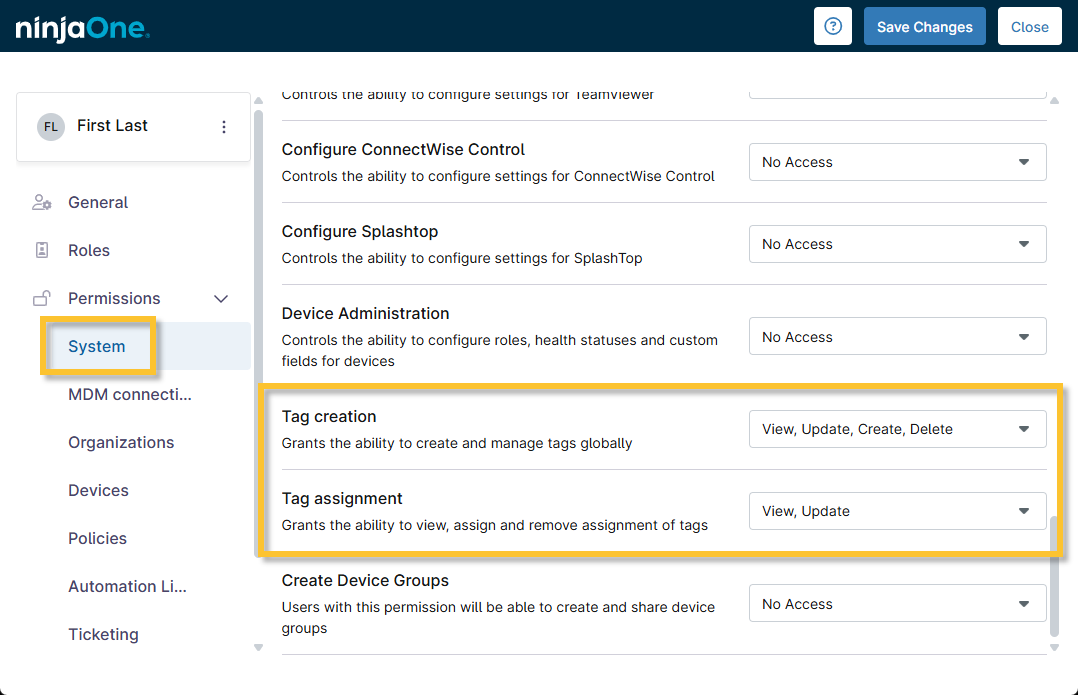
Figure 1: Assign tag creation and assignment permissions to a technician
Create a System Tag
To create a system tag, perform the following steps:
- In NinjaOne, go to Administration → Library → Tags.
- In the Tags pane, click Create tag.
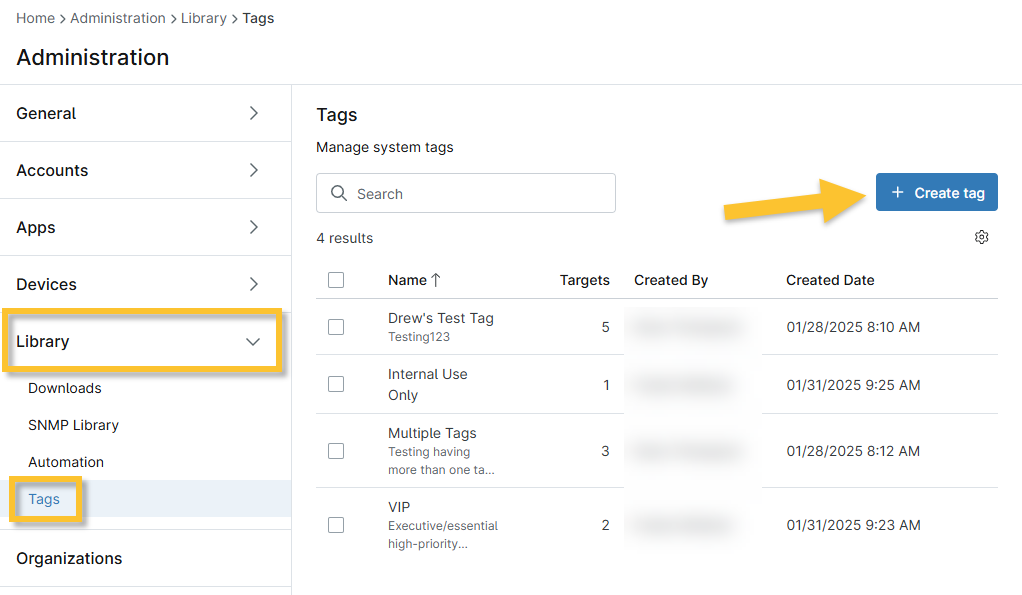
Figure 2: NinjaOne → Administration → Library → Tags → Create tag
- Give your tag an identifiable name and, optionally, a description.
- Click Create.
You can also create a tag directly from the device dashboard. Refer to the following section for more information.
Assign a System Tag
When you assign a tag, the tagged device becomes a "target." The Targets column on the Tags management page refers to the number of devices assigned to that tag.
To create a target, perform the following steps:
- From the Devices search page or organization dashboard, open the device dashboard.
- To learn how to use the Devices search page, refer to Find and Manage Endpoints from the Devices Search Page.
- To learn how to access and use the organization dashboard, refer to NinjaOne Platform: Navigating the System and Organization Dashboard.
- Click Edit in the top right corner and select Tags.
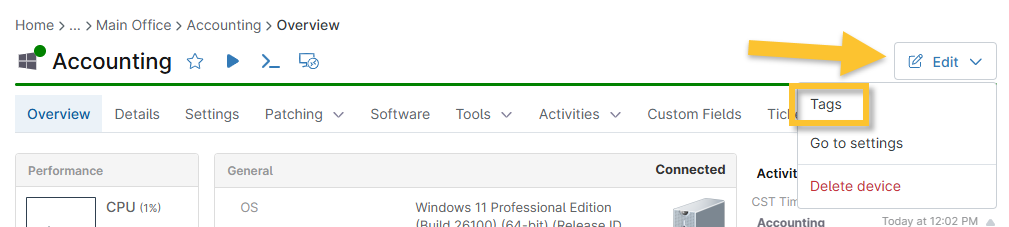
Figure 3: NinjaOne device dashboard → Edit → Tags
- Select an existing tag from the drop-down menu or click Create tag. If you create a new tag, you must select it from the drop-down menu after saving it. You can add multiple tags to a device.
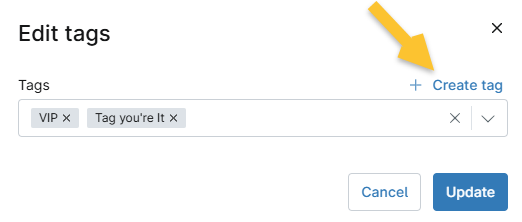
Figure 4: Select or create a tag for the device dashboard
- Click Update to confirm the selection.
The tag is displayed at the top of the dashboard, under the device name.

Figure 5: View device tags
Merge or Delete Tags
To merge or delete tags, select one or more checkboxes next to the Name column. The action buttons appear above the table.
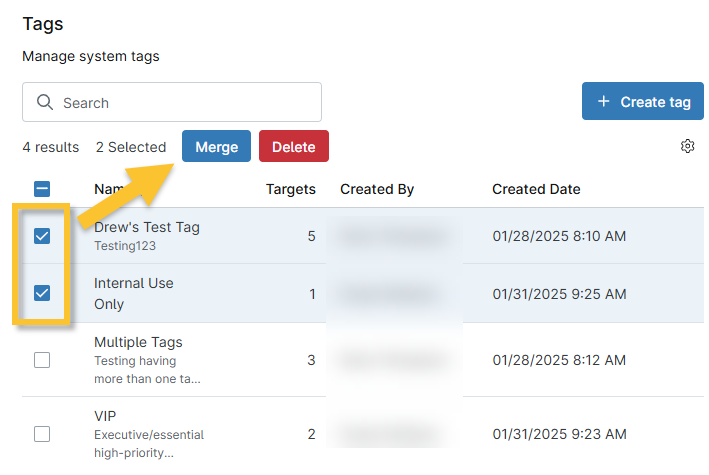
Figure 6: Merge or delete a system tag in NinjaOne
When merging, use the modal to configure a merge method:
- Merge selection into an existing tag. If you select this option, use the Merge with drop-down menu to choose the top-tier tag.
- You can choose to merge with a tag that was not selected (notice that in Figure 7, the tag labeled "VIP" was not selected but still appears as an option for merging).
- The top-tier tag will be the name displayed on the Tags page. For example, if "tag 1" and "tag 2" are selected and "tag 3" is selected from the Merge with drop-down menu, then "tag 1" and "tag 2" will no longer display on the Tags page, but "tag 3" will show the sum of all tag targets.
- The name of the top-tier tag will display on the device dashboard instead of the name of the merged tag.
- Create a new tag to contain the selection. Use this option to create a new tag. This tag will show as an existing tag once saved.
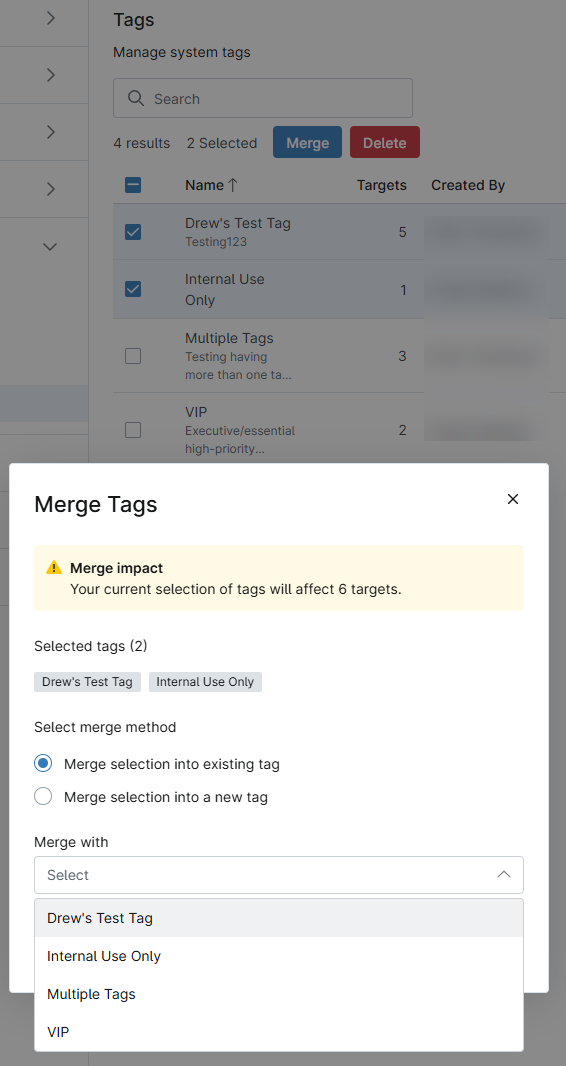
Figure 7: Merge tags
Using Tags With NinjaOne Ticketing
You can use tags to dictate which boards a ticket applies to, or create automations based on those tags. This tab allows you to create new tags, and rename, merge, and delete existing tags.
Create a New Tag
To create a new tag, perform the following steps:
- Click Add in the top right corner of the NinjaOne Ticketing app.
- Enter a name for the tag (no spaces) and click Continue.
The tag list displays the tag name, the total number of tickets currently using the tag, and the date the tag was created.
Following creation, you can take the following actions on tags by either selecting the checkbox next to the tag name or clicking the ellipsis button at the end of the row:
- View Tickets: Review a list of tickets assigned to this tag. The data displays in a separate browser tab.
- Merge: Combine two tags into a single tag. This option helps remove duplications. View instructions for this option in the Merge Tags section of this article.
- Rename: Change the name of the tag.
- Delete: Erase the ticketing tag.
Merge Tags
To merge tags, perform the following steps:
- Select one or more tags and click Merge.
The Merge tags modal allows you to choose additional tags to merge with the selected tag. - Select the tag that will merge the selected tags from the Merge into field, or type in the name of a new tag.
- Click Merge.
The selected tags are removed from the tag lists, and the Total Tickets column updates to reflect the number of tickets that were merged. - Click the number hyperlink in the Total Tickets column to view a filtered list of all tickets with that tag. The list opens in a new tab.
Additional Resources
Refer to the following resources to learn more about NinjaOne tags: