Topic
This guide explains how to use Duo to set up System for Cross-domain Identity Management (SCIM) with NinjaOne.
Environment
NinjaOne platform
Duo Security integrated vendor
Description
Integrate your Identity Provider (IDP) via SCIM to automatically create and delete technicians and end users within NinjaOne.
This article is meant to work as a starting point for SCIM configuration with NinjaOne. Configuration is dependent on your specific Duo setup, so we recommend reviewing the Additional Resources section to find related processes.
Index
- Pre-Requisites and Important Considerations
- Enable SCIM in NinjaOne
- Provision SCIM in Duo
- Map Attributes Between NinjaOne and Duo
- Assign Users or Groups to SCIM Provisioning
- Map Duo Groups to NinjaOne Roles
- Additional Resources
Pre-Requisites and Important Considerations
Prior to provisioning SCIM with Duo, there are several configuration items that NinjaOne recommends you review and determine if they need to be included in your provisioning setup.
Starting points and general instructions will be included for each category. Possible configuration items include:
- Groups: Necessary if you would like to automatically map groups of Duo users to specific user Roles in NinjaOne. Learn more
- Create and map user attributes: Required if you need to map end users to a specific organization or create technician accounts. Learn more
- Assign user attributes: These will ensure each user is mapped to the correct NinjaOne organization (end users) and will have the correct account type (technician or end user). Learn more
Create and Use Groups
You can use Duo groups to map users to specific roles in NinjaOne. If you do not use groups, you must assign roles to users manually in NinjaOne; refer to User Roles and Permissions for more information.
To create a new Duo group, perform the following steps:
- Log in to the Duo Admin Panel (external).
- Navigate to Users → Groups and click Add Group.
- Enter a name for your new group in the Group name field.
- Click Add Group to save the group. Assign the status as Active (recommended) or Bypass as needed.
- Click + Add users to group and add target users.
- Repeat the process as needed.

Create and Map User Attributes
Prior to provisioning SCIM with Duo, we recommend that you consider the following use cases and create the corresponding attributes as needed. These custom user attributes will later be mapped to NinjaOne attributes during the SCIM setup process.
You can also add and import these attributes from your external directory (external) if it is synced with Duo.
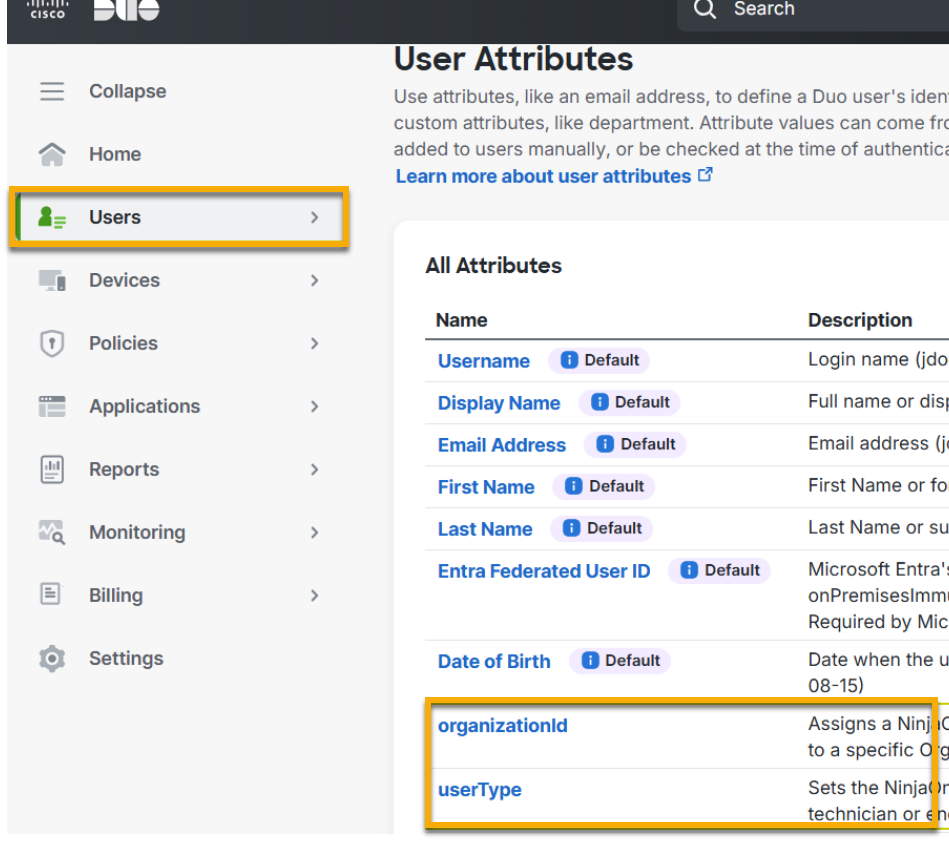
- Requirement 1: Map end users to an organization. Create a custom Duo user attribute that will be mapped to the optional NinjaOne attribute "organizationid."
- Requirement 2: Create NinjaOne technician accounts. Create a custom Duo user attribute that will be mapped to the optional NinjaOne attribute "userType."
Once you determined which user attributes are required for your SCIM provisioning, perform the following steps to create the custom attributes in Duo:
- Log in to the Duo Admin Panel (external).
- Navigate to Users → User Attributes. Click Add Custom Attribute.
- Enter a unique identifier for your new attribute in the Name field. This can be any value of your choice.
- Click Add Custom Attribute to save the data.
- Repeat these steps for each requirement.
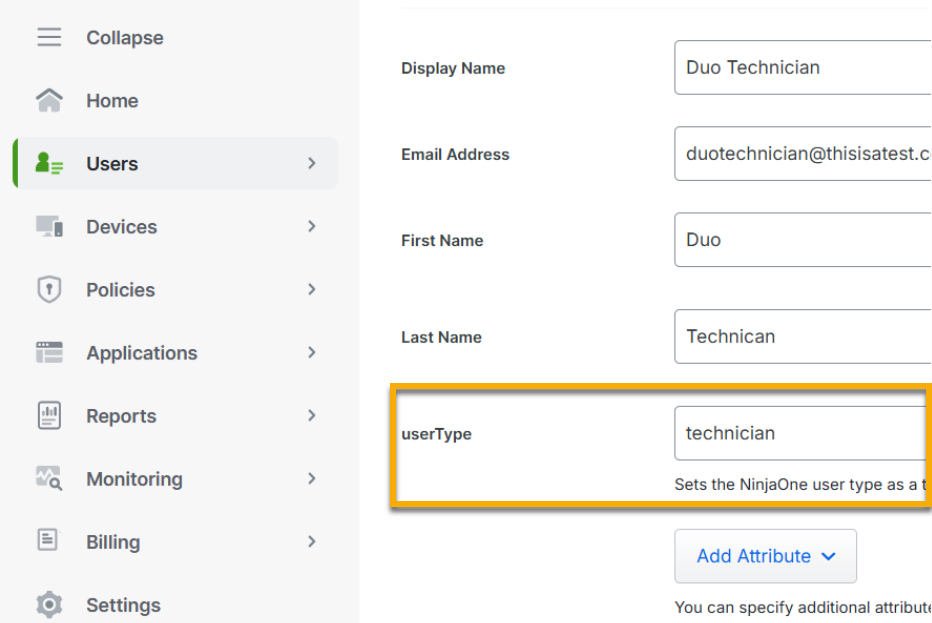
Assign Attributes to Users
Now that the custom attributes have been created, you will need to assign the attributes to the target users. NinjaOne’s SCIM will provision an account based on the attribute values assigned to a user. These values are used to set the user type (technician or end user) and the organization (All organizations or a specific organization). You will need to assign the necessary values for each user so that their accounts are created with the desired configuration.
You can assign attributes to a user via the following methods (external):
- User Attributes | Duo Security | Import Attributes Values with Directory Sync
- User Attributes | Duo Security | Add Custom Attributes to Users from the Admin Panel
- Duo Administration - Import Users from CSV | Duo Security
When assigning attributes to users, you must assign the correct value to the corresponding attribute. The following values are the only ones you will be expected to use during the account provisioning process.
| Attribute | Required Value |
|---|---|
| organizationID | "All" (creates a global end user) |
| organizationID | "<InsertOrganizationID>" (assigns an end user to the corresponding organization; refer to NinjaOne Platform: How to Find an Organization ID for instructions on obtaining the ID) |
| userType | "technician" (creates a NinjaOne technician account) |
| userType | "endUser" (creates a NinjaOne end user account) |

Enable SCIM in NinjaOne
Learn about using SCIM in NinjaOne with our guide NinjaOne Identity Management: Identity management with SCIM.
To enable SCIM and generate the secret token, perform the following steps:
- In the NinjaOne console, navigate to Administration → Accounts → Identity Providers and open the IDP entry.
- Click Enable for System for Cross-domain Identity Management (SCIM).

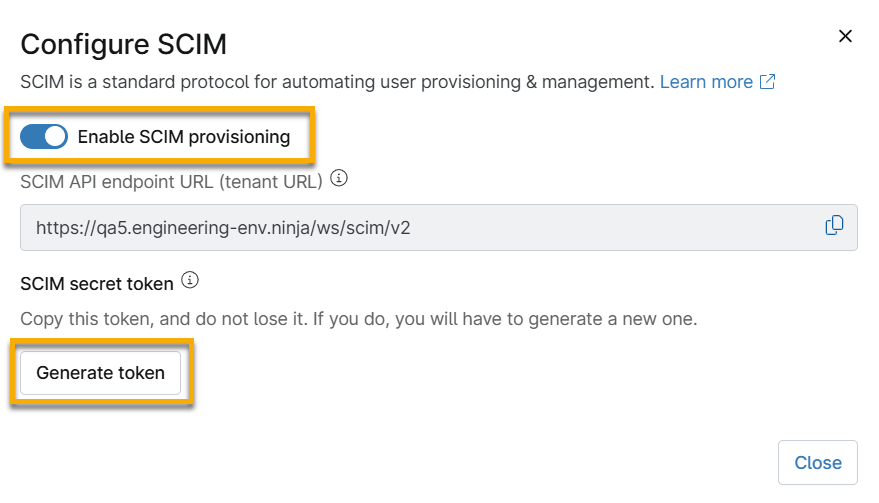
- Activate the Enable SCIM provisioning toggle switch in the configuration modal and then click Generate token. Keep this configuration modal open so you can copy the data for the upcoming steps.
Provision SCIM in Duo
- In Duo, navigate to Applications → Manage → Applications. Select your Duo Generic SAML Service Provider Application for NinjaOne.
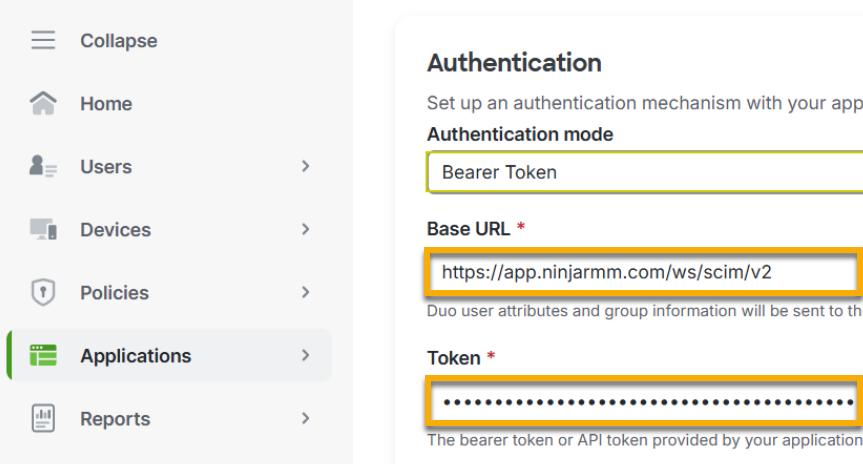
- Open the Provisioning tab and select "Bearer Token" from the Authentication mode drop-down menu.
- Copy the API endpoint URL and SCIM secret token from the NinjaOne console.

- Paste the data into the Base URL and Token fields in Duo, respectively.
- Test the connection to verify success and then connect to the application.
Map Attributes Between NinjaOne and Duo
Once authentication is successful, you will receive a list of required and default NinjaOne attributes that will need to be mapped to Duo user attributes.
Take note of the following NinjaOne attributes:
- name.familyName
- name.givenName
- username
You must map the NinjaOne attributes to the corresponding Duo user attributes (as follows) for a successful SCIM provisioning:
| Duo User Attribute | NinjaOne Attribute |
|---|---|
| Last Name | name.familyName |
| First Name | name.givenName |
| Email Address | username |
| <organizationId> | (optional) organizationID |
| <userType> | (optional) userType |
Map End Users to a Specific Organization
Map your custom Duo user attribute (<organizationId>) to the optional NinjaOne attribute, “organizationId.” If an Organization ID value is missing or has a value of “all” for an end user, a global end user will be created.
Create NinjaOne Technician Accounts or Both End User and Technician Accounts
Map your custom Duo user attribute (<userType>) to the optional NinjaOne attribute “userType.”
The userType attribute has two accepted values:
- “technician” creates a NinjaOne technician account.
- “endUser” (case sensitive) creates a NinjaOne end user account.
Assign Users or Groups to SCIM Provisioning
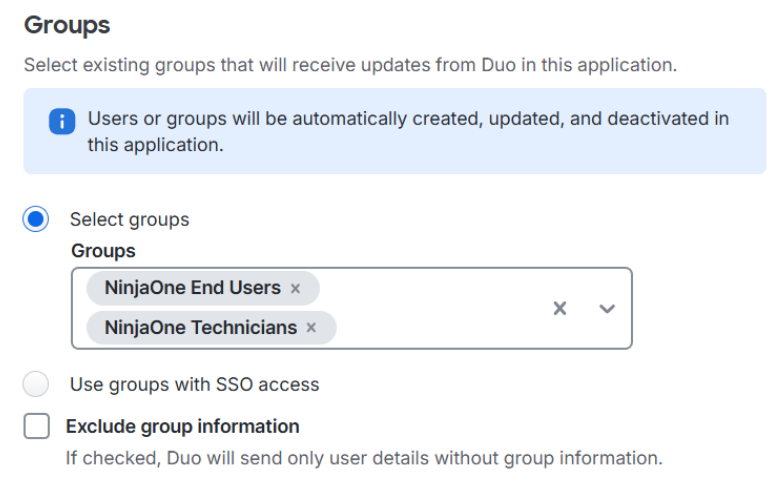
Once attributes have been mapped, you must assign groups or target users to SCIM provisioning.
The decision to assign specific users, all users with SSO access, or specific groups of users to be managed via SCIM is dependent on your organization’s goals and Duo configuration.
This section provides a commonly utilized approach of using groups to assign users to SCIM provisioning. Please refer to Duo’s documentation to determine which method is best for you.
In the following example, we created a group for end users and a group for technicians. Once you save the configuration, the user provisioning process will begin automatically.
Map Duo Groups to NinjaOne Roles
If you assign groups to SCIM provisioning in Duo, they will appear in the Group Mapping section of the Identity Provider page in the NinjaOne console. Group mapping allows you to assign end user or technician roles to an identity group.
To learn more about creating and managing roles in NinjaOne, refer to User Roles and Permissions.
- Identity group: These are groups mapped from the IDP.
- User roles: These are roles assigned to the group.
To set group mapping for your identity provider, perform the following steps:
- In the NinjaOne console, navigate to Administration → Accounts → Identity Providers and open the provider entry.
- Click Edit in the Group mapping section.
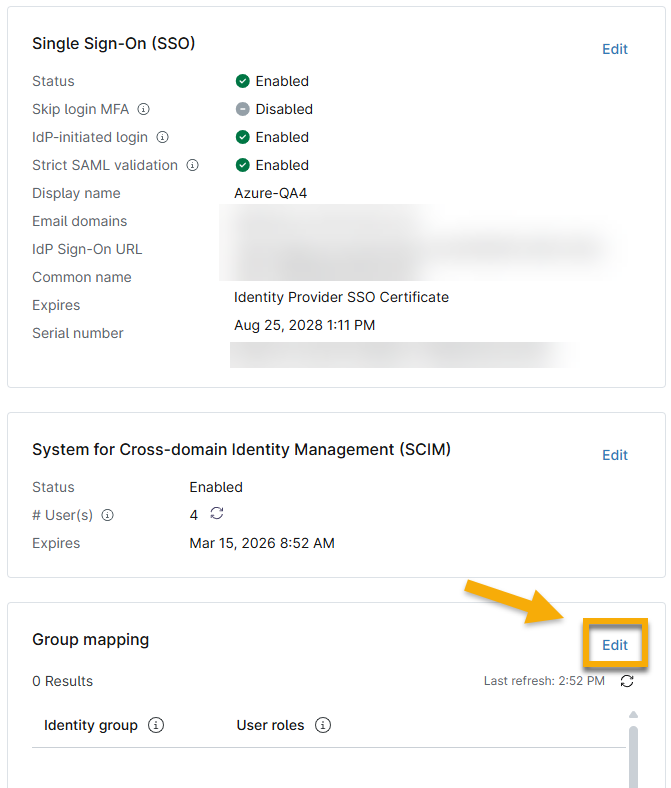
- Map the NinjaOne roles to their respective Duo groups. If you have not configured groups to be mapped from Duo to your NinjaOne division, you will not see eligible mapping options in the Map groups modal. To correct this issue, review the steps taken in the Map Attributes Between NinjaOne and Duo and Assign Users or Groups to SCIM Provisioning sections.
Each user and their role will display in their NinjaOne account configuration page so you can track mapping or edit permissions as needed.
Additional Resources
Refer to the following resources to learn more about identity management in NinjaOne: