Topic
This article provides instructions for the second part of the ServiceNow setup in NinjaOne.
Before you begin this step, you must complete Steps 1 and 2:
For a comprehensive overview of the setup process, refer to NinjaOne Integrations: Getting Started With ServiceNow.
Environment
- NinjaOne Integrations
- ServiceNow
Description
To configure table access for NinjaOne in ServiceNow, perform the following steps.
Configure GET access
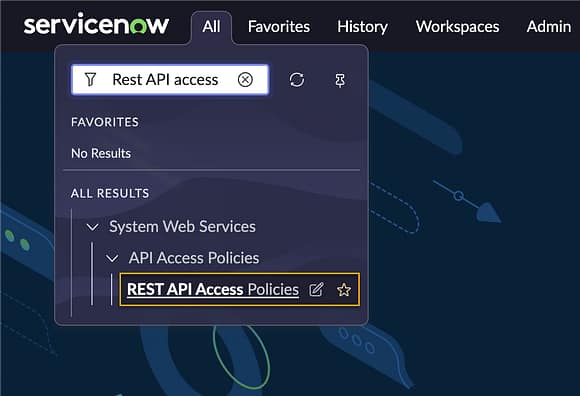
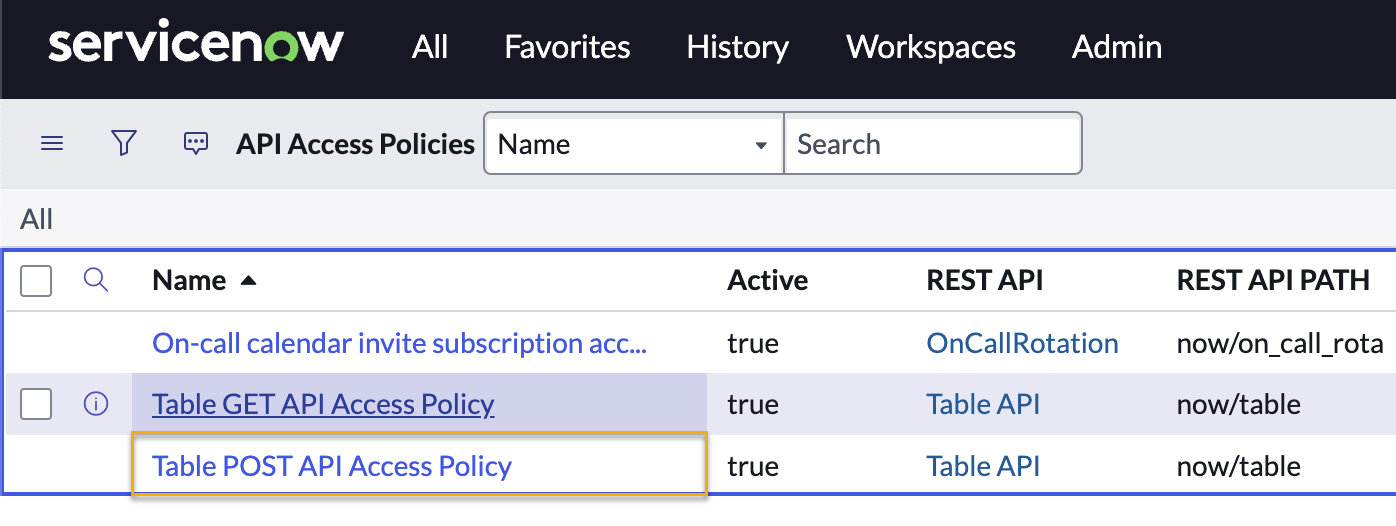
- In ServiceNow, navigate to All → REST API Access Policies.
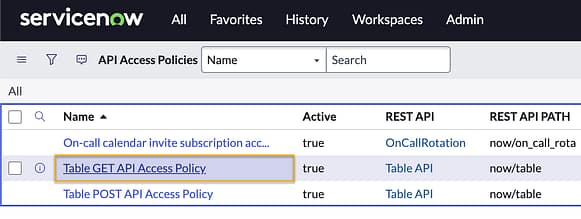
- On the API Access Policies page, select Table GET API Access Policy.
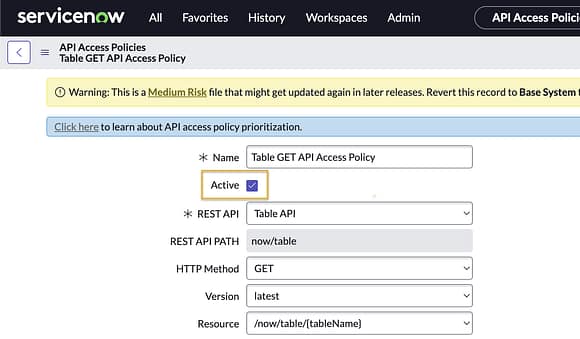
- Ensure the Active checkbox is selected for the Table GET API Access Policy.
- Locate the Inbound Authentication Profile field and click the search icon in the Authentication profile column.
- In the Authentication Profiles window, select New.
- When prompted, choose the Create standard http authentication profiles option.
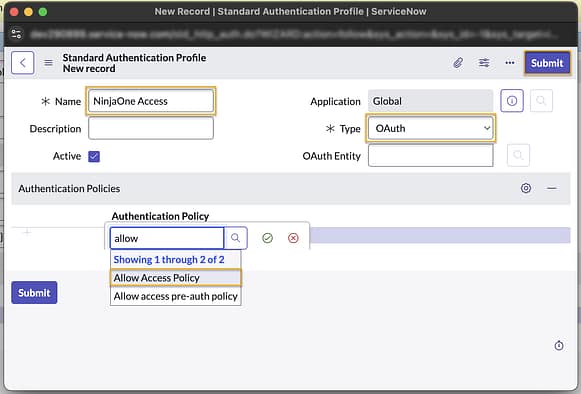
The Standard Authentication Profile New record window will open. Complete the required fields as follows:
Field Data Name NinjaOne Access Type OAuth Authentication Policy Allow Access Policy - When you finish completing the fields, click Submit.
- On the Table GET API Access Policy page, click Update.
- In the Inbound authentication profiles section of the page, click the edit icon next to the NinjaOne Access profile.

- On the NinjaOne Access editor page, use the OAuth Entity field to search for and select ninjaone oauth.
- Click Update to save the changes.
Configure POST access
- In ServiceNow, navigate to All → REST API Access Policies.
- On the API Access Policies page, select Table POST API Access Policy.
- Ensure the Active checkbox is selected for the Table POST API Access Policy.
- On the Table POST API Access Policy page, click Update.
- In the Inbound authentication profiles section of the page, search for and assign the NinjaOne Access profile you created in the previous section of this article.
- Click Update to save the changes.
Next Step: Configure API Credentials in NinjaOne
Creating the API user and application registry in ServiceNow allows you to activate the ServiceNow application in NinjaOne. However, the integration will be one-sided until you complete the following steps in NinjaOne.
Learn how: NinjaOne Integrations: Getting Started With ServiceNow to view the full integration scope and workflow.