Topic
NinjaOne's Documentation Knowledge Base tool provides the ability to share documents publicly or privately by linking users outside of the NinjaOne platform to specific content within NinjaOne.
Environment
NinjaOne Documentation feature
Index
Overview
The Share function allows system administrators and technicians with the appropriate "Global Knowledge Base Documentation Access" permissions to create a public link for specific documents or grant access to certain folders for end-user roles. Files and folders cannot be shared with individual end users; they must be assigned to a role.
Public links allow documents to be accessed outside of NinjaOne with the branding that was configured for custom application logo. System administrators and technicians can control how long this public link is accessible and track what IP addresses have used the link.
When a link is shared, an event is created in the system dashboard Activities log, and a history log of all shared links can be found in Administration.
Technician and End User Permissions
In addition to access to the Knowledge Base, technicians or their roles must also have permission for Sharing Global Knowledge Base folders with end users set to "Allowed."
Share a Document from the Knowledge Base
To the far right of a file or document name, click the ellipsis icon and select Share, or hover over the link icon in the Active Links column (if applicable) and click Share. 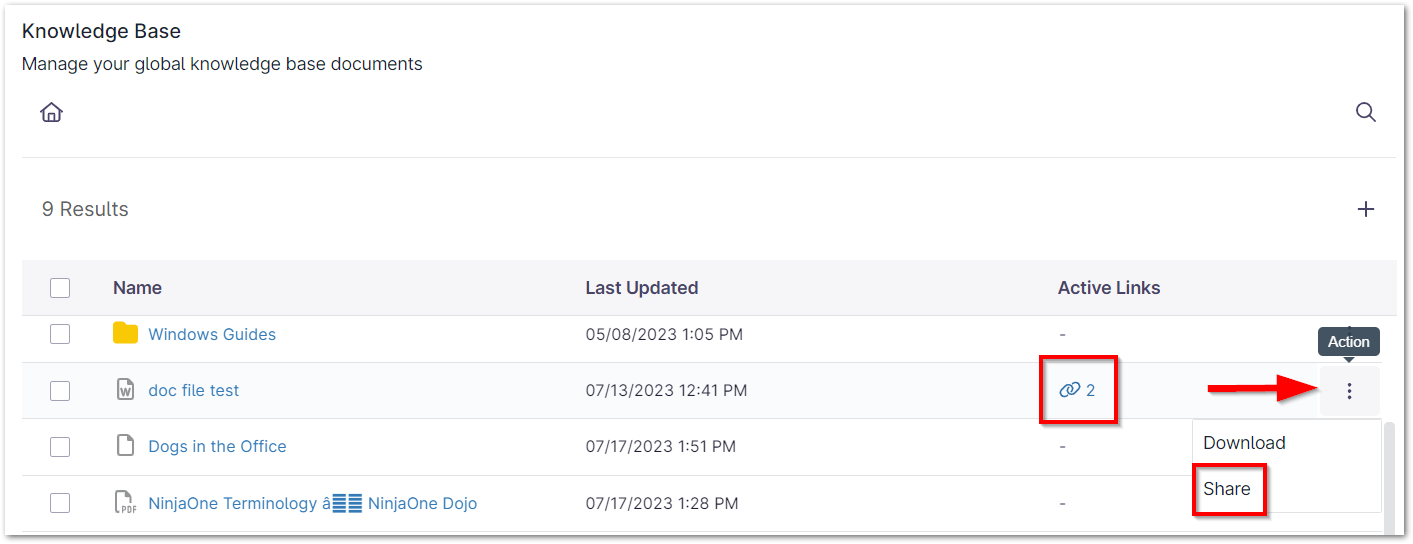
Alternatively, you can click the link icon from within a document to share it. When a link is created for that document, a banner displays on the document page until the public link expires or is deleted. 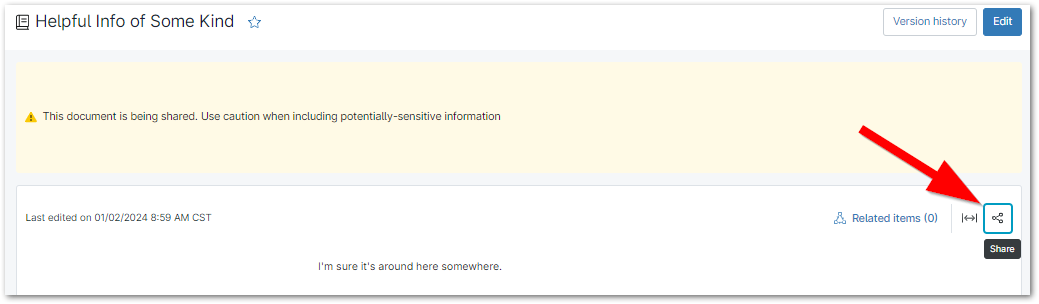
Sharing Files
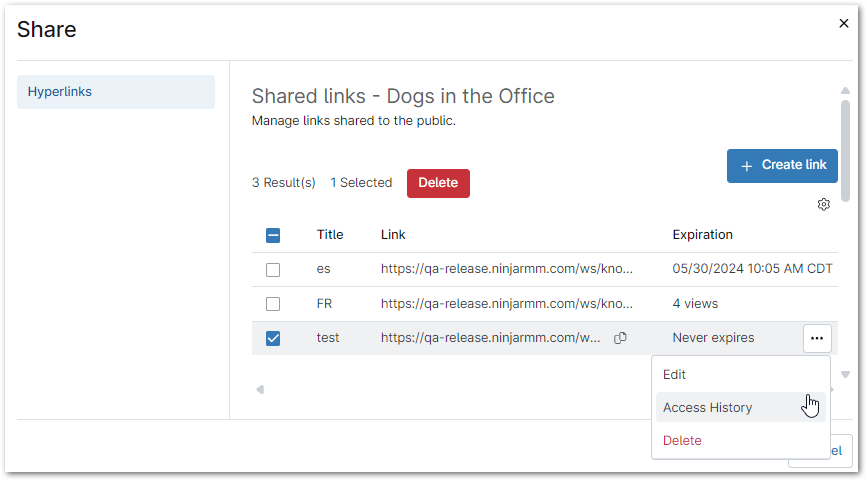
In the Share modal, you have the following options:
- Create a new link for documents (this option is not available for folder sharing). You can create multiple links for the same document, which can be helpful if you want certain audiences to have different expiration dates. Lists of links will be paginated to show a maximum number of 150 links per page.
- Click Create Link.

- Create a title for the new link and select an expiration date from the drop-list.
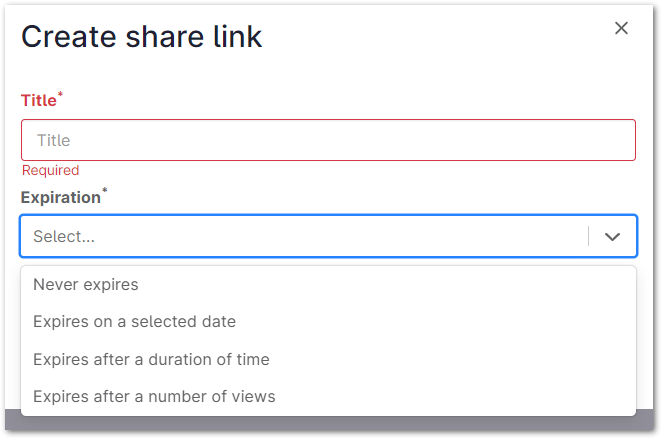
- Once the link expires, the document can no longer be accessed publicly using that specific link. The expired link remains on the Shared Links modal for tracking and reporting purposes.
- Click Create Link.
- Copy an existing link—the link is copied to your virtual clipboard.
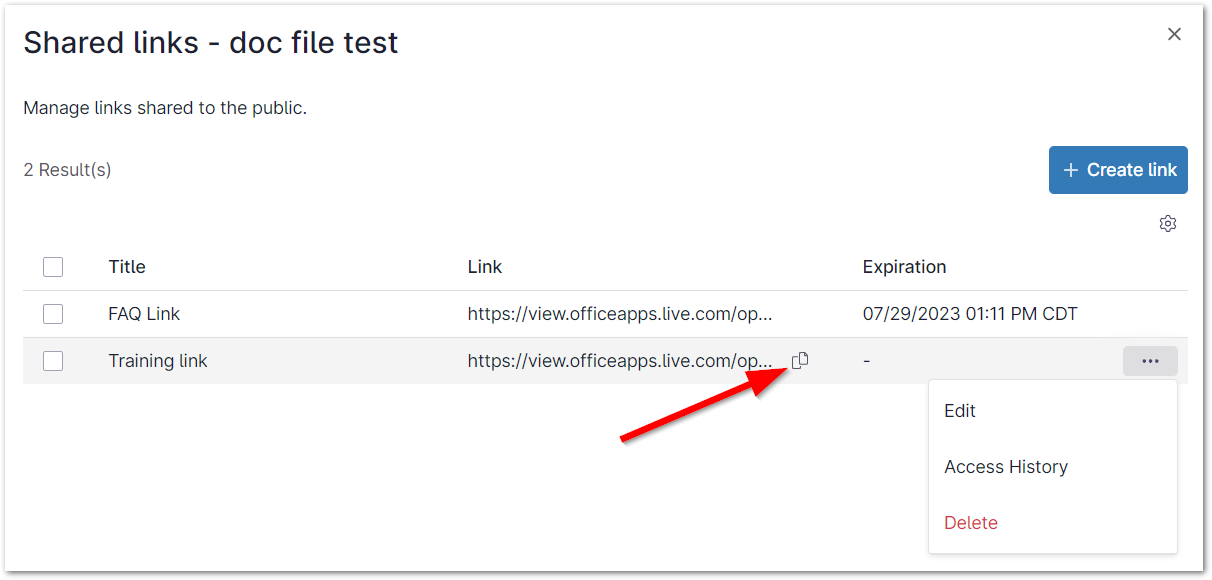
- Edit an existing link—change the name, expiration date, or both. You can also edit links from the Administration page.
- View link access history—this opens a modal showing the IP address that used the link and the date and time the link was used. You can see a full list of all public links across multiple organizations from the Administration page.
- Delete link—removes access for anyone who is using the associated link.
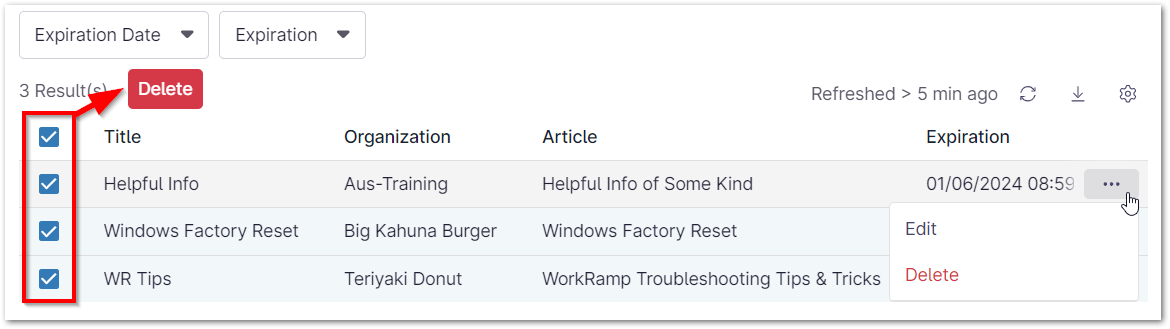
- You can delete multiple links by activating the checkboxes next to the link title and clicking the Delete button that appears at the top of the list. You can also delete links in bulk from Administration.
Sharing Folders
Important Note: You can share folders with both technicians and end-user roles from the system dashboard. From the organization dashboard, you can only share folders with technicians.
In the Share modal, you have the following options:
- Share with all technicians/end users or only specific roles.
- Select one or more roles from the dropdown; these roles will have permissions set to access the folder.
- Use the checkbox to decide how the folder's contents will be displayed. If you are sharing multiple folders with a user role, displaying contents with a folder may be beneficial to optimize organization.

When a folder is shared with a role, the Active Links column will not be updated but the folder icon will change to indicate that the folder is being shared. In addition, the End user roles tab is updated on the Documentation app configuration page, where access can be further managed. 
Below is an example of two folders shared with an end user role. The Mac Guides folder is the result of deactivating the "Display contents without a folder" checkbox. 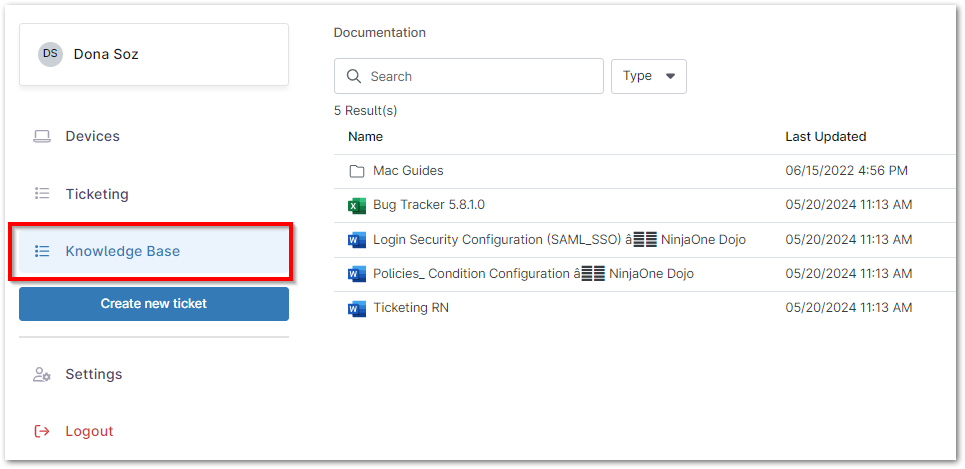
Public Links History
The Public Links History tab relates to the public links created from the Share function in the Knowledge Base (beta). From here, you can filter and view a list of all public links created within NinjaOne. Public links can be managed from the Shared Links tab.
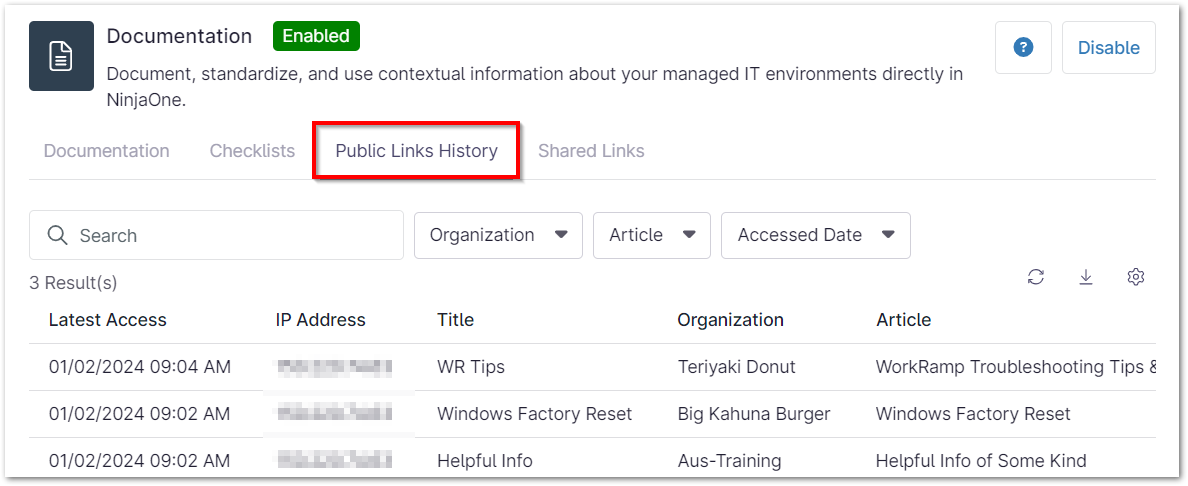
- Latest Access—Date and time the public link was used.
- IP Address—IP Address used to access the link.
- Title—Name of the public link.
- Organization—Organization to which the document belongs, if applicable (documents not tied to an organization show "GLOBAL_ORGANIZATION").
- Article—Title of the document accessed.
- Share Link—URL of the public link to the document. Hover your mouse over this area to see an option to copy the link.
A maximum of 150 results display on the page, after which the X result(s) text changes to display paginated results that can be navigated through by clicking the arrows.
Use the available dropdowns to filter your search; results default to show all global documents by most recent access date. You can use the Search field to find access points by IP address or public link title. The Accessed Date filter allows you to search by a specific day or date range.

Use the export button to download a .csv copy of the access history list in a zip file. Use the table settings button to modify the columns that display on the page.

Shared Links Administration
From the Shared Links tab, technicians and system administrators can edit or delete all active shared links in one place, regardless of which organization is using them.
- Edit a shared link by activating the checkbox and selecting Edit, or click the ellipsis button to the right and select Edit.
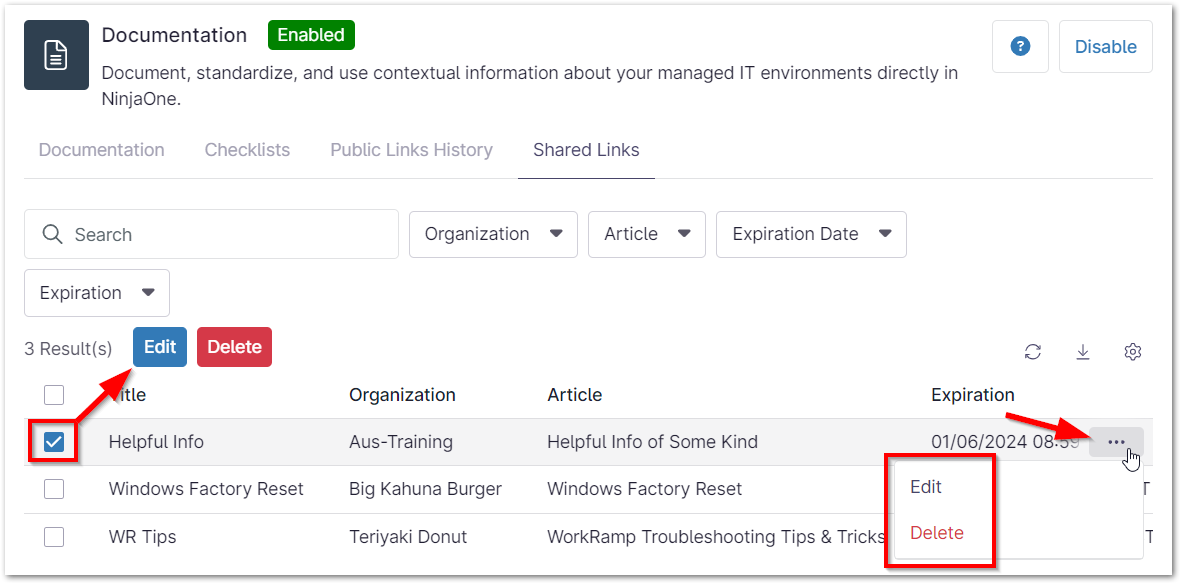
- Delete one or more shared links by activating the checkbox(es) and selecting Delete, or click the ellipsis button to the right and select Delete.
End User Roles
When sharing a folder with end users, the information populates under the End User Roles tab. 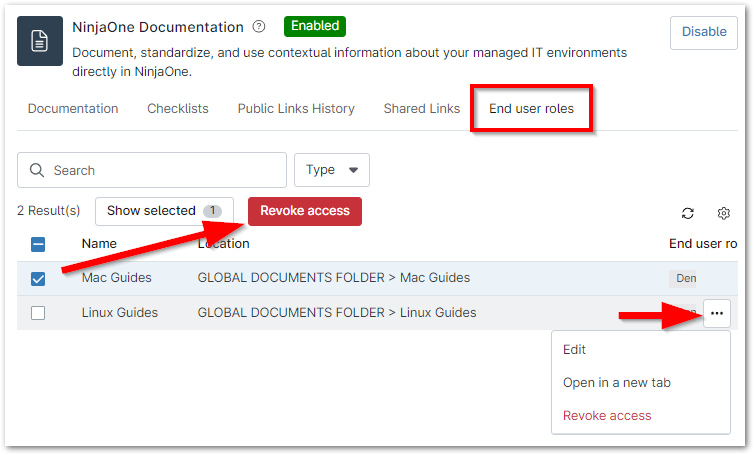
- Revoke access to a folder. This will remove the row from the page and revoke access for all user roles associated.
- Open the folder in a new tab. This redirects you to the Knowledge Base tab on the global dashboard, where you can see all files within that folder.
- Edit access to add or remove user role(s) or display contents with or without a folder.