Topic
Vulnerability Management for networks and systems is an ongoing, iterative process that requires continuous attention and adaptation to emerging threats and vulnerabilities. It’s a critical component of an organization’s overall cybersecurity strategy, helping to protect assets and data from potential breaches and attacks.
If you need to scan generic vulnerabilities (products other than Qualys, Rapid7, Tenable, or CrowdStrike), learn how to set up and configure the Vulnerability Importer here.
Please submit feature requests for improvements through our website here.
Environment
NinjaOne Vulnerability
Index
- Download or Create the Scan Group for NinjaOne
- Enable the Rapid7 Scan Integration in NinjaOne
- View Vulnerabilities Associated with an Organization
Download or Create the Scan Group for NinjaOne
To use the Vulnerability Importer feature in NinjaOne, you must upload a CSV file to NinjaOne. Your CSV file must contain a column containing the device ID(s) and a column containing the CVE ID(s) with corresponding vulnerabilities.
Rapid7 provides assistance for reporting data in their Support Documentation: Export CVEs to a CSV | Threat Command Documentation
Enable the Rapid7 Scan Integration in NinjaOne
- In NinjaOne, navigate to Administration → Apps → Installed and click Add Apps in the top right corner of the page.
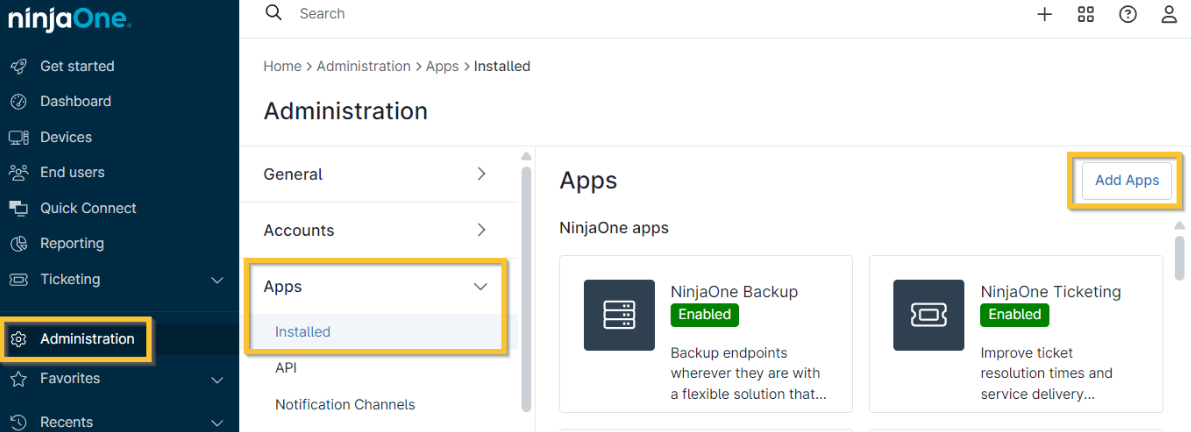
Figure 1: Administration → Apps → Installed → Add Apps
- Find and select the Rapid7 app (you can use the search field at the top of the modal). Click Continue in the confirmation modal and it will download to the Apps page.
- You will automatically navigate to the Rapid7 application settings page. Click Enable in the top right corner.

Figure 2: Administration → Apps → Rapid7 → Enable
- To create a new group, click Create scan group on the right side of the importer. A scan group is a specific grouping relating to any particular items including servers, workstations, etc.
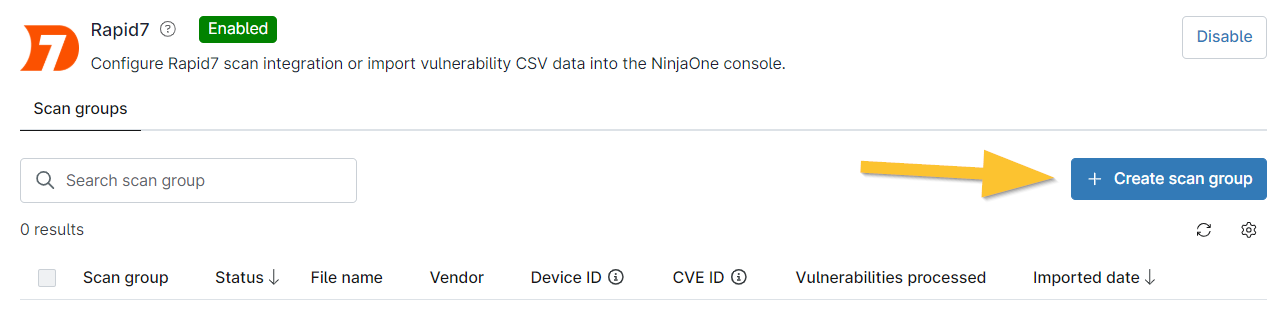
Figure 3: Rapid7 app → Create scan group button
- The Create scan group editor displays as a modal. Enter a scan group name.
- From the Select a scanning vendor dropdown list, select a scanning vendor. This will help you identify where the scanning source originated. If you select "Other," a new data field will display where you must enter a scanning source name for reference.
- Click Upload CSV file. Navigate to and select a .csv file (limited to 200 MB in size) containing vulnerability data.
- Click Continue to confirm the mapping attributes from the file.
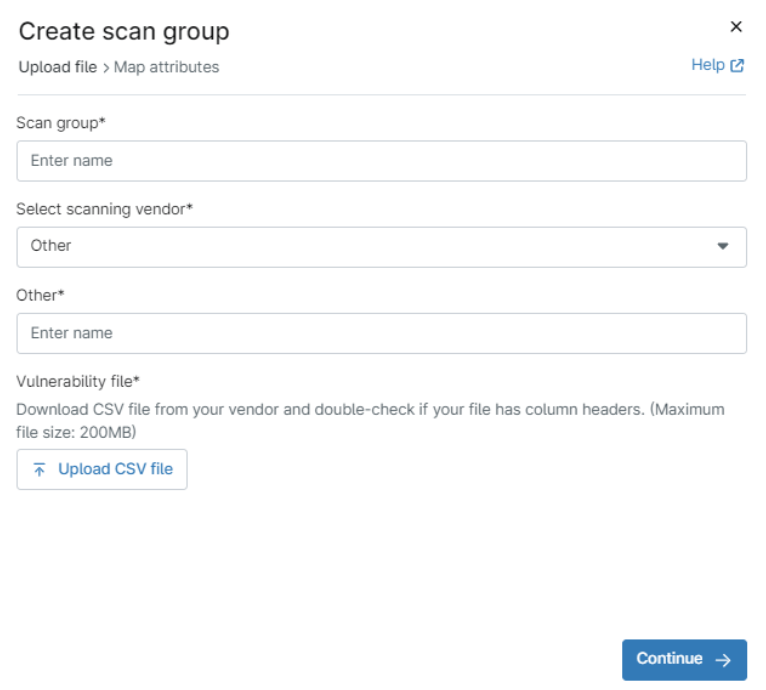
Figure 4: Vulnerability scan group creation → Create scan group modal
- The next page of the modal allows you to map the attributes. From the top dropdown list (Device ID identifier), select the column title that has the device identifier listed in the file.
- A new dropdown displays to confirm Device ID type. Select the applicable option from the dropdown.
- From the third dropdown list (CVE ID identifier), select the column with the CVE ID.
- Click Finish.
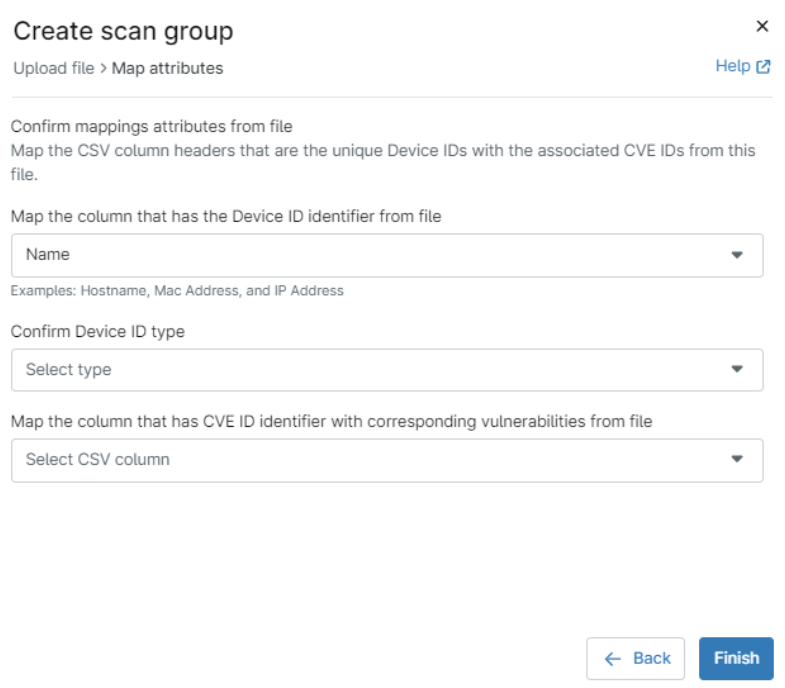
Figure 5: Vulnerability scan group creation → Create scan group modal → map attributes
The imported file displays in the importer grid with associated column data.
If your status is not active, refresh your console to update the status and view the number of vulnerabilities processed from within the file.
View Vulnerabilities Associated with an Organization
To learn how to view and manage found vulnerabilities in NinjaOne, please refer to our Vulnerability Management page here.