
Topic
This article explains how to set up Microsoft Entra backups in NinjaOne SaaS Backup.
Environment
- NinjaOne SaaS Backup
- Microsoft Entra
Description
Microsoft Entra comprises a suite of identity and network access products designed to support a Zero Trust security framework. With Entra, organizations can verify user identities, enforce access policies, and validate permissions. It encrypts connection channels and continuously monitors for potential security breaches. These capabilities help you build a dynamic security layer that continuously enforces trust across your network.
You can use NinjaOne to back up your Entra objects and configurations. We offer the following Entra Backup plans:
- Entra Backup (Backup+Entra)
- Entra Archiver (Entra+Archiver)
The following sections of this article describe how to set up and work with Entra backups. Select a topic to continue.
Setting up Entra Backups
Working With Entra Backups
Add a Microsoft 365 (M365) Tenant
If you don't already have one, you must add an M365 tenant to NinjaOne before you can back up Entra. First, follow the steps in NinjaOne SaaS Backup: Adding an M365 Tenant to Backups. Then, proceed to the next section of this article.
Select an Entra Plan
- In NinjaOne, navigate to Administration → Apps → NinjaOne SaaS Backup.
- Click Enable. The setup dialog will open.
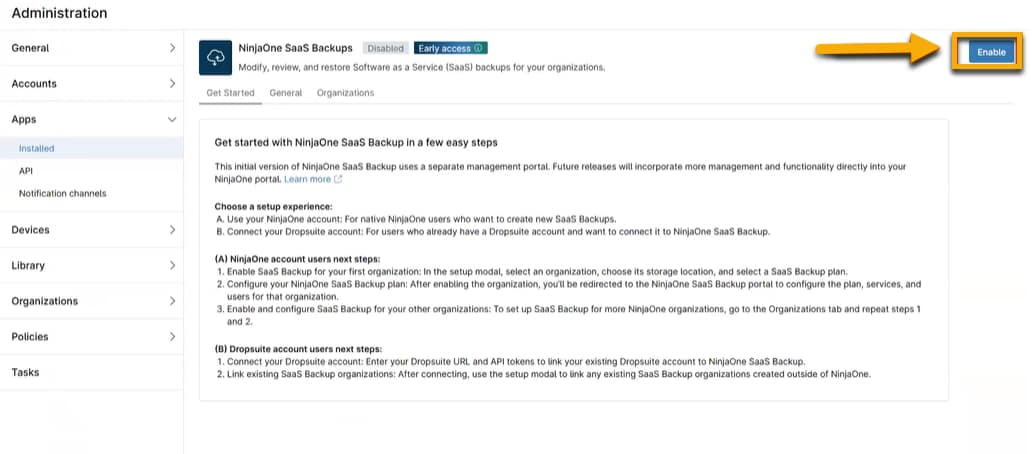
- Select an organization.
- Select a storage location.
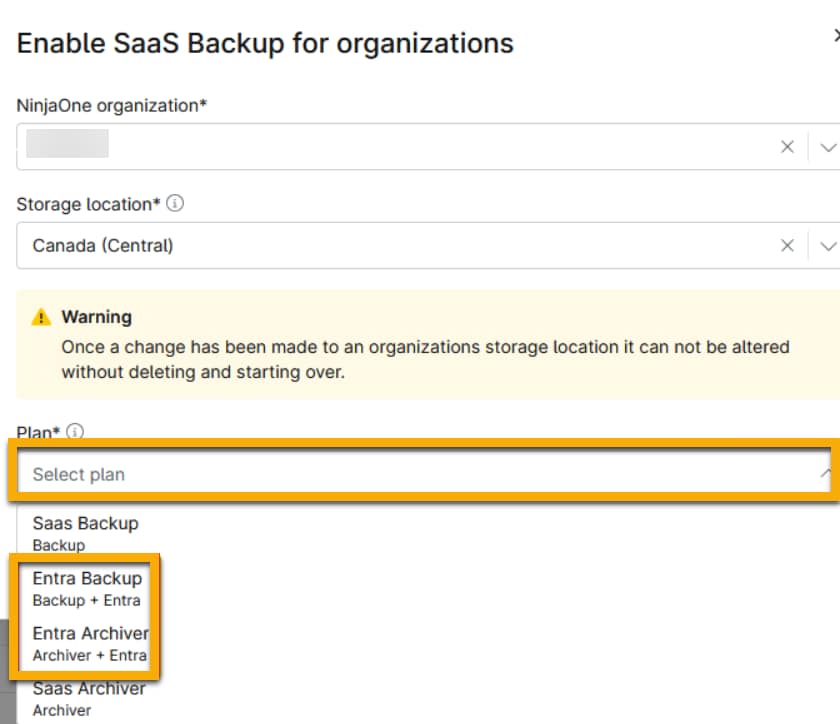
- Choose one of the two available Entra plans.
- Entra Backup (Backup+Entra): This plan includes the M365 backup.
- Entra Archiver (Entra+Archiver): This plan includes the M365 Archiver plan.
- Click Enable.
After you've selected your plan, you'll need to authorize Entra in your NinjaOne instance. To do so, follow the steps described in the Entra Authorization section of this article.
Entra Authorization
There are two available authorization applications with different purposes:
- Backup app: This app has read-only privileges. You will use it exclusively to perform backup operations. The Backup app is a required application.
- Restore app: You can activate this app permanently to restore operations without additional authentication and authorization, or temporarily as part of a specific restore operation.
To activate the Entra apps, review the steps outlined in the following sections.
Authorize Entra Backup App
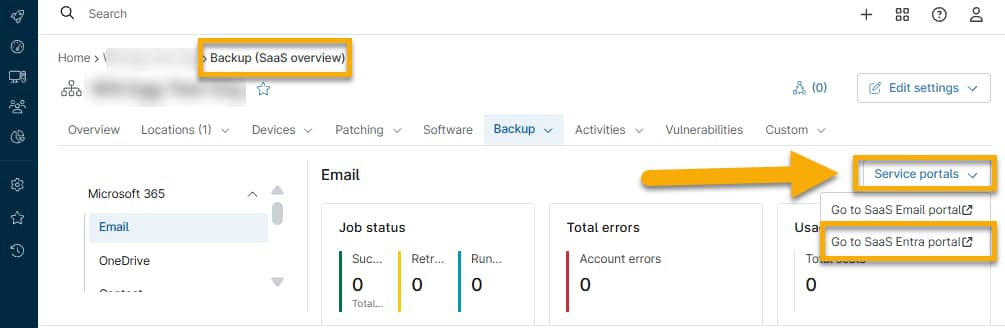
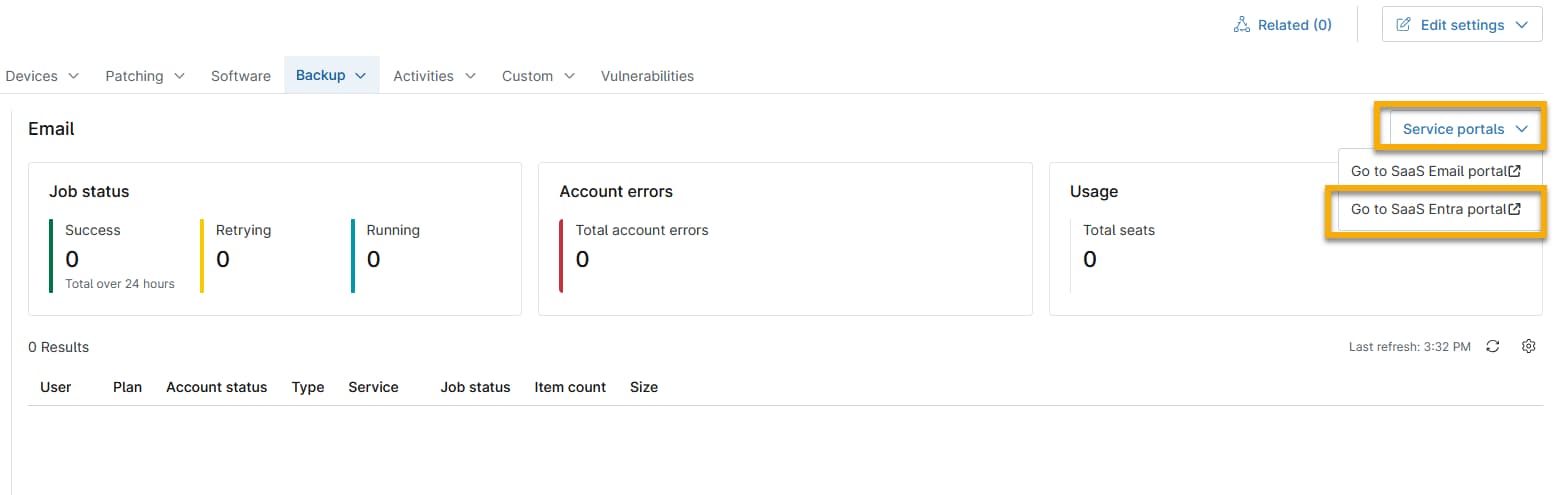
- From the organization-level SaaS Backup dashboard in NinjaOne, navigate to Service Portals → Go to SaaS Entra portal.
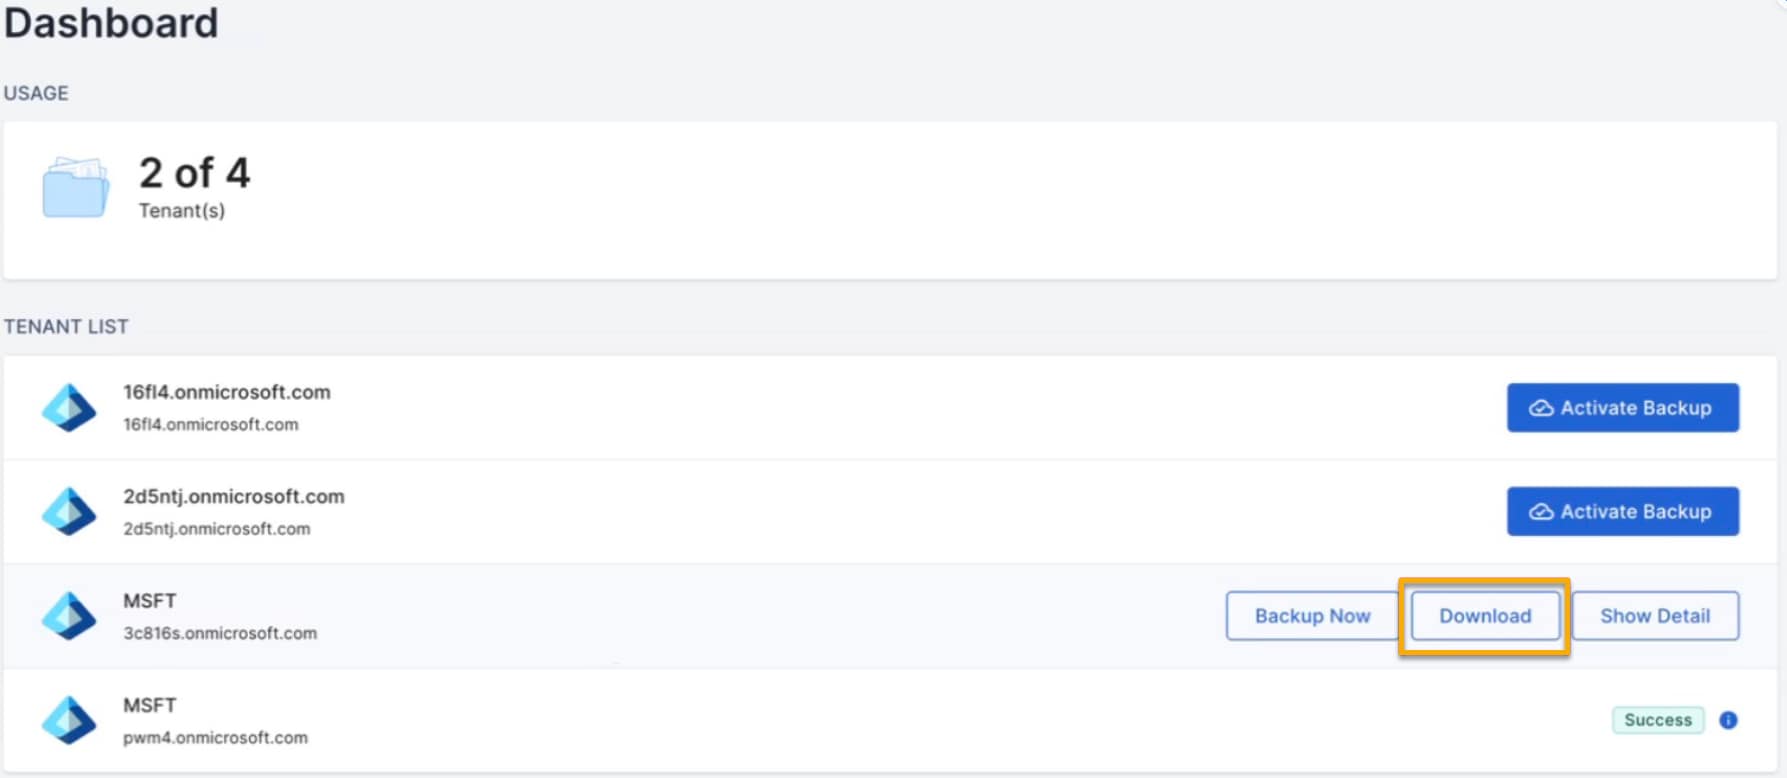
- The Entra dashboard shows a list of M365 tenants you've added. Select the tenant you want to back up, and then select Activate Backup.
- On the New Tenants page, select Sign in with Microsoft to authorize.
- A new window will appear with the Microsoft login page. Use an M365 administrator account to authorize the Entra Backup app.
- Activate Immediate Backup to have Entra Backup start backing up immediately after authorization is granted.
- Set the Backup Frequency (currently only available every 24 hours).
- Choose Continue to complete authorization.
After authorization completes, the Entra portal will display that tenant's Backup Now, Download, and Show Detail options.
Authorize Entra Restore App
- From the organization-level SaaS Backup dashboard in NinjaOne, navigate to Service Portals → Go to SaaS Entra portal.
- On the Entra dashboard, you'll see a Reauthorization Required badge for the M365 tenants. Select the tenant, and then select Update Now.
- On the New Tenants page, select Sign in with Microsoft to authorize.
- The Microsoft login page will open. Use the administrator email address to sign in.
Reauthorization
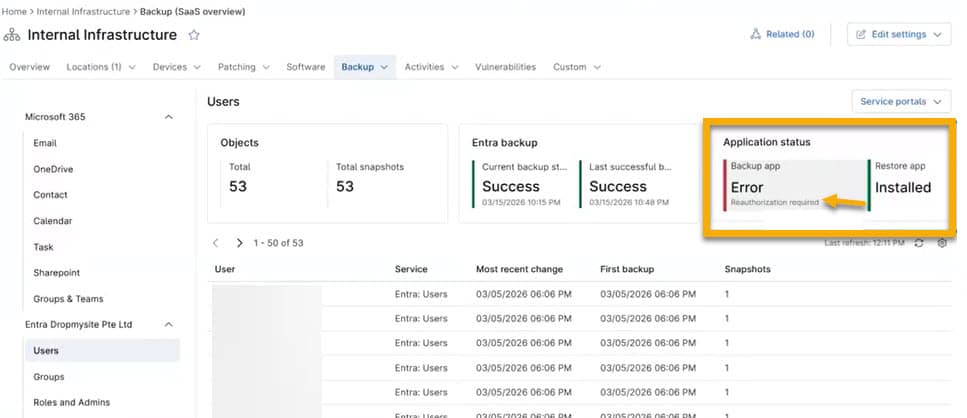
When updates or other changes to the application occur, Microsoft may occasionally require you to reauthorize the NinjaOne Entra Backup application. When that happens the Entra dashboard will display an error message in the Application Status card. Click the card to be taken directly to the appropriate section of the NinjaOne SaaS Backup Entra Portal where you can reauthorize the application.
Entra Backup
After setup and authorization are complete, you can perform backups. To do so, follow these steps:
- Navigate to the Entra Portal. You can access the Entra Portal directly from your NinjaOne SaaS Backup dashboard within NinjaOne. Navigate to: Service Portals → Go to SaaS Entra portal.
- On the main dashboard in the Entra Portal, move your cursor over the tenant and select Backup Now.
- After the backup initiates, a success banner will appear.
- Visit the System Status page to monitor backup progress.
Download and Export Data
The Download button in your Entra Portal generates a download containing a .zip file with the selected data in JSON format. You can download specific objects, all objects of a particular type (such as user or group), or all currently backed-up objects.
The JSON format allows you to review data in a text editor, a JSON tool, or a programmatic tool such as PowerShell or Graph API. In the event of a failed restore, you can use JSON data to perform a manual restore outside of Entra Backup.
Download Options
You have the following options available to you for downloading tenant data:
Tenant Level: On the dashboard, select Download.
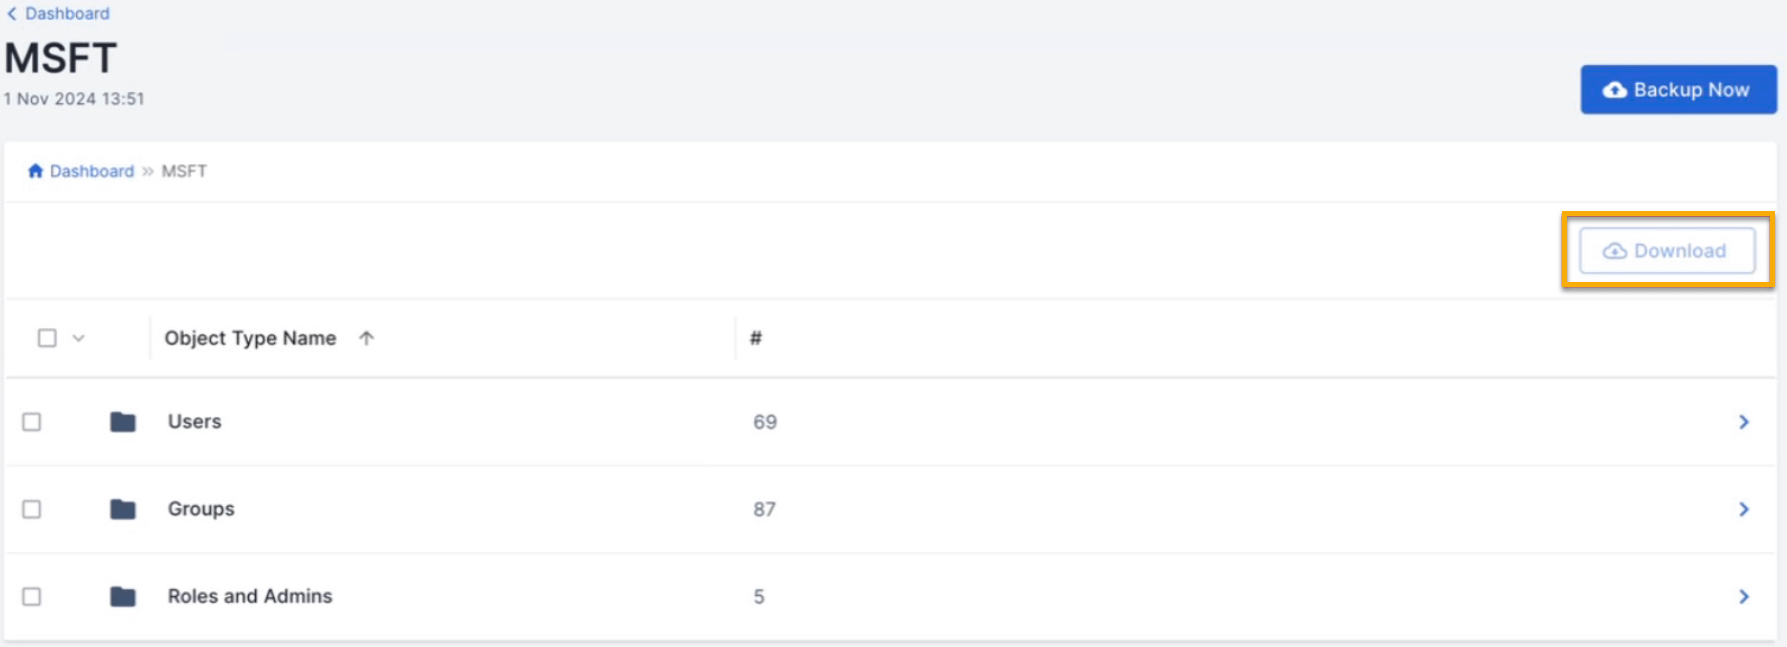
Object Type Level: Select the tenant on the dashboard, select the object type, and then choose Download.
Object Detail Level: Select the tenant, select the object type and specific object, and then choose Download in the sidebar.
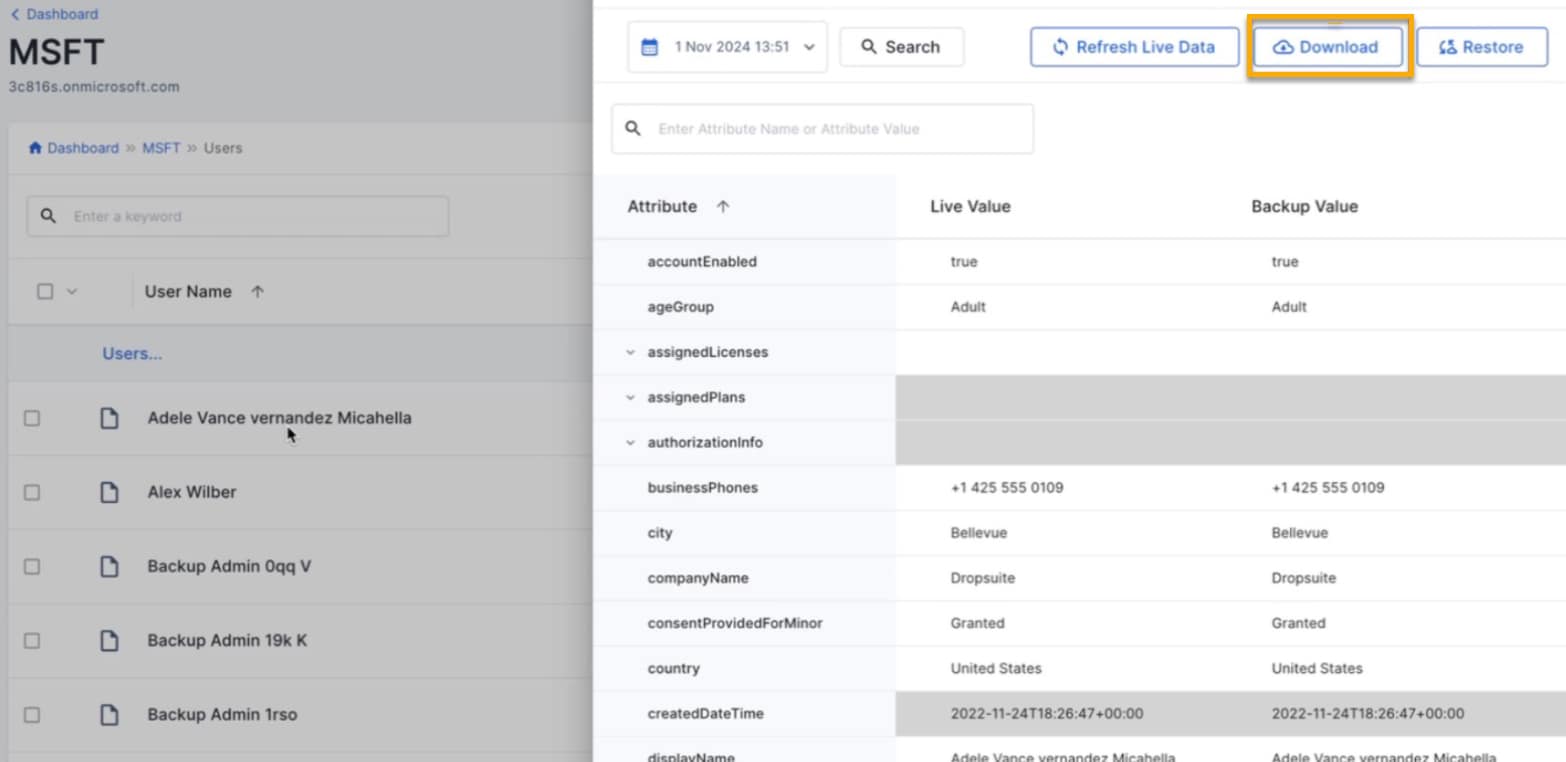
After initiating a download, monitor progress on the System Status page. The download link expires in seven days.
Restore Data
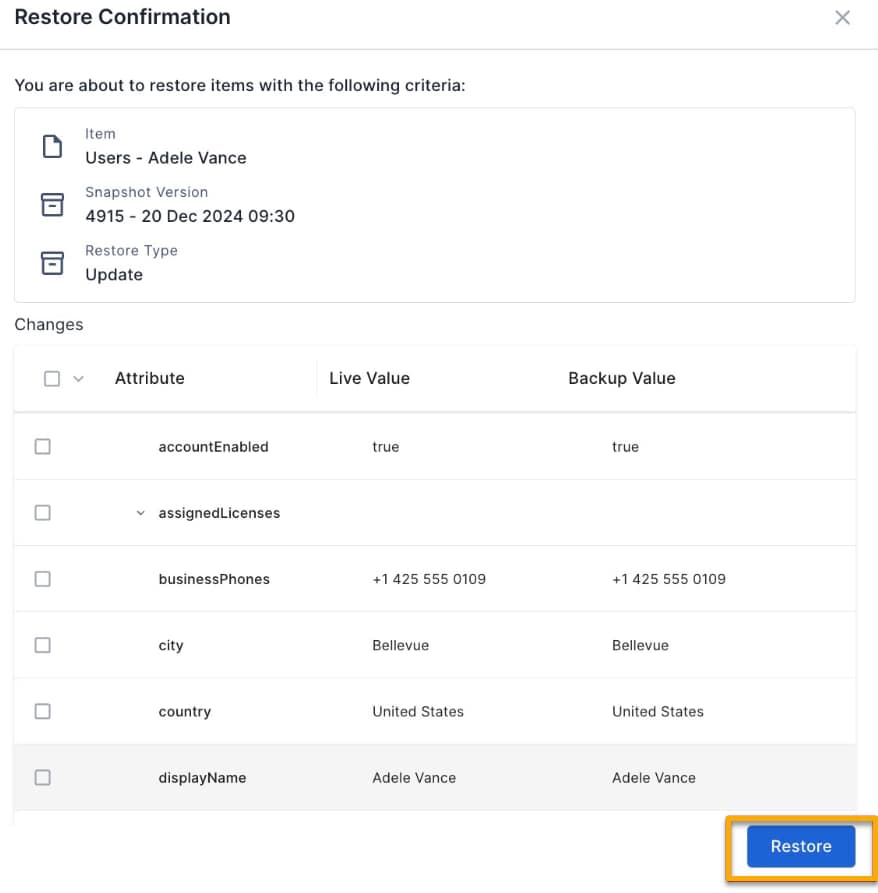
Unlike downloads, restores are available only at the Object Detail level.
After you select Restore, Entra Backup, a confirmation message appears. To proceed, choose Restore.
The Entra Dashboard in NinjaOne
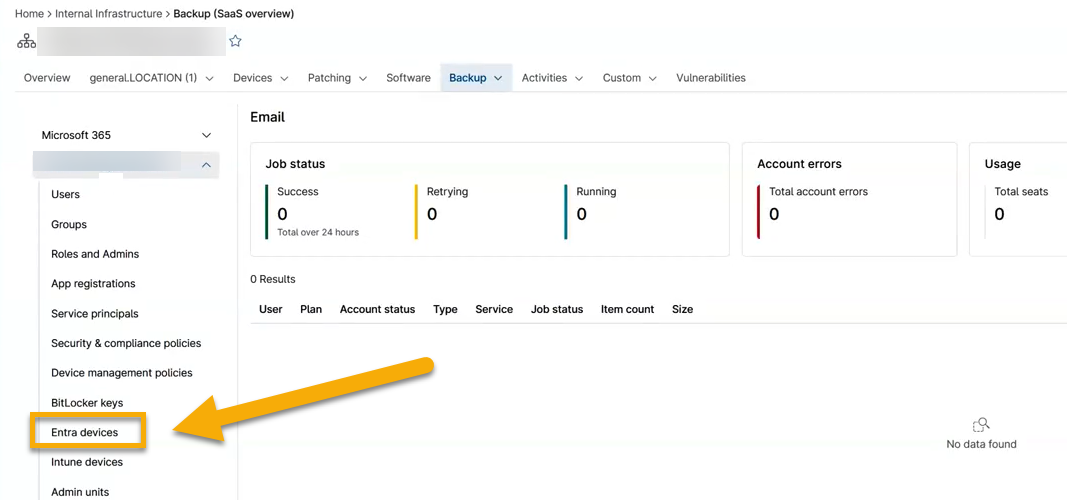
You can monitor the status of your Entra backups by accessing the Entra section of the NinjaOne SaaS Backup dashboard directly from NinjaOne. To do so, follow these steps:
- Open NinjaOne and navigate to the organization-level dashboard you wish to view
- Navigate to Backup → SaaS → Microsoft 365. NinjaOne will display the SaaS overview page for M365.
- Choose Entra devices from the list of Microsoft 365 applications.
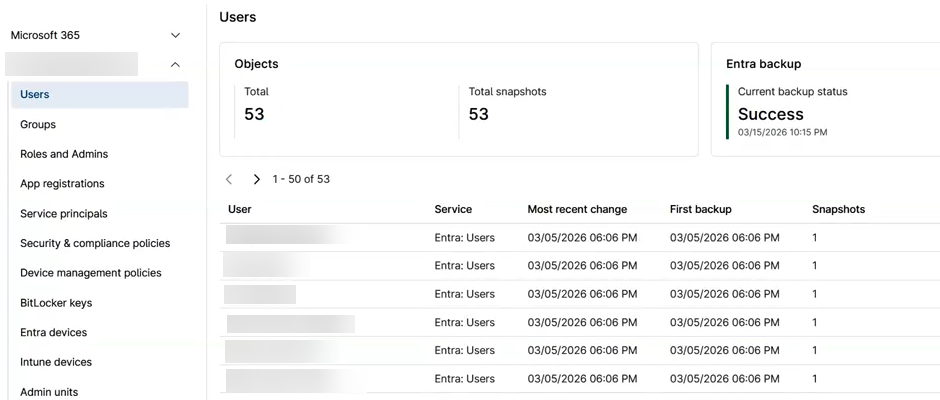
The Entra dashboard will display a list of all the Entra entities you currently back up. Clicking an entity on the list displays the backup data for that entity, including the following:
- Total Objects
- Total Snapshots
- Current backup status
- Most recent changes
- First backup date and time
The Entra dashboard connects you directly to your NinjaOne SaaS Backup Entra Portal with no need for a separate login. When you are viewing an entity table, you can move your mouse cursor over any row in the table to reveal an actions menu icon. Click the icon to go directly to the relevant section of the NinjaOne SaaS Backup Entra Portal.
Additional Resources
The NinjaOne Dojo provides documentation for the NinjaOne SaaS Backup integration. For resources specific to the full NinjaOne SaaS Backup platform, including release notes and troubleshooting guides, visit the NinjaOne SaaS Backup Help Center.