Topic
This article explains how to set up multi-factor authentication (MFA) for your technicians and end users in NinjaOne.
Environment
NinjaOne Platform
Description
Multi-factor authentication provides an additional layer of security for your NinjaOne account. It requires multiple forms of verification before granting access to specific features, product areas, or administrative actions. All NinjaOne users are required to perform MFA both at login and when performing administrative actions. NinjaOne also supports text-based (SMS) and time-based authentication and security keys.
Index
Select a category to learn more:
- Set up Primary MFA for Your NinjaOne User
- Change Authentication Method
- Configure Global Administrative Idle Time
- Additional Resources
Set up Primary MFA for Your NinjaOne User
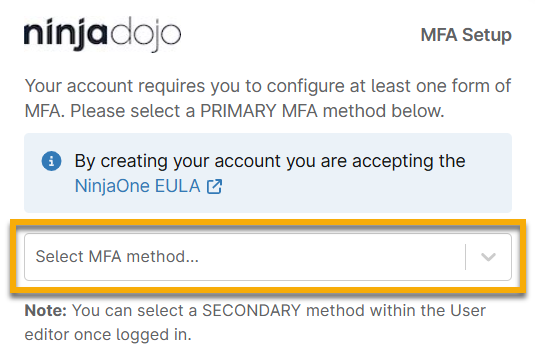
NinjaOne will prompt all users to enable MFA upon first login after accessing NinjaOne through the emailed account invitation. Once you enter your NinjaOne login credentials for the first time, NinjaOne will prompt you to set up a primary MFA method.
You must choose whether you want to use time-based, SMS-based, or hardware-based security key authentication as a primary MFA method and then continue through the required setup steps.
- To learn about time-based authentication, refer to the following section of this article titled Setting up an Authenticator App for Primary MFA.
- To learn about SMS-based authentication, refer to the section of this article titled Setting up SMS for Primary MFA.
- To learn about hardware-based security key authentication, refer to the section of this article titled Adding Hardware-based Keys or Additional Primary Authentication Method.
Setting up an Authenticator App for Primary MFA
To set up an authenticator app for your primary MFA, perform the following steps:
Download an authenticator app on an easily accessible endpoint, such as a local computer or mobile device. Any Time-Based One-Time Password (TOTP) application that supports QR code scanning and generates six-digit pins may work. NinjaOne has tested and confirmed that the following applications will work:
- Apple Passwords (for iOS 18)
- Authy
- Two-factor Authentication (2FA)
NinjaOne also supports browser plug-ins or desktop applications for time-based authentication.- Select Authenticator App from the Select MFA method drop-down menu. Then, scan the barcode with the device that has the authenticator app downloaded, or manually enter the code listed under the barcode to configure MFA.
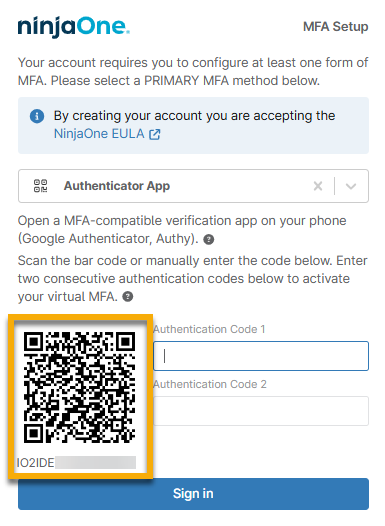
- Use the QR code or number in the authenticator app to set up the codes.
- Most authenticator apps will provide one code for several seconds and then refresh to provide another code. Enter the first code provided into the Authentication Code 1 field and then wait for the second code to appear. Enter the second code into the Authentication Code 2 field.
- Click Sign In to complete the setup process.
Setting up SMS for Primary MFA
As soon as you select SMS as your primary authentication method, NinjaOne will send an SMS message to the phone number currently associated with your user account. Enter the code into the available text field and click Sign In to complete setup.
If the user does not have access to the phone number set up for them, you can update it on their NinjaOne account configuration page or by clicking Change phone on the MFA Setup dialog. NinjaOne will prompt you to enter the correct phone number and send a code to this number.

If you receive a prompt indicating your phone country code is not supported for SMS MFA, choose an alternative MFA option. MFA setup includes restrictions so users cannot register SMS MFA if they have a phone number with a country code that NinjaOne cannot support. For a full list of these restrictions, refer to NinjaOne SMS Phone Numbers.
Adding Hardware-based Keys or an Additional Primary Authentication Method
We recommend setting up a secondary backup MFA option to account for potential compatibility or implementation issues that may arise with the hardware key. For example, the hardware-based security key will not work if the user replaces their laptop and attempts to use the same NinjaOne account.
- Select Hardware-Based Security Key from the Select MFA method drop-down menu.
- Enter a unique identifier in the Security key name field.
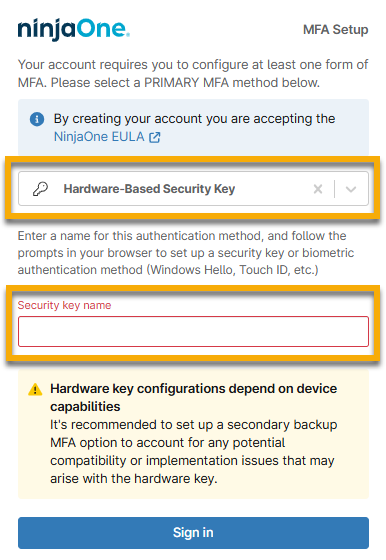
- Click Sign in.
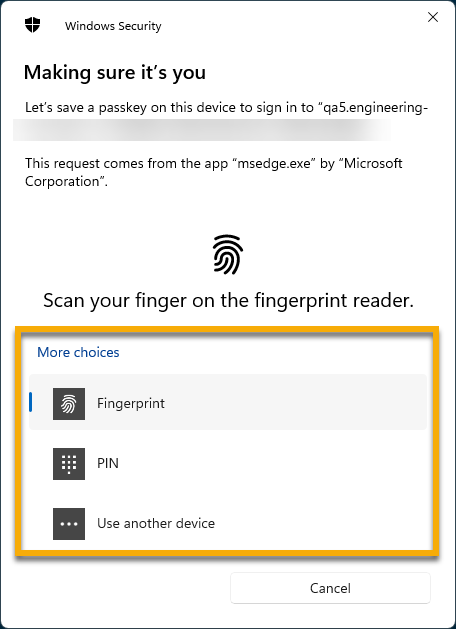
- The default option for Fingerprint may appear if your device is compatible. If your device does not have a fingerprint reader or you prefer to use an alternative method, select PIN or Use another device. Otherwise, follow the on-screen prompts.
Change Authentication Method
If a user cannot log in due to errors with their MFA, you can change the authentication method in NinjaOne. To do so, perform the following steps:
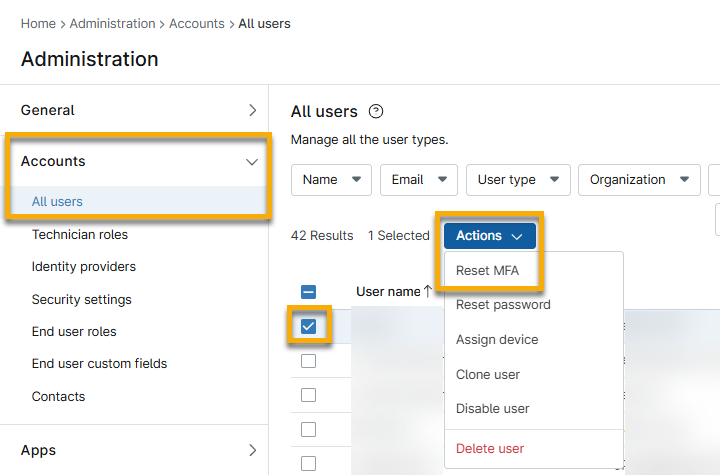
- Navigate to Administration → Accounts → All users.
- Select the checkbox for the technician or end user and then click Actions.
- Select Reset MFA and then click Reset in the confirmation dialog.
The next time the user logs in, NinjaOne will prompt them to set up their MFA.
NinjaOne will log the user out of all open sessions when:
- Configuring self-MFA
- Resetting password
- Configuring email
- Configuring phone number
Configure Global Administrative Idle Time
The global administrative idle time refers to the interval of time to pass before NinjaOne prompts a user to re-authenticate their MFA when attempting to perform an administrative task, which includes initiating remote connections to devices. Idle time will determine how often technicians must re-authenticate.
Your global administrative idle time applies to all users in your NinjaOne environment, and a system administrator can configure it by following these steps:
- Navigate to Administration → Accounts → Security Settings.
- Click Edit in the MFA global administrative idle time widget.
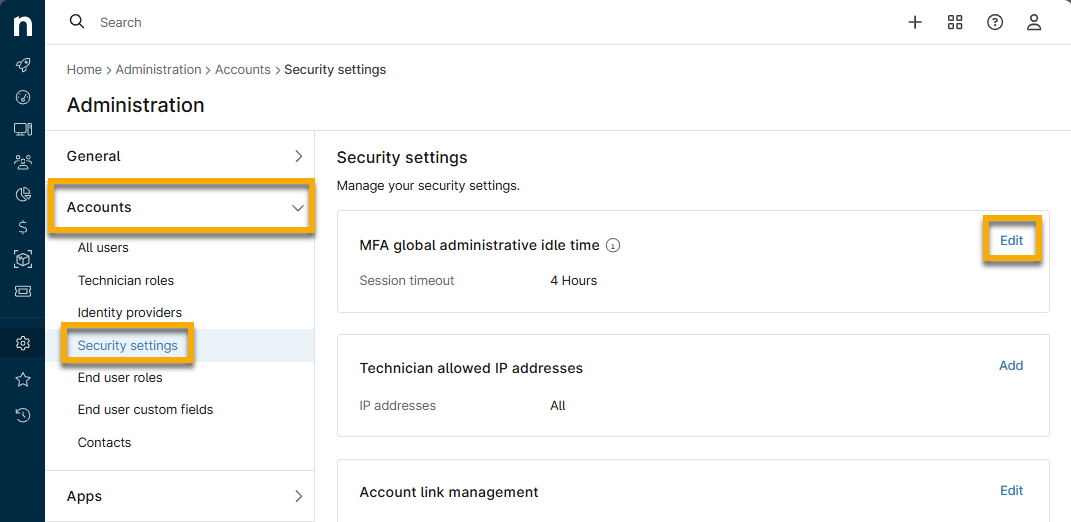
- Select your preferred idle time from the drop-down menu and then click Save.
Additional Resources
For a list of frequently asked questions about MFA in NinjaOne, refer to: Multi-Factor Authentication: Frequently-Asked Questions (FAQ).