Enrollment profiles are a reusable configuration for creating enrollment tokens, enabling users to enroll their Android Enterprise devices in NinjaOne Mobile Device Management (MDM). Additionally, enrollment profiles retain all generated tokens for review, auditing, and reuse.
Enrollment profiles allow organizations to create customized tokens with embedded WiFi, provisioning options, and more.
Select a topic to continue.
Navigating to Enrollment Profile Settings
Follow these steps to navigate to the Enrollment profiles page.
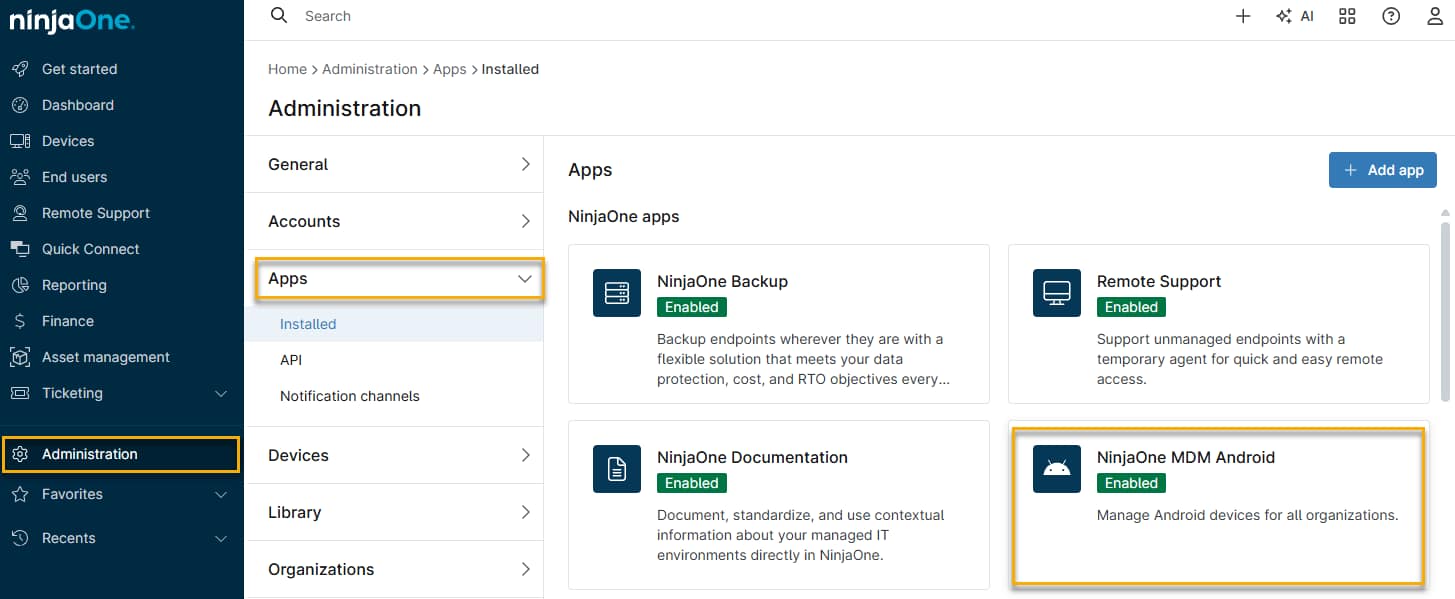
- In NinjaOne, click Administration, then select Apps and click the NinjaOne MDM Android app.
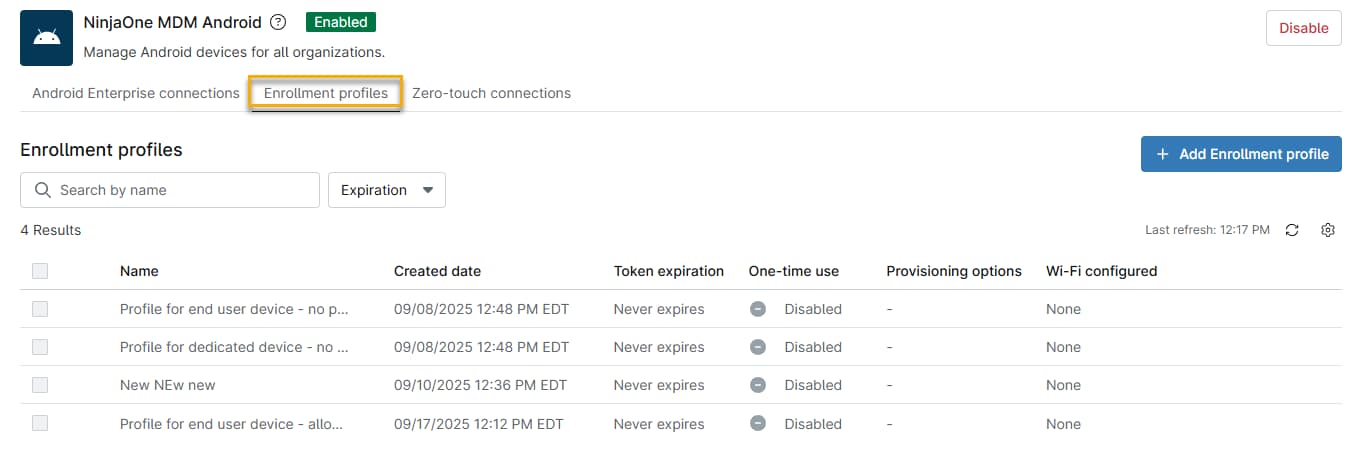
- On the NinjaOne MDM Android page, select Enrollment profiles.
Creating a New Enrollment Profile
On the Enrollment profiles page, click Add Enrollment profile. The New enrollment profile page will open.

Configure General Settings
On the New enrollment profile page, select the General tab if it is not already selected, then configure the following settings:
| Setting | Description |
|---|---|
| Profile name | Enter a descriptive name for your profile. |
| Restrict the enrollment profile settings to designated Android Enterprise connections | By default, enrollment profiles are available to all Android Enterprise connections. This optional setting can limit visibility of an enrollment profile to specific connections. |
| Usage type | This option specifies who owns the device: the end user, the company, or no specific user.
|
| Locale | This option allows you to set the device's language and regional formats to the user's preferences. |
| Timezone | Select the time zone for the user's primary operating location. |

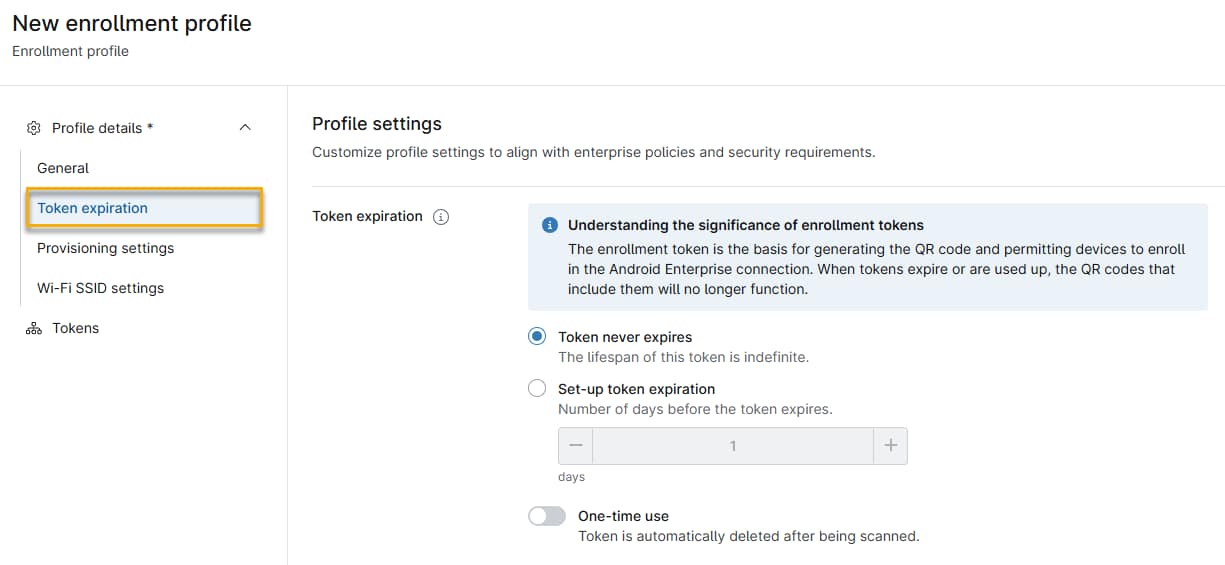
Configure Token Expiration Settings
Token expiration settings allow you to control the duration for which the enrollment token remains active before it expires. When tokens expire, NinjaOne automatically removes them and generates an activity, alerting technicians to their removal.
| Setting | Description |
|---|---|
| Token never expires | The token has no expiration date and can enroll devices indefinitely. |
| Set-up token expiration | Use this control to specify the number of days before the token expires. |
| One-time use | You can use this token once for device enrollment. After a user scans the QR code, NinjaOne will delete the token. |
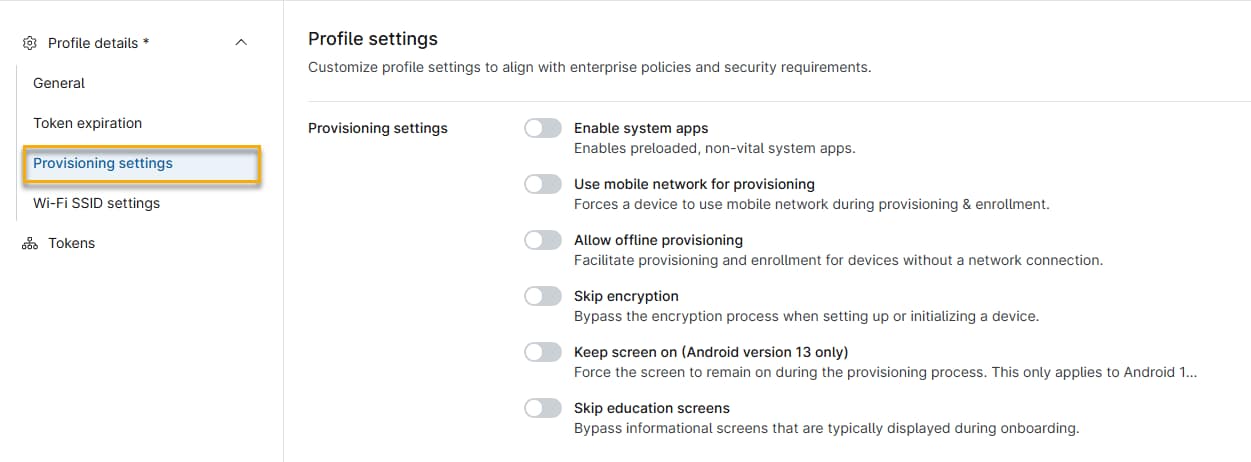
Configure Provisioning Settings
Provisioning settings enable you to control how NinjaOne MDM initially configures user devices during enrollment, allowing you to optimize provisioning speed while maintaining security.
| Setting | Description |
|---|---|
| Enable system apps | This setting pre-loads all system apps on a device, giving an experience similar to setting up the device without management. |
| Use mobile network for provisioning | Activate this option to force device provisioning over the user's cellular network. |
| Allow offline provisioning | This setting allows provisioning to take place without an active internet connection. This feature is limited-use; contact NinjaOne Support for assistance. |
| Skip encryption | This option enables bypassing the encryption requirement for devices without default-enabled encryption. |
| Keep screen on (Android version 13 only) | Activate this toggle to keep the display active and prevent the device from entering sleep mode during the provisioning process. |
| Skip education screens | This option lets you bypass the tutorial screens and UI tours that typically appear when users first open new applications. |
Configure WiFi SSID Settings
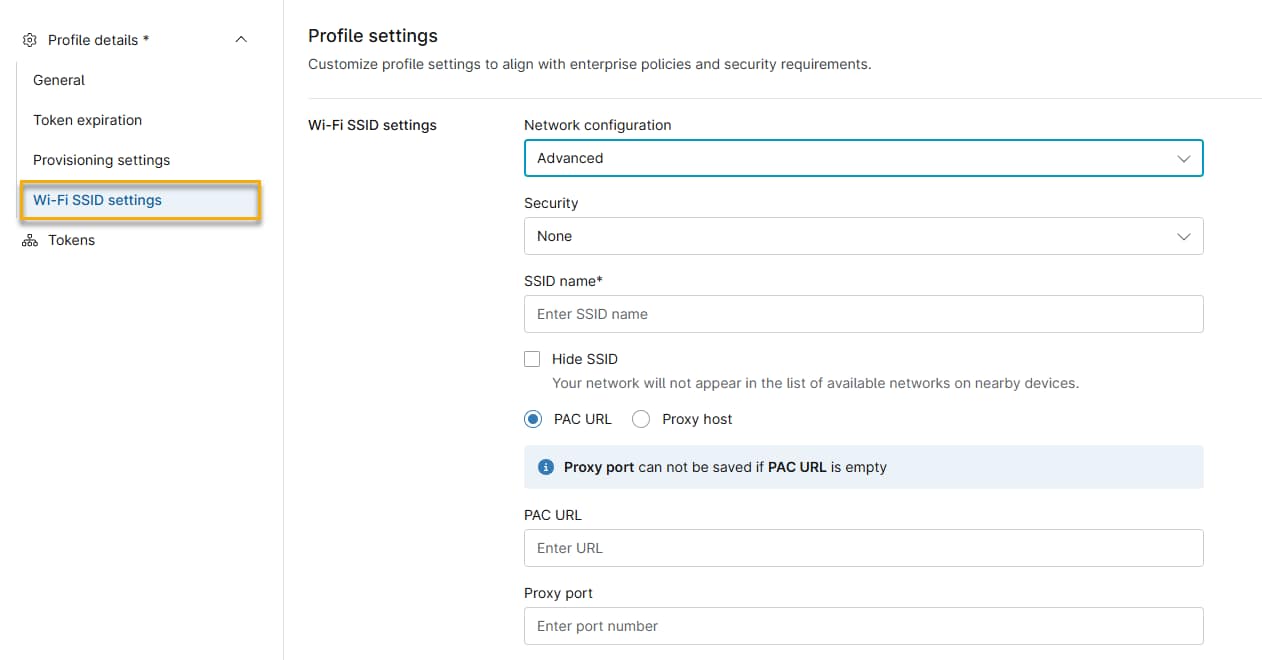
These settings determine how NinjaOne configures the WiFi network, credentials, and security information on provisioned devices.
| Setting | Description |
|---|---|
| Network configuration | Use the drop-down menu to select Standard or Advanced.
|
| Security | Select the encryption type: WEP, WPA, or none. |
| SSID name | The SSID name is the name of the network to which the devices will connect. NinjaOne pre-loads this field when you open WiFi SSID Settings. |
| Skip encryption | (Advanced configuration feature only) Activate this setting to avoid the encryption process when setting up the device. |
| Hide SSID | (Advanced configuration feature only) Select this checkbox to prevent the SSID name from appearing in nearby lists of available networks. |
| PAC URL and Proxy Host | (Advanced configuration feature only) Use these options to define a proxy connection.
|
Modifying Enrollment Profiles
After you save an enrollment profile, it will appear on NinjaOne MDM's Enrollment profiles page.
To choose an edit action, place your cursor over any profile, then click the actions menu.
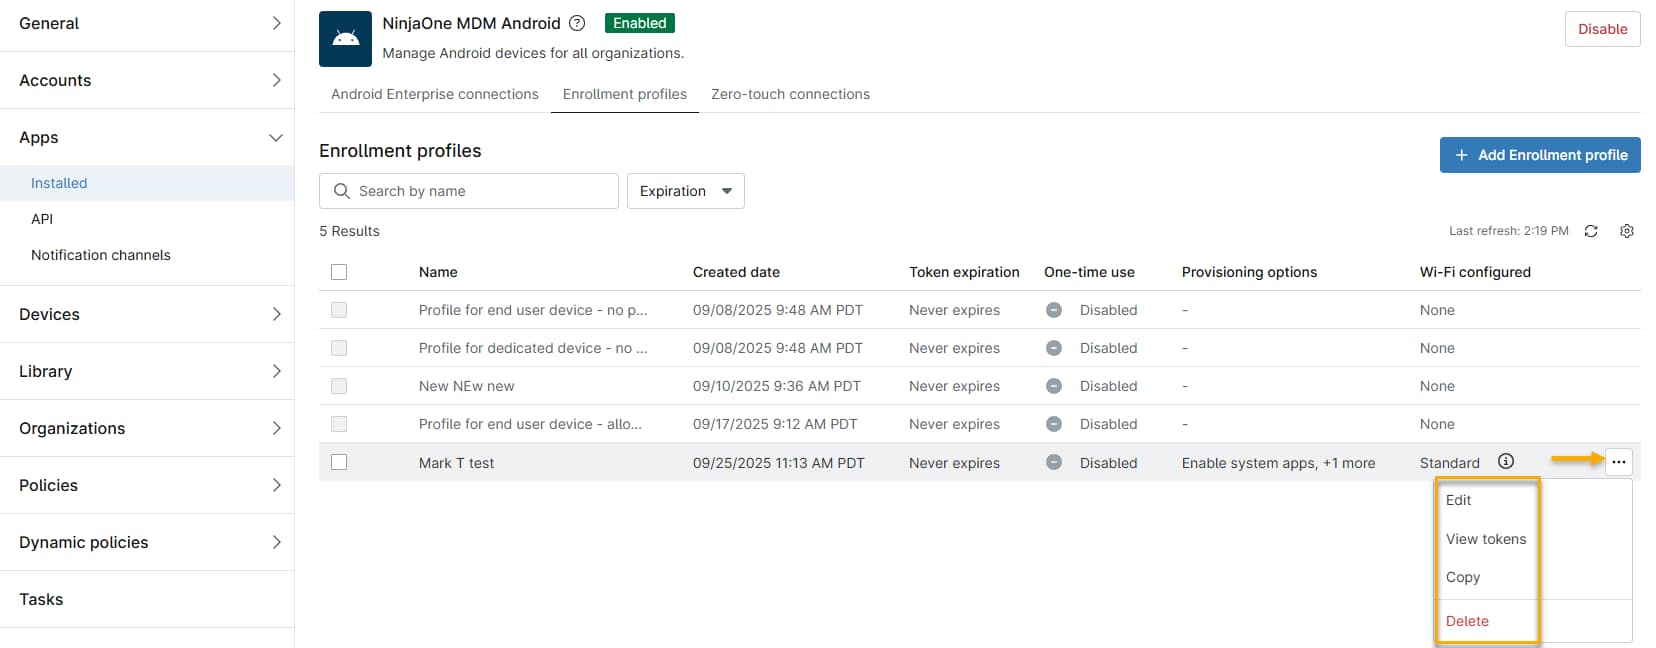
You can perform the following actions:
- Edit: Reopen the New enrollment profile page to reconfigure the settings from the Creating a New Enrollment Profile section of this article.
- View tokens: Examine the token information that controls the enrollment profile. Refer to the Viewing and Filtering Tokens section of this article for more information.
- Copy: Copy the enrollment profile for use on additional devices.
- Delete: Delete the enrollment profile.
Viewing and Filtering Tokens
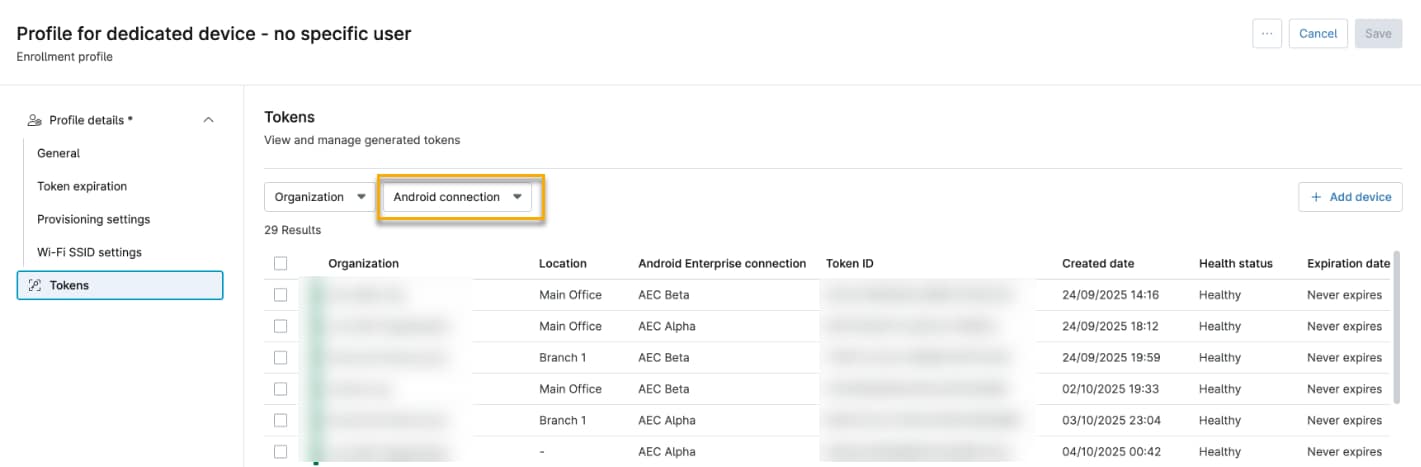
On the Enrollment profiles page, place your cursor over any profile, click the actions menu, and select View tokens to open the Tokens table for that profile.
Use the Android connection drop-down menu at the top of the table to filter the token list by Android Enterprise connection. The table will update to display only the tokens associated with the selected connection.
The Expiration date column displays the expiration date of each token within the selected connection.