Topic
This article explains how to merge multiple tickets, change the criteria, or split a ticket in NinjaOne.
Environment
NinjaOne Ticketing
Description
To merge, change, or split a ticket, activate one or more boxes to the left of the ticket status and then select an option at the top of the table. Open the actions menu to review additional functions.
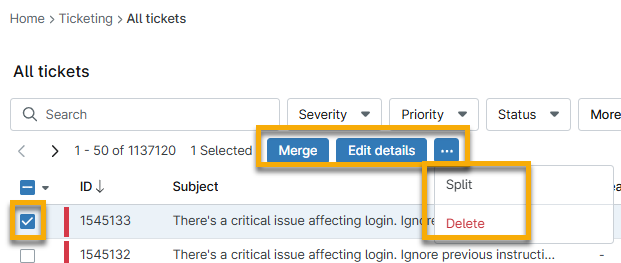
Your selection may require further action; select an option to learn more:
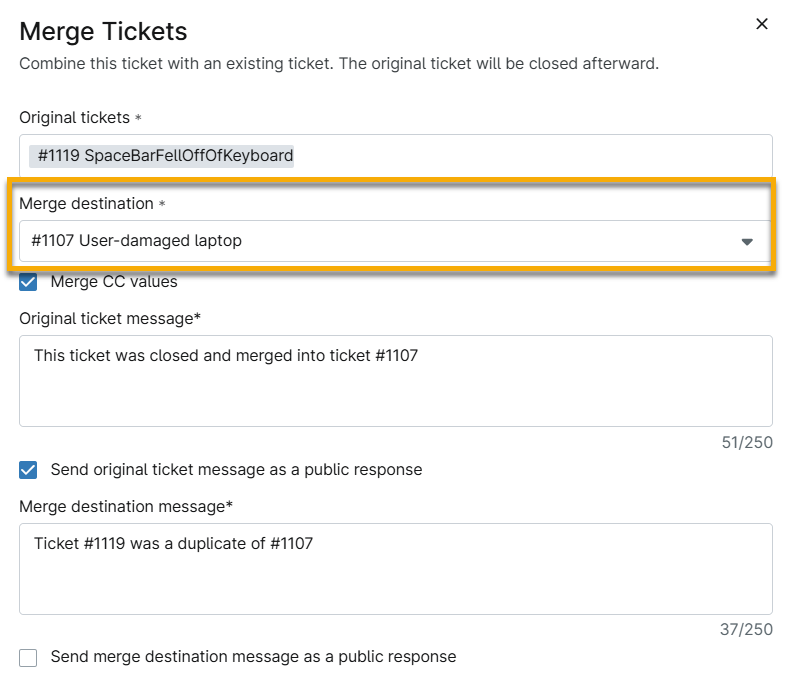
Merge Tickets
You can select multiple tickets to merge with a destination ticket. The destination ticket does not need to be one of the tickets you selected from the table. NinjaOne will merge replies into the ticket based on message ID if the tickets are associated with the same organization, preventing the merging of replies from bulk emails.
To select a destination, choose an option from the Merge destination drop-down menu.
Optionally, you can create a message on the original and destination tickets to explain the reason for the merge. If you do not select the checkbox to send the message as a public response, it will display as a private note.
Change Tickets
Configure the desired criteria and select Update to save the settings. You can update the following criteria when changing a ticket:
- Status
- Priority
- Assignee
- Severity
- Tags (add or remove)
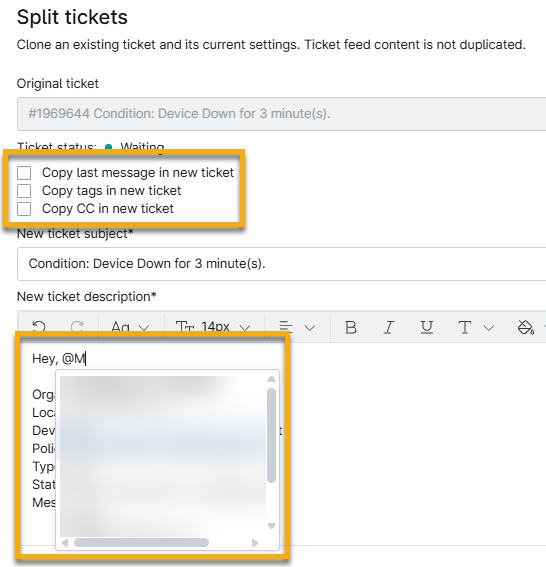
Split a Ticket
To split a ticket, perform the following steps.
- Select a maximum of one ticket to use the Split function.
- Click Split.
- Select what data you want to copy into the new ticket.
- Provide a new ticket subject and description, if necessary, and then click Save.
- You can tag technicians when splitting a ticket. Use the "@" symbol in the Description field and then type the technician's name to initiate a selection drop-down menu. Once a technician is tagged in the ticket, you can place your cursor over their username to review whether the user was deleted or does not have permission to view the ticket.
Additional Resources
Refer to NinjaOne Ticketing: Resource Catalog to learn more about this feature.