Topic
This article explains how to enroll and manage macOS devices through our mobile device management (MDM) solution. To learn more about our MDM solution, refer to What is Mobile Device Management (MDM).
Environment
- NinjaOne Mobile Device Management (MDM)
- Apple macOS
Description
NinjaOne Apple MDM allows the enrollment of macOS devices in addition to iOS and iPadOS. You can enroll macOS devices via Automated Device Enrollment (ADE) or manually install an enrollment profile.
When you've enrolled a macOS in NinjaOne Mobile Device Management (MDM) and activated tokenization, the NinjaOne agent will automatically be deployed and installed. To learn more about tokenization, refer to NinjaOne Agent Installation: Agent Tokenization.
If a device already has the NinjaOne agent installed, you can still perform MDM enrollment.
When you enroll a macOS device in NinjaOne MDM and install the agent, a technician can perform all capabilities granted by both the RMM and MDM platforms. By default, MDM-enrolled macOSes will also have the necessary permissions for NinjaOne Device Backup.
If your devices are already in Apple Business Manager (ABM) or Apple School Manager (ASM) and you have enrolled them via Automated Device Enrollment (ADE) into the original MDM, you can use the following article to migrate these devices into NinjaOne MDM without requiring a full wipe of the device: NinjaOne Apple MDM: Migrate Without a Device Wipe.
Index
Select a category to learn more:
Enroll a macOS Device in MDM
You can select from the following options to enroll macOS devices:
- Manually Install the Enrollment Profile
- Enroll via ADE During the Setup Assistant
- Enroll via ADE Using the "Profiles" Command
Manually Install the Enrollment Profile
This process is analogous to performing a QR code enrollment on an iOS or iPadOS device. On those platforms, the QR code directs the device to download an enrollment profile, which the user then installs on the device. On macOS, there is no native QR code reader. Instead, technicians have two options to access the enrollment profile:
- Download the enrollment profile directly from NinjaOne, and then transfer it to the target device, or
- Send end users a link to download and install the enrollment profile.
To generate an enrollment profile for macOS, perform the following steps:
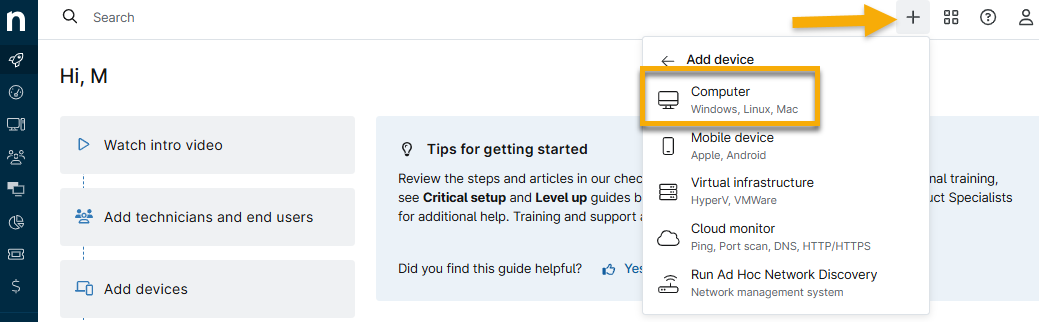
- Click the plus sign icon (+) in the NinjaOne Web application.
- Click Device and then select Computer.
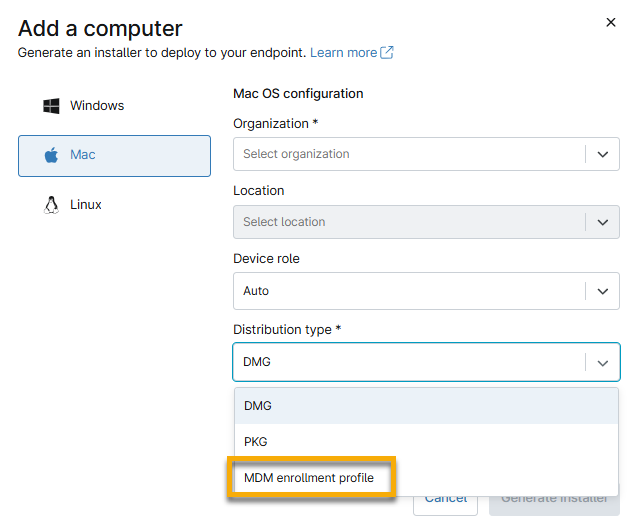
- Select Mac.
- Select an organization, location, and device role. From the Distribution type field, select MDM enrollment profile.
- Select the APN certificate.
- Click Generate Installer.
- From here, you can specify user accounts to directly email the enrollment profile to, copy a link to the profile, or download the profile directly.
How to generate an enrollment profile for macOS:
- Copy or download the enrollment profile onto the macOS device you want to enroll.
- Double-click the file to install it.
- Follow the prompts on the device in System Settings to complete the enrollment. Once installed, you can see the enrollment profile, and any other installed MDM profiles, at System Settings → General → Device Management.
Enroll via ADE During the Setup Assistant
As a prerequisite to enrolling macOS devices using ADE, you must first integrate with Apple Business Manager (ABM) or Apple School Manager (ASM) and define an ADE Profile as described in the article NinjaOne Apple MDM: Integrate with ABM for Automated Device Enrollment (Supervised Devices).
When you sync a device record with NinjaOne as part of an ADE profile and assign it to an organization and location, that device will automatically enroll in NinjaOne MDM when the device goes through the Setup Assistant. This operation will occur:
- When a device is unboxed and turned on for the very first time.
- When you've reset a device through the "Erase all Contents and Settings" option in macOS.
- When you've completely wiped a device through an MDM service that is currently managing the device.
When the device proceeds through the Setup Assistant, after connecting to Wi-Fi, a Remote Management screen will display that verifies you've enrolled the device in NinjaOne MDM.
Enroll via ADE Using the "Profiles" Command
As a prerequisite to enrolling macOS devices using ADE, you must first integrate with Apple Business Manager (ABM) or Apple School Manager (ASM) and define an ADE Profile as described in the article NinjaOne Apple MDM: Integrate with ABM for Automated Device Enrollment (Supervised Devices).
Once you sync a macOS device record with NinjaOne as part of an ADE profile and assign it to an organization and location, you can initiate ADE with the following command in the device Terminal:
sudo profiles renew --type enrollmentThis command will generate a system notification on the device that the user can click to proceed with the ADE flow. Note the following prerequisites for this flow to work:
- The device must be part of ABM or ASM, and you must have already synced the device into the ADE Profile configured in NinjaOne.
- You cannot have the device currently enrolled in any MDM solution. Remove all previous MDM profiles before using the terminal command. You can use the following steps to do so. These steps will not cause a factory reset.
- In ABBM, set up an MDM server directed at NinjaOne. Set up all device records in this new MDM server and sync them into the NinjaOne ADE profile.
- Ensure all devices are assigned to an organization and location and are ready to enroll.
- In your other MDM solution, perform the necessary command to unenroll the device. The specifics of this step will be dependent on the MDM solution you are using.
- Once the previous MDM profile is no longer on the device, enter the command provided earlier in this section into the device Terminal.
- Follow the prompts to enroll ADE in NinjaOne.
Policy Settings for macOS and MDM
After you've enrolled a macOS device in NinjaOne MDM, you can use the traditional agent policy to configure both agent-derived and MDM-derived settings. To view these settings, create or edit any agent policy where the assigned device role is Mac Desktops and Laptops or Mac Servers. To learn how to create a policy, refer to
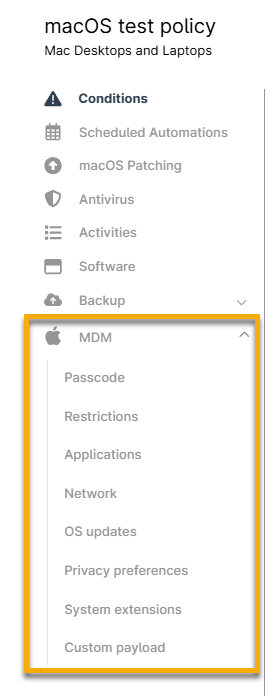
You can configure the following payloads for any MDM-enrolled macOS devices:
| Payload | Description |
|---|---|
| Passcode | Define minimum passcode requirements for your devices. |
| Restrictions | Restrict access to specific device functionality as required by your organization. |
| Applications | Deploy App Store apps that have been synced into NinjaOne via an integrated Apps and Books content token. |
| Network | Define managed Wi-Fi networks that devices can automatically connect to, as well as global proxy settings. |
| OS Updates | Define default behavior for handling OS updates. Technicians can also manually approve specific OS updates for the policy and deploy them to devices with a defined enforcement deadline. |
| Privacy Preferences | Define and pre-approve any permissions required by third-party apps, such as access to all files or access to Accessibility APIs, bypassing end-user prompts upon app installation. |
| System Extensions | Define and pre-approve any system extensions required by third-party apps, bypassing end-user prompts upon app installation. |
| Custom Payloads | Define a custom mobileconfig payload that can be used to deploy any MDM-configured or Managed App Preference configuration to devices. |
Applications
You can manage and deploy App Store-based apps you synced into NinjaOne via the Apps and Books content token. When configuring your content token, ensure you have added apps that support the appropriate platforms between iOS, iPadOS, and macOS so that they will appear in the respective policies.
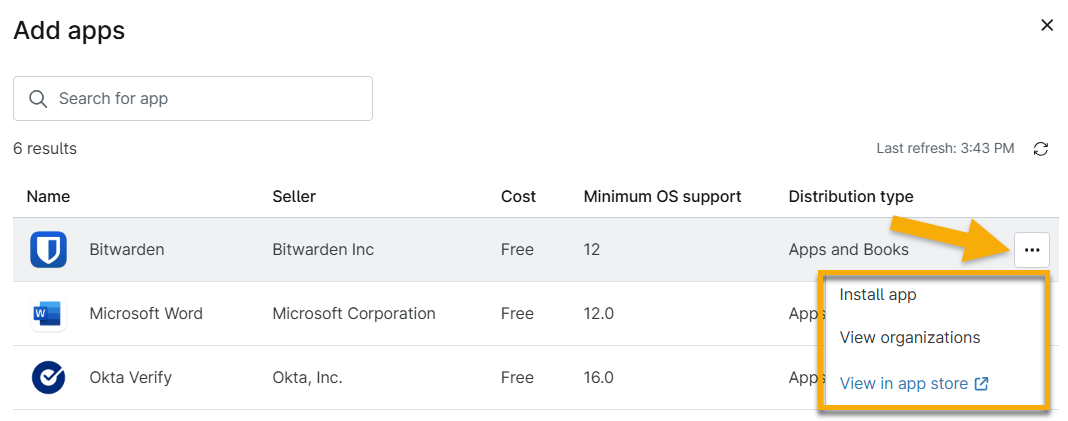
- To add applications to a macOS device, click Add apps to find a list of eligible apps for device installation. To learn more about adding apps to a policy, refer to NinjaOne Apple MDM: Application Configuration and Management.
- Move your cursor over the app row to view the actions menu, which provides the following actions:
- Install the app.
- View all organizations assigned a content token that includes the app.
- View the app information in the store.
Additional Resources
For more information about NinjaOne MDM and macOS, refer to: NinjaOne MDM: Resource Catalog.
To learn about each setting provided in the MDM section of the policy, refer to: