Topic
This article explains how to use checklists with NinjaOne Documentation to organize tasks, manage workflow steps, or outline steps for your technicians and end users.
Environment
NinjaOne Documentation
Description
You can create checklists to assign tasks to your technicians in NinjaOne, and configure requirements or notifications to ensure adherence to standard operating procedures. Creating checklist templates ensures easy replication and effectively captures critical information.
With NinjaOne checklists, you can ensure task completion with the following features:
- Task type: Identifies the category or maintenance area (backup validation, patch deployment, system cleanup).
- Steps or validation items: A sequence of checks with checkboxes to confirm completion.
- Technician notes: A free-text field for observations, anomalies, or remediation steps taken to provide context beyond checkboxes.
- Sign-off section: Technician initials or name with a timestamp for accountability and audit trail creation.
Index
Select a topic to learn more.
- Manage Technician Permissions
- Create Global Checklist Templates
- Create Organization-Level Checklists
- Manage and Assign the Checklists
- Additional Resources
Manage Technician Permissions
A system administrator must manage permissions for technicians to work on checklist items. To do so, perform the following steps:
- Navigate to Administration → Accounts and open a technician account or role.
- Select Documentation and ensure the Enabled toggle is active.
- Select a permission level from the following drop-down menus:
- Organization checklist access
- Checklist template access
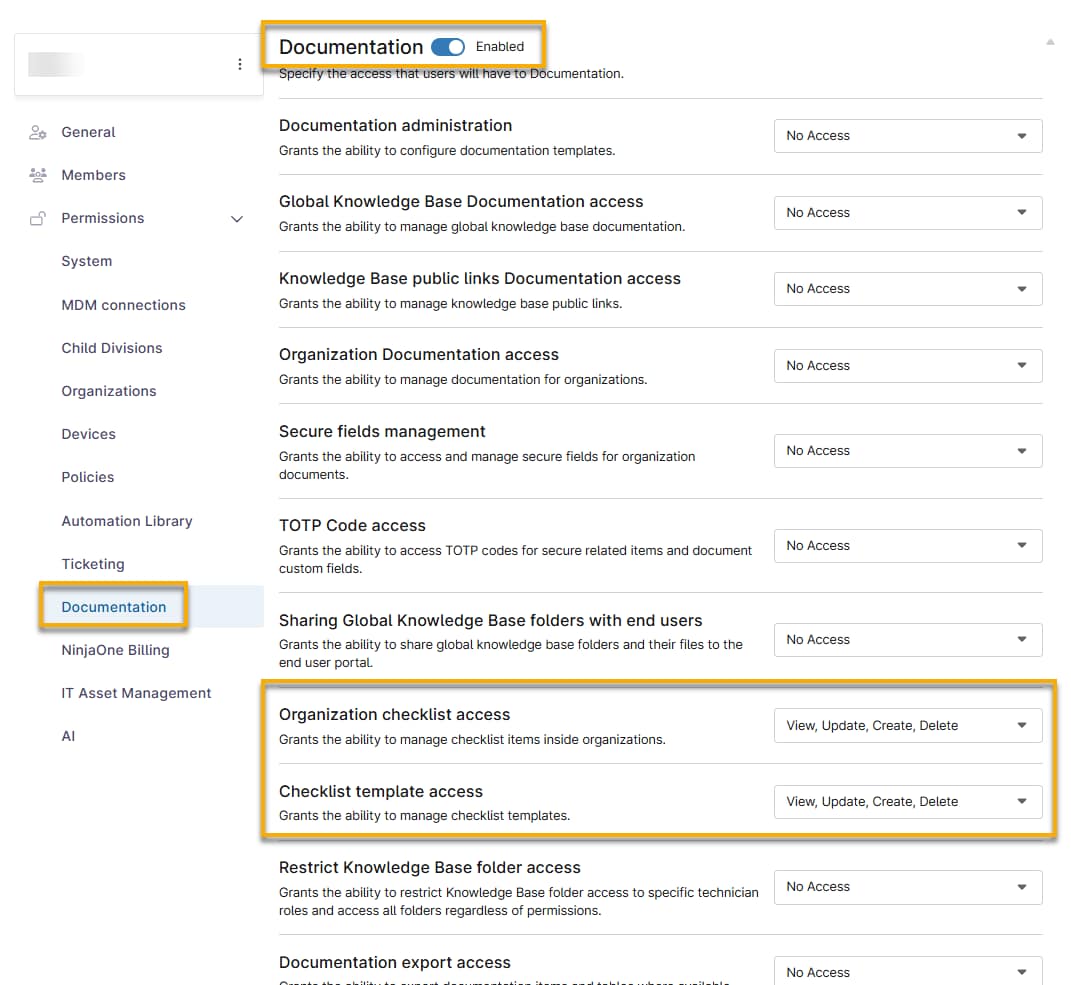
- Click Save Changes.
Create Global Checklist Templates
Technicians with the appropriate permissions can create and manage checklists from the NinjaOne Documentation application.
Creating a checklist from the NinjaOne Documentation application page makes the checklist available to all organizations. To create a checklist that is available to only one organization, refer to the section of this article titled Create Organization-Level Checklists.
- To add a global template, navigate to Administration → Apps → and select Ninja Documentation.
- Open the Checklists tab and click + Add.

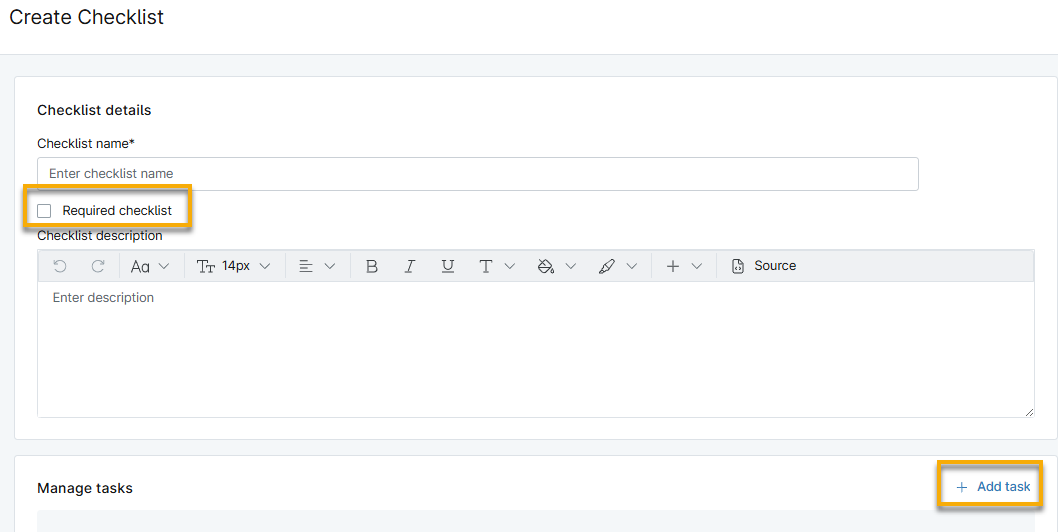
- Give your template a title and optional description.
- Require technicians to complete the field by selecting the Required checklist checkbox.
- Click Add task to populate the checklist.
- In the Add task dialog, enter a unique identifier for Task name and optionally provide a description.
- Click Save task.
- Click Add task again to continue adding to the checklist.
- You can manage your tasks by moving your mouse cursor over the task row and selecting either the Edit or Delete icons. Click the horizontal move handle and drag the row up or down to change the order of tasks.

- Click Save Changes.
- View or edit your checklists by selecting them from the Checklists tab in NinjaOne Documentation. Select the checkbox next to the checklist name to archive it.
Import the Checklist to the Organization Dashboard
The Checklists page on the organization dashboard will be empty until you import the global template. To add the checklist to the dashboard, perform the following steps.
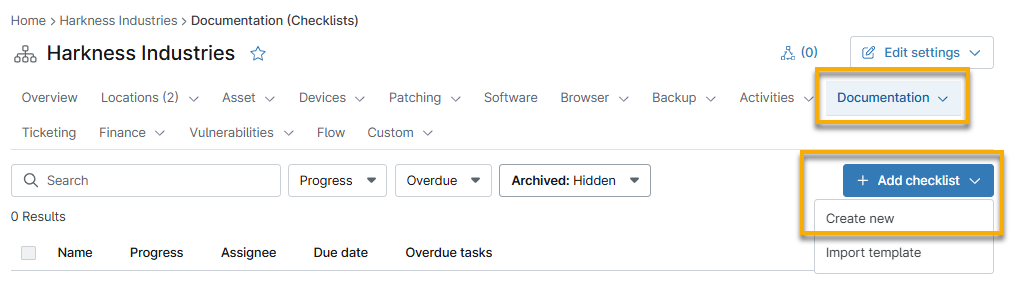
- Navigate to an organization dashboard. Click Documentation and select Checklists.
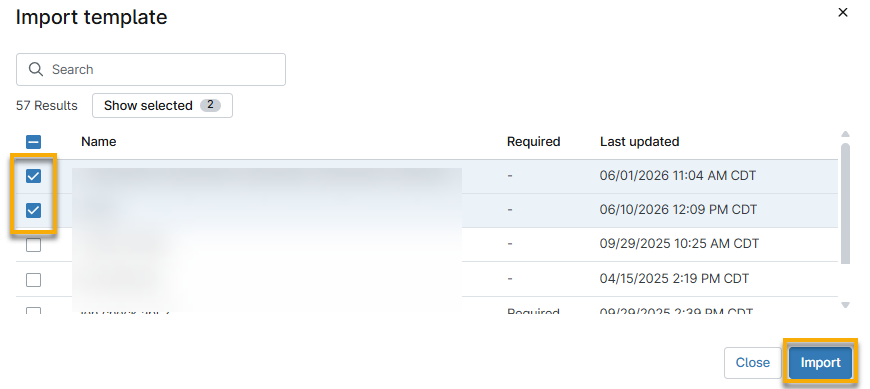
- Click Add checklist and select Import checklist.
- In the Import template dialog, select the checkbox for one or more checklists and then click Import.
Delete a Checklist Template
You can delete a custom checklist after archiving it. To do so, perform the following steps.
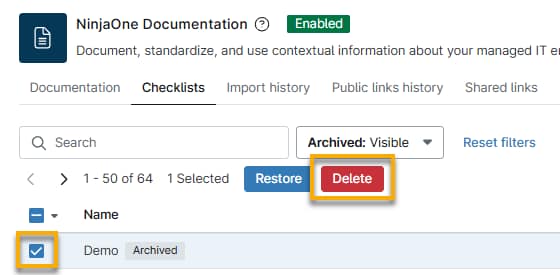
- Select the checkbox next to the checklist name and click Archive.
- Select Visible from the Archived filter drop-down menu.
- Select the checkbox next to the checklist name and click Delete.
Create Organization-Level Checklists
To create a checklist that is available to a specific organization, perform the following steps.
- Navigate to an organization dashboard. Click Documentation and select Checklists.
- Click Add checklist and select Create new.
- Repeat the process per the steps listed in Create and Manage Global Checklist Templates section of this article.
Manage and Assign the Checklists
After you create or import a checklist to the organization dashboard, you can take the following actions:
- Edit the checklist: Click the checklist name to open the details page, and then click Edit checklist. You can change the checklist name, mark the checklist as required, update the description, and add, edit, remove, or reorder tasks.
- View progress of completion: The Progress column will show you how many tasks are done, and how many need to be completed.
- Assign the checklist to a technician: Move your mouse cursor over the checklist row and click the Actions menu to select Assign technician.
- You can only assign the checklist to one technician.
- You can assign each task within a checklist to a separate technician. Refer to section Assign a Checklist or Task for details.
- Assign a due date for the checklist: Move your mouse cursor over the checklist row and click the Actions menu to select Add due date.
- If the due date passes and progress is not complete, the Overdue tasks column will show an alert icon with the number of required tasks that need attention.
- Archive, promote, or copy the checklist. Move your mouse cursor over the checklist row and click the Actions menu to use these options.
- Refer to section Promote a Checklist to the System Dashboard to learn what happens when you promote a checklist.
- Archiving a checklist from the organization dashboard does not archive the checklist from other organizations that have imported the template.

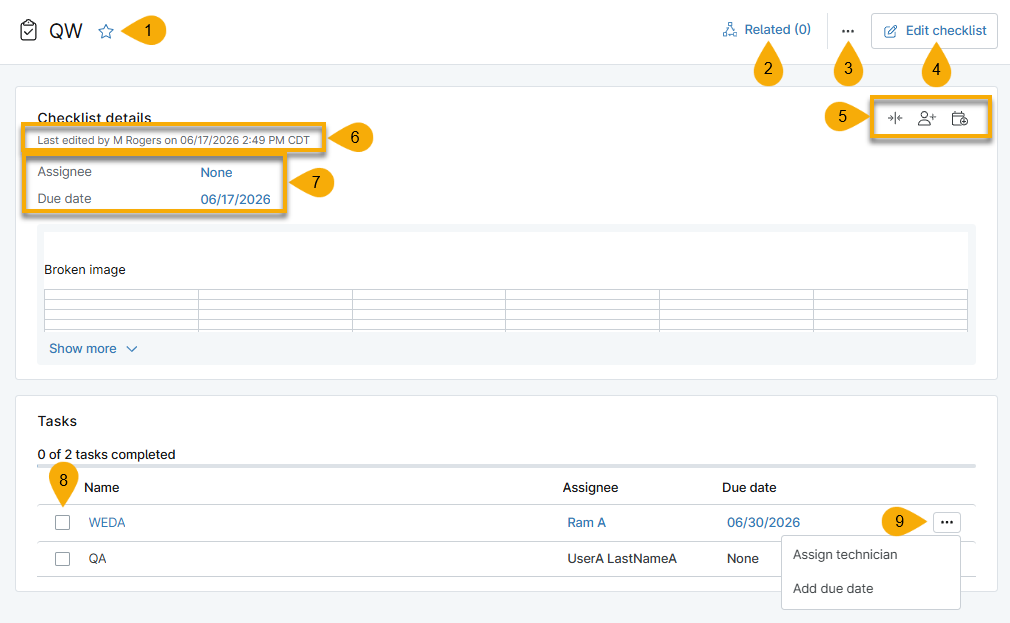
Checklist Details
Clicking the title of a checklist opens the detailed view where technicians can take action on tasks or make changes. Refer to the following table for a description of the tools on this page.
| Number | Description |
|---|---|
| 1 | Click the star icon to add the checklist to your Favorites list. |
| 2 | Add related items to the checklist. |
| 3 | Archive the checklist. |
| 4 | Edit the checklist name, description, and tasks. |
| 5 | Move your cursor over these icons to view the description. |
| 6 | View who made the most recent changes to the checklist. |
| 7 | Click the data to change the checklist Assignee or Due date. |
| 8 | Take action on checklist tasks. Click the task name to view the task description. |
| 9 | Assign a single task to a technician or due date. |
Assign a Checklist or Task
You can assign an entire checklist to one technician, or you can assign each task within the checklist to separate technicians. Additionally, you can assign a due date to the whole checklist or each task.
Any technician can complete an assigned task. The Last edited by details will update to show the last account that took action on a task.
When you assign a checklist or task and select the option to Send email notification to the technician, they will receive an email containing the following information:
- Name of the checklist
- Due date of the checklist, if set
- A link to view the checklist
- The organization in which the checklist was created
- A list of all tasks in the checklist
Promote a Checklist
When you promote a checklist from the organization dashboard, it will create a copy of it on the Checklists tab of the NinjaOne Documentation configuration page. This action is intended for checklists created from the organization dashboard to make them available for other organizations to import.
- From Documentation → Checklists on the organization dashboard, select a checklist and click Promote.
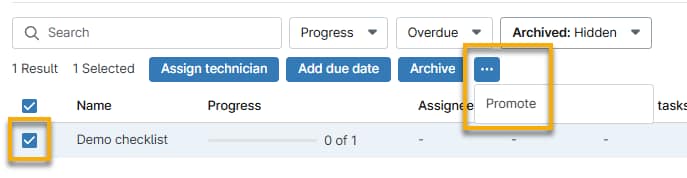
- Enter a new name for the copy and then click Confirm.
Additional Resources
Refer to NinjaOne Documentation: Resource Catalog to learn more about other NinjaOne Documentation features.