
Topic
This article explains how to define and track service-level agreements (SLAs) for tickets in NinjaOne.
Environment
NinjaOne Ticketing
Description
Use the NinjaOne Ticketing application to configure and assign SLAs. When you configure your SLAs, you can use the Ticketing section on the organization configuration page to assign a default SLA for its tickets. You can also assign the SLAs to tickets via automation triggers.
NinjaOne Ticketing boards display relevant SLA information, and you can filter them based on SLA due dates or remaining time. You can adjust table columns to display and sort relevant SLA details, such as the remaining time for an SLA target.
Select a category to learn more:
Configure the SLA
To configure the SLA, perform the following steps:
- Navigate to Administration → Apps → Installed → NinjaOne Ticketing. Open the Service level agreements tab.
- Click Add service level agreement.
- The Add service level agreement dialog appears with the General section open by default. Enter a unique identifier into the Name field and specify your holiday and support hours, if needed.
- Refer to NinjaOne Ticketing: Configure Support Hours to learn how to configure holidays.
- Refer to the following section of this article titled Organization-specific Support Hours to learn how to configure organization-specific support hours.
- Open the Priority targets section.
- For each target, define the agreed-upon Response time and Resolution time values. These times update for the ticket's SLA when you configure the Priority field.

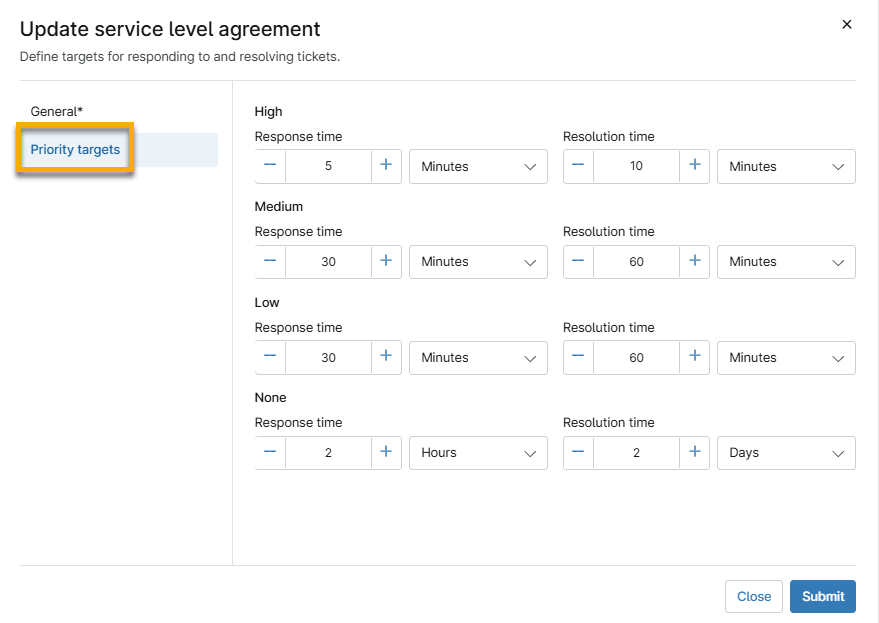
- Click Submit.
Organization-specific Support Hours
When you define targets for your SLAs, you can inherit support hours from the organization. To set up an organization's default support hours, perform the following steps:
- Navigate to Administration → Organizations and select an organization to edit.
- Open the Ticketing section and click Edit.

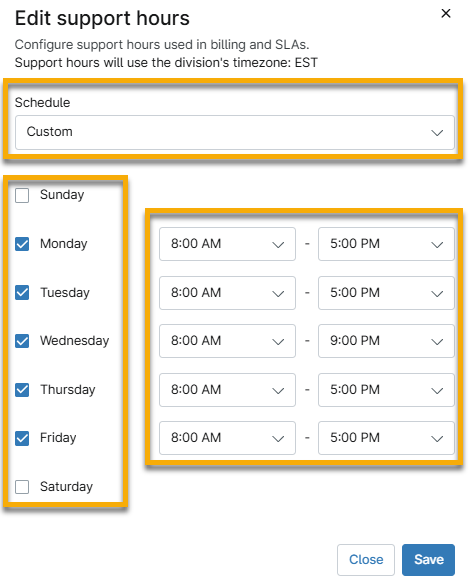
- In the Edit support hours dialog, select Use global default or Custom.
- Select the checkbox for each day the organization is available.
- Use the Start and End drop-down menus to specify hours.
Assign the SLA
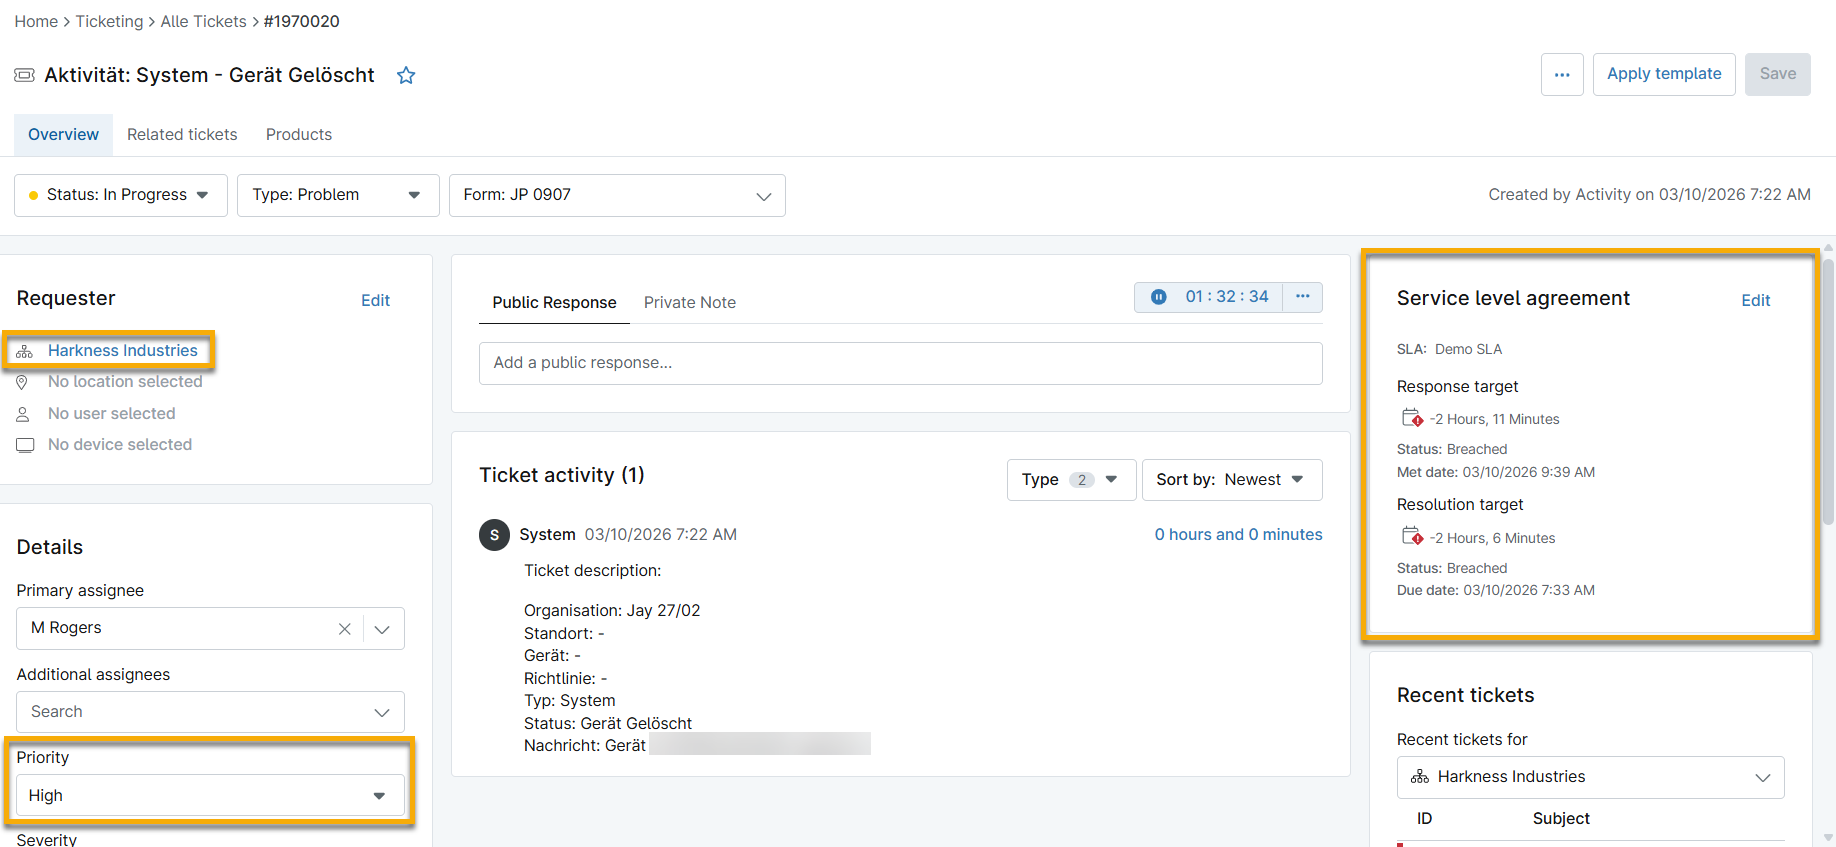
You assign the SLA to your organization. When you assign a ticket to the organization and set the priority, the Service level agreement section of the ticket will update to select the specified default SLA.
- Navigate to Administration → Organizations and select an organization to edit.
- Open the Ticketing section and select the applicable SLA from the Default service level agreement drop-down menu.

- Click Save.
Filter Tickets by SLA
To filter the ticket board by SLAs, follow these steps.
- Select a ticketing board from the sidebar menu and click Edit Board.
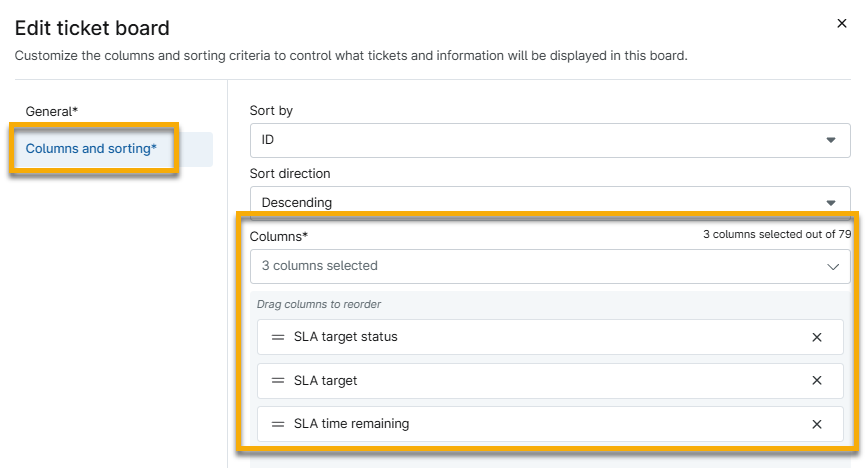
- In the Edit ticket board dialog, select Columns and sorting.
- Add one or more of the following columns, depending on your search criteria:
- SLA target status: NinjaOne Ticketing displays the current SLA status as In Progress, Breached, or Achieved.
- SLA target: NinjaOne Ticketing displays the active SLA target date and time. It shows the response target until a technician responds to the ticket, then switches to the resolution target.
- SLA time remaining: NinjaOne Ticketing displays the time remaining before you must meet the SLA.
Change the SLA on a Ticket
Tickets that you have not assigned to an organization will use the default system SLA. Assign the ticket to an organization and select the priority to change the SLA and its response, and resolution times.
You can also manually select the SLA for the ticket by clicking Edit in the Service level agreement section and selecting a new option from the drop-down menu.
Additional Resources
Refer to NinjaOne Ticketing: Resource Catalog for a complete list of NinjaOne Ticketing articles and guides.