Topic
This article describes how to connect NinjaOne SaaS Backup to HaloPSA.
Environment
- NinjaOne SaaS Backup
- HaloPSA Integration
Description
Follow the steps below to connect HaloPSA to your NinjaOne SaaS Protection instance.
Index
- Complete Partner Setup in HaloPSA
- Connect to Halo on the NinjaOne SaaS Backup Partner Portal
- Complete Integration Configuration
- Creating a New Organization Linked With HaloPSA
- Editing an Existing Organization From HaloPSA
- Revoking the HaloPSA Integration
Complete Partner Setup in HaloPSA
Follow these steps to perform partner setup:
Create the Role
- Launch HaloPSA URL. The URL will vary from partner to partner, using the format [user's domain].halopsa.com.
- Log in with your valid credentials.
- Navigate to Configuration → Teams & Agents → Roles. To create a new role, select New.
- Complete the role information
Configure the Role
Configure role options using the following settings:
Details Tab
- Role Name: Select Dropsuite API role, then save and choose Edit.
Permissions Tab
- Feature Access section:
- Tickets Access Level: Select Read and Modify.
- Customers Access Level: Select Read Only.
- Suppliers Access Level: Select Read and Modify.
- Software Licensing Access Level: Select Read and Modify.
- Tickets Permissions section:
- Can add new Tickets: Select Yes.
- Can Edit Tickets Which Are Not Assigned To Them: Select Yes.
- Ticket Type Restrictions section: Allow use of all Ticket Types: Select Yes.
- Client Restrictions section: To grant access to all customers, select Yes. To restrict access to specific customers, select No, then choose those customers from the Accessible Customers drop-down menu. When finished, click Save.
Create the Agent
Follow these steps to create the Dropsuite API agent.
- Navigate to Configuration → Teams & Agents → Agents.
- Choose New to create a new agent.
Click the Details tab and configure agent options using the following settings:
Account Details section:
- Username: Type "Dropsuite API agent".
- Roles: Select Dropsuite API role.
- Account: Select Account Active.
- Agent type: Select Is an API-only Agent.
Agent Details section:
- Default Team: Select No Default Team.
- Work Hours: Select Default Working Hours.
Approval Settings section:
- Clear out the Can approve Invoices option. When finished, click Save.
Set Up the Application
After creating the agent, you must set up the HaloPSA application.
- Navigate to Configuration → Integrations → HaloPSA API.
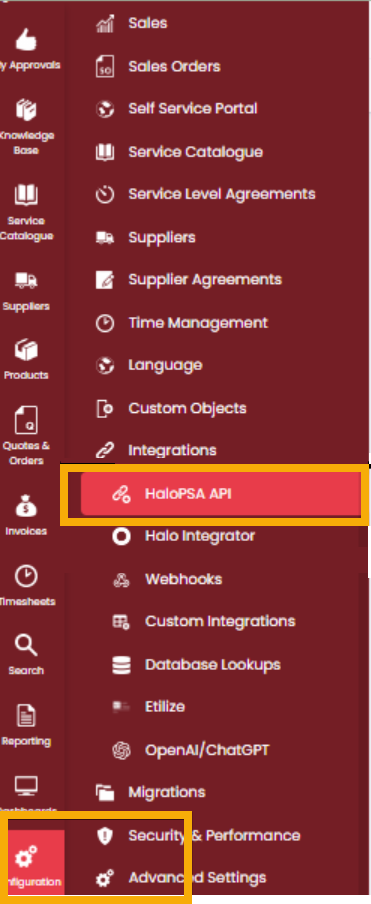
Figure 1: The HaloPSA Navigation menu (click to enlarge)
- Choose View Applications, then choose New to create a new application.

Figure 2: The HaloPSA Navigation menu (click to enlarge)
- Give the application a descriptive name, ensure the Active checkbox is checked, and set the Authentication Method to Client ID and Secret (Services).
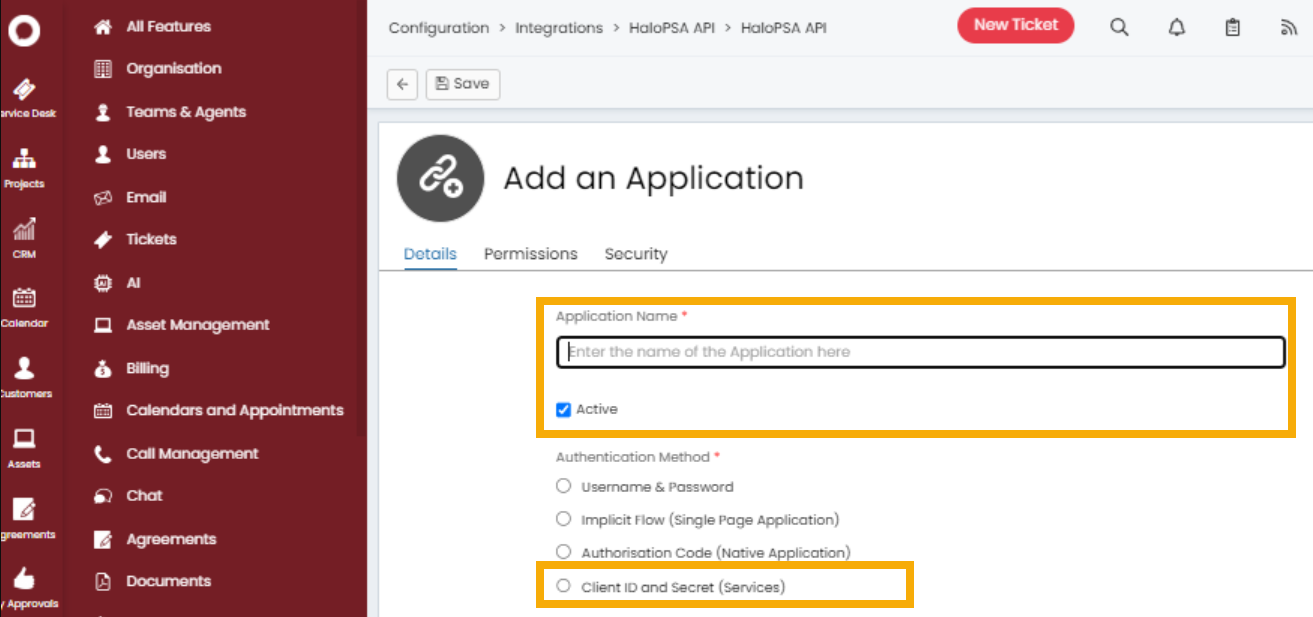
Figure 3: The Add an Application screen (click to enlarge)
4. Copy the client and secret for use later in this process, and the Client Secret for use later in this process. Then, set the login type to Agent and click Save.
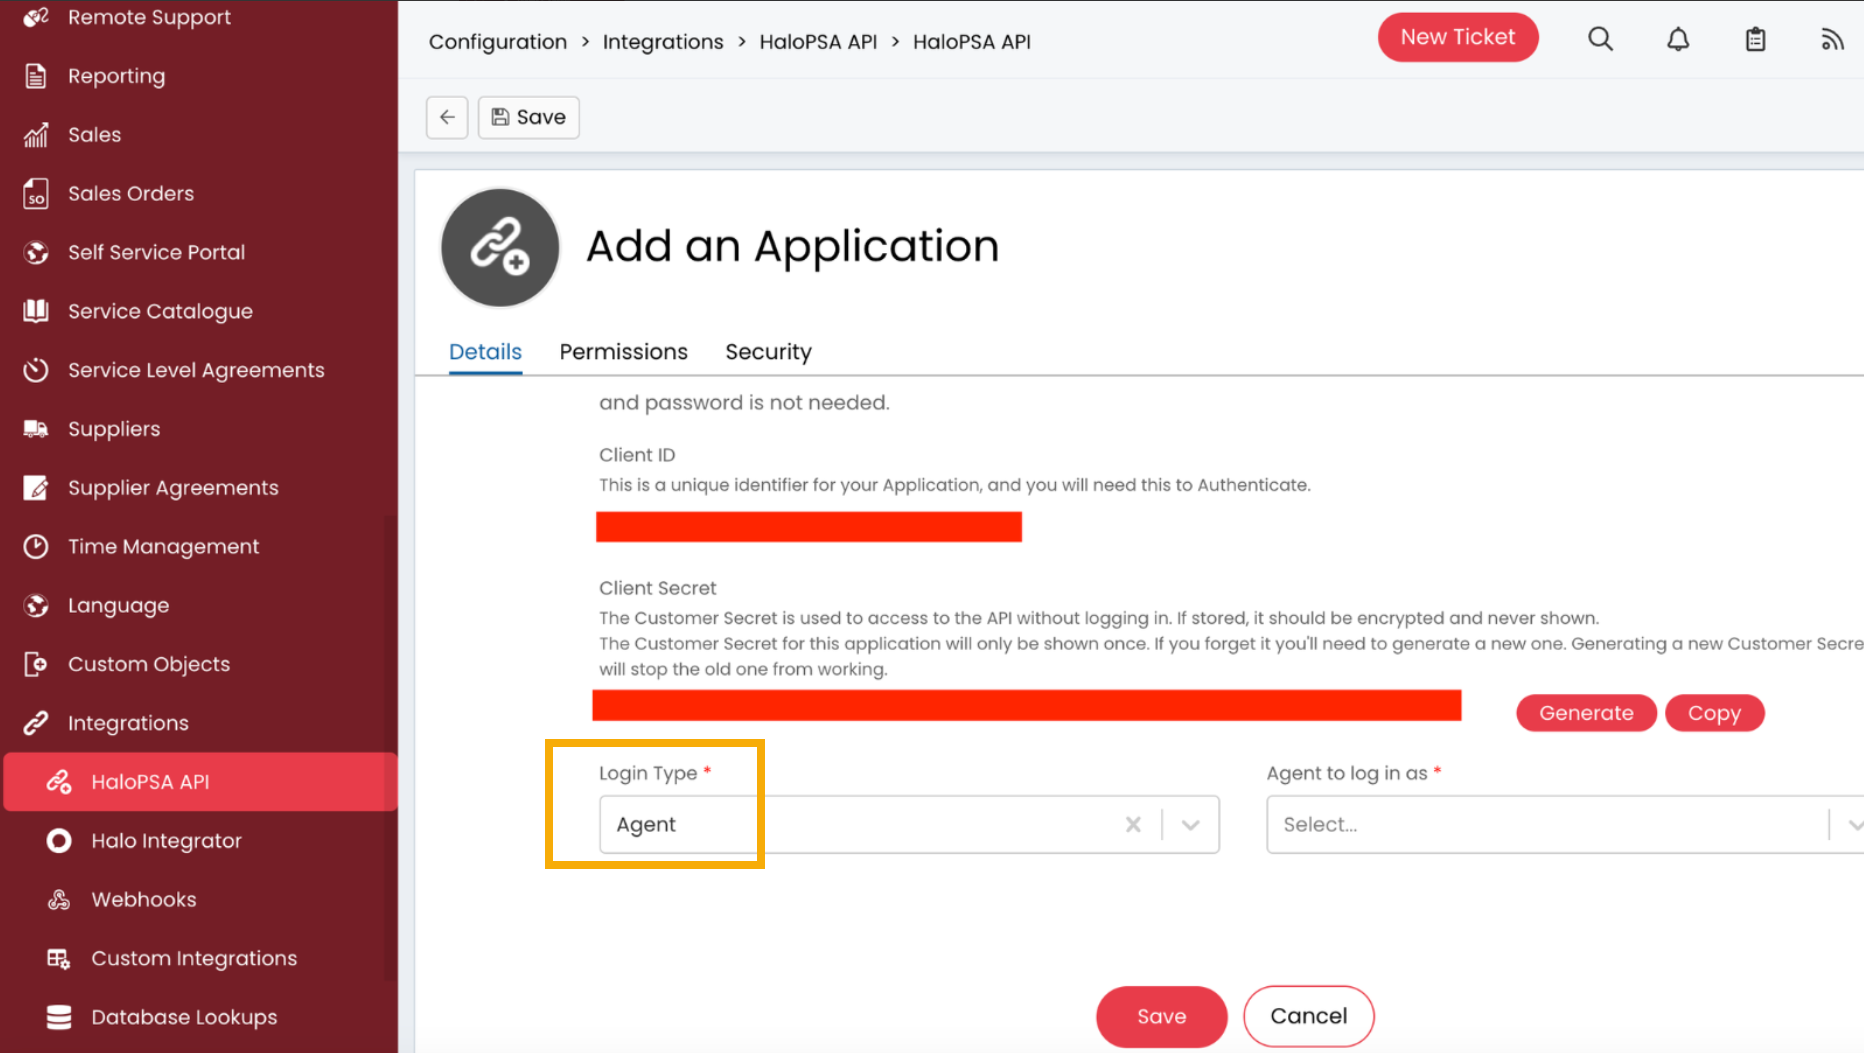
Figure 4: The Client ID and Client Secret (click to enlarge)
- Select the agent you created in the Complete Partner Setup in HaloPSA section, above.
- Click the Permissions tab and select the all: standard permission type.
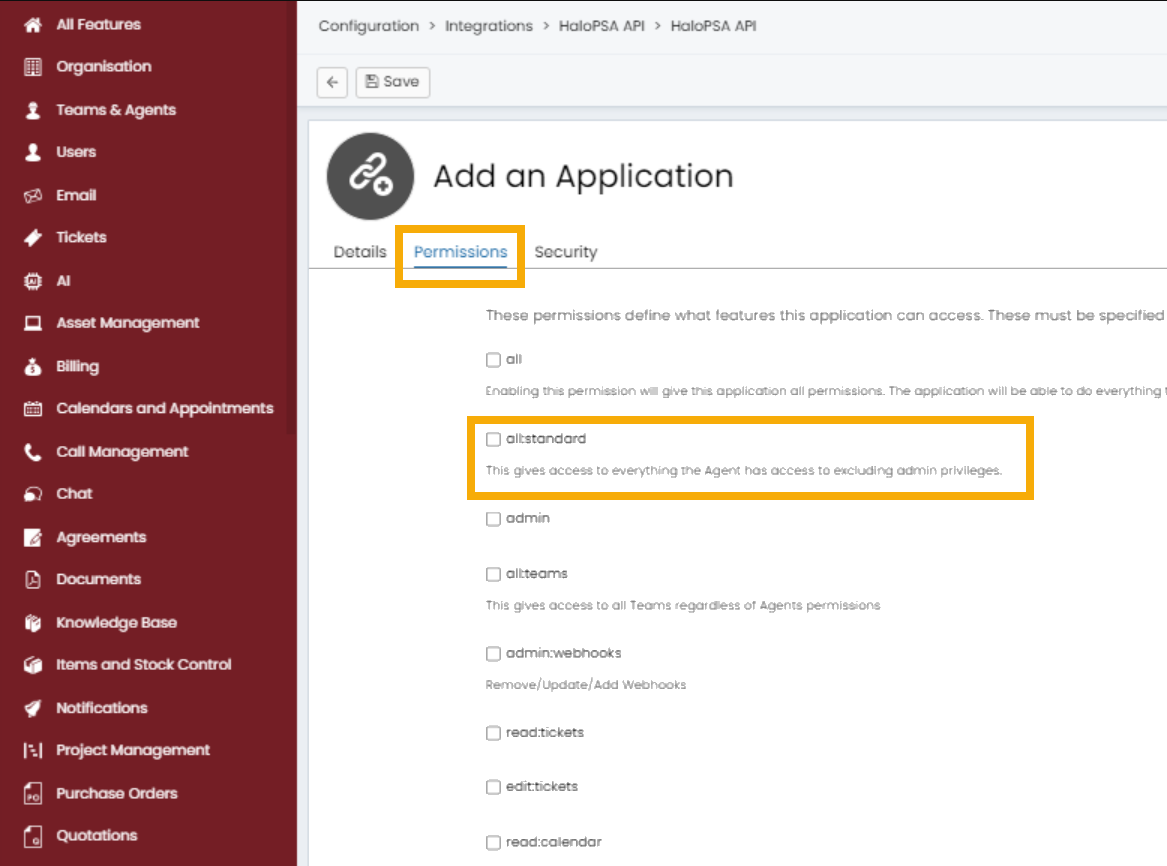
Figure 5: The Permissions tab (click to enlarge)
Connect to Halo on the NinjaOne SaaS Backup Partner Portal
This part of the process links HaloPSA with the SaaS Backup Partner Portal.
- Log in to the NinjaOne SaaS Backup Partner Portal and Navigate to Configuration → Integrations.
- On the Integrations page, click Connect on the HaloPSA card.
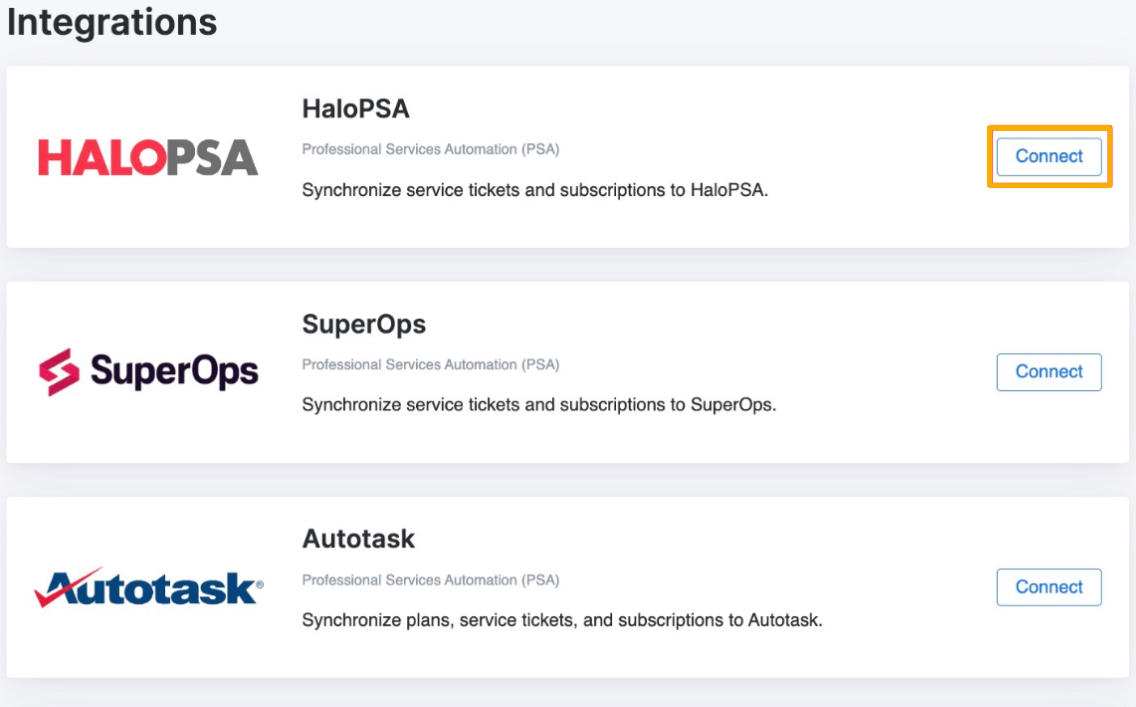
Figure 6: The Integrations menu (click to enlarge)
- Fill out the form with the correct credentials, and then choose Next Step. Enter the following information:
- Site URL: You can find this at Configuration → Integrations → HaloPSA API (Remove /API from the resource server URL).
- Client ID: Found and copied in the Set Up the Application section, above.
- Client Secret: Found and copied in the Set Up the Application section, above.
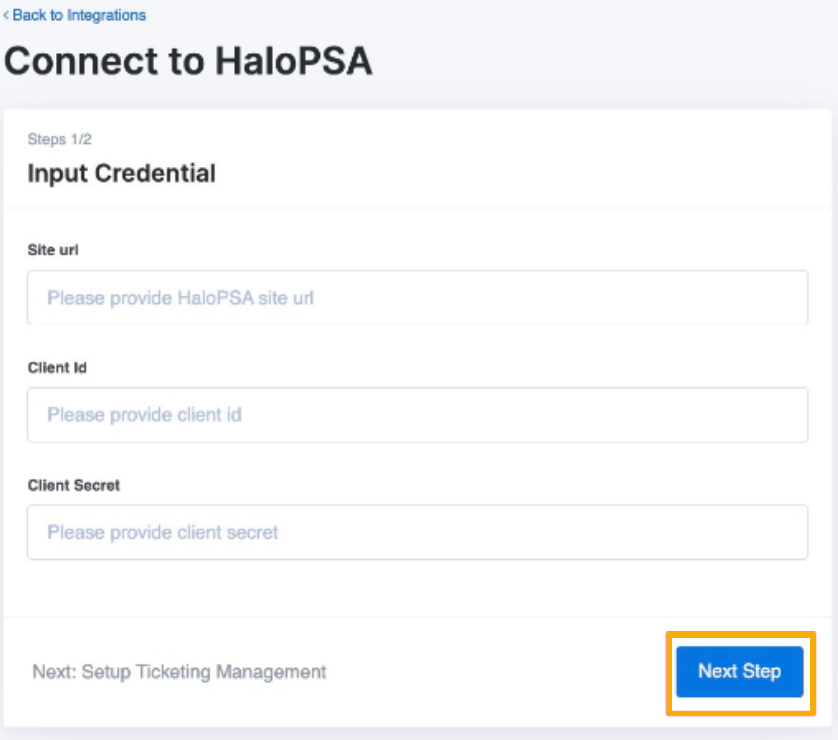
Figure 7: The Integrations menu (click to enlarge)
After connecting, a success banner will appear, and HaloPSA will redirect you to the integration configuration form. Returning to the Integration page will display a Connected badge next to HaloPSA.
Complete Integration Configuration (optional)
You can use this section to further configure your integration options.
- Fill out all required fields in the integration configuration form, then click Next Step.
- Specify if you want to sync the seat quantity to PSA.
- Select Ticket type for service ticket creation.
- Select Ticket SLA for service ticket creation.
- Select Ticket priority for service ticket creation.
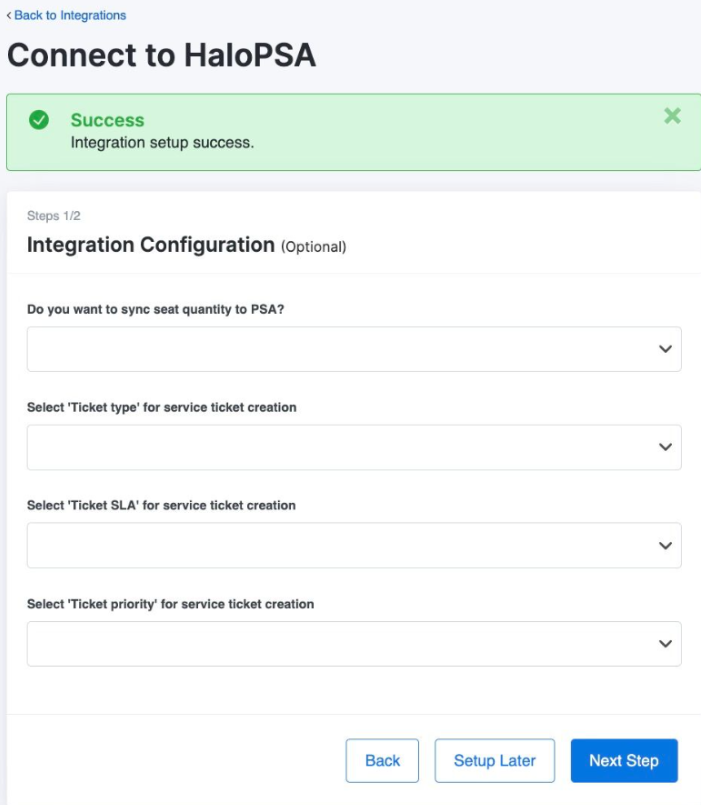
Figure 8: Integration configuration options (click to enlarge)
HaloPSA will show a banner with a completed integration configuration setup. You can continue to the steps below for organization mapping. Clicking the Reset integration configuration button will only clear the integration configuration form. Your HaloPSA connection will not be affected.
Creating a New Organization Linked With HaloPSA
Follow this procedure to link a newly-created organization to HaloPSA.
- Create a new organization. Refer to Creating and Editing Organizations for more information.
- A dialog box will appear, displaying all connected integrations. Scroll to HaloPSA and choose Manage.
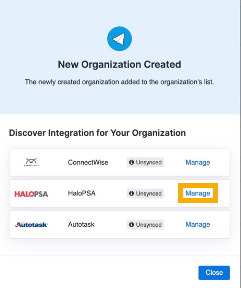
Figure 9: The New Organization Integrations modal (click to enlarge)
- HaloPSA redirects you to the Manage Connection page. Select Customer and Software License, then click Connect. HaloPSA will deactivate this function if the required fields are empty.

Figure 10: The Manage Connection page (click to enlarge)
Upon successful mapping, a green check mark will appear, and theUnlink button will be accessible.
Editing an Existing Organization From HaloPSA
You can edit your existing organization from within HaloPSA.
- From the Organization page, select the organization, click the kebab (three dots) menu, and select View Integration.
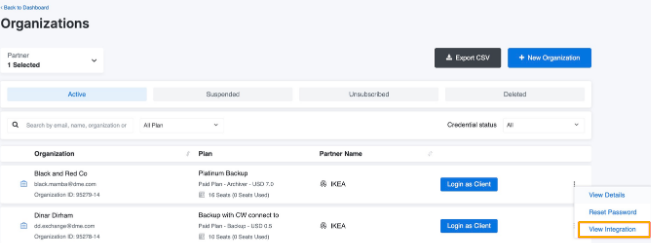
Figure 11: The integration view (click to enlarge)
- In the HaloPSA section, choose Manage. HaloPSA will redirect you to the Manage Connection page. Select the customer and software license, then choose Connect.
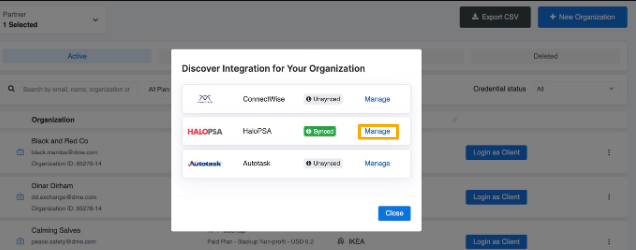
Figure 12: The Integration window (click to enlarge)
- On the Integration page, select Manage Connection under the HaloPSA option.
- HaloPSA will redirect you to the Manage Connection page. Select the customer and software license, then choose Connect.
Revoking the HaloPSA Integration
Follow these steps to terminate the connection between HaloPSA and NinjaOne SaaS Backup.
- In the NinjaOne SaaS Backup Partner Portal, navigate to the Integration page.
- Click Option, then select Revoke Connection on the HaloPSA card. After revoking succeeds, HaloPSA will display the same page with the Connect button active.
Additional Resources
Use the following KB article to understand error codes in the setup and function of your HaloPSA integration:
NinjaOne SaaS Backup: HaloPSA Service Ticket Error Descriptions