Topic
This article explains how to configure an approval process for tickets in NinjaOne.
Environment
NinjaOne Ticketing
Description
Define approval processes for NinjaOne Ticketing to determine the designated person or team to provide approval for a specific workflow. After you define an approval process, you can trigger it from the ticket, and the approvers will receive a notification that allows them to approve or deny the request via email. The ticket will reflect an approved or rejected status in NinjaOne.
You can designate any account type (technician, user, contact) to approve or reject a ticket.
Index
Select a topic to learn more.
- Manage Permissions
- Create an Approval Process
- Restore an Approval Process
- Request Approval for a Ticket
- Additional Resources
Manage Permissions
To grant the ability to create approval processes or request approvals, perform the following steps:
- Navigate to Administration → Accounts and either open an individual technician account or a technician role.
- Click Ticketing and ensure the Enabled toggle is active.
- Select Allowed from the Request approval drop-down menu if you want the technician to be able to request approval from users.
- Select Allowed from the Approval process drop-down menu if you want the technician to create, manage, and delete approval processes.
- Click Save Changes.
Create an Approval Process
The approval process rule allows users with the appropriate permissions to request approval, and allows the ticket to move through an approval chain. To create the rule, perform the following steps:
- Navigate to Administration → Apps and select NinjaOne Ticketing.
- Select Approval process and click +Create approval process.
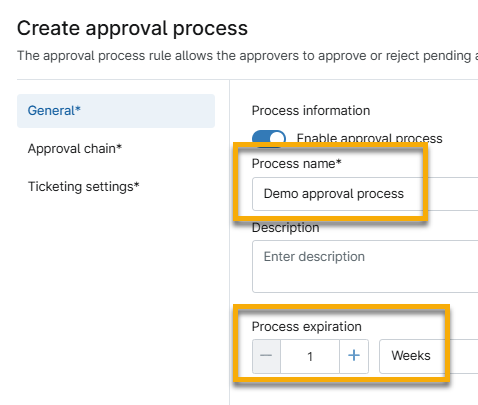
- In the Create approval process dialog, provide a unique identifier for Process name.
- You must set an expiration date for the process, at which point the Enable approval process toggle will deactivate. Refer to section Restore an Approval Process if the expiration date has passed and you would like to reuse the approval process.
- Select Approval chain in the Create approval process dialog sidebar menu. Click +Add approvers to determine who will sign off on the ticket. Refer to sections Define the Approval Count and Approve by Any or All to learn how to define these rules.
- Select Ticketing settings in the Create approval process dialog sidebar menu. Use the following table as a guide to configure the settings.
| Field | Description |
|---|---|
| On approval set status to | Select a new status for a ticket if approved. |
| On rejection set status to | Select a new status for a ticket if rejected. |
| Email template | Select which email template to use to send the approval request. Refer to NinjaOne Ticketing: Email and Notification Management if you need to learn how to create one. We will add placeholder support for the approval process in a future release. |
- Click Add.
Define the Approval Count
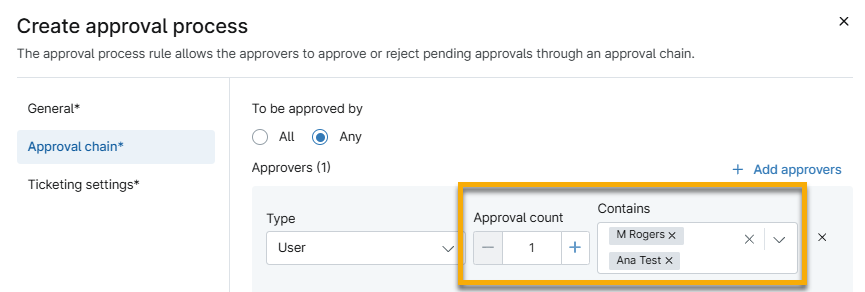
If you select User, Technician role, Contact, or End user role from the Type drop-down menu, and then select more than one option from the Contains drop-down menu, you must specify the required Approval count.
The Approval count number determines how many of the selected users must provide approval for the ticket.
If I select two users but only have an Approval count of one, then only one of the selected users needs to approve the ticket. If the Approval count is two, then both of the selected users must approve the ticket.
If both users approve or reject the ticket, and the Approval count is one, then NinjaOne will record the first decision. If the Approval count is two, but one user approves, and the other user rejects the ticket, the ticket status does not update.
Approve by Any or All
The To be approved by options only apply if you selected multiple types of approvers.
- All: All selected types must approve or reject to change the status of the ticket. The Approval count rule remains, so in Figure 6, only one of the Users needs to provide a decision.
- Any: Only one of the selected types must approve or reject to change the status of the ticket. There is no hierarchy of importance.
Restore an Approval Process
You can only restore a deactivated approval process. If you delete an approval process, you must create a new one to replace it.
To restore an approval process with a status of Disabled, perform the following steps:
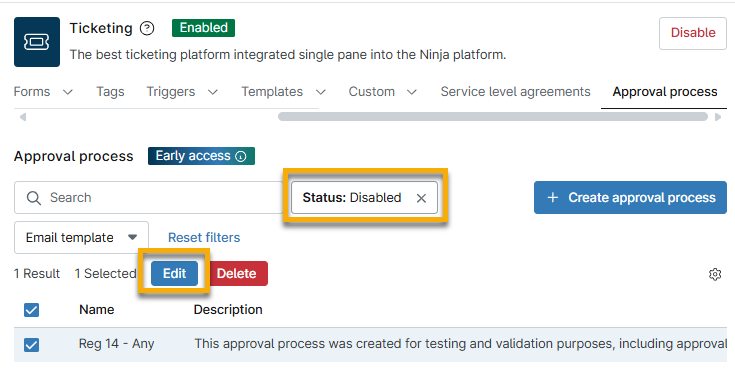
- From the Approval process tab on the NinjaOne Ticketing configuration page, select Disabled from the Status drop-down menu.
- Select the checkbox next to an approval process and click Edit.
- Select the Enable approval process toggle to activate it.
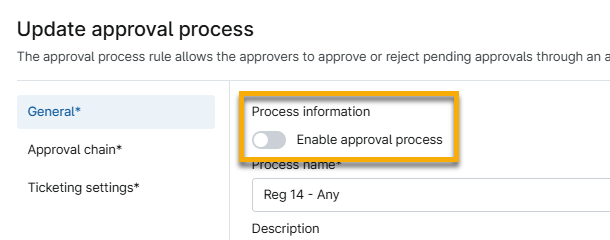
- Click Update.
Request Approval for a Ticket
After creating the approval process rule, you can apply it from within a ticket by using the following steps. You can create multiple approval requests from the same ticket.
- Within the ticket, select Approvals and click Request approval.

- Select which approval process you want to apply from the Approval process drop-down menu.
- If the approval process you select contains multiple approver types for the Any option, you must select an option from the Request approval from drop-down menu.
- If the approval process contains only one approver type or the process requires all selected approvers to take action, then this field will not appear.
- If the approval process approver type is Select at time of approval, then you may select the Specific approver option and select one or more approvers from the Specific approvers drop-down menu. You can select an end user, technician, contact, or any combination of those types.
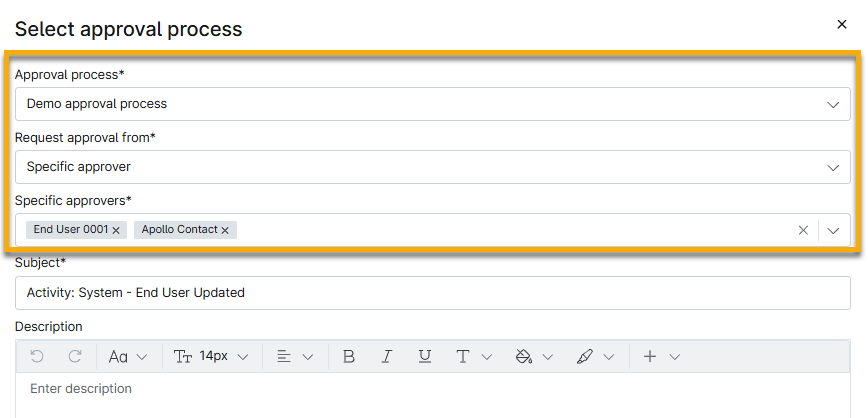
- Optionally, add a description to explain why approval is required.
- Click Create.
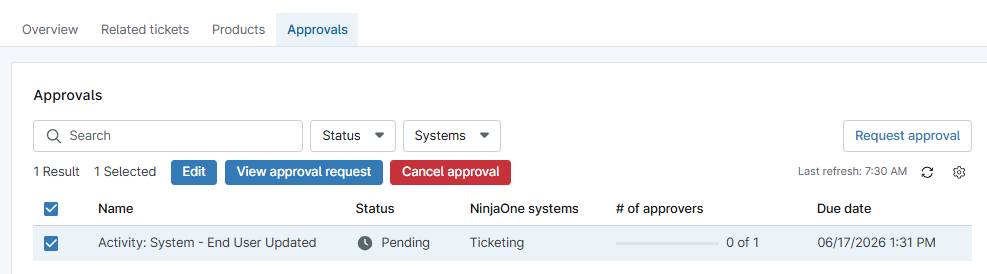
After you add the approval, it will appear on the Approvals page, where you can view, edit, or cancel it.
Additional Resources
Refer to the .