Topic
This guide provides instructions for generating a NinjaOne Agent installer for an Apple macOS device.
Environment
- NinjaOne Endpoint Management
- NinjaOne Agent for Apple macOS
Description
The NinjaOne Agent installer is an executable file that installs the NinjaOne Agent on a device, enabling the device to be monitored and managed in NinjaOne. This guide explains how to generate the installer from the NinjaOne platform, download it to your device, and share an installer link with end users.
Before You Start
Before generating the installer, confirm that your environment meets the following requirements:
- You must generate and install the NinjaOne Agent on a device before you can manage the device in NinjaOne. Refer to NinjaOne Endpoint Management: Apple macOS Agent System Requirements and OS Support before installing the NinjaOne Agent on your endpoints.
- To generate the NinjaOne installer, you first need to set up an organization and create a policy. Refer to NinjaOne Endpoint Management: Creating and Editing Organizations and NinjaOne Policies: Create and Manage a Policy for instructions.
Generating a NinjaOne Installer
- In NinjaOne, click the Add icon and choose Device from the drop-down menu.
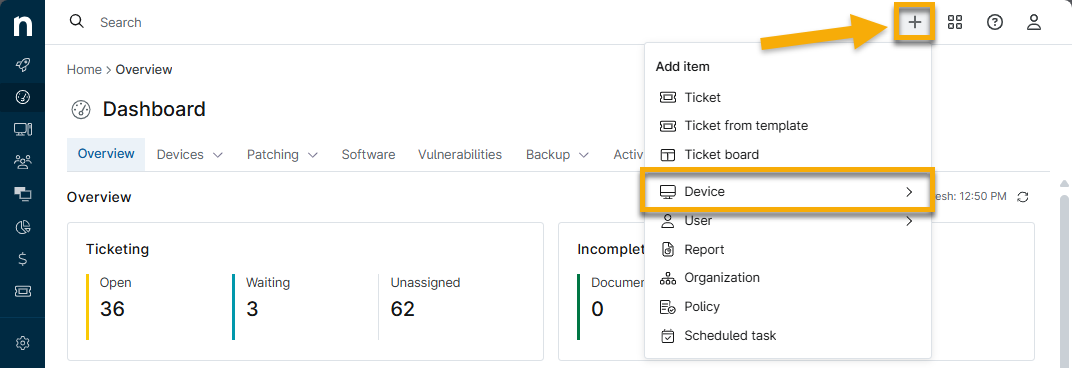
- Select Device from the menu.
- The Add a computer window will open.
- Select Mac from the operating system options.
- Select the appropriate Organization, Location, Device Role, and Distribution type values.
- Click Generate Installer.
- NinjaOne will surface a prompt alerting you that the installer has been generated successfully.
- After the installer has been generated, you can download it using the Download button or copy the link to the installer to your clipboard using the Copy link button. [VERIFY WITH PM: Add full click path for Download and Copy link UI elements.]
Do not rename the installer or mount multiple Apple Disk Image (DMG) volumes with the installer. Doing so will interfere with the installer’s ability to correctly install and register with NinjaOne.
Sharing a Link to the Installer
To send end users a link to download the installer, click Generate installer and select Copy link. This link may expire in the following circumstances:
- Division cached installers are cleared.
- A minor or major agent upgrade is released.
- A bug fix for an installer-related issue has been released.
Installing the macOS Agent on a Device
Apple macOS Monterey (12) and later requires manual approval for certain Security & Privacy settings before opening downloaded software for the first time. Follow the steps below to install the NinjaOne Agent with these settings enabled.
- Click the Finder tab on the device and locate the NinjaOne Agent install file.
- Control-click the file, then select Open from the drop-down menu.
- Click the installer icon and input any necessary credentials.
- Complete the NinjaOne Agent Setup Wizard prompt.
For macOS Monterey and later, installation steps may differ depending on your macOS version. Refer to the following external documentation from Apple for more details: Open a Mac app from an unknown developer (external link).
For some macOS devices, and for full usage of the file browser, you may also need to manually grant the NinjaOne Agent, labeled ninjarmm-macagent, full disk access to the computer. Navigate to System Preferences → Security & Privacy → Privacy → Full Disk Access to grant this access.
Additional Resources
The following articles provide additional guidance for deploying the NinjaOne Agent to other platforms and environments.
- For information about installing on Microsoft Windows devices, refer to NinjaOne Agent Installation: Add a Microsoft Windows Device.
- For information about installing on Linux devices, refer to NinjaOne Agent Installation: Add a Linux Device.
- For information about installing on Linux devices for FedRAMP customers only, refer to NinjaOne Endpoint Management: How to Add a Linux Device (FedRAMP)
- For additional methods of deploying the NinjaOne Agent on multiple devices, refer to NinjaOne Installer: Mass Deployment.
- To learn more about the NinjaOne Agent, refer to NinjaOne Agent: Resource Catalog.