Topic
LiveLinks can be set up in Autotask to provide quick access to a respective NinjaOne device from an Autotask configuration item.
In order for this feature to work properly, devices must be re-synced to Autotask following the deployment of the 5.2 release to your instance. The easiest way to trigger a configurations sync is to modify your Autotask settings. For example, de-selecting and then re-selecting sync attribute options (and saving the settings in between) trigger a configurations sync.
Environment
Description
Configuring LiveLink from the AXN Catalog (preferred)
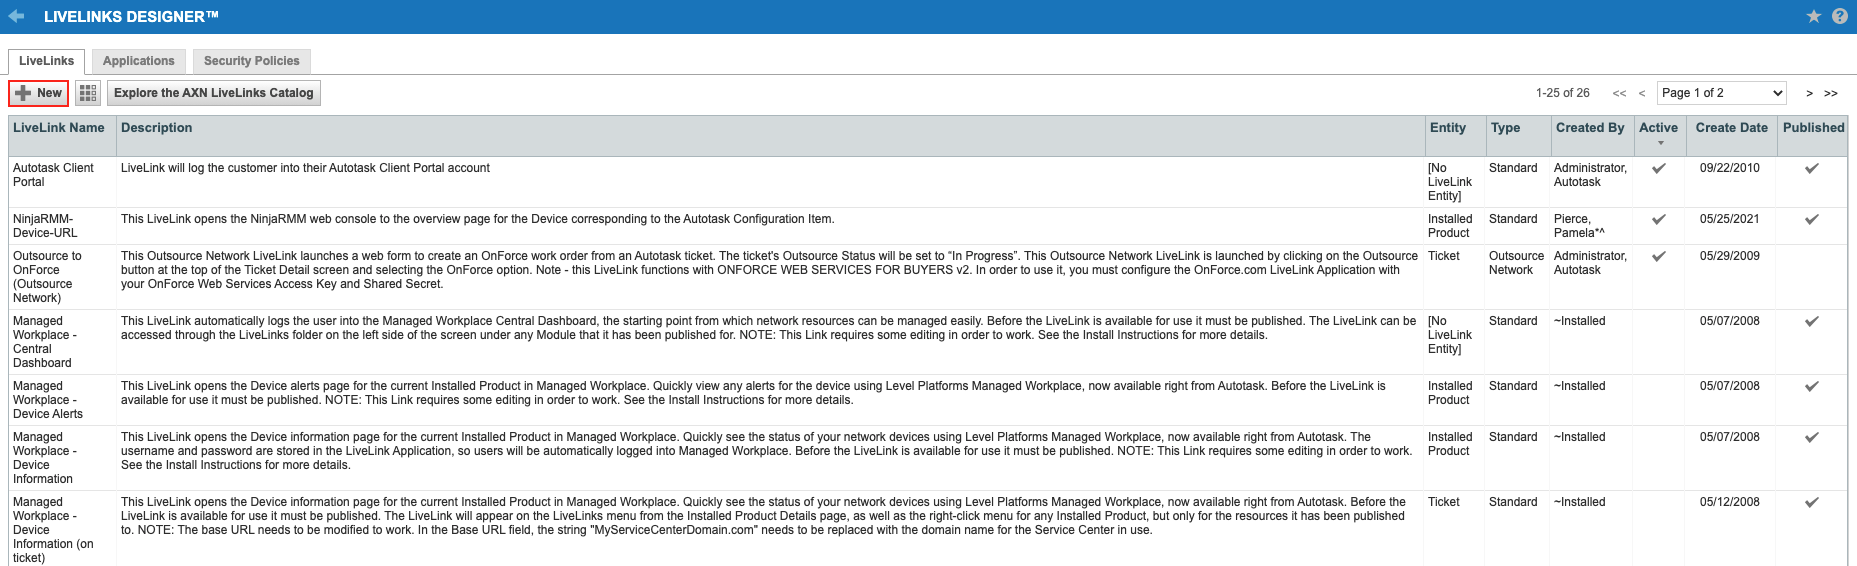
- From within the Autotask dashboard, navigate to the menu bar > Admin > Automation.
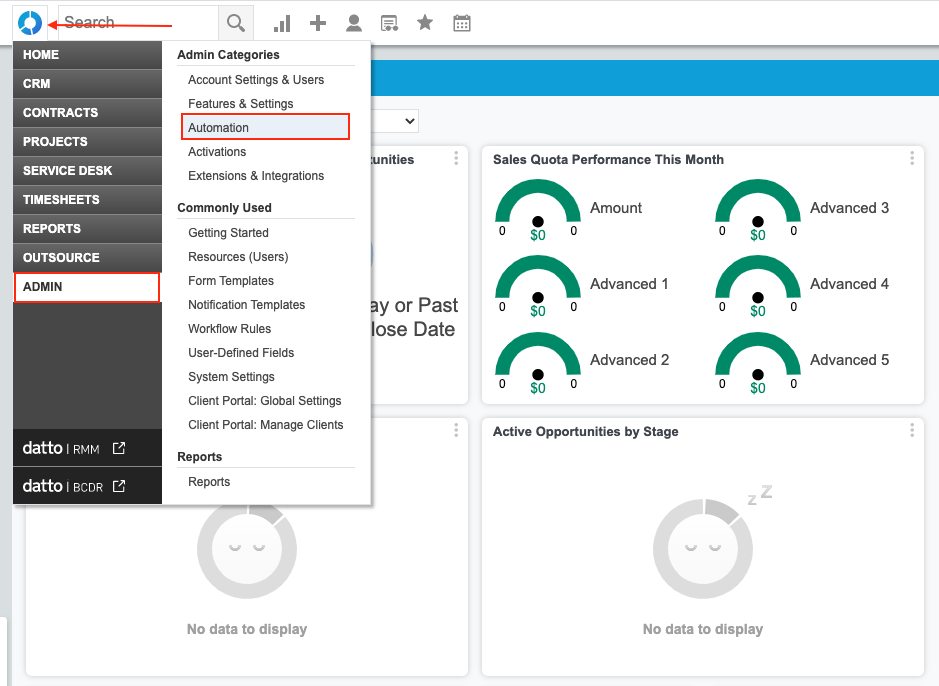
- Expand the AutoForms & LiveLinks section, and select LiveLinks Designer.

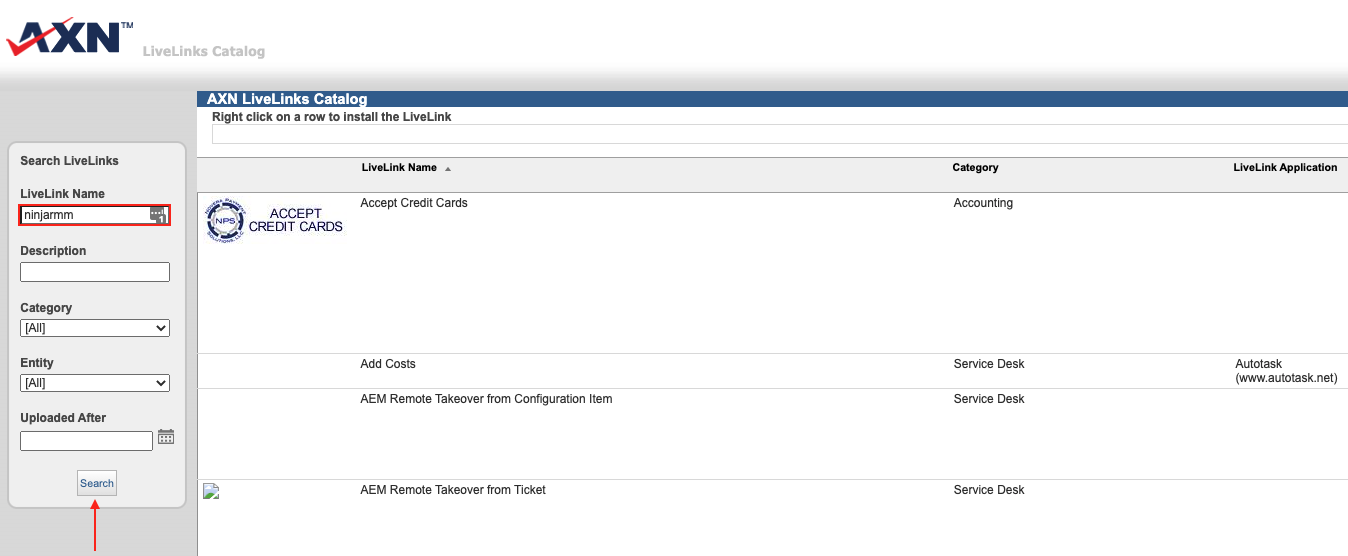
- Click 'Explore the AXN LiveLinks Catalog'. This will open a new tab with the catalog.

- Search the catalog by the LiveLink Name "NinjaRMM".
- Find the LiveLink that corresponds with the NinjaOne instance you use (NA, US2, EU, or OC), right-click the row, and click Install LiveLink.
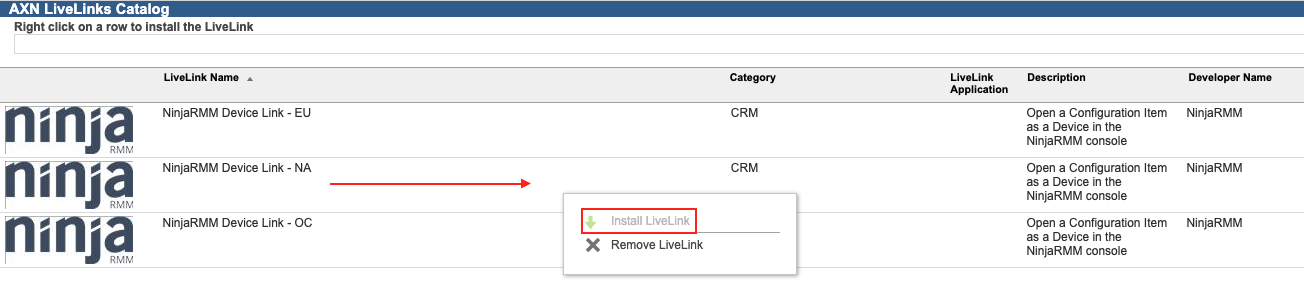
- Review the Terms & Conditions, check the box to accept them, and click Install.

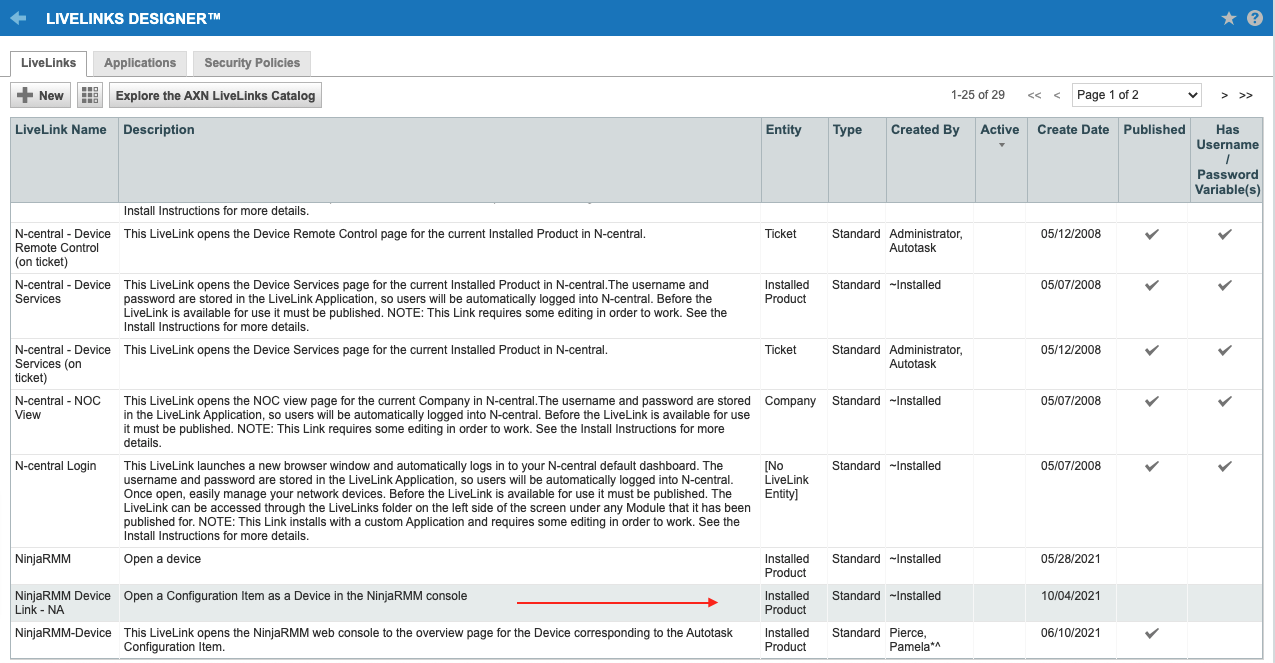
- Now that the LiveLink has been installed, it needs to be published in order to be visible under configuration items. Find the LiveLink that you just added in the list and click on it to open it.
- In the resulting pop-up window, check the box to make the LiveLink Active and then click Save & Publish.

- During the publication process, choose which Security Levels will have access to the LiveLink. Select the Security Levels tab and check off the levels to grant access to. "No Security Levels" will be granted access to the LiveLink by default, so this step is necessary for the LiveLink to be visible to users.
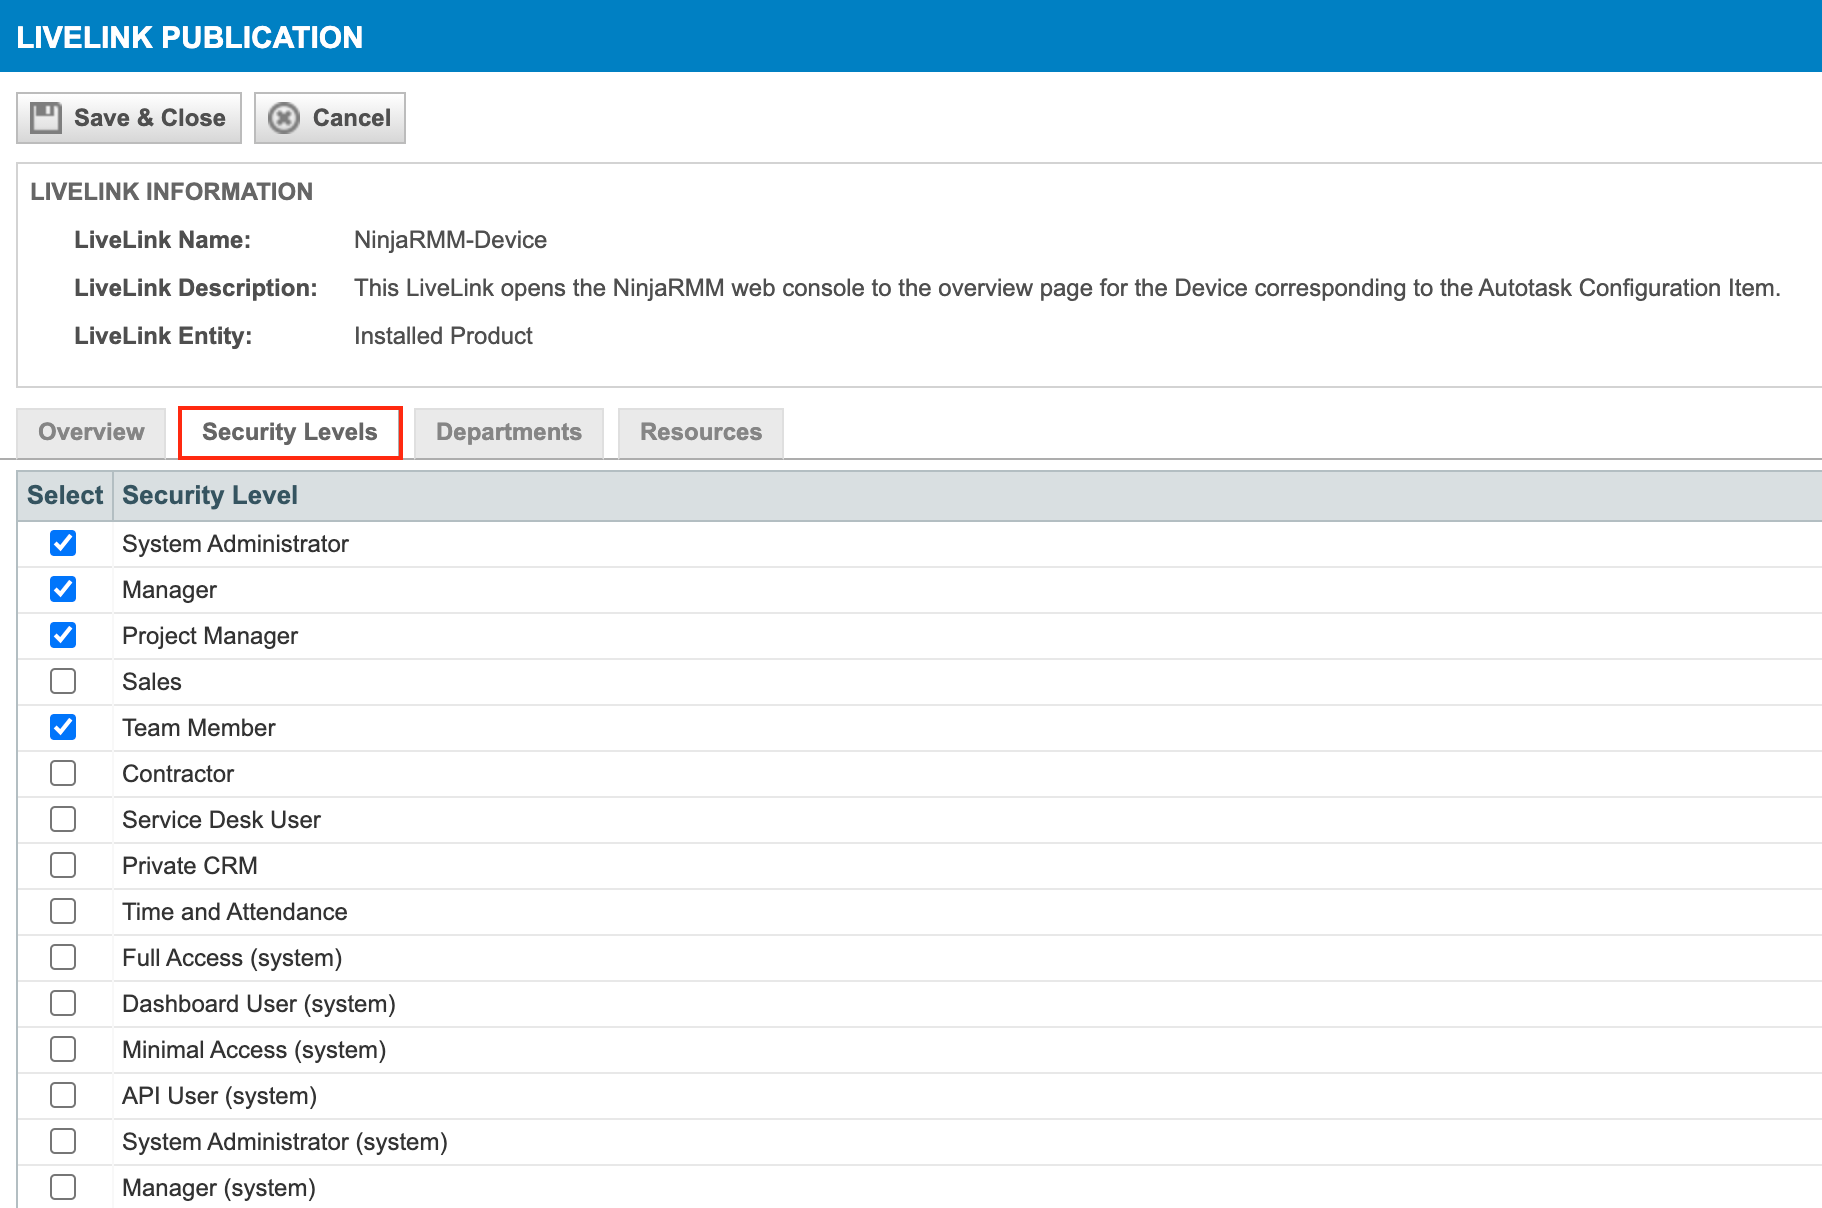
- Finally, click Save & Close to complete the setup process for the LiveLink.
Manually Configuring a LiveLink
Important Note: The following process is not necessary if importing one of our published LiveLinks from the AXN Catalog.
- From within the Autotask dashboard, navigate to the menu bar > Admin > Automation.
- Expand the AutoForms & LiveLinks section, and select LiveLinks Designer.
- Click + New in the top left corner to design a new LiveLink.
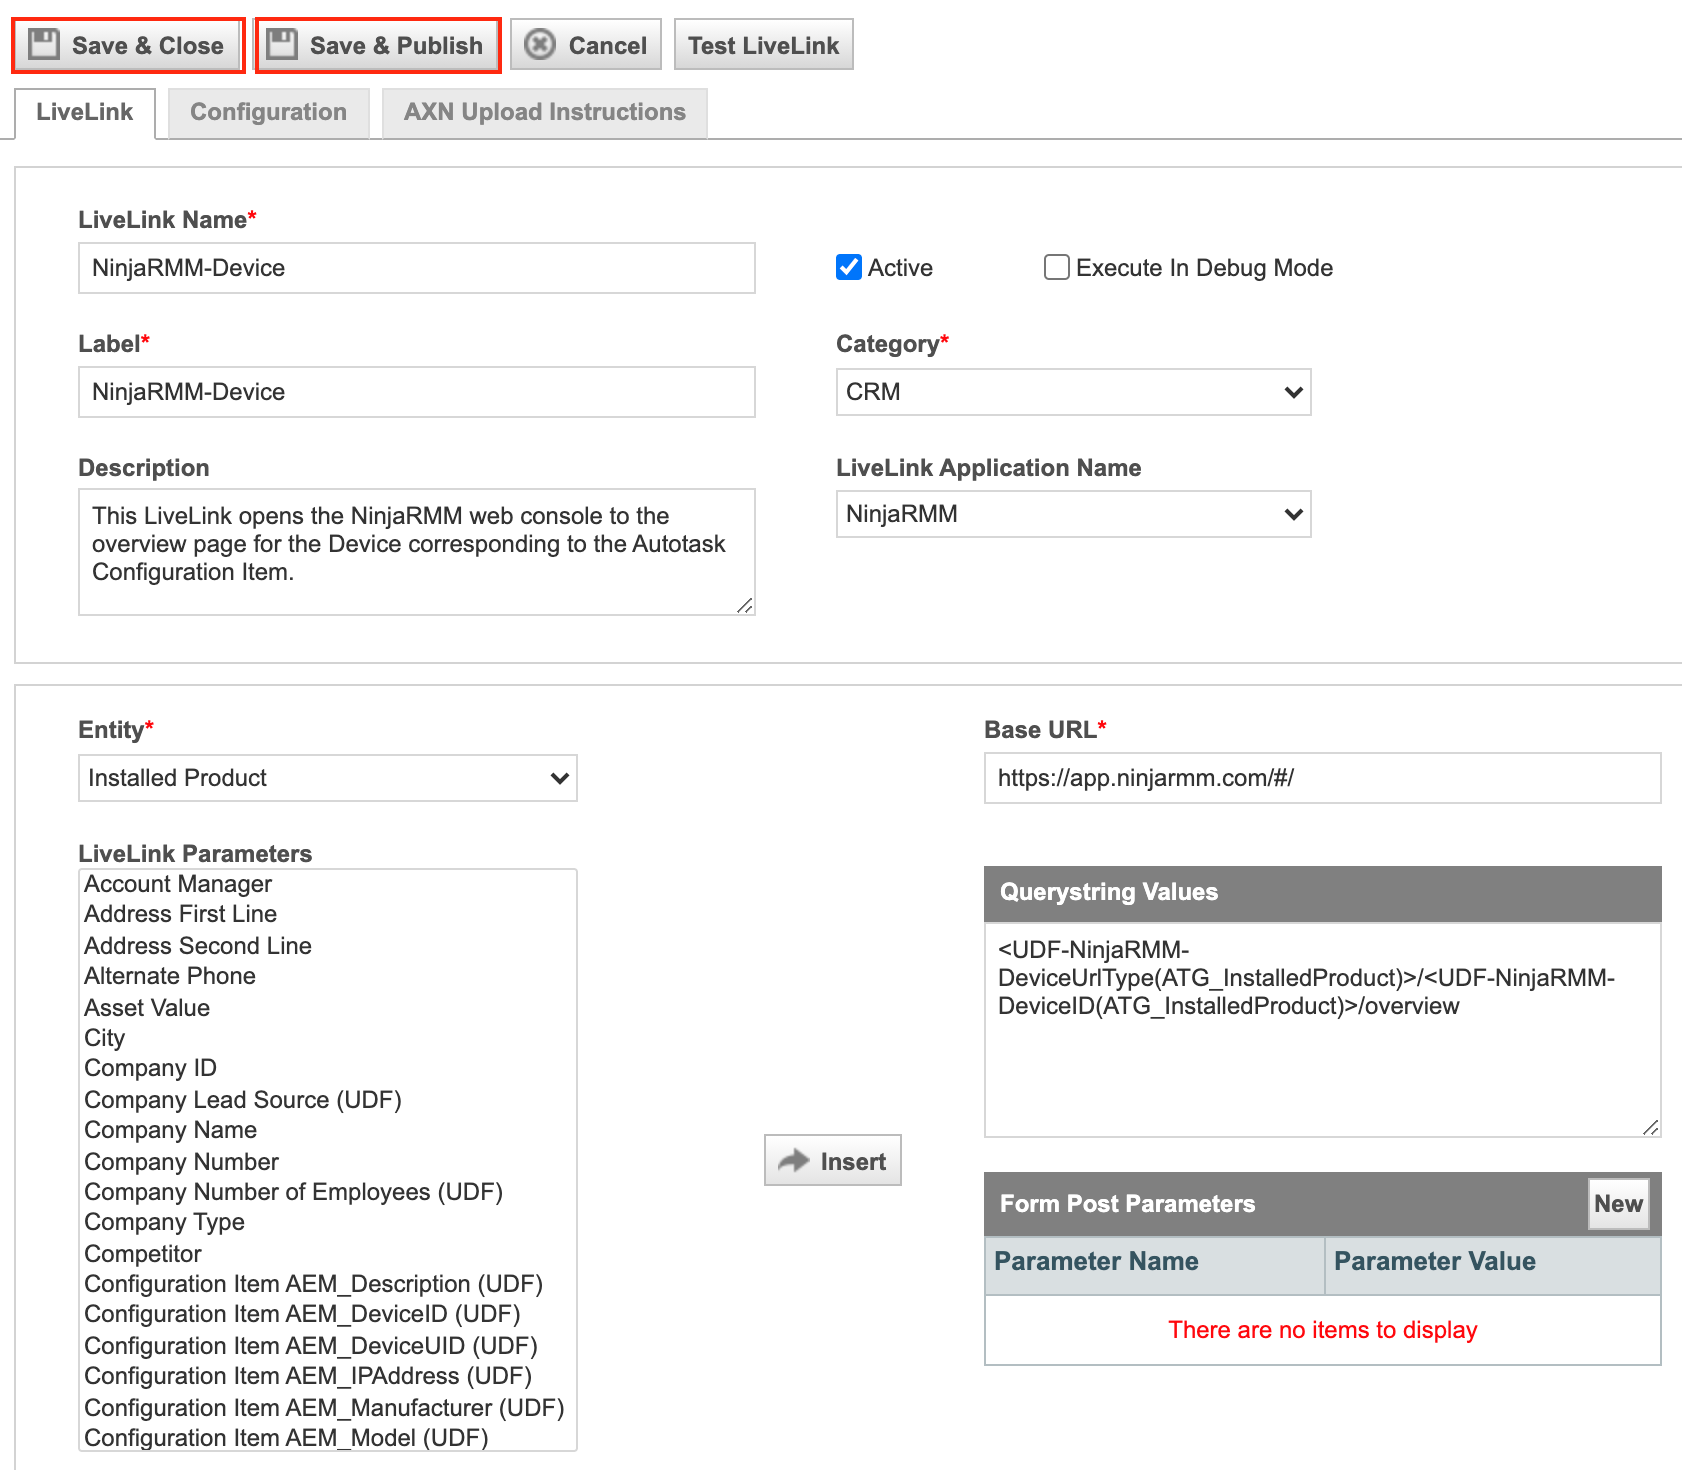
- Configure the new LiveLink using the screenshot below as an example.

- Give the new LiveLink a name, label, and optional description.
- The Active box will be checked by default, while the Execute in Debug Mode box will not be checked. Leave these options as they are.
- Assign the Category as CRM and the LiveLink Application Name as NinjaRMM.
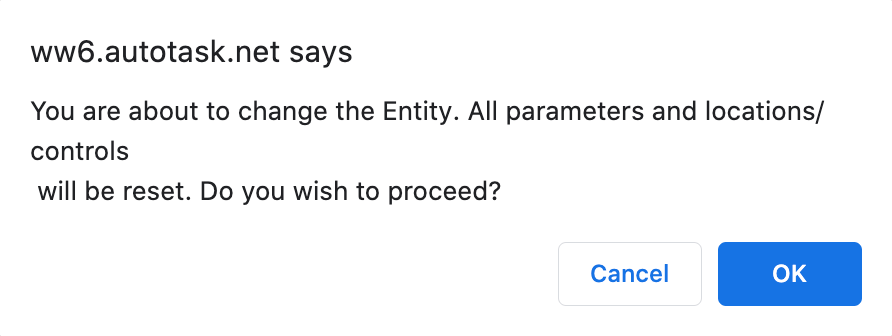
- For the Entity, select Installed Product. When changing the entity, you will be prompted to confirm that you wish to proceed. Click OK.
- Use the Base URL that corresponds to the instance that your NinjaRMM environment belongs to:
- NA Instance - https://app.ninjarmm.com/#/
- US2 Instance - https://us2.ninjarmm.com/#/
- EU Instance - https://eu.ninjarmm.com/#/
- OC Instance - https://oc.ninjarmm.com/#/
- CA Instance - https://ca.ninjarmm.com/#/
- The Querystring Values should be as follows:
<UDF-NinjaRMM-DeviceUrlType(ATG_InstalledProduct)>/<UDF-NinjaRMM-DeviceID(ATG_InstalledProduct)>/overview
- There are two options for saving the new LiveLink - Save & Close and Save & Publish.
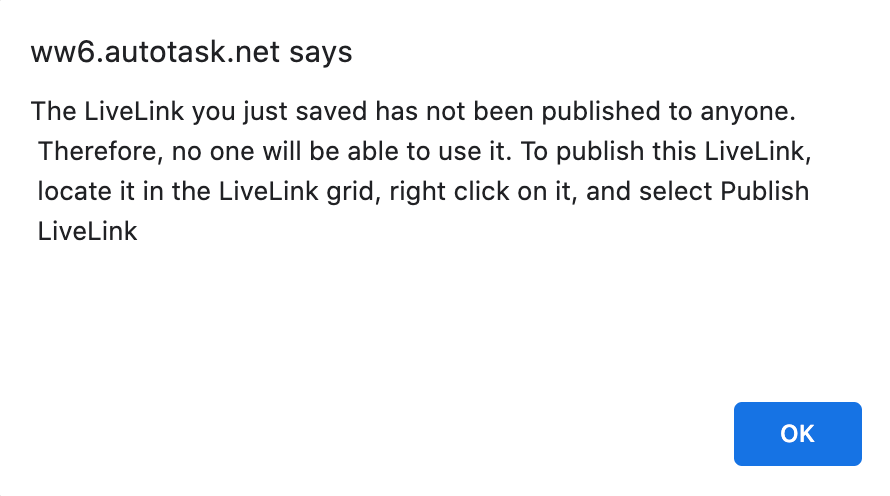
- Save & Close will save the LiveLink without making it actually available to anyone. You can then opt to publish the LiveLink at a later date.
When you do opt to publish the LiveLink, you will need to grant access to any Security Levels that should be able to view the LiveLink per the step below. - Save & Publish opens a LiveLink publication page. To choose which Security Levels will have access to the LiveLink, select the Security Levels tab and check off the levels to grant access to. "No Security Levels" will be granted access by default, so this step is necessary for the LiveLink to be visible to users.
- Save & Close will save the LiveLink without making it actually available to anyone. You can then opt to publish the LiveLink at a later date.