Topic
This article discusses device (node) approval in NinjaOne.
Environment
NinjaOne Endpoint Management
Description
Device approval allows you to require approval for incoming devices before the NinjaOne agent can monitor and manage them and before they gain access to the secure credential store.
Get Started: Node Approval (NinjaOne Inc. 01:24)
Index
Click the links below to jump to the corresponding section in the article.
- Approval Status
- Configuring Device Approval Settings for Organizations
- Approving or Rejecting Devices
- Other Ways to View Approval Status
- Changing Approval Status in Device Settings
- Additional Resources
Approval Status
When a new device registers with NinjaOne, the system will assign it one of three statuses (depending on the approval settings configured for the organization): Pending, Approved, or Rejected.
- Pending: These devices are waiting for manual approval or rejection.
- The NinjaOne agent is currently installed on the device in a dormant state (no data is being monitored or managed), but it will not install any integrated components.
- The device does not have access to the credential store.
- Approved: These devices are approved for monitoring and management. They adhere to the settings and policy for their assigned organization and have access to that organization's secure credential store.
- Rejected: These devices were denied, and the system uninstalled the NinjaOne agent. Attempts to reinstall the NinjaOne agent on these devices will fail unless an Administrator clears the rejection.
Configuring Device Approval Settings for Organizations
Follow these steps to configure device settings for new and existing devices.
New Devices
To change approval settings on a new device:
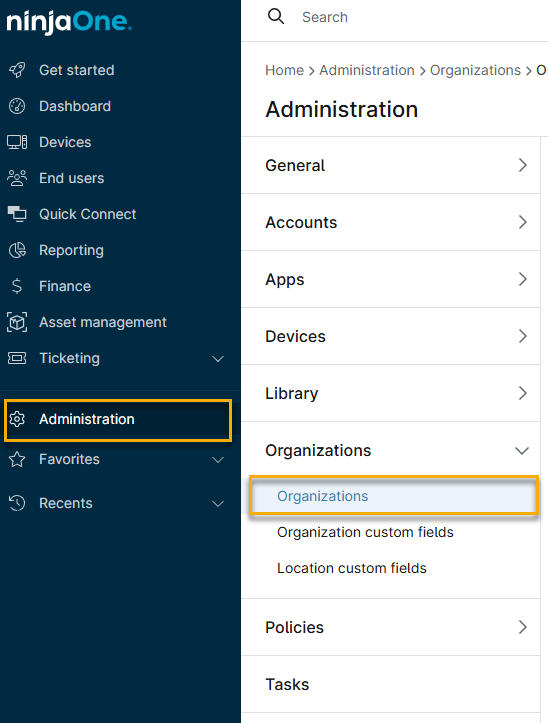
- Click Administration in the navigation menu, then select Organizations from the expanded options.
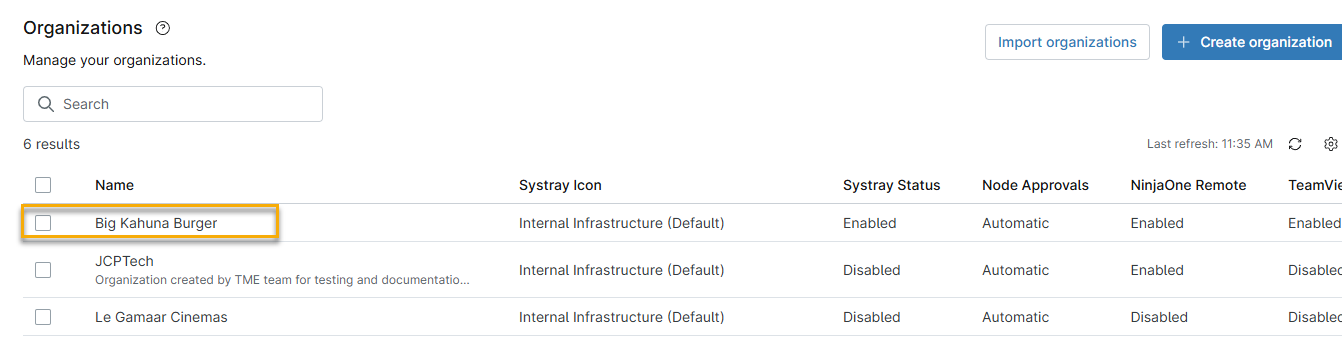
- In the Organizations list, select the organization to which the device will belong.
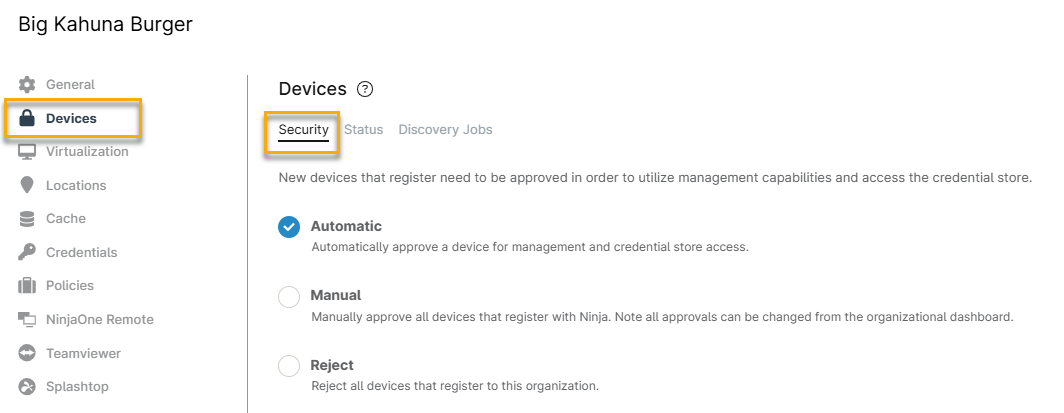
Click Devices in the Organization navigation menu. The Security tab will be open by default. From here, choose from three possible approval options:
- Automatic: The system automatically approves new devices. This setting is the default option.
- Manual: A NinjaOne system administrator must manually approve or reject new devices.
- Reject: The system automatically rejects new devices. This action triggers the uninstallation of the NinjaOne agent and turns off agent reinstallation on the device.
When finished, click Save.
Figure 3: Device approval options (click to enlarge)
Existing Devices
To change approval settings on an existing device:
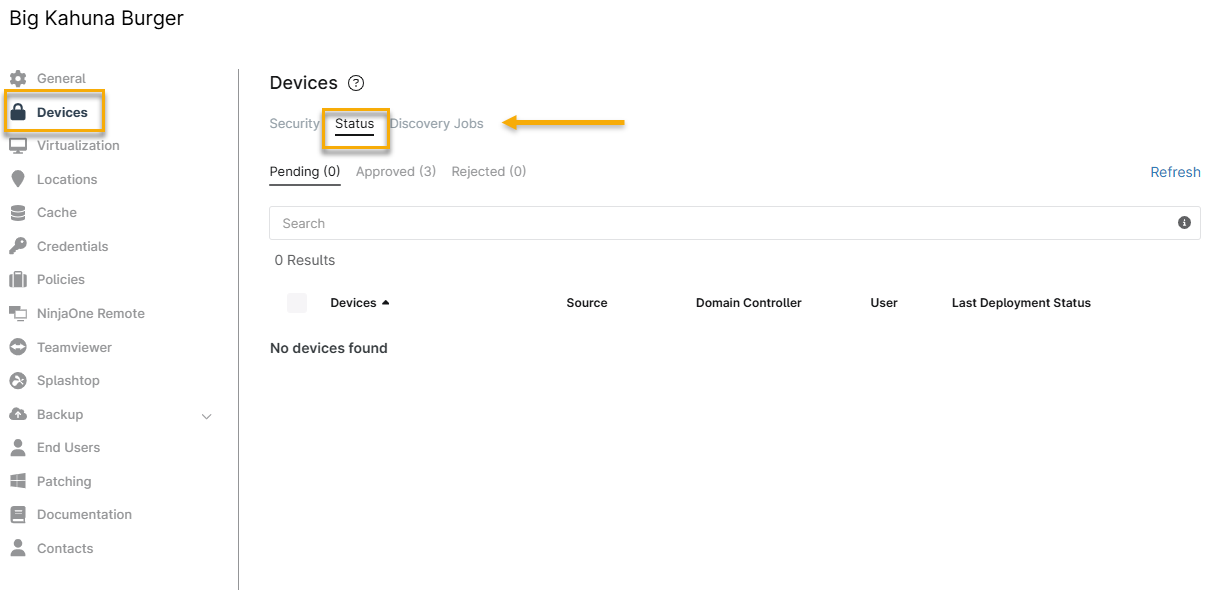
- Click Devices in the Organization navigation menu, then click the Status tab.
- Select Pending, Approved, or Rejected to reach the devices with your desired status.
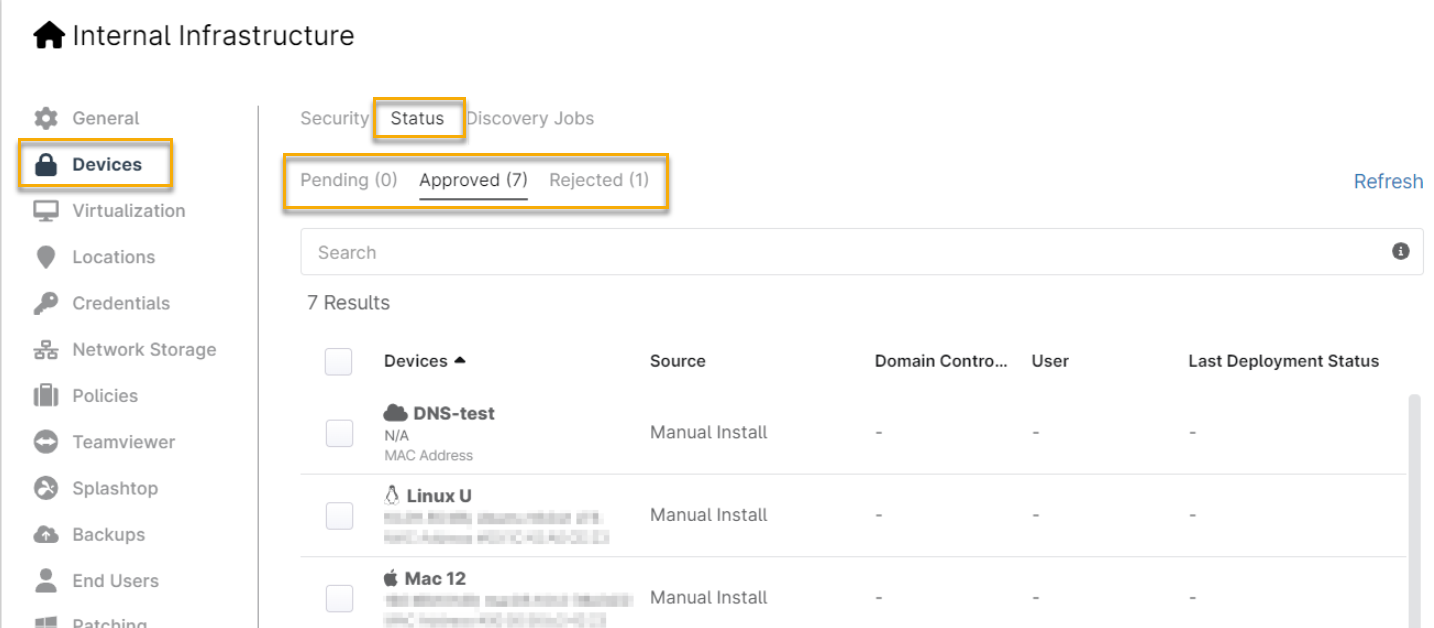
Select the checkboxes next to the devices, then select the applicable option (depending on the device's current status) in the navigation menu.
Figure 5: Changing device status (click to enlarge)
Approving or Rejecting Devices
The Device Approval dashboard is an easy way to view and change approval statuses for the pending and rejected devices in your NinjaOne environment.
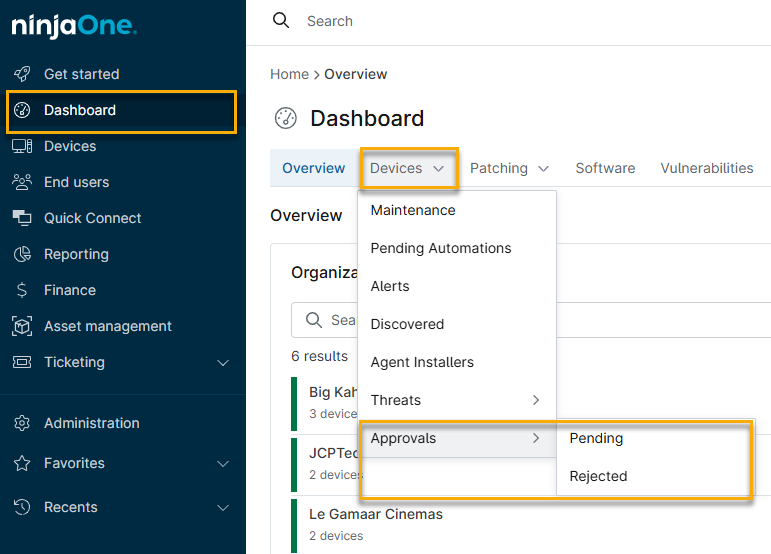
- In NinjaOne, click Dashboard in the navigation menu, then place your cursor over the Devices tab and select Approvals from the drop-down menu.
Place your cursor over Devices and then Approvals. Click Pending to proceed with device approval or rejection. Click Rejected to show a list of previously rejected devices. From hear, you can clear the rejection status.
Figure 6: Navigating to the Device Approval dashboard (click to enlarge) - The dashboard will show a list of all devices awaiting approval or rejection. Select the checkbox next to the device name, then click Approve or Reject when the option appears.
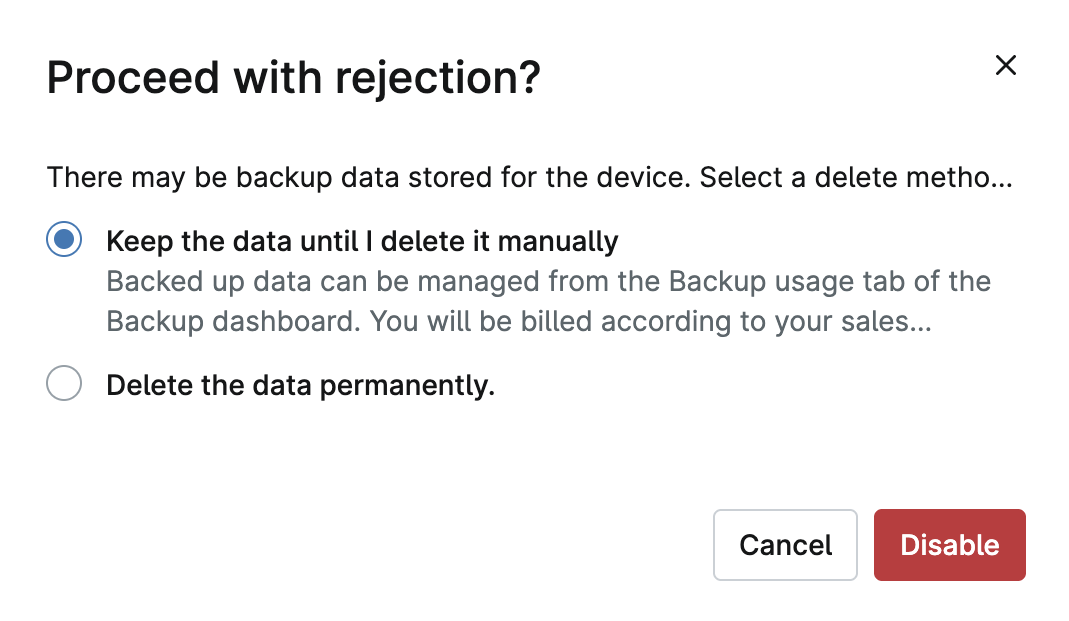
Rejecting a Device
If you click Reject, the system will warn you that doing so may delete stored backup data and offer you the alternative of keeping the data until you delete it manually. Make your selection, then click Disable to complete the device rejection.
Clearing a Device Rejection
Clearing a device rejection allows you to move the device back into the Pending state and reinstall the NinjaOne agent on it.
Other Ways to View Approval Status
There are two other places where you can view a device's approval status:
From the Administration → Organizations tab
- Select an organization to open the organization editor.
- Click Devices and open the Status tab. The system will show you a list of devices in the Pending, Approved, and Rejected categories.
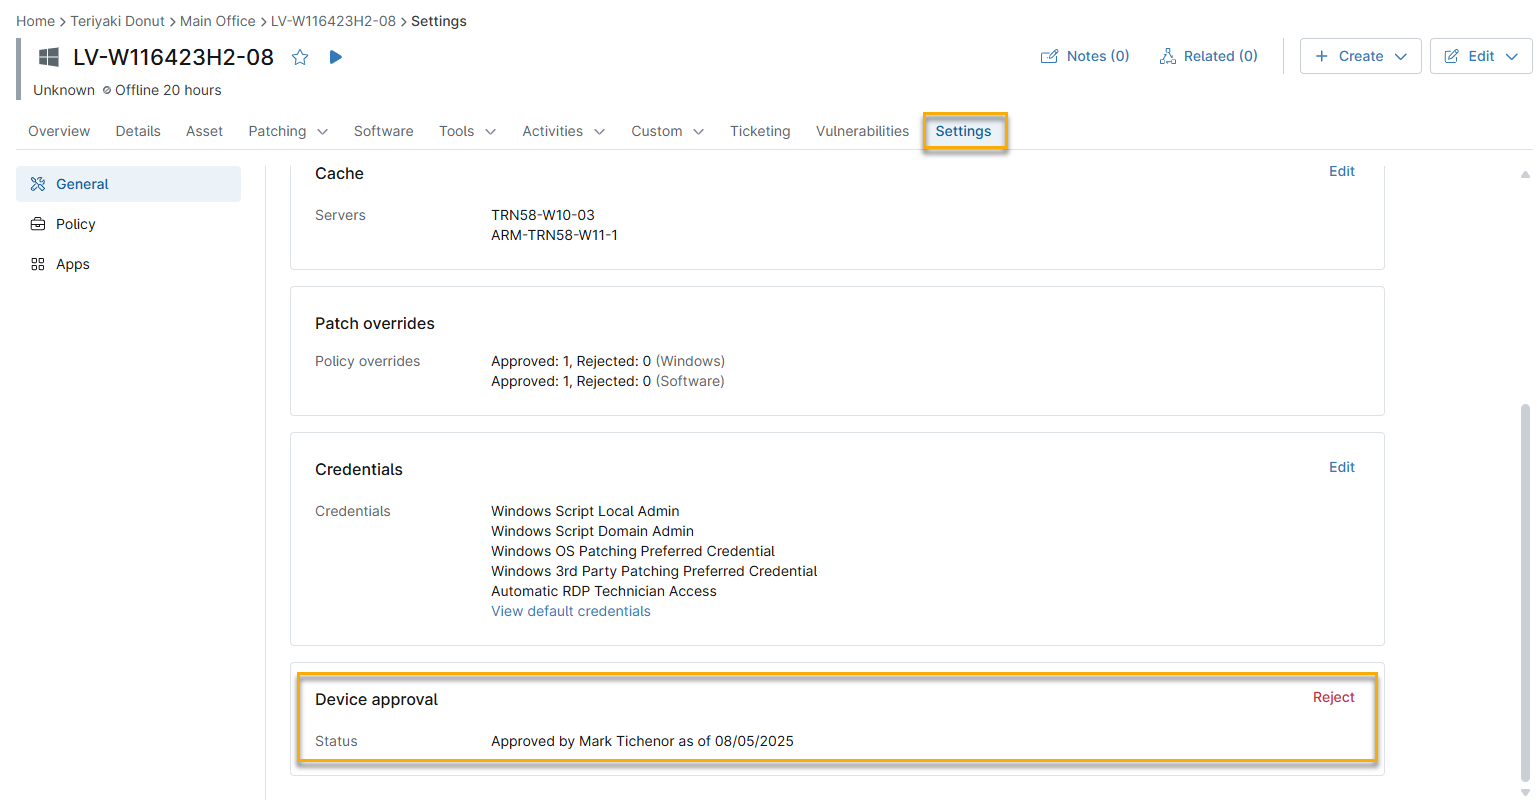
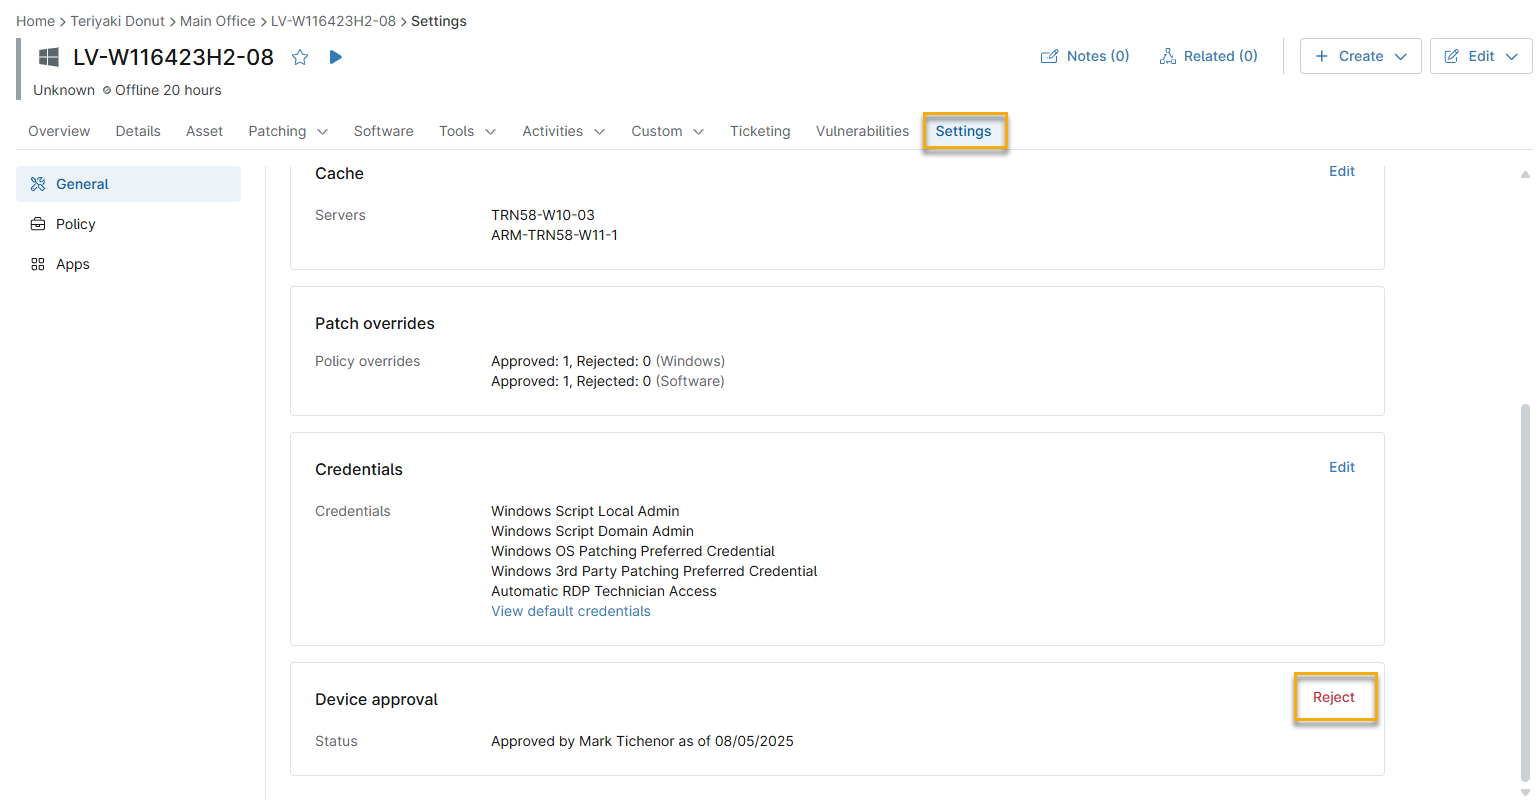
From a Device's Settings Tab
Open the device's Settings tab, then scroll to the Approval Status card.
Changing Approval Status in Device Settings
You can also change a device's approval status from its Settings tab.
- Open the device's Settings tab and scroll to the Approval Status card.
Click the Approve or the Reject link to change the approval status.
Figure 11: Changing device approval status (click to enlarge)
Additional Resources
For a list of frequently asked questions about node approval, refer to the following Dojo article: