Topic
This article explains how to add or edit device warranty information and locate devices in NinjaOne based on their warranty status.
Environment
NinjaOne Endpoint Management
Description
In the Devices search grid, you can add columns and filters for warranty start and end dates. You can also set warranty dates in the device dashboards. Refer to Enable Warranty Tracking to learn how to track warranty information automatically.
Automatic warranty syncs occur every Saturday at 1:00 A.M. UTC.
Select a category to learn more:
Supported Vendors
NinjaOne supports warranty tracking for workstations, servers, and virtual hosts from the following manufacturers:
- Dell
- Hewlett-Packard (HP) non-Enterprise
- Lenovo
- Microsoft
- Toshiba
Edit Device Warranty Information
You can update the device's warranty date from the Overview tab in the device dashboard.
In the Device information card, click the Warranty date link to set the warranty start and end dates manually. Click the "circling arrows" icon to automatically sync any device that supports the Warranty Tracking feature with the manufacturer's warranty information. Successful syncing requires a valid serial number.
Some device types, such as unmanaged devices, may keep warranty dates in the Settings tab. To change start and end dates for these devices, click Settings, then click the pencil icon to change the dates.
Find Devices by Warranty Dates
- In NinjaOne, click Devices. The Devices search grid will open.
- If the Warranty columns are not displayed, click the gear icon. The Table settings window will open.
- Click the Columns drop-down menu, select Warranty Start Date and Warranty End Date, then click Save. The warranty information columns will appear in the Devices search grid.
- To filter the Warranty Start Date and Warranty End Date, click More filters, then type "warranty" to find the matching filters. Click one or both of the filters to refine the warranty dates.
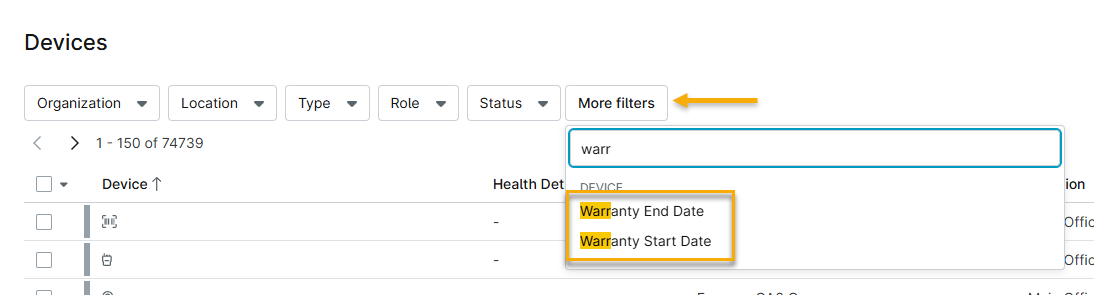
- View status indicators and tooltips in the Devices search grid:
- A check mark indicates that the warranty will not expire for at least another 90 days.
- A clock icon indicates that the warranty will expire within the next 90 days.
- An exclamation point indicates that the warranty has expired.
Additional Resources
To learn more about device management in NinjaOne, refer to Device Enrollment and Management: Resource Catalog.