Topic
This article describes the process for adding a new Microsoft 365 (M365) tenant to your organization and then adding users to be backed up.
- NinjaOne SaaS Backup
- Microsoft M365
Description
An M365 tenant is an instance of Microsoft 365 that an organization uses. You need to add an M365 tenant to your organization in NinjaOne SaaS Backup before you can back it up. Follow the instructions provided in the sections below to add an M365 tenant to your organization, then add users to a backup.
Adding the M365 Tenant to Your Organization
To add the M365 tenant to your organization, follow these steps:
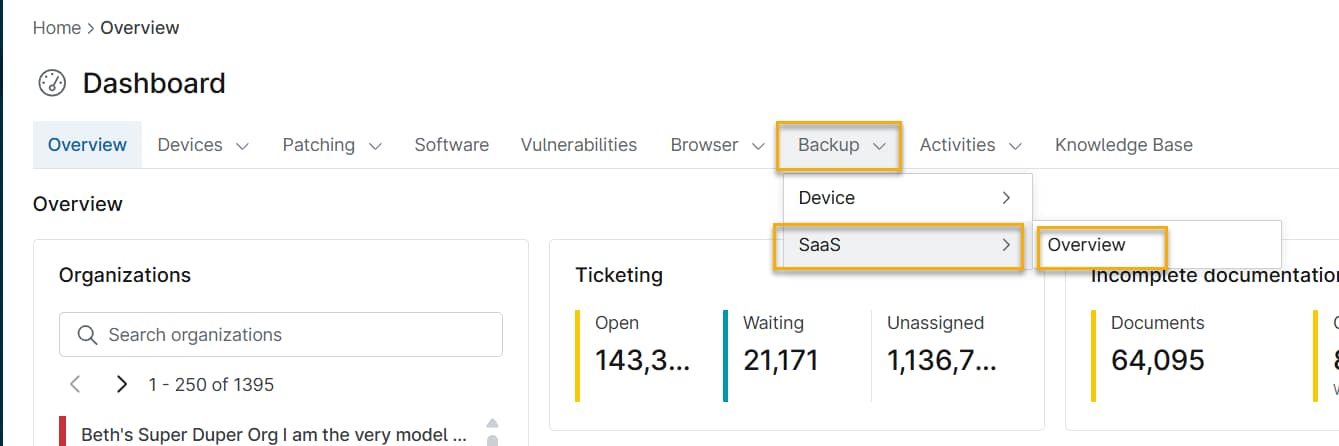
From the NinjaOne dashboard navigation menu, navigate to Backup → SaaS → Overview. You'll refer to the organizations for which you have activated NinjaOne SaaS Backup listed on the overview page.
Figure 1: Dashboard (click to enlarge) Click the three dots at the end of the organization's listing and select Manage services from the drop-down menu.
Figure 2: Manage services (click to enlarge) - Click Add Backup to add a new tenant.
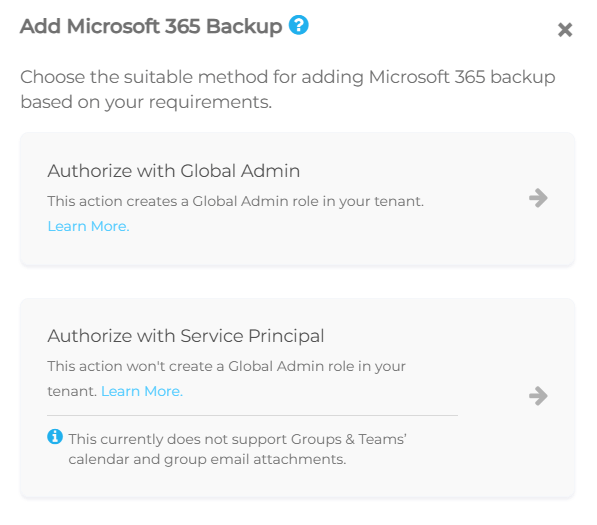
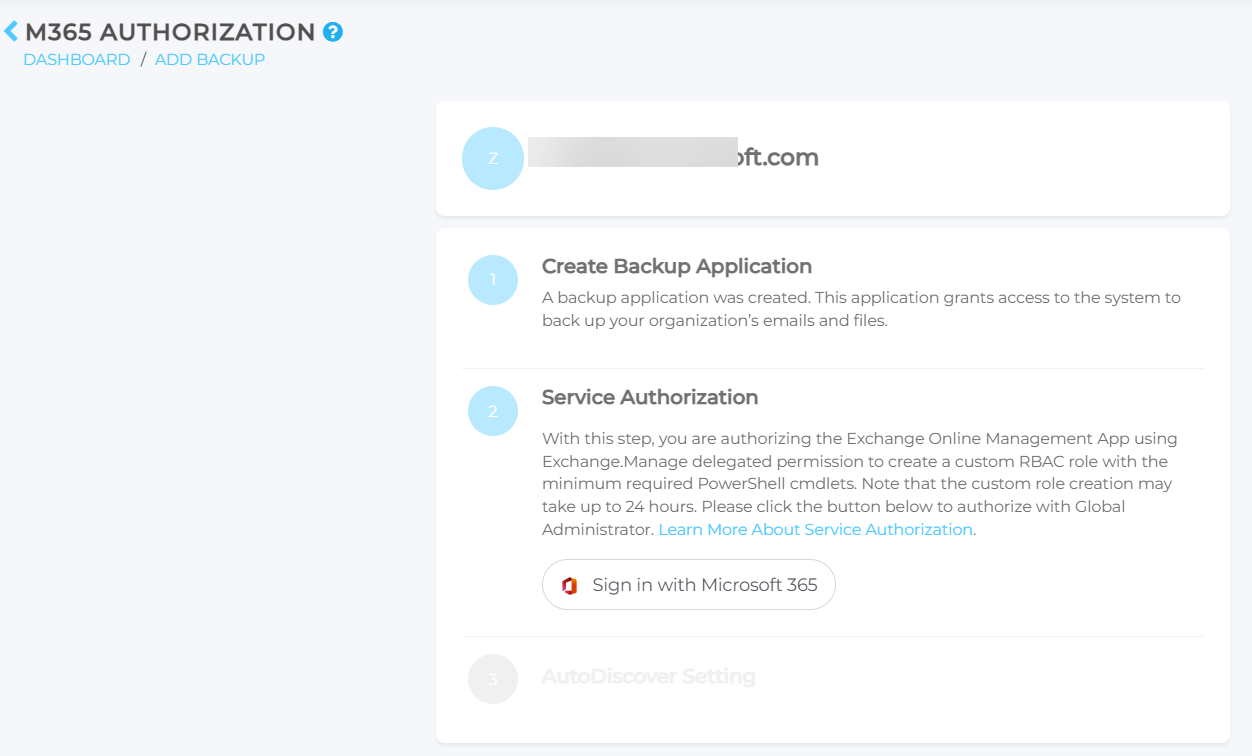
Click the Sign in with Microsoft 365 option. Microsoft will prompt you to authorize with either a Global Admin or Service Principal login. We suggest the Service Principal option as it grants the minimum required permissions, and that's what we will use for this example.
Service Principal permissions do not currently support Groups and Teams calendars and group email attachments.- Select Authorize with Service Principal and input your M365 administrator account credentials. The system may also prompt you to enter multi-factor authentication credentials.
- A list of permissions to be granted will display. Scroll to the end of the page and click strongAccept.
After you have given consent, the M365 authorization page will open. There are two steps to complete on this page: - Select the correct email address and click Continue.
- Sign in to your M365 account once more.
- The organization's email portal will open. Click Finish Setup to complete the process.
Adding Users to Backup
- The Add Users page will display automatically after setting up the tenant using the above steps. You can also access it by using the Add From Existing option when clicking + Add Backup from the dashboard.
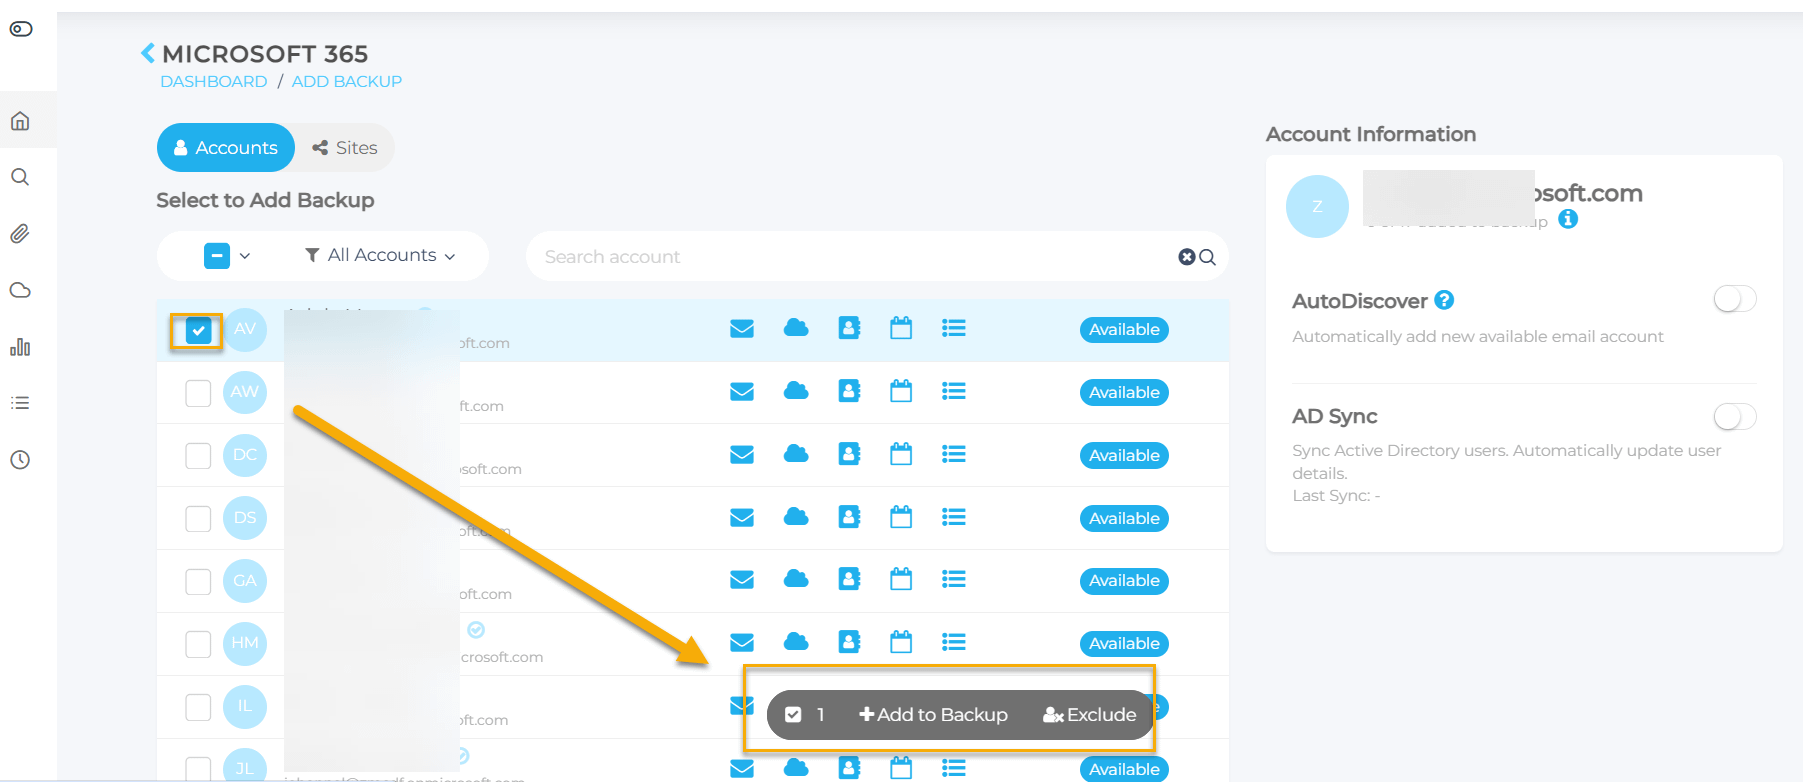
- When you first access the page, it will auto-populate with all the mailboxes that NinjaOne SaaS Backup detects in the tenant.
- Use the Select All option or select the individual users that you want to add. An Add to Backup option will appear on the screen. You also have an Exclude option for cases when you want to exclude the selected users from backups.
From this same page, you can also enable Autodiscover and AD Sync.
Autodiscover will automatically detect and add new users, provided you have sufficient seats available in the organization. When used in conjunction with Autolicensing (set in Organization Settings within the Partner Portal), you can automatically adjust licenses to add new users without requiring any manual action.
AD sync will update things like name changes when Active Directory detects them.Figure 5: Add to Backup (click to enlarge)
Additional Resources
For more information about M365 backups, refer to: NinjaOne SaaS Backup for M365 FAQ.