
Issue
In rare cases, SentinelOne will detect the NinjaOne Patcher or other NinjaOne components (lockhart.exe, NinjaOne Remote, or others) as a threat.
Environment
- NinjaOne Integrations
- SentinelOne
Cause
SentinelOne incorrectly identifies signed NinjaOne executables as threats because the NinjaOne certificate (NINJAONE, LLC or NINJARMM, LLC) is not included in SentinelOne's exclusions list by default.
Resolution
We recommend creating a Certificate Exclusion in your SentinelOne Web Management portal. If you are using a Unified Exclusion, refer to the section of this article titled Creating Alerts Exclusions in Unified Exclusions Management.
To create the exclusion, perform the following steps:
- Log in to the SentinelOne Web Management console at the account level.
- Click Sentinels on the left navigation menu.
- Click Exclusions in the top navigation menu.
- Click New Exclusion → Create Exclusion.
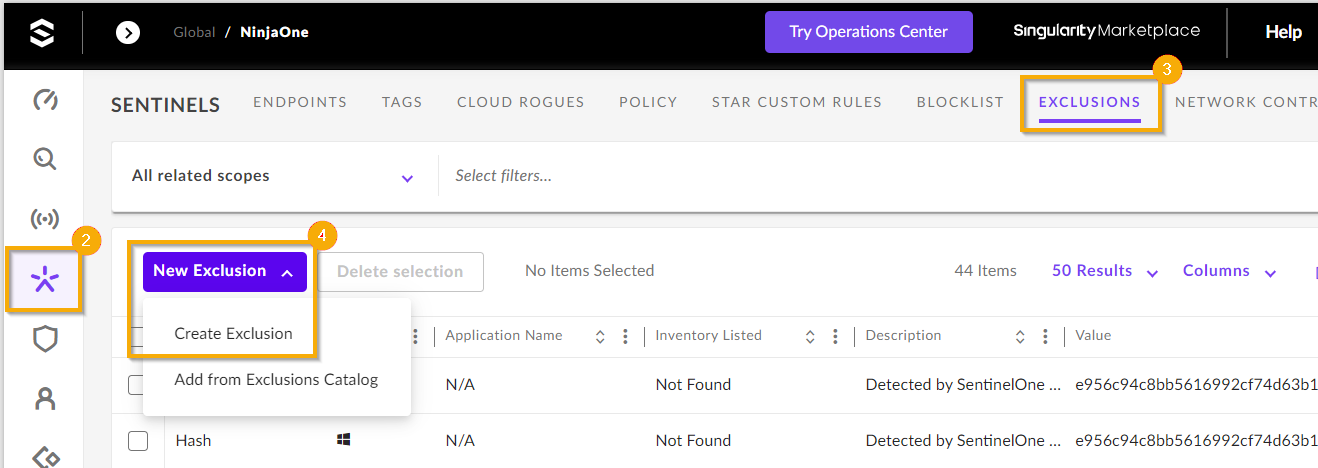
Enter the data exactly as follows:
- Exclusion Type: Certificate
- OS: Windows
- Signer Identity: NINJAONE, LLC
If you are using an environment managed by NinjaOne, you must add both the NINJARMM, LLC and NINJAONE, LLC signed certificates in the exclusions. New consoles not managed by NinjaOne can allow only NINJAONE, LLC certificates. The SentinelOne Agent 23.4 SP2 introduces exclusions for the NinjaOne executables.- Click Threats to test whether NinjaOne products are properly excluded.
- Click Save.

Creating Alerts Exclusions in Unified Exclusions Management
To create the alert exclusion, perform the following steps:
- Set the general details for the exclusion:
- Log in to the SentinelOne Web Management console at the account level.
- Click Sentinels on the left navigation menu.
- Click EXCLUSIONS in the top navigation menu.
- Click New Exclusion → Create Exclusion.
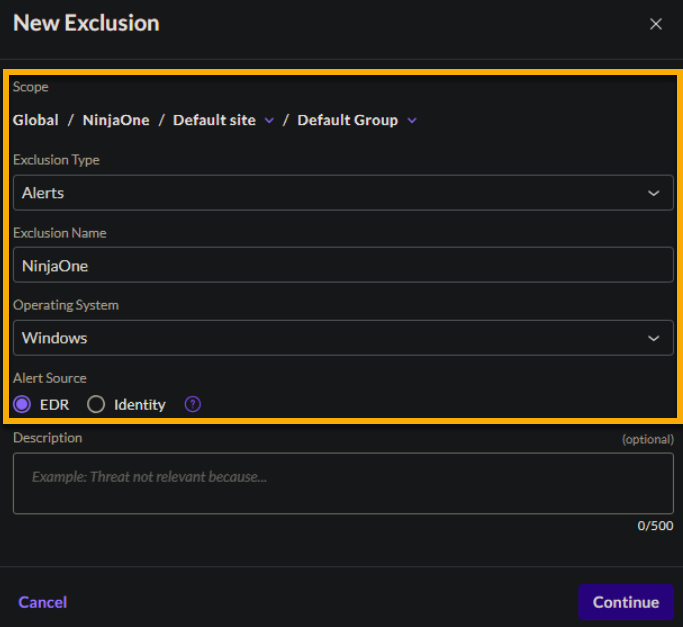
- Give the exclusion a unique identifier for Exclusion Name.
- For Scope, we recommend creating the exclusion at the narrowest possible scope. To change the Scope, select Global, an account, site, or group.
- Enter the data exactly as follows:
- Exclusion type: Alerts
- Operating System: Select the platform to which the exclusion applies (Windows, macOS, or Linux).
- If the Operating System selected is Windows, select the Origin of the alert that you want to suppress:
- EDR: Suppress alerts related to Endpoint Detection and Response (EDR) engines.
- Identity: Suppress alerts related to Identity Detection engines.
- Click Continue.
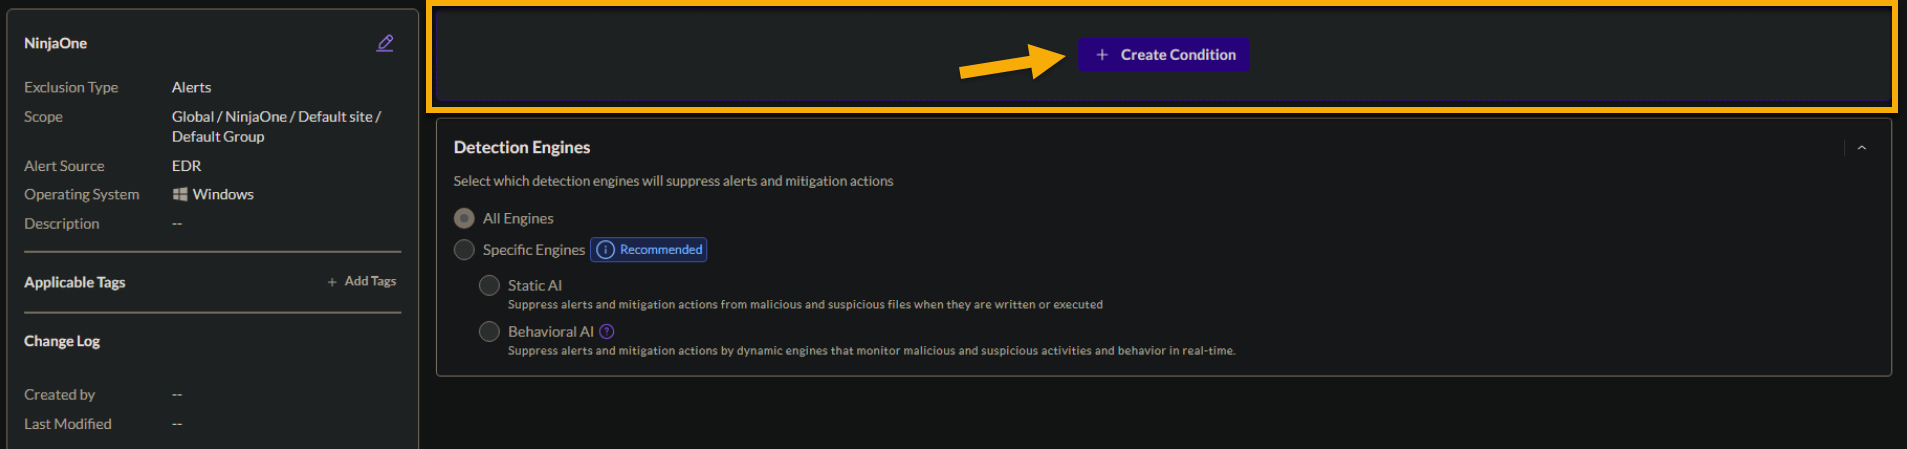
A summary of the exclusion details shows the option to Create Condition and set specific detection engines.
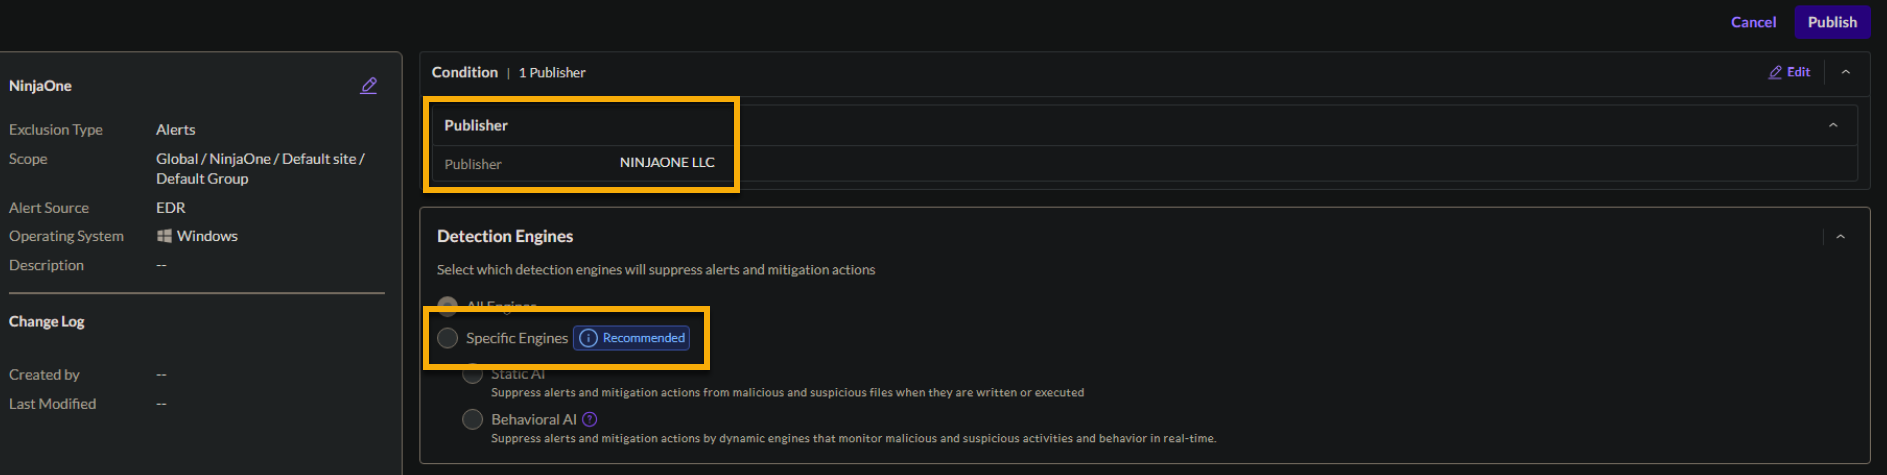
- Set conditions for the alert exclusion.
- On the exclusion details page, click Create Condition.
- On the Condition Creation page, click Publisher (also known as "certificate").
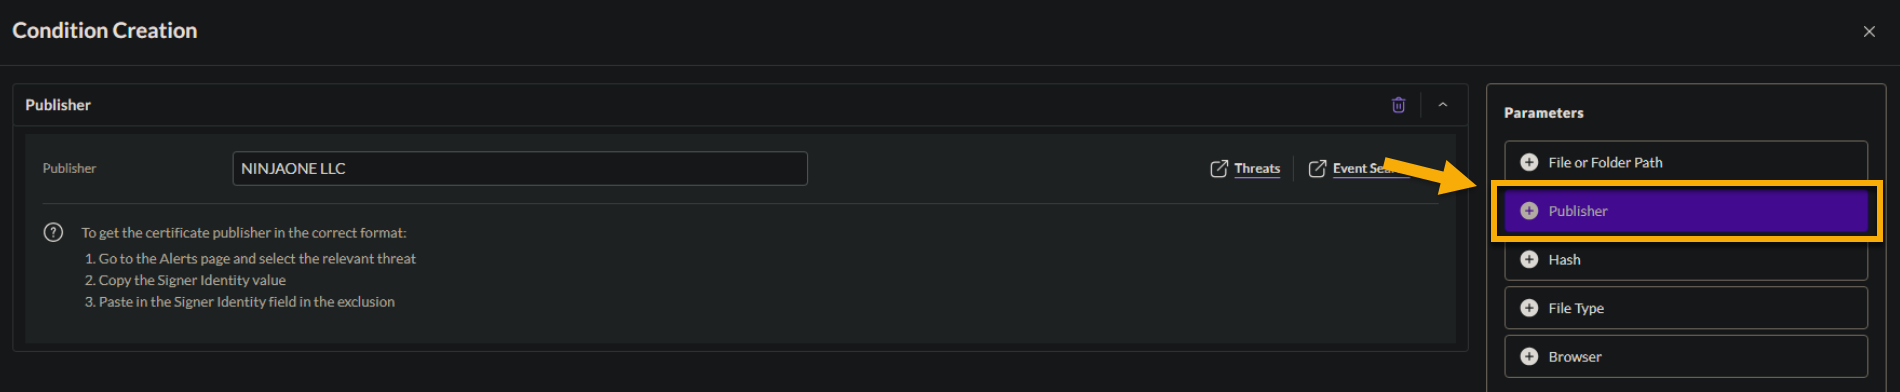
- Enter the value for the parameter, exactly as follows: "NINJAONE LLC."
- Click Save.
- To apply the exclusion, click Publish.
Additional Resources
The following learning content will help you make full use of the SentinelOne feature set.