Topic
This article will guide you through adding an "unsupervised" Apple mobile device to NinjaOne for remote monitoring.
Environment
NinjaOne mobile device management
Description
After you enrollment process.
- Adding a device to NinjaOne using the method described in this article enrolls the device as unsupervised, and as such only settings for "unsupervised" devices are able to be used. To enroll the device as supervised, you must use Apple Business Manager and ADE.
- When adding a mobile device manually, the device cannot use an ABM account for the Apple ID—the device owner must either use their own Apple account or create a new one. If the Apple ID is not set up under Settings, then the device will still be added in NinjaOne but none of the apps will deploy to the device.
- NinjaOne MDM does not have access to any personal files/photos no matter if the device is company or personally owned.
- The enrollment token does not have an expiration date and can be reusable with different devices.
Are you interested in watching a video related to this process? Refer to our NinjaOne MDM Video Library.
Index
- Add a Mobile Device to NinjaOne
- Download the NinjaOne Profile to the Device
- Verify and Renew Device Enrollment
Add a Mobile Device to NinjaOne
- Enroll with APN, if you have not done so already.
- Click on the plus icon (+) at the top right corner of the screen and select Device.

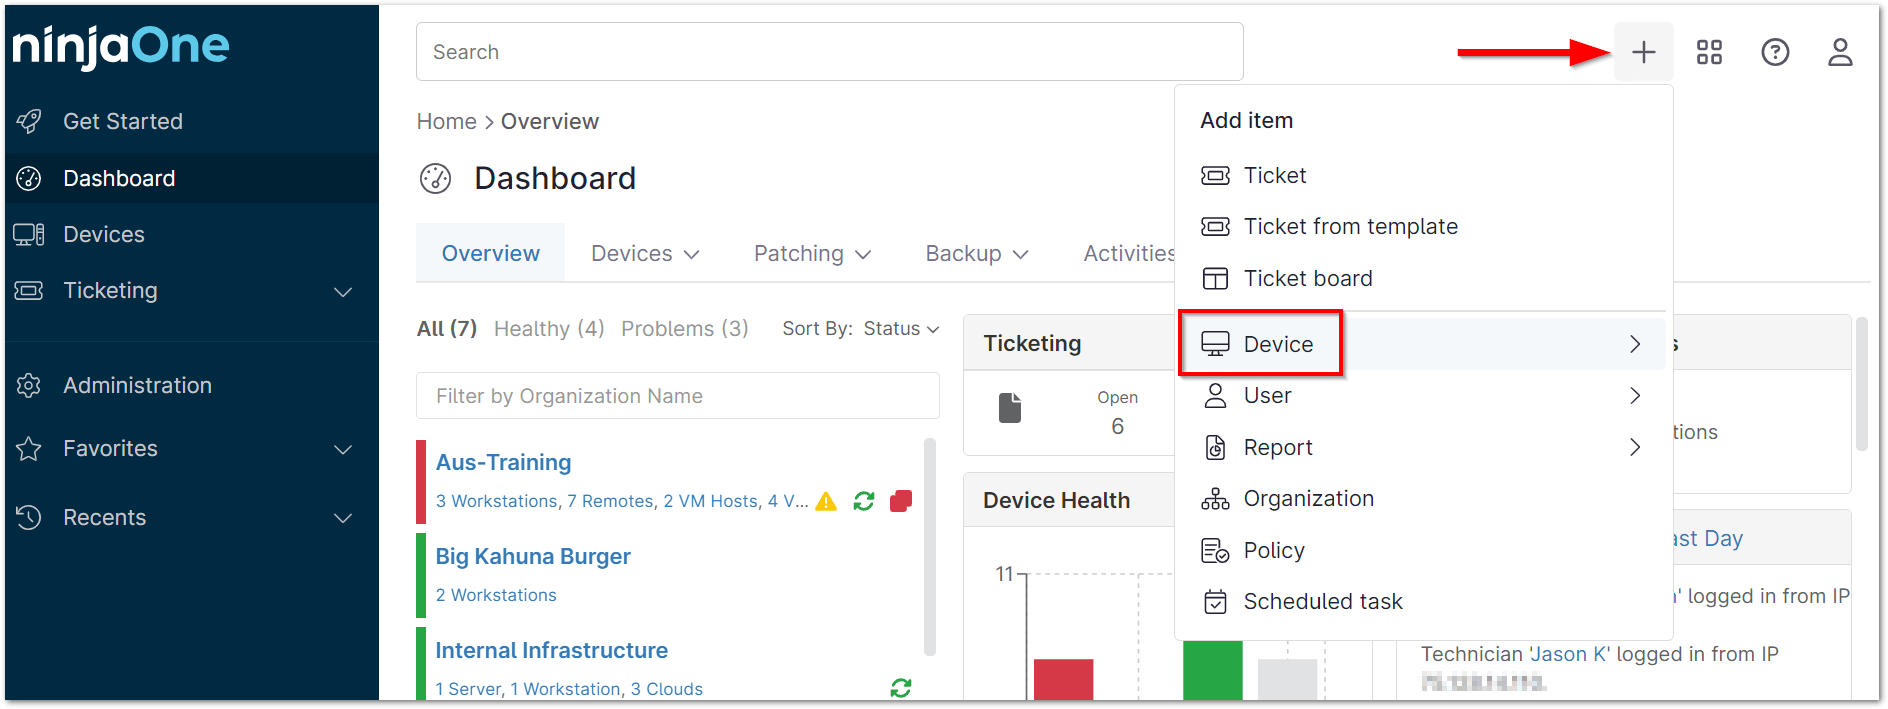
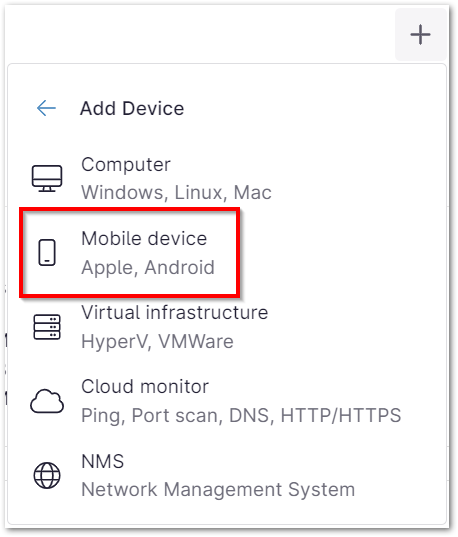
- Select Mobile device.
- Select Apple for the new mobile device and the organization it belongs to.
- Select which APNs certificate profile should be assigned to the device. If you have not yet set this up, you will see a notification prompting you to do so with a hyperlink to help you navigate to the configuration page. Then, click Generate QR Code (this button will not activate until all required fields are populated).

- Use the QR code to enroll your device.
- Use the options on the NinjaOne screen to send the QR code via SMS or email.Important Note: You can send the QR code to multiple email addresses, but it will work for only one device. A new QR code must be generated for the next device being added. Currently, devices cannot be added to the NinjaOne console in bulk.

- Use the options on the NinjaOne screen to send the QR code via SMS or email.
Download the NinjaOne Profile to the Device:
Once you scan the QR code or click the link provided from SMS or email, you must finish the rest of the steps on the physical device.
- On the home screen, tap and hold the camera icon.
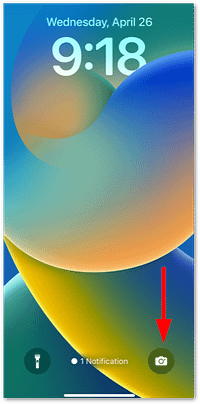
The camera tool opens. - Position the camera lens to capture the QR code. If successful, a notification will pop up at the top of the device screen—tap to open.
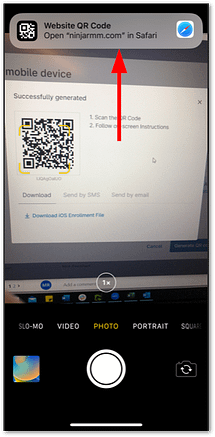
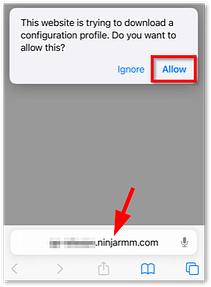
- Verify that your NinjaOne environment displays in the URL field. Once confirmed, tap Allow.
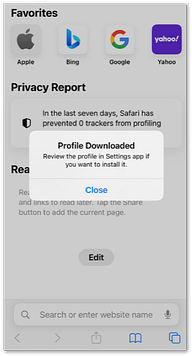
- Click Close when you see the Profile Downloaded confirmation popup.
- Open the Settings app
 on your device.
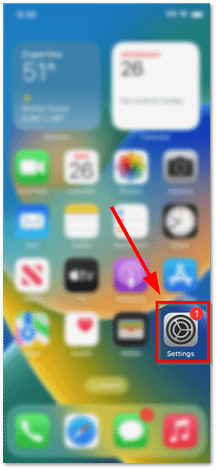
The Settings app opens.
Your app layout may look different than the screenshot above, but the Settings app icon will look the same. - Select Profile Downloaded.

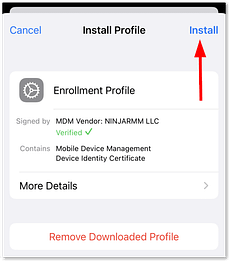
The Install Profile page displays. - Tap Install in the top right corner of the screen.
The Warning page displays. - Tap Install again and then tap Trust when you see the Remote Management popup notification.

When complete, you are returned to the Profile Installed page. You can now use your device; the device is successfully added to NinjaOne, and you will see it on the organization dashboard.
You can now set up policy settings for the device.