
Topic
This article explains how to activate and implement the Follow-up date & time field within a ticket.
Environment
NinjaOne Ticketing
Description
You can track the next time an action should be taken on a ticket when you have NinjaOne Ticketing activated. For instructions about enabling and configuring NinjaOne Ticketing, refer to NinjaOne Ticketing: Getting Started.
Select a category to learn more:
- How to Use the Follow-up Date and Time Fields
- Filter Tickets by Follow-up Fields
- Automate Tasks Based on Follow-up Date and Time
- Additional Resources
How to Use the Follow-up Date and Time Fields
Use the Follow-up date & time field in a ticket to follow up on a task after returning from a holiday or to schedule an appointment. You can also use the data in this field to filter tickets and carry out automated tasks.
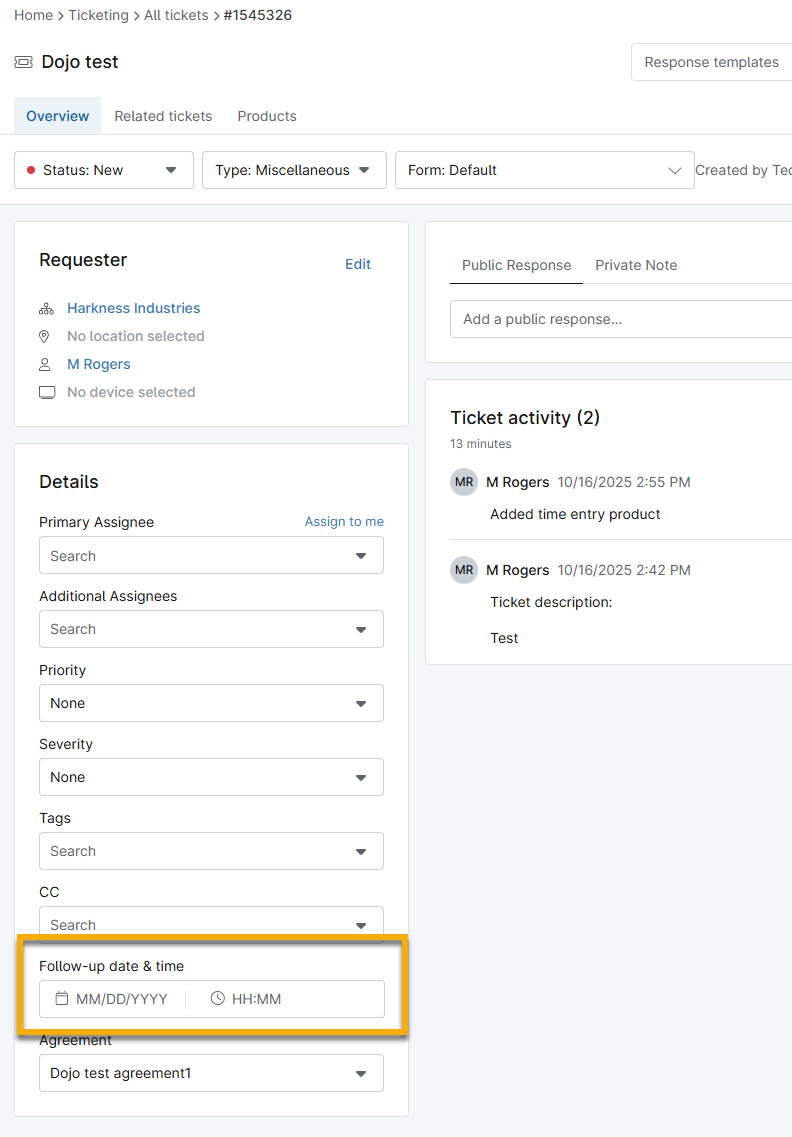
- Within the ticket, find the Follow-up date & time field in the Details section. Be sure to save the ticket after making changes.
- Click the calendar icon to select the day to follow up. Use the drop-down menus and arrows to navigate to a different month and year.
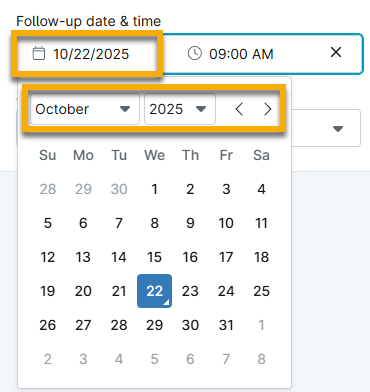
- Click the clock icon to set the follow-up time. Use the arrows to increase or decrease the numbers.

Filter Tickets by Follow-up Fields
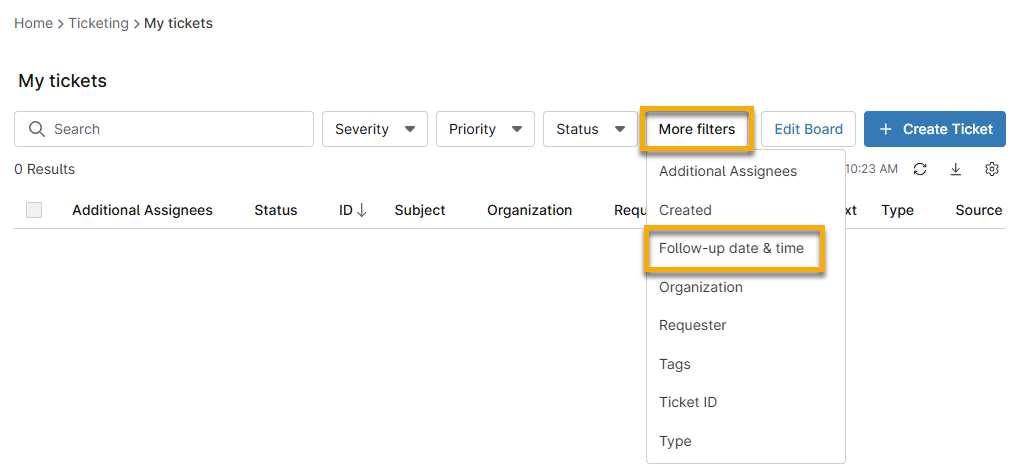
From any ticketing board, click More filters to use the Follow-up date & time search tool. You can also export this column data for reporting purposes.
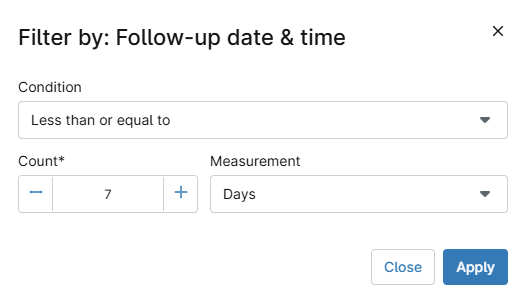
You can search for follow-up requirements that are due soon or weeks in the future. Select the applicable criteria and then click Apply. In the following example, the board will display follow-up tasks that technicians must complete this week.
Automate Tasks Based on Follow-up Date and Time
For more information about ticketing automations, refer to NinjaOne Ticketing: Automation.
You can create time-based triggers for the Follow-up date & time field. To do so:
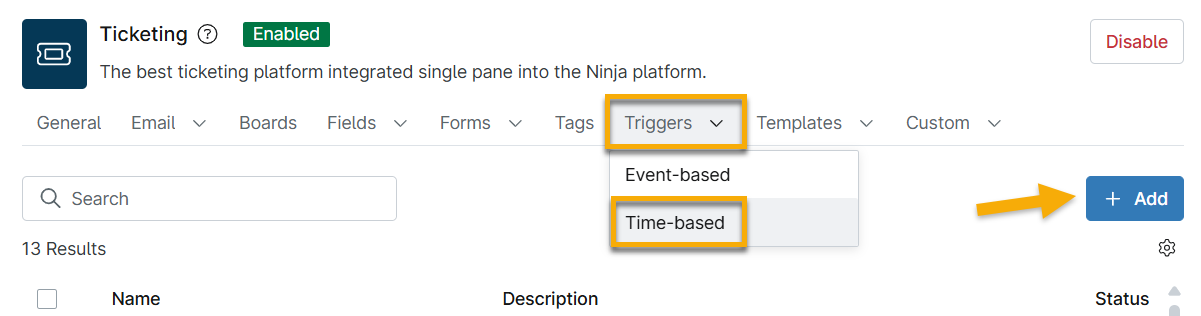
- On the NinjaOne Ticketing app configuration page, open the Triggers tab and select Time-based. Click Add.
- The Add time-based automation dialog displays. Enter a name and optional description where indicated in the General section.
- In the Conditions section, click Add for either classification to determine which tickets you want routed to the board.
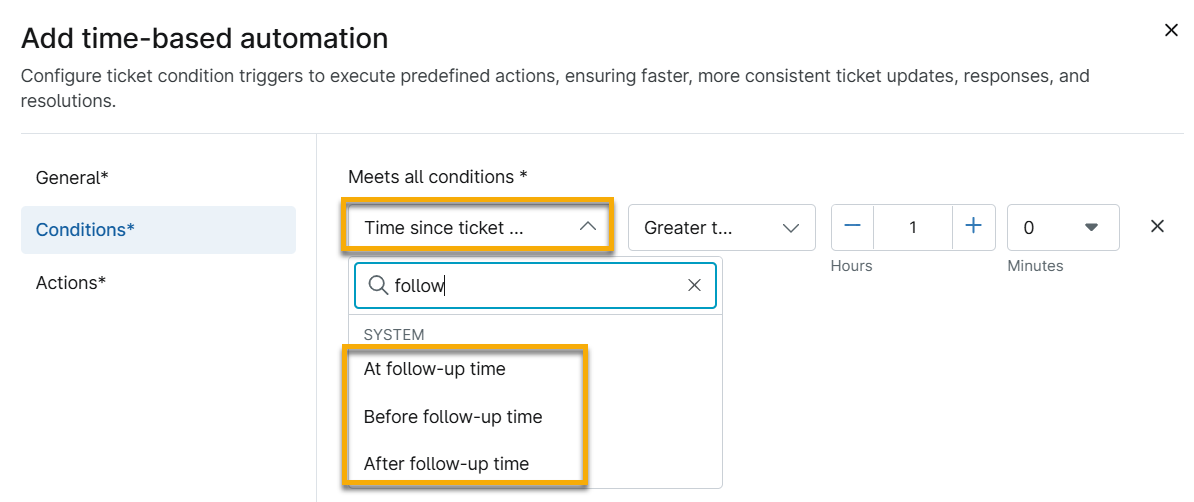
- Use the search field to find the follow-up options and select one from the drop-down menu.
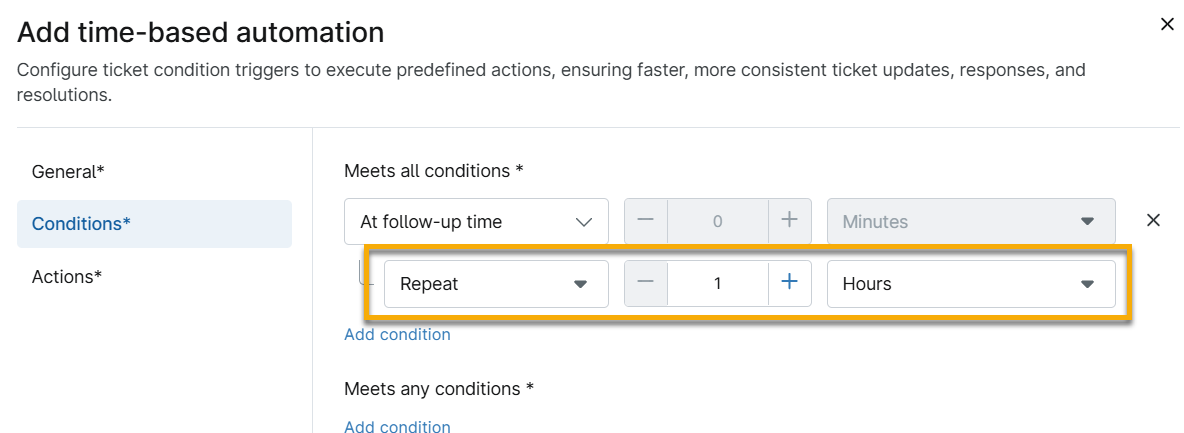
- You can configure the action to repeat, which may be helpful if it sends a notification or adds a comment to the ticket. From the following drop-down menu, select Repeat and then modify the new fields.
- Open the Actions section and select the action to perform when the condition is triggered.
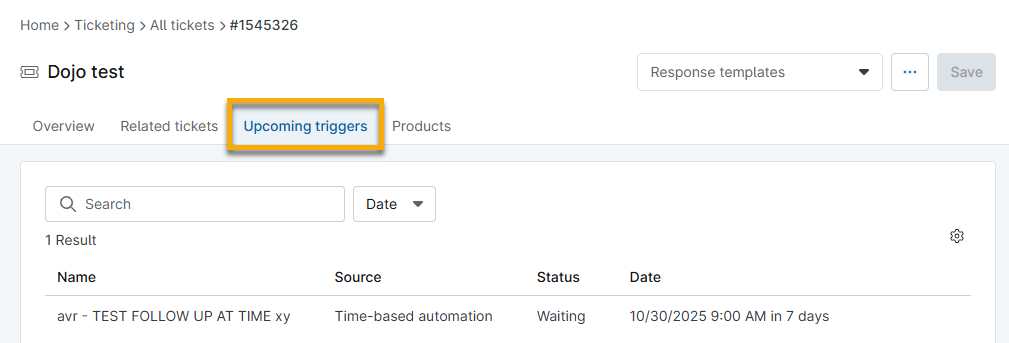
With automation activated, a new tab titled "Upcoming triggers" will appear in the ticket. This tab will show the automation name, the automation type (source), the current status, and the date the automation will initiate an action.
Additional Resources
Refer to NinjaOne Ticketing: Resource Catalog to learn more about NinjaOne Ticketing.