Topic
This guide provides instructions for setting up the Autotask integration with NinjaOne.
Environment
NinjaOne platform
Autotask integrated vendor
Description
Before you can configure and map Autotask settings to NinjaOne, you must first enable the integration. Refer to Enable the Autotask Integration in NinjaOne for more information.
The configuration settings for Autotask in NinjaOne enable organization, device, and product mapping while syncing tickets, alerts, and key device actions.
Select a category to learn more:
- Configuring Autotask Settings in NinjaOne
- Viewing Configuration Sync Logs
- Setting up Ticket Templates
- Additional Resources
Configuring Autotask Settings in NinjaOne
From the Autotask configuration screen (Administration → Apps), click Edit to the right of the Settings header.
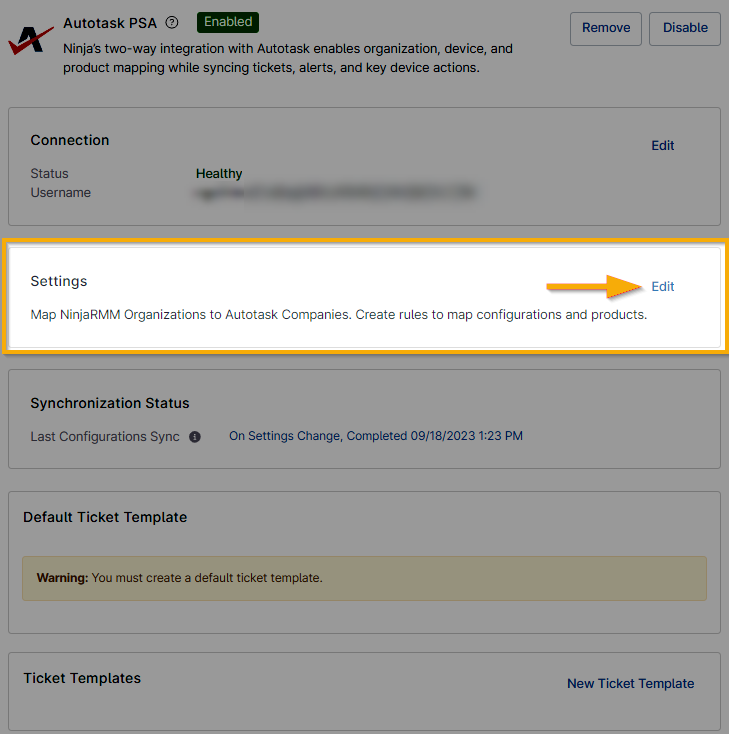
Figure 15: Settings → Edit (click to enlarge)
Mapping Autotask Companies to NinjaOne Organizations
The Accounts tab is open by default. From here, you can sync your Autotask companies to NinjaOne organizations.
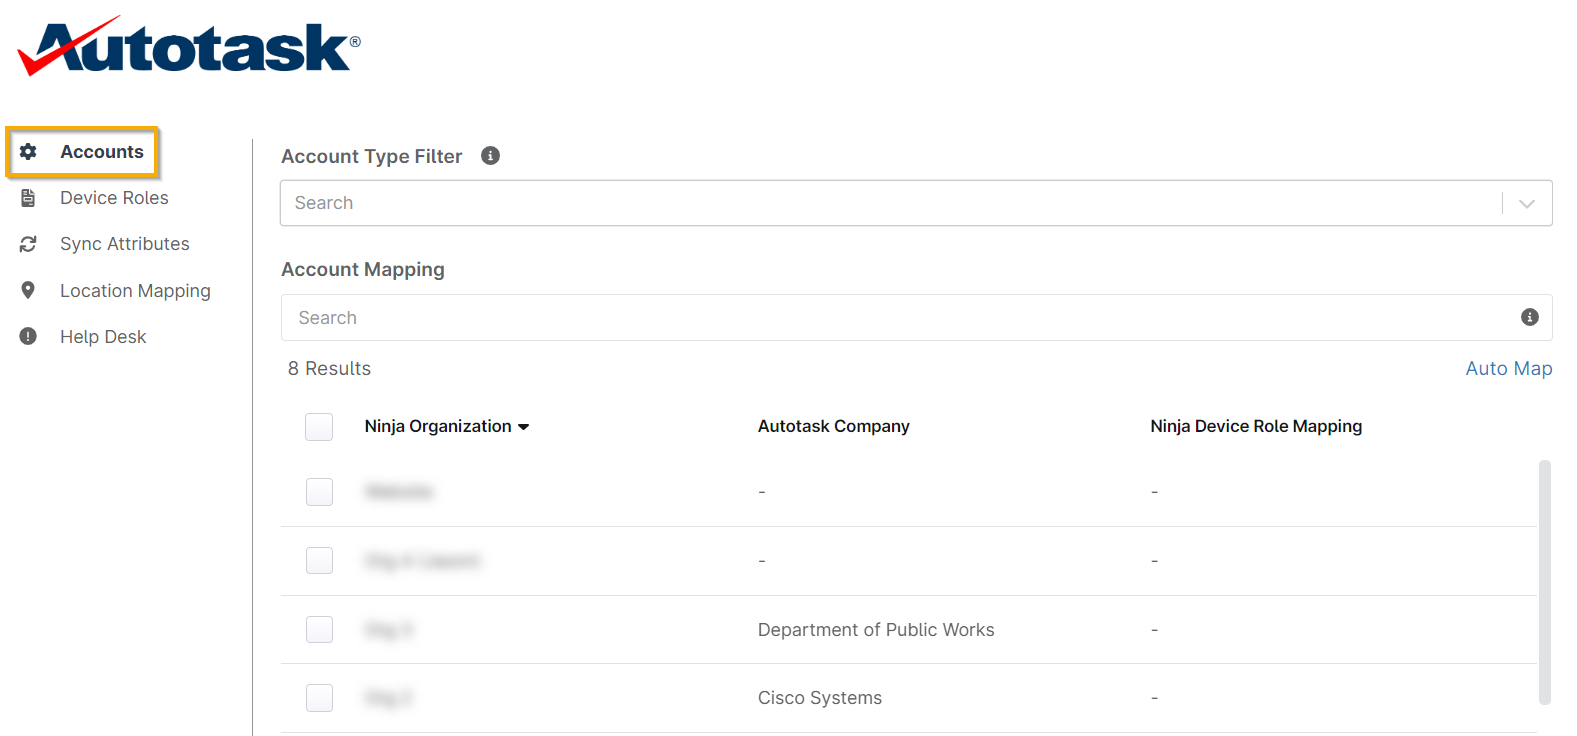
Figure 16: Accounts (click to enlarge)
- Account Type Filter allows you to select particular Autotask account types to limit the accounts that are available for mapping.
- Account Mapping is where you map NinjaOne organizations with Autotask companies. You can either select Auto Map to the far right under this field, which will automatically perform mappings if there are identical Organization/Company names, or you can click on each organization to map to the respective account in Autotask. You can also choose the device role mapping to assign to this organization. To learn more about Device Roles for Autotask mapping, please continue to the section below.
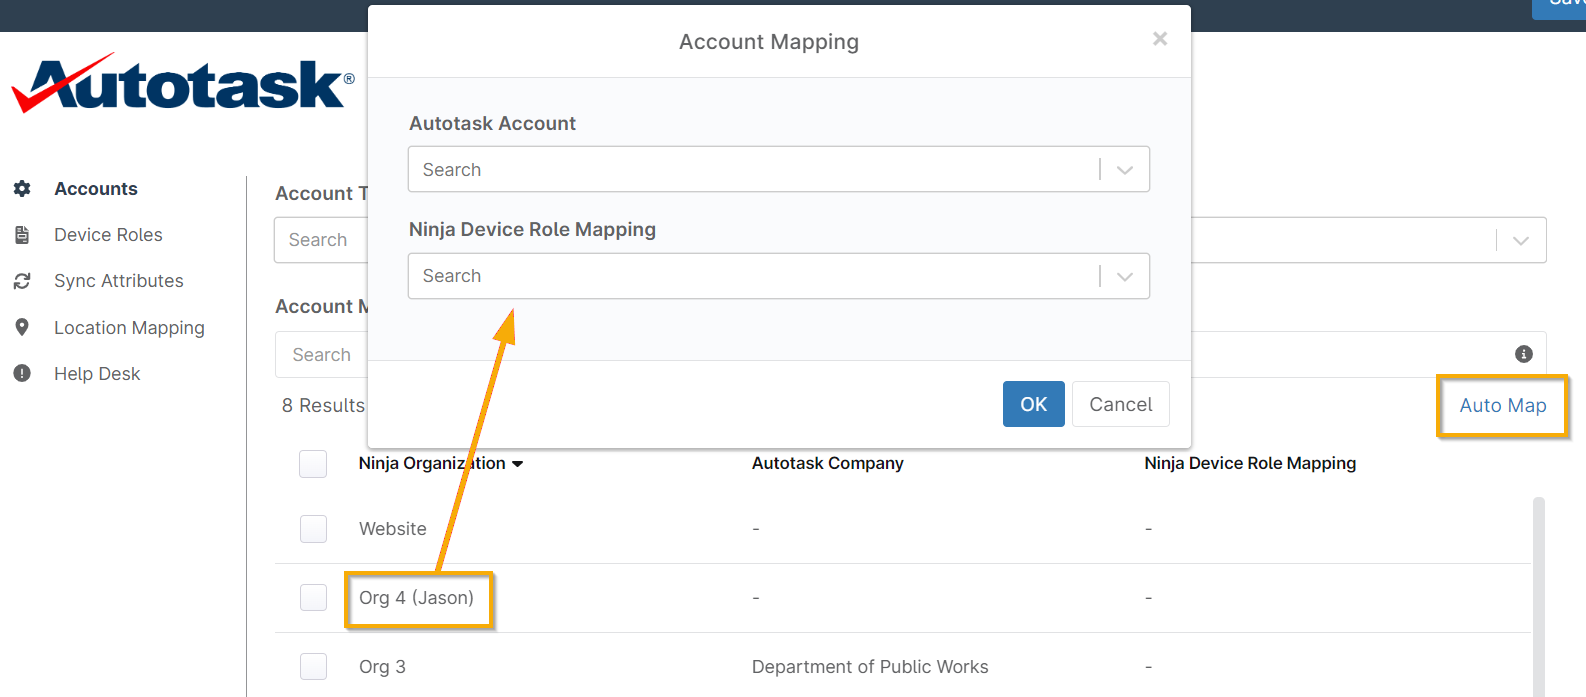
Figure 17: Account Mapping (click to enlarge)
Creating Device Role Mappings
For information about what information is mapped from NinjaOne to Autotask and examples of different scenarios, refer to Autotask: Mapping Specifications.
- Within the Autotask settings editor (Administration → Apps → Autotask → Settings → Edit), navigate to the Device Roles section. From here, you can map Autotask configurations to NinjaOne device roles.
- Click Add in the top right corner to create a new mapping.
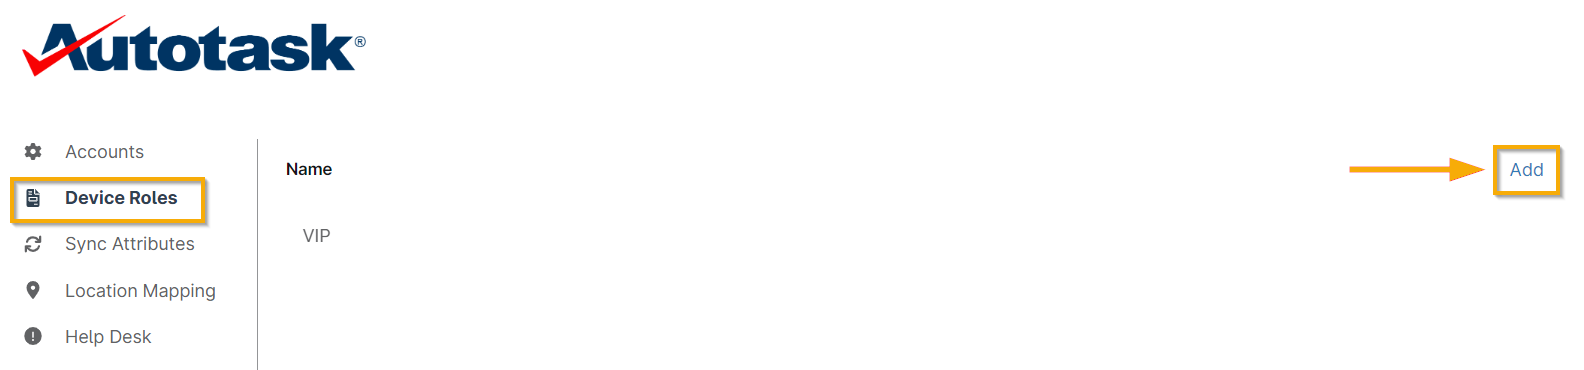
Figure 18: Device Roles → Add (click to enlarge)
The NinjaOne Device Role Mapping editor displays in a popup window.
- Click Add in the popup to configure a mapping for a device role.
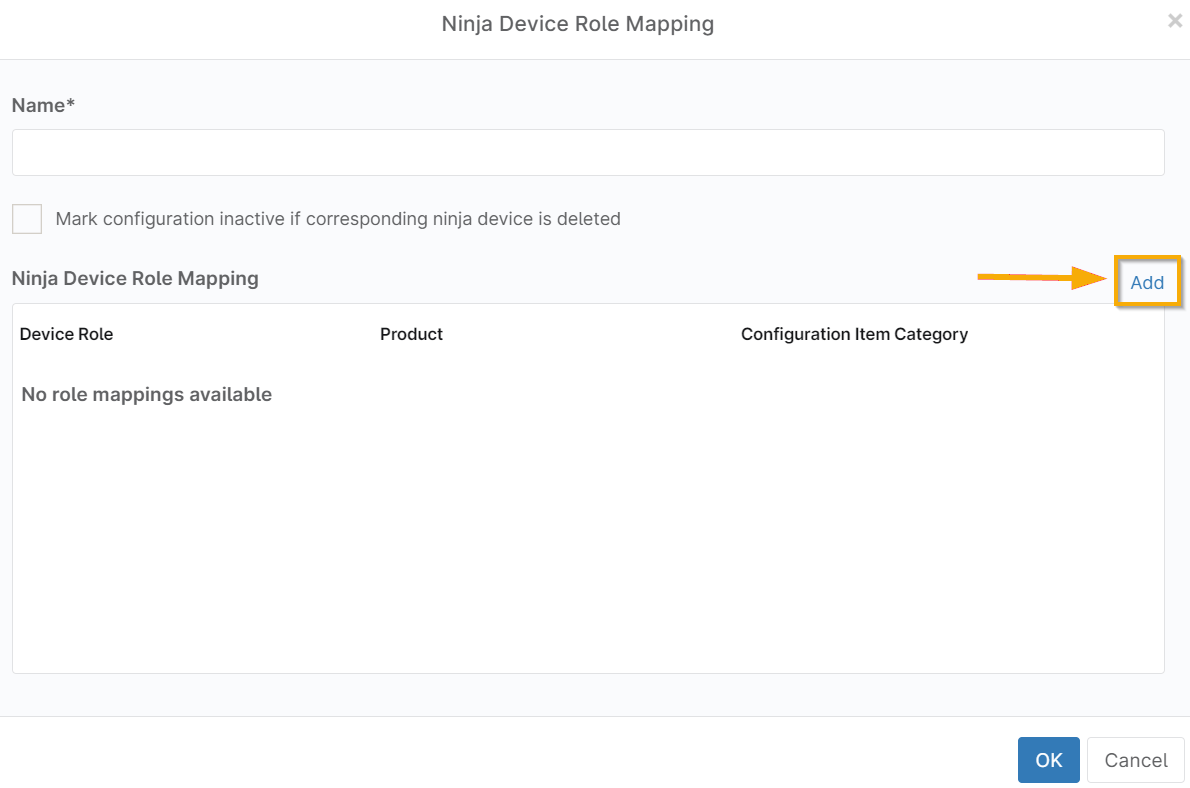
Figure 19: Ninja Device Role Mapping → Add (click to enlarge)
- Select the device role, Autotask configuration type, and Autotask product for the new mapping. Click OK to save.

Figure 20: Edit Mapping
- Activate the check box below the Name field if you want Autotask to automatically update the status of the device to "inactive" if it is deleted from NinjaOne.

Figure 21: Mark configuration inactive... (click to enlarge)
- Repeat Steps 3 and 4 as necessary for additional device roles.Important Note: You must add multiple lines in a single device role configuration for multiple device types to be synced.
Enabling Sync Attributes
To enable and configure the attributes that sync between Autotask and NinjaOne, perform the following steps:
- Within the Autotask settings editor, open the Sync Attributes section.
- Select any attributes that should be synced over to Autotask.
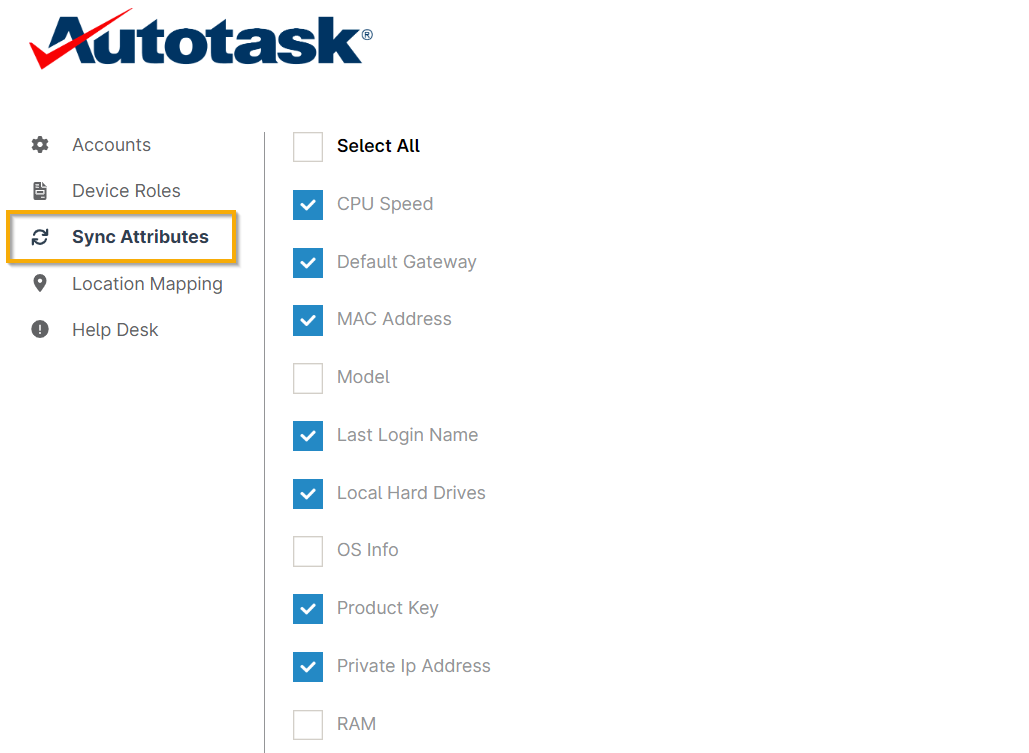
Figure 22: Sync Attributes (click to enlarge)
Mapping NinjaOne Locations to Autotask Locations
To map NinjaOne organizations and locations to Autotask companies, perform the following steps:
- Within the Autotask settings, select the Location Mapping tab.

Figure 23: Location Mapping (click to enlarge)
- Click each NinjaOne location to map it to an Autotask location. The company listed will reflect the configured account mapping.
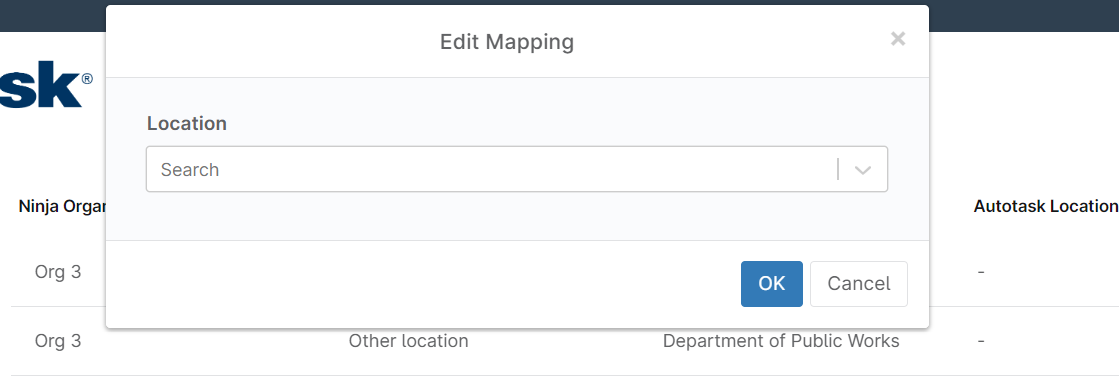
Figure 24: Edit Mapping
Configuring Help Request Form Settings
From the Autotask settings, select the Help Desk tab.
There are two configuration options pertaining to ticket creation from the systray icon's Help Request Form. Specifically, you can choose whether to create a contact for email addresses that do not already exist in Autotask and whether to embed any images within the request.
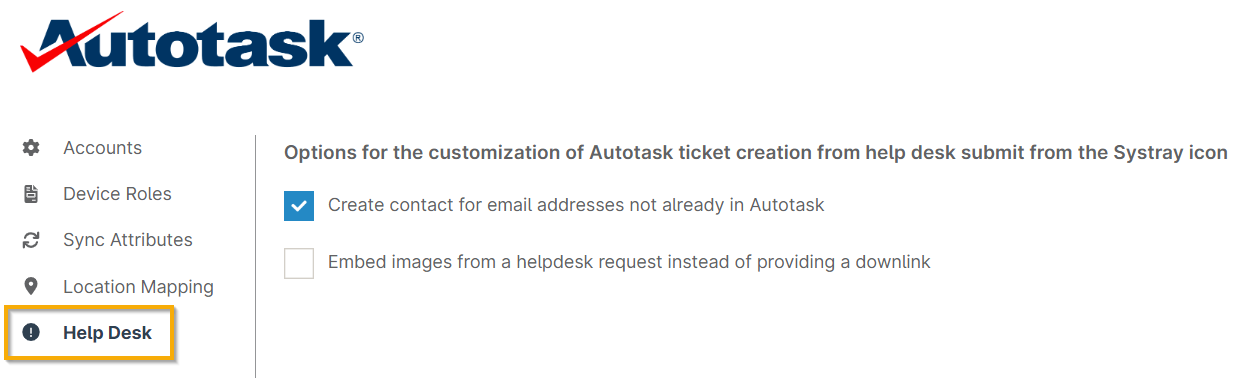
Figure 25: Help Desk (click to enlarge)
Viewing Configuration Sync Logs
From Administration → Apps → Autotask PSA, the Synchronization Status will list the last occurrence of a Configurations sync as a hyperlink. To view the sync logs, click the link text.
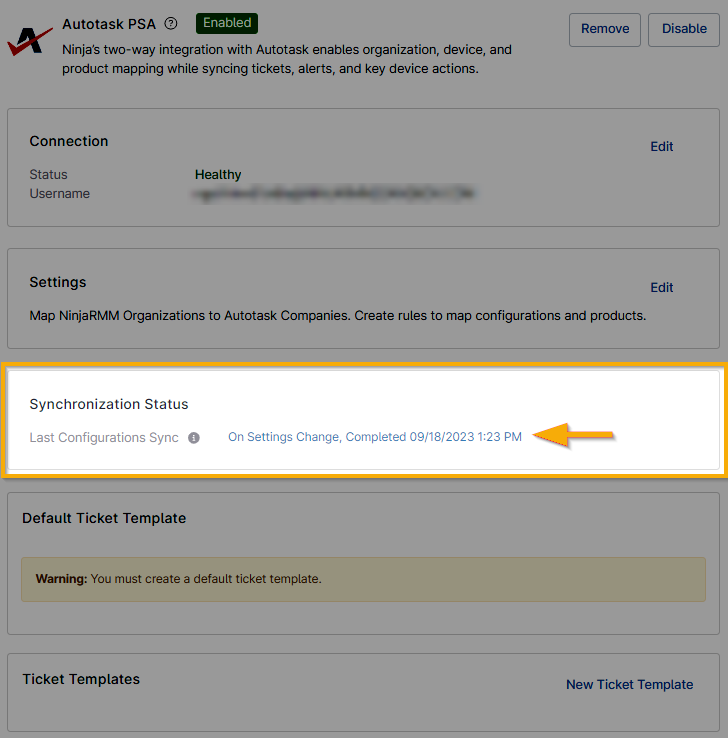
Figure 26: Synchronization Status (click to enlarge)
Sync logs carry a status of Informational, Warning, or Error and include a Message field that details the actions occurring during each sync. The Autotask integration generates logs under the following conditions:
- Full sync: If the configuration of the integration changes, a full sync will occur, resulting in log activity showing the results of the changes across all clients.
- By client: When the mapping of a client changes, a log entry will generate. The following actions trigger client-level log activity:
- Changes to company mapping
- Changes to device role mapping
- Modifications to the device role mapping used by the client
- By node: When a user or agent updates a recognized device, an activity log will generate for each device updated.
You can export sync logs to a CSV file by clicking the Export link on the Configuration Synchronization Logs screen.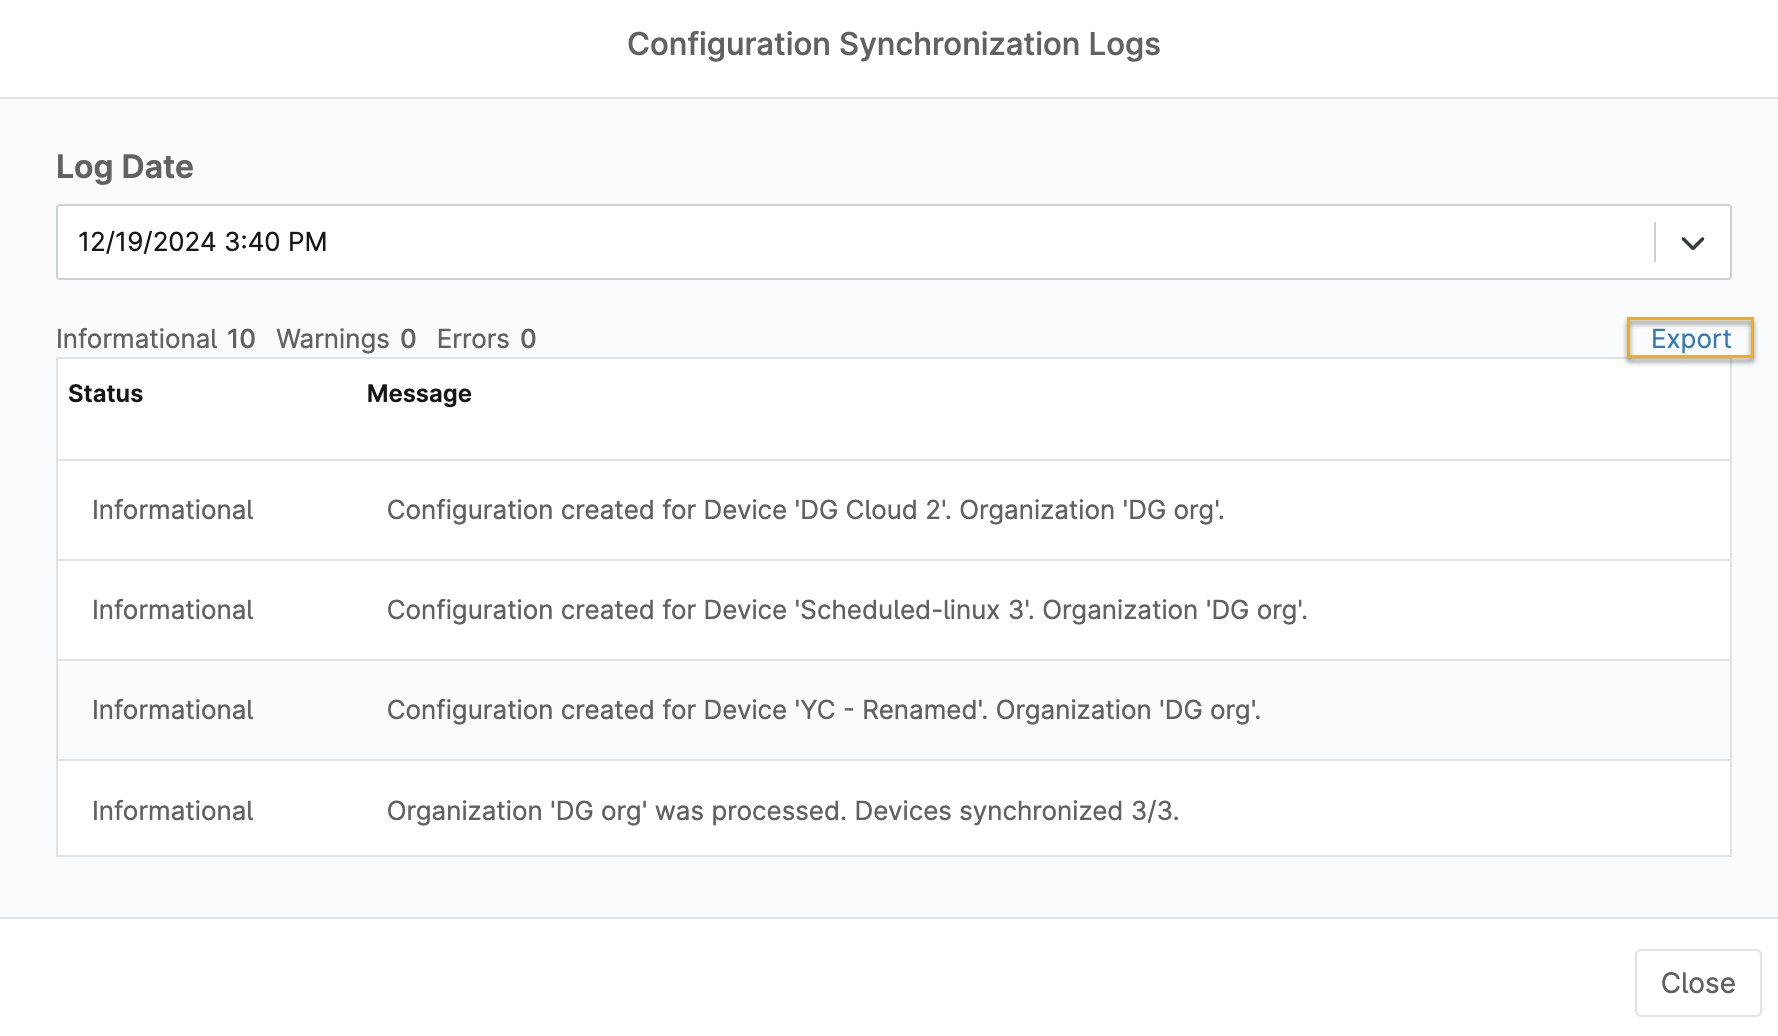
Figure 27: Configure Synchronization Logs → Export (click to enlarge)
Setting up Ticket Templates
To create a template for your tickets, perform the following steps:
- From the bottom of the Autotask configuration screen (Administration → Apps → Autotask), click New Ticket Template to the right of the Ticket Templates heading.
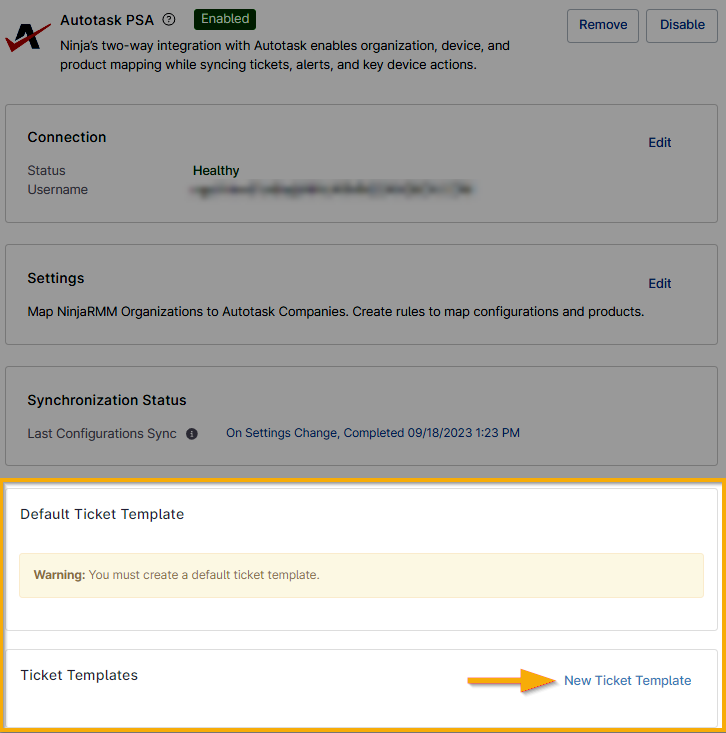
Figure 28: Ticket Templates → New Ticket Template (click to enlarge)
- Fill out the desired fields.
- At the bottom of the ticket template form, select how you want tickets to be handled if the condition that generated the ticket is reset. You can also select additional options if the condition is retriggered.
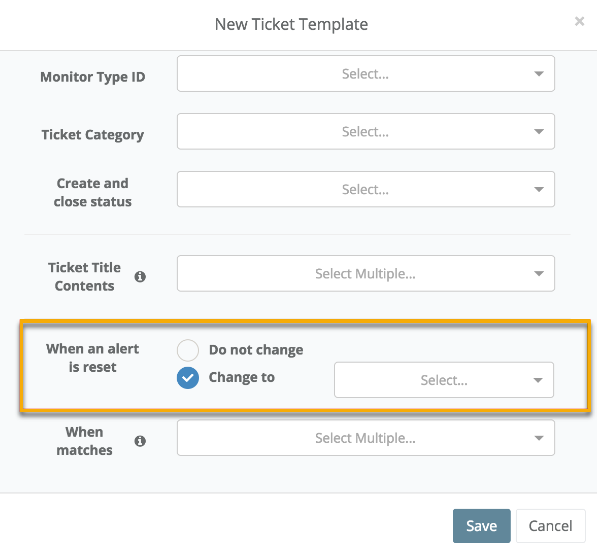
Figure 29: When an alert is reset → Change to
- If you select "Change to" for the condition reset, you should see two additional drop down menus. The dropdown to the right indicates the status that the new ticket will change to if the current status reflects what is selected from the When matches dropdown. If nothing is selected from the When matches dropdown, then any status will initiate the Change to status upon condition reset.
- For example, When matches is set to "New" and Change to is set to "In Progress." The alert is reset and the current ticket status is "New," so it will automatically update to "In Progress."
When a condition is triggered again, you can either create a new ticket or append the re-trigger to the existing open ticket.

Figure 30: When condition retriggers → Create new ticket
If you choose to append the condition to an existing ticket, you will be required to fill out additional fields to configure the related ticket.
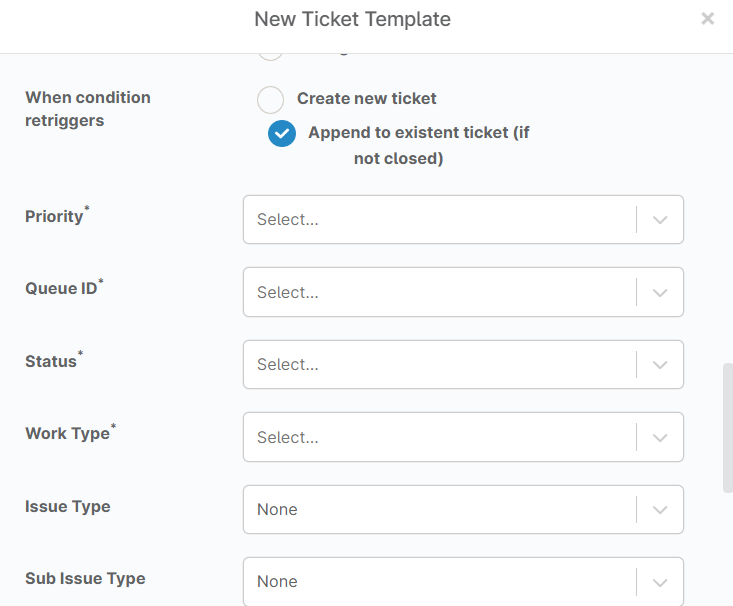
Figure 31: Append to existent ticket...
Additionally, if you'd like to have NinjaOne conditions reset when the associated Autotask ticket is closed, create a new extension from the Autotask end:
- Open the top left drop-down menu, select Admin, and then click Extensions & Integrations.

Figure 32: Admin → Extensions & Integrations (click to enlarge)
- Open the Other Extensions & Tools drop-down and click Extension Callout (Tickets).
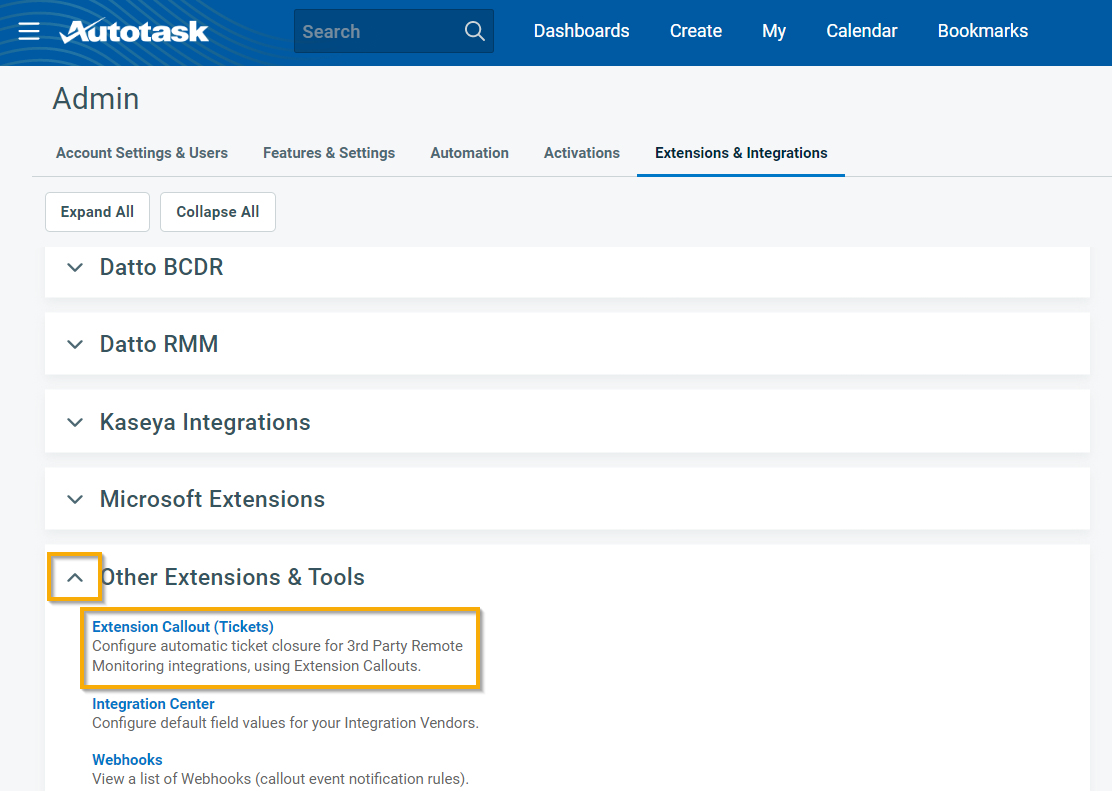
Figure 33: Other Extensions & Tools → Extension Callout (Tickets) (click to enlarge)
- Click the New Extension Callout button and set up the new extension per the screenshot below, using one of the following URLs (depending on the NinjaOne instance you use):
- US2: https://webhook-us2.us2.ninjarmm.com/webhook/autotask/callback
- NA: https://webhook.ninjarmm.com/webhook/autotask/callback
- EU: https://webhook-eu.ninjarmm.com/webhook/autotask/callback
- OC: https://webhook-oc.ninjarmm.com/webhook/autotask/callback
- CA: https://webhook-ca.ninjarmm.com/webhook/autotask/callback
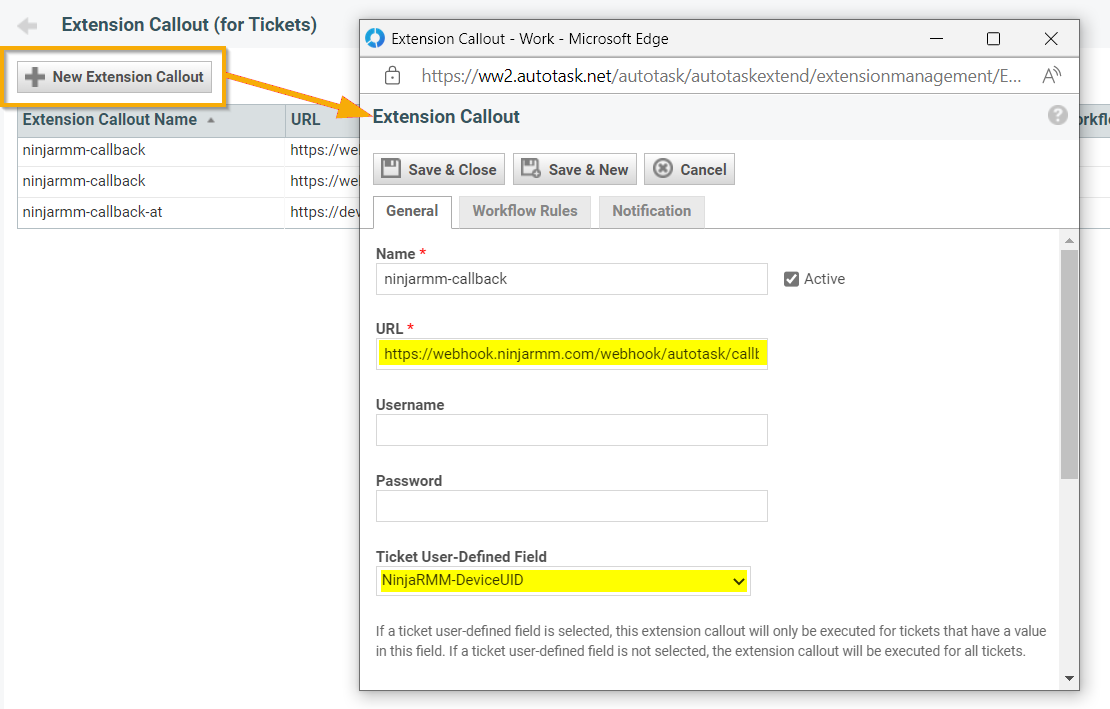
Figure 34: New Extension Callout → Extension Callout (click to enlarge)
- Next, create a new workflow. You can do so by going back to the Admin page and opening the Automation tab, then by expanding the Workflow Rules drop-down and clicking Workflow Rules.
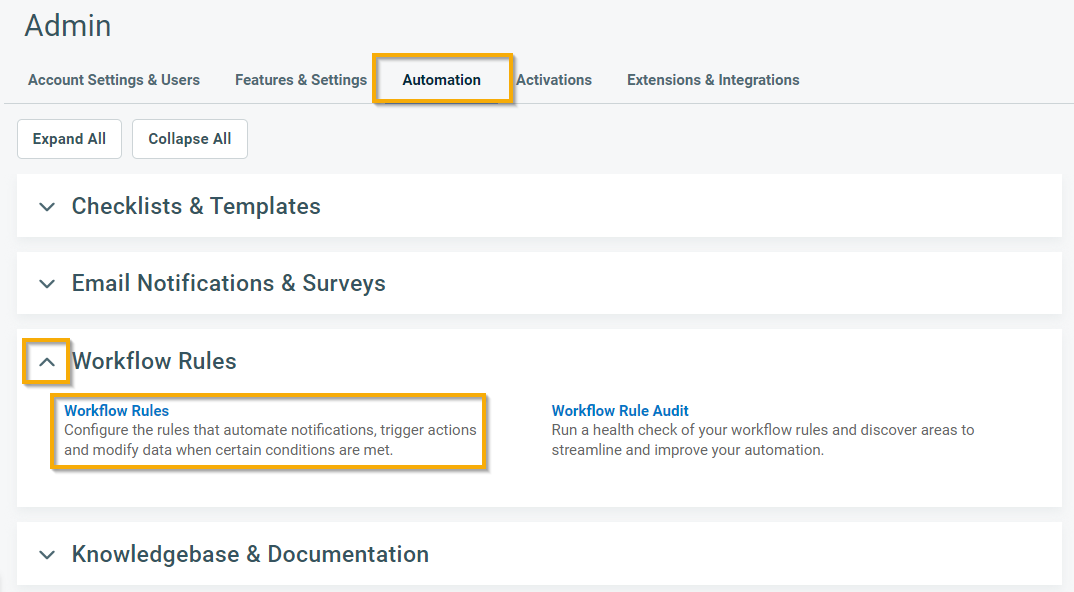
Figure 35: Workflow Rules (click to enlarge)
- The Service Desk tab should be open by default; click New in the top left to create a new workflow.
- Configure the workflow per the screenshot below.
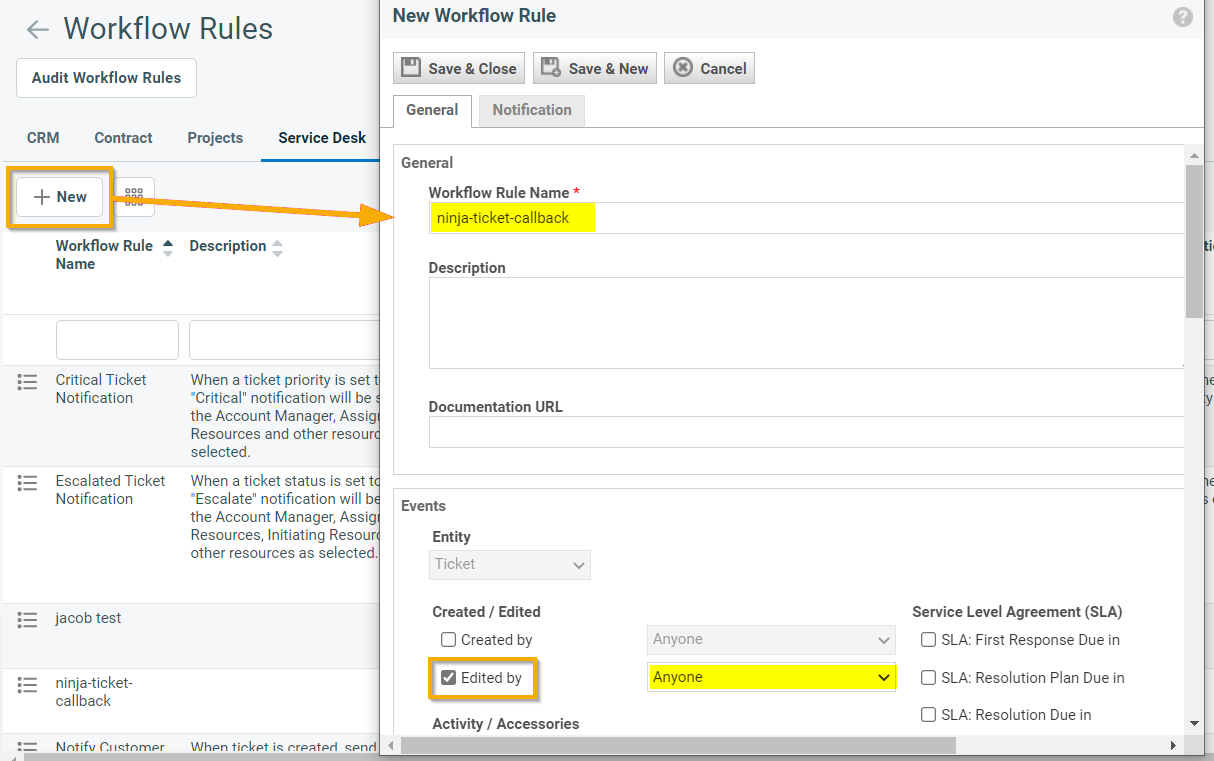
Figure 36: New → Workflow Rule Name (click to enlarge)
- Scroll to the bottom of the New Workflow Rule popup window until you see the Actions section. Create an action in the workflow that references the extension you created.

Figure 37: Actions (click to enlarge)
Additional Resources
For a list of frequently asked questions about our Autotask integration, review our Autotask: FAQ content.