Topic
This article provides instructions for the fourth part of the ServiceNow setup in NinjaOne.
Before you begin this step, you must complete Steps 1–3:
- Add the NinjaOne Application Registry to ServiceNow.
- Create an API User in ServiceNow.
- Configure NinjaOne Table Access in ServiceNow.
For a comprehensive overview of the setup process, refer to NinjaOne Integrations: Getting Started With ServiceNow.
Environment
- NinjaOne Integrations
- ServiceNow
Description
Creating the API user and application registry in ServiceNow allows you to activate the ServiceNow application in NinjaOne. However, the integration will be one-sided until you complete the following steps in NinjaOne.
- In NinjaOne, navigate to Administration → Apps → API and open the Client app IDs tab. Click Add.
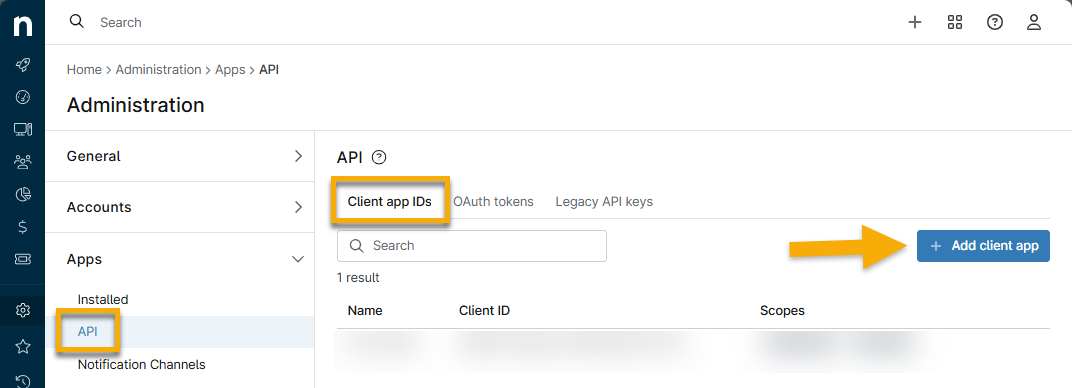
Use the following table to complete the applicable fields.
Field Data Application Platform API Services (machine-to-machine) Name ServiceNow Scopes Monitoring and Management Allowed Grant Types Client Credentials - Copy the client secret credential that appears in the confirmation dialog and save the API configuration.
- In ServiceNow, open the All menu at the top of the page and type ninja into the search field.
- You should notice a result for NinjaOne Integration. Click Configuration.
- Click the NinjaOne Configuration Settings option.
- Use the table below to update the applicable fields.
| Field | Data |
|---|---|
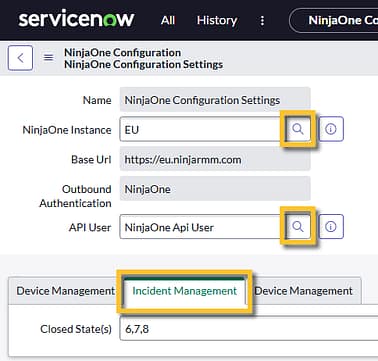
| NinjaOne Instances | Click the magnifying glass icon and select an option from the NinjaOne Instances modal. "Instance" refers to the region you select when logging in to NinjaOne. You can determine which region you are in by checking the base URL. |
| API User | Click the magnifying glass icon and search for the name of the API user (first, last) that you created for Create an API User in ServiceNow. |
| Incident Management | Input 6,7,8. Do not enter any spaces between characters. These statuses are suggested to identify incidents that are in a closed state. You can customize these statuses to your preference. When the state is updated in ServiceNow, the data will be sent to NinjaOne. Only incidents created by the selected API User will use these states. |
- Click Update.
- Reopen the NinjaOne Configuration Settings page. You should now see NinjaOne at the Outbound OAuth Registry tab, and an Open NinjaOne Instance hyperlink at Related Links.
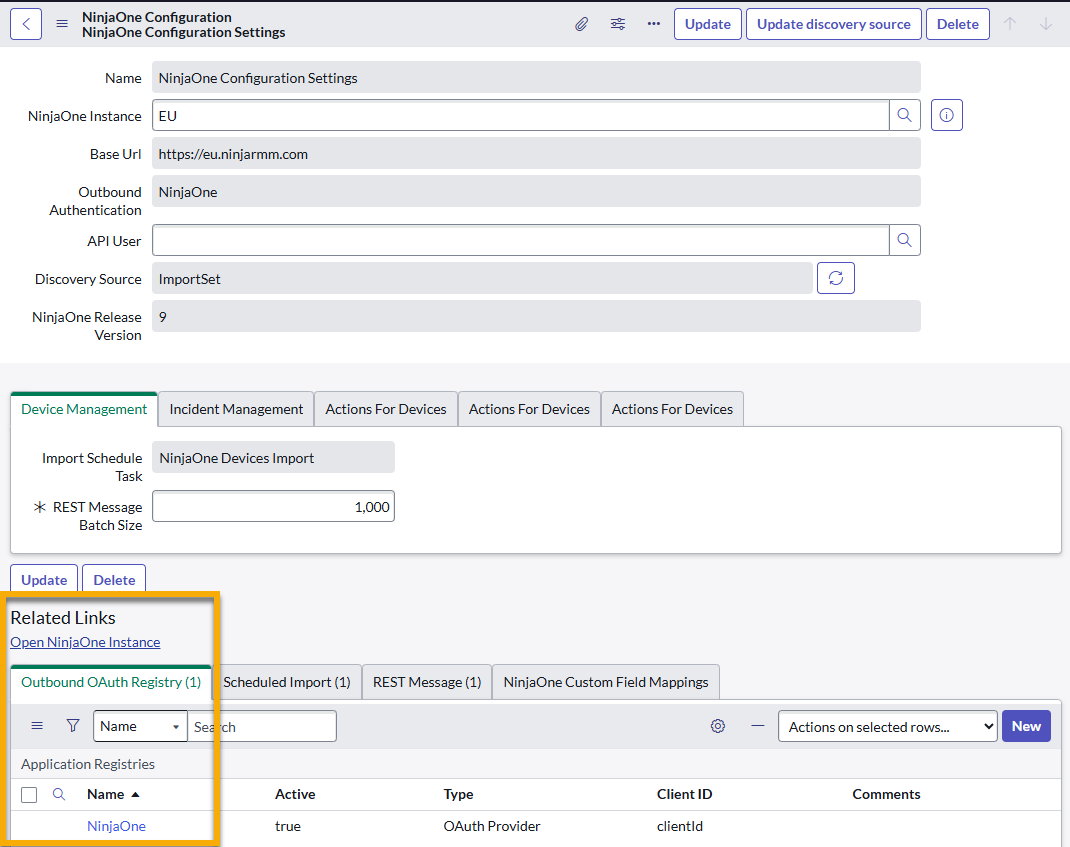
- Verify the endpoint: Open the REST Message tab and ensure the Endpoint matches the Base URL.

- Open the NinjaOne Instance link in a new tab. You'll be directed to the ServiceNow app page in NinjaOne. Leave this tab open for now and return to the NinjaOne Configuration Settings page in ServiceNow.
- Click the hyperlink in the Outbound OAuth Registry tab.
- The Application Registries record will open.
- You may find a banner regarding the current application at the top of the page. If so, click the here hyperlink to edit the record.
- In the Client ID field, paste the Client ID from NinjaOne → API → Client App IDs, which you created in Step 2 of this section.
- In the Client Secret field, paste the client secret credential from Step 3 of this article.
- Click Update.
- Go back to the NinjaOne Configuration Settings page. Test the connection by opening the REST Message tab, clicking the NinjaOne Integration REST hyperlink, and then clicking Get OAuth Token.

Additional Resources
Once you have activated the integration, you can configure the settings for ServiceNow in NinjaOne. For more information, refer to the Configure ServiceNow Settings in NinjaOne section in the following article: NinjaOne Integrations: Getting Started With ServiceNow.