Topic
This article explains how to use Quick Connect to provide ad hoc support and rapid deployment.
Environment
NinjaOne Remote
Description
NinjaOne Quick Connect is a remote access tool designed for ad hoc support and rapid deployment, unlike NinjaOne Remote, which works with devices already integrated into NinjaOne. Quick Connect allows immediate, one-time access to devices without pre-installed agents, making it ideal for new client onboarding, emergency support, and managing devices not regularly monitored in the remote monitoring and management (RMM) system. Quick Connect streamlines the remote connection process for rapid problem resolution or RMM deployment in many contexts.
Quick Connect allows you to perform the following actions:
- Create invitations for specific recipients and manage the expiration of these invitations.
- Launch remote sessions on a device.
- Deploy the NinjaOne agent to devices.
View additional tutorials in our video library.
Select a topic to continue.
- How Quick Connect Works
- Activate Quick Connect
- Connect to a Device with Quick Connect
- Add Devices to Quick Connect
- Launch a Remote Session
- Deploy the RMM Agent
- View Quick Connect Activities
- Additional Resources
How Quick Connect Works
Quick Connect, also known as Share My Screen in the N1 Assist app, is a form of remote access that allows technicians to connect to unmanaged devices through a secure connection, which installs the NinjaOne Remote agent on the unmanaged device.
Quick Connect enables agent deployment by providing a unique link, access code, or email. You can configure the invitation to expire or override access confirmation. Once deleted from Quick Connect, the agent should uninstall itself.
Activate Quick Connect
You must activate Quick Connect in NinjaOne before you can use it.
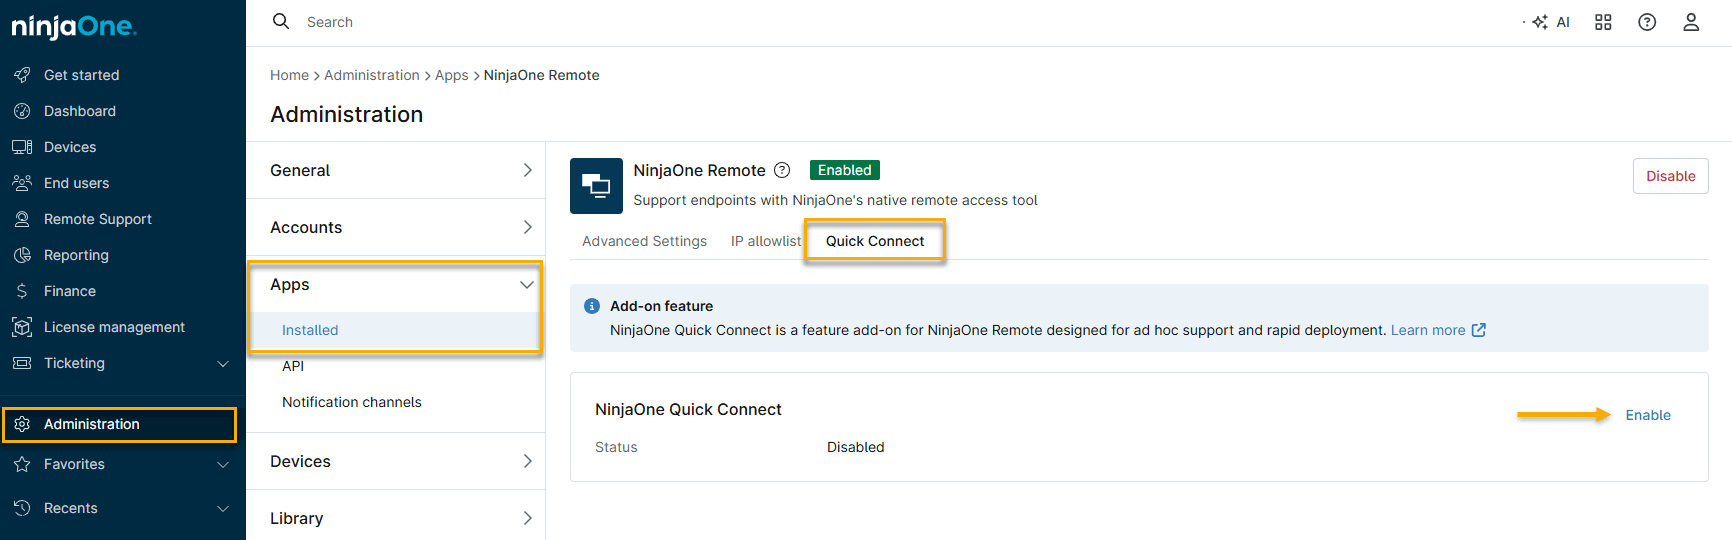
- In NinjaOne, navigate to Administration → Apps → Installed and select NinjaOne Remote.
- Open the Quick Connect tab and click Enable. Then, click Enable again in the confirmation window.
After activation, the Quick Connect tool will appear in NinjaOne. For more information, refer to the
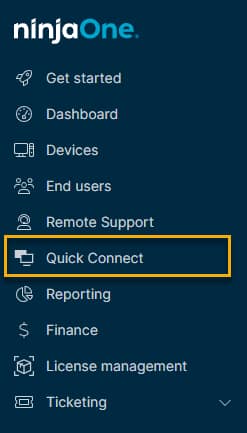
Connect to a Device with Quick Connect
To connect to a device with Quick Connect, perform the following steps.
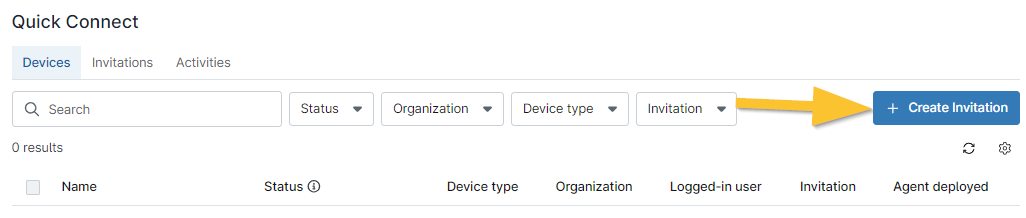
- In NinjaOne, click Quick Connect, then click Create invitation.
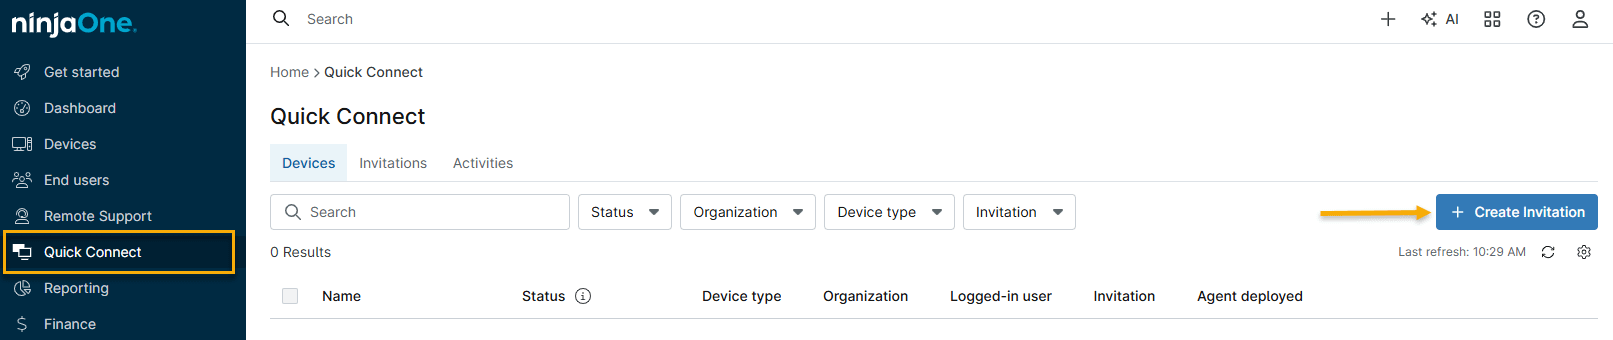
- The Create invitation window will open. Enter the following information, then click Create.
| Field | Explanation |
|---|---|
| Name | Give the connection a descriptive name. |
| Description | Add an optional description for the connection. |
| Organization (optional) | Select the organization that owns the device. |
| Expires | Specify the connection duration. |
| Ask for confirmation before connecting | Require permission from the end user to launch the session. |
The Quick Connect dashboard opens with the Devices tab displayed by default. The Invitations tab allows you to add, manage, or remove devices, and the Activities tab shows event details for connected devices.
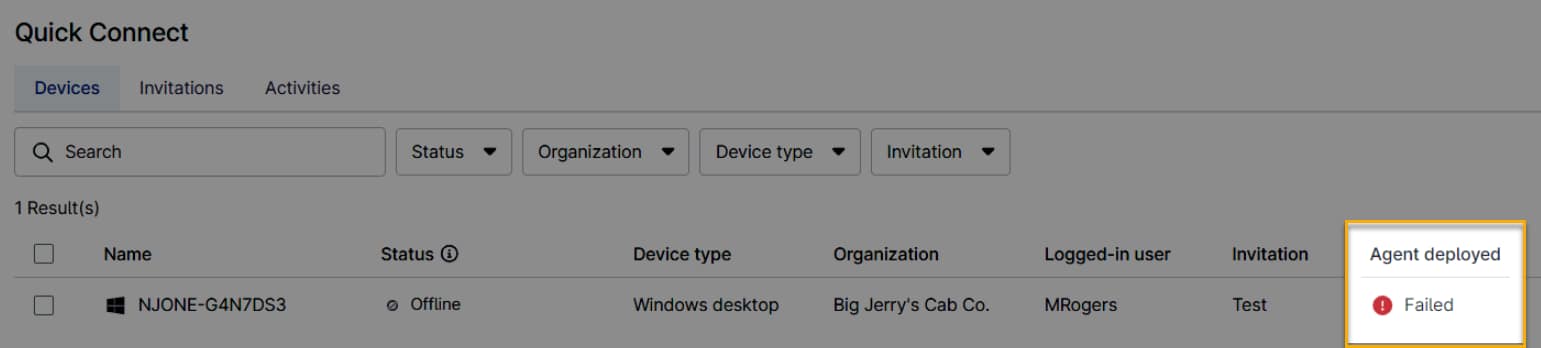
In addition to deploying the agent or launching a remote session from the Devices tab, you can also view the Agent Deployed status of all devices invited to the Quick Connect dashboard:
| Deployment Status | Description |
|---|---|
| Unavailable | The device is already being managed by NinjaOne under another division. |
| Deployed | NinjaOne agent has been successfully installed. |
| Agent already installed | The device is already managed by an organization in your division. |
| Failed | Unable to install NinjaOne agent. Failures will display the cause when you place your cursor over the status. Click the device row to view details. You can delete the device or attempt to deploy the agent again. |
| Pending | The NinjaOne agent is being installed. |
Add Devices to Quick Connect
To add the Quick Connect launcher on the target device:
- In NinjaOne, click Quick Connect, then select Create Invitation.
Give your invitation a title and optional description. Update the remaining fields according to the table below, then click Create.
Field Purpose Organization (optional) Select the organization that owns the devices with which you want to launch a session. Expires Determine when the invitation expires. If you select Custom, you can enter a specific calendar date into a new field. If you select On use, the invitation will become invalid once the remote session begins.
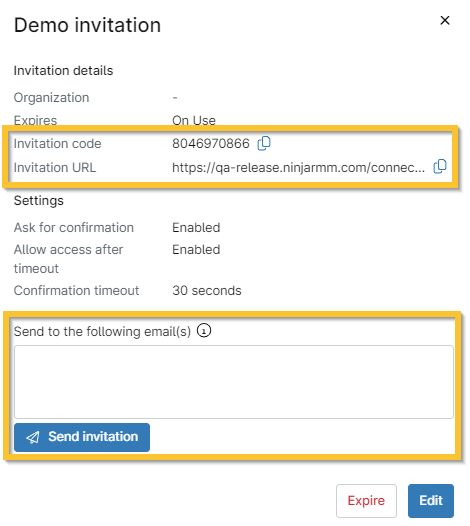
Once an invitation expires, users cannot starta new sessionuntil a new invitation is sent out.Ask Confirmation (optional) Request permission from the end user to launch the session. Allow after timeout This option only displays if you activate the Ask Confirmation toggle first. When activated, the system will grant remote access if the end user does not respond within the timeout threshold as specified in the Confirmation timeout field. Confirmation timeout This option only displays if you activate the Allow after timeout toggle switch. Select an amount of time to pass before enabling access without the end user's confirmation. - The Quick Connect window will update to provide the invitation code and URL, which you can share with the customer or client device to initiate the session. You can copy these or use the text field to send the invitation to one or more email addresses, separated by commas. Click Send invitation to send via email. These invitations enable remote connections for mobile devices when the user activates the link from their device's mail app.
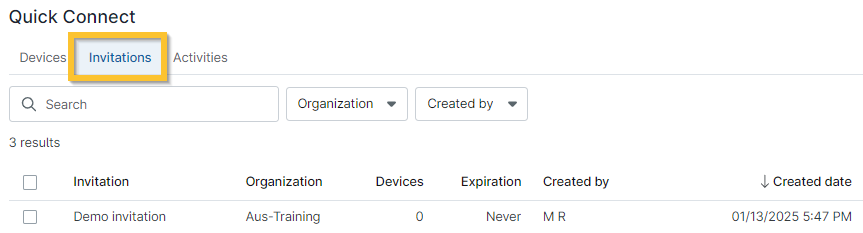
You can view the created invitations on the Quick Connect dashboard's Invitations tab. From this tab, you can edit, expire, or send the invitation to additional recipients.
Remove an Invitation
You can expire an invitation by editing it or editing the deployment settings on the device.
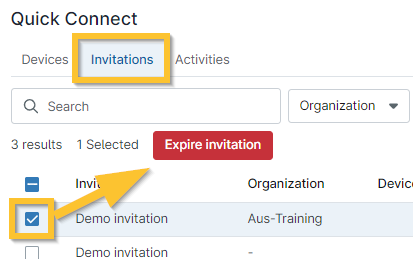
- In Quick Connect, navigate to the Invitations tab.
- Select the checkboxes next to the invitations, then click Expire. Alternatively, you can click the invitation name and click the Expire invitation button.
Any devices previously connected using the currently expired invitation will remain connected; NinjaOne will not remove devices. To delete a device from the devices list, you must enter both the email and on-demand password (ODP) code.
Edit an Invitation
Currently, you can only edit the name and description of an invitation.
- Navigate to the Invitations tab within Quick Connect and click the invitation name.
- The Invitation manager window will open. Click Edit, then adjust the name and description. After making your edits, click Save.
Launch a Remote Session
Follow these instructions to launch a remote session through Quick Connect.
Special Considerations
Before you begin, note the following details regarding security, permissions, and connectivity.
- Depending on your security setup, you may need to prompt your browser to trust the file.
- If devices are not present on the Devices tab, you must first create an invitation, send the link to the target device (for example, as an email), and then install the Quick Connect launcher.
- You cannot connect to a device unless it is online.
- The installation of Quick Connect does not require administrator rights, allowing end users to access the software.
- If the technician has access permission for NinjaOne Remote and Quick Connect set to Allowed, but does not have access permission to create a new device, they will not be able to deploy the NinjaOne agent to a Quick Connect device.
Procedure
- Once the recipient has opened the link from the invitation, the system prompts the target device to confirm the remote session. Click Connect to proceed. The target system will download the Quick Connect software installer.
- Access your downloads and open the file. When installing the Quick Connect software, your operating system (OS) security features may alert you. In this example of a Windows device, select Run Anyway.
- Once the software installation is complete, select the device and then click Connect to remotely access it from the Devices tab.
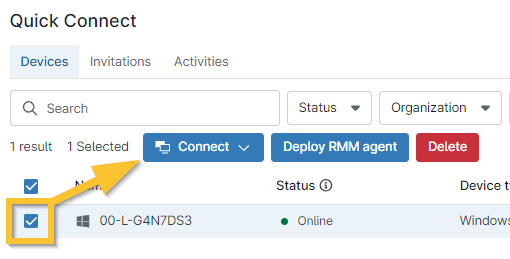
Connect As
The Connect As option allows technicians to select and connect to a device using administrator credentials, which unlocks additional tools for technicians to assist customers.
Connecting with Connect As
Follow these steps to connect to a device through the Connect As feature.
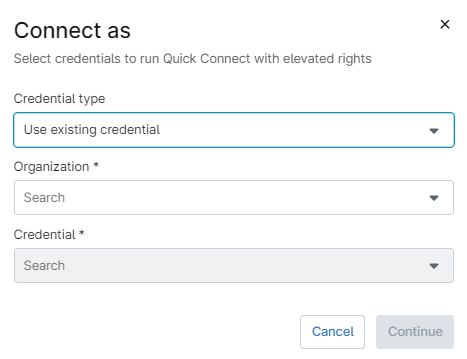
- Select a device, then click Connect → Connect As.
- Enter credentials with administrator access. You can select existing or one-time credentials. One-time credentials require knowledge of the administrative username and password.
Connect with the NinjaOne Assist App
The NinjaOne Assist mobile application now supports screen sharing using Quick Connect. The technician must create an invitation on the Web app and share it with the end user, who will enter the code on their device after tapping Share My Screen within the mobile app.
The Quick Connect section of the NinjaOne web app will update the list of devices to include the mobile device, where technicians can connect or deploy the NinjaOne agent. After the technician connects, the end user will start the broadcast and confirm their agreement to share content.
Deploy the RMM Agent
You can use Quick Connect to deploy the NinjaOne agent to devices.
- From the Quick Connect Devices tab, click the device to which you want to deploy the agent, then click Deploy RMM Agent.
- The Deploy RMM agent window will open. Decide which organization and location to assign to the device and any optional credentials. To use credentials not listed in the drop-down menu, click Add Credential. You'll also have the option to uninstall the Quick Connect software. Once you've selected the deployment settings, click Deploy.
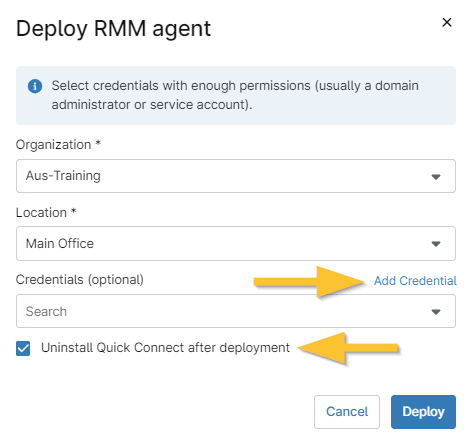
A notification will appear on the NinjaOne UI alerting that the deployment has begun, and the Agent deployed status column will update on the Quick Connect Devices tab.
View Quick Connect Activities
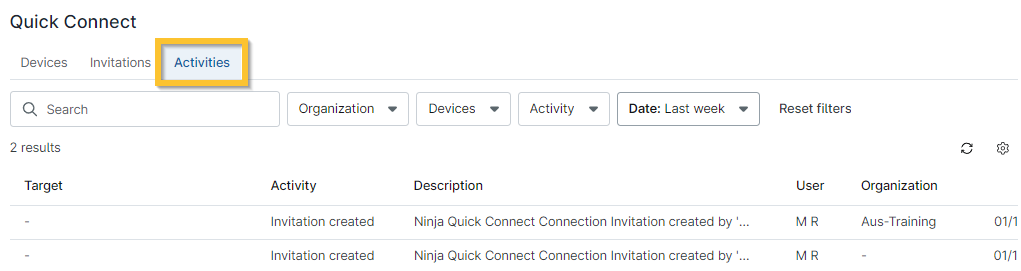
On the Activities tab in Quick Connect is a log of invitation creation and deletion, agent deployments, and other Quick Connect events.
Details provided in activities include the target of the remote session, the type of activity, a description of the activity, the associated user, and the date and time of the activity.
Additional Resources
Refer to Remote Access: Resource Catalog to learn more about connecting to devices with NinjaOne Remote.