Issue
I configured the application registries and the user as described in NinjaOne Integrations: Getting Started With ServiceNow, but the integration is not working.
Environment
- NinjaOne Integrations
- ServiceNow
Cause
There are a couple of possibilities explaining why this issue occurs. We will outline all known remedies in the following Resolution section. If the following resolutions do not resolve the issue, contact NinjaOne Support.
First, you should verify that you meet all allowlisting requirements. Refer to NinjaOne Global Allowlist Information for more information.
Resolution
Issues Related to REST API Access Policies
Creating the API user and application registry in ServiceNow allows you to enable the ServiceNow application in NinjaOne. To determine whether the connection issues are related to the REST API plugin, first verify that the REST API access policy is active. To do so, perform the following steps:
- Navigate to All → System Applications → All Available Applications → All.

- Use the search filter to find the REST API Access Policy plugin. You can search for it by the name REST API Access Policy Plugin or plugin ID com.glide.rest.policy.
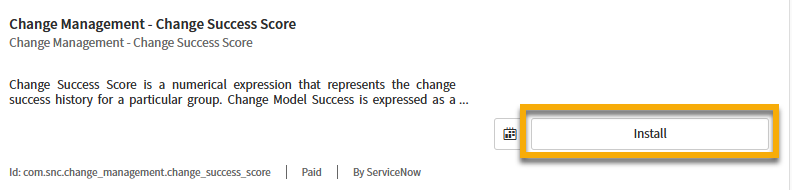
- If you have not installed the plugin, click it to open the management page and then click Install. The following figure shows an example of where you can find the button on the application manager page.

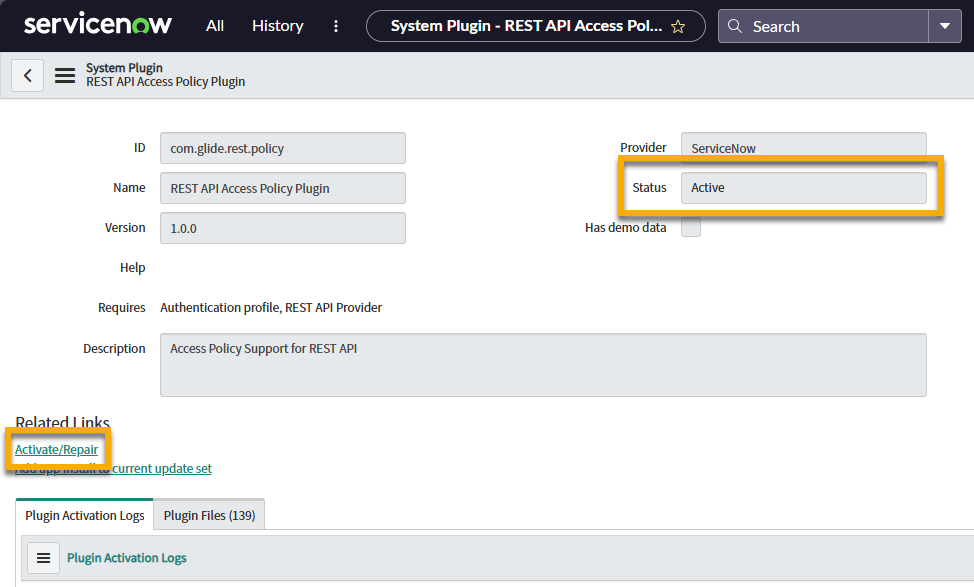
- Verify the plugin Status displays Active. If it is Inactive, this indicates that the plugin is not active. Click Activate/Repair or Repair to resolve the issue.

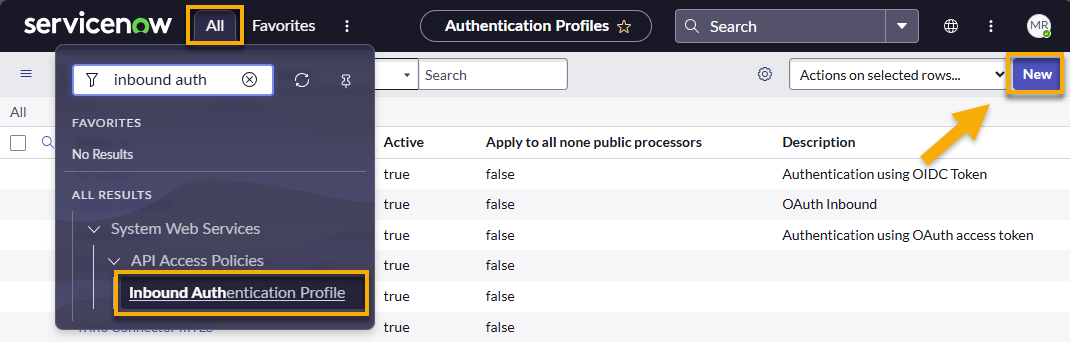
- Once the plugin is active, you must configure it. Navigate to All → System Web Services → API Access Policies → Inbound Authentication Profile.
- Click New.
- Select Create standard http authentication profiles.
- Use the following table to complete the applicable fields.
| Field | Data |
|---|---|
| Name | Enter Ninja OAuth. |
| Description | Enter Authentication profile for NinjaOne OAuth. |
| Active | Select this checkbox. |
| Type | Enter OAuth. |
| OAuth Entity | Click the magnifying glass (search) button and select the entity that you registry in the Application Registry in Service Now. For instructions to create the Application Registry, refer to NinjaOne and ServiceNow: Enable the Integration. |
- Click Submit.
- Double-click Insert a new row in the Authentication Policy tab.
- Click the magnifying glass (search) button.
- Select Allow Access Policy.
- Click the green check mark to save the changes.
- Click Update.
Check Ninja Application OAuth Credentials in ServiceNow
Insufficient or incorrect OAuth credentials may cause the integration to fail. This section explains how to check the credentials and change them if needed.
- Log in to an active instance in ServiceNow with an administrator role.
- Navigate to All → System OAuth → Application Registry.
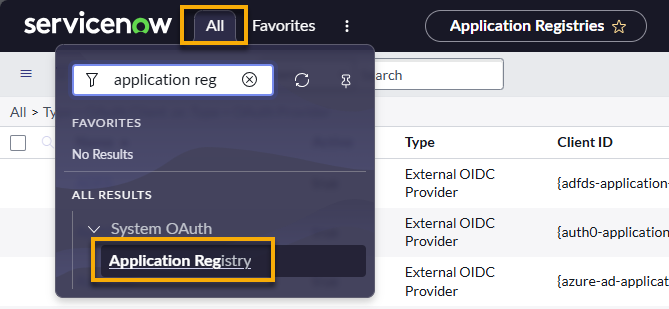
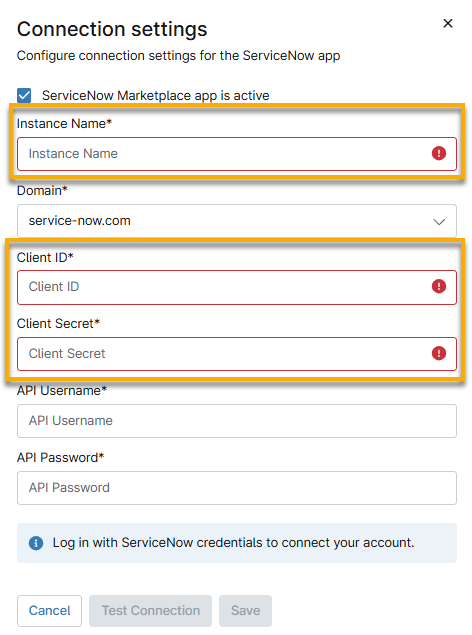
- Search for NinjaOne OAuth or NinjaOne OAuth Client, as this is the name recommended for use in our NinjaOne and ServiceNow: Enable the Integration guide. Open the record to find the Client ID and Client Secret.
- Click the lock button to show the Client Secret.

- To obtain the data for Instance Name when you enable the ServiceNow integration in NinjaOne, find the value in the URL bar between https:// and service-now.com.
- Log in to NinjaOne as a system administrator and enable the ServiceNow app. Enter the applicable data as indicated.