Topic
This article discusses deploying a Microsoft Windows image via the Imaging and OS Deployment feature in NinjaOne. For additional tips on using this feature, refer to NinjaOne: OS Deployment Tips and Tricks.
Environment
NinjaOne Endpoint Management
Description
The OS Deployment feature captures a Microsoft Windows image configured to your organizational requirements and deploys it in bulk to your Windows machines. OS deployment is a two-part process:
- Capture a generalized Windows image to serve as the deployment template.
- Deploy the image to the machines in your inventory.
Refer to the following sections for instructions on creating and deploying your OS image.
- Before You Start
- Procedure
- Provision Bootable Media
- Image Capture
- Deploy the Image
- Troubleshooting
- Additional Resources
Before You Start
To provision a Windows image using the OS Deployment tool and host the bootable image on a network storage device, you will need:
- a Windows machine with settings and options configured for deployment
- a connection to an SMB network share to store the deployable image
Procedure
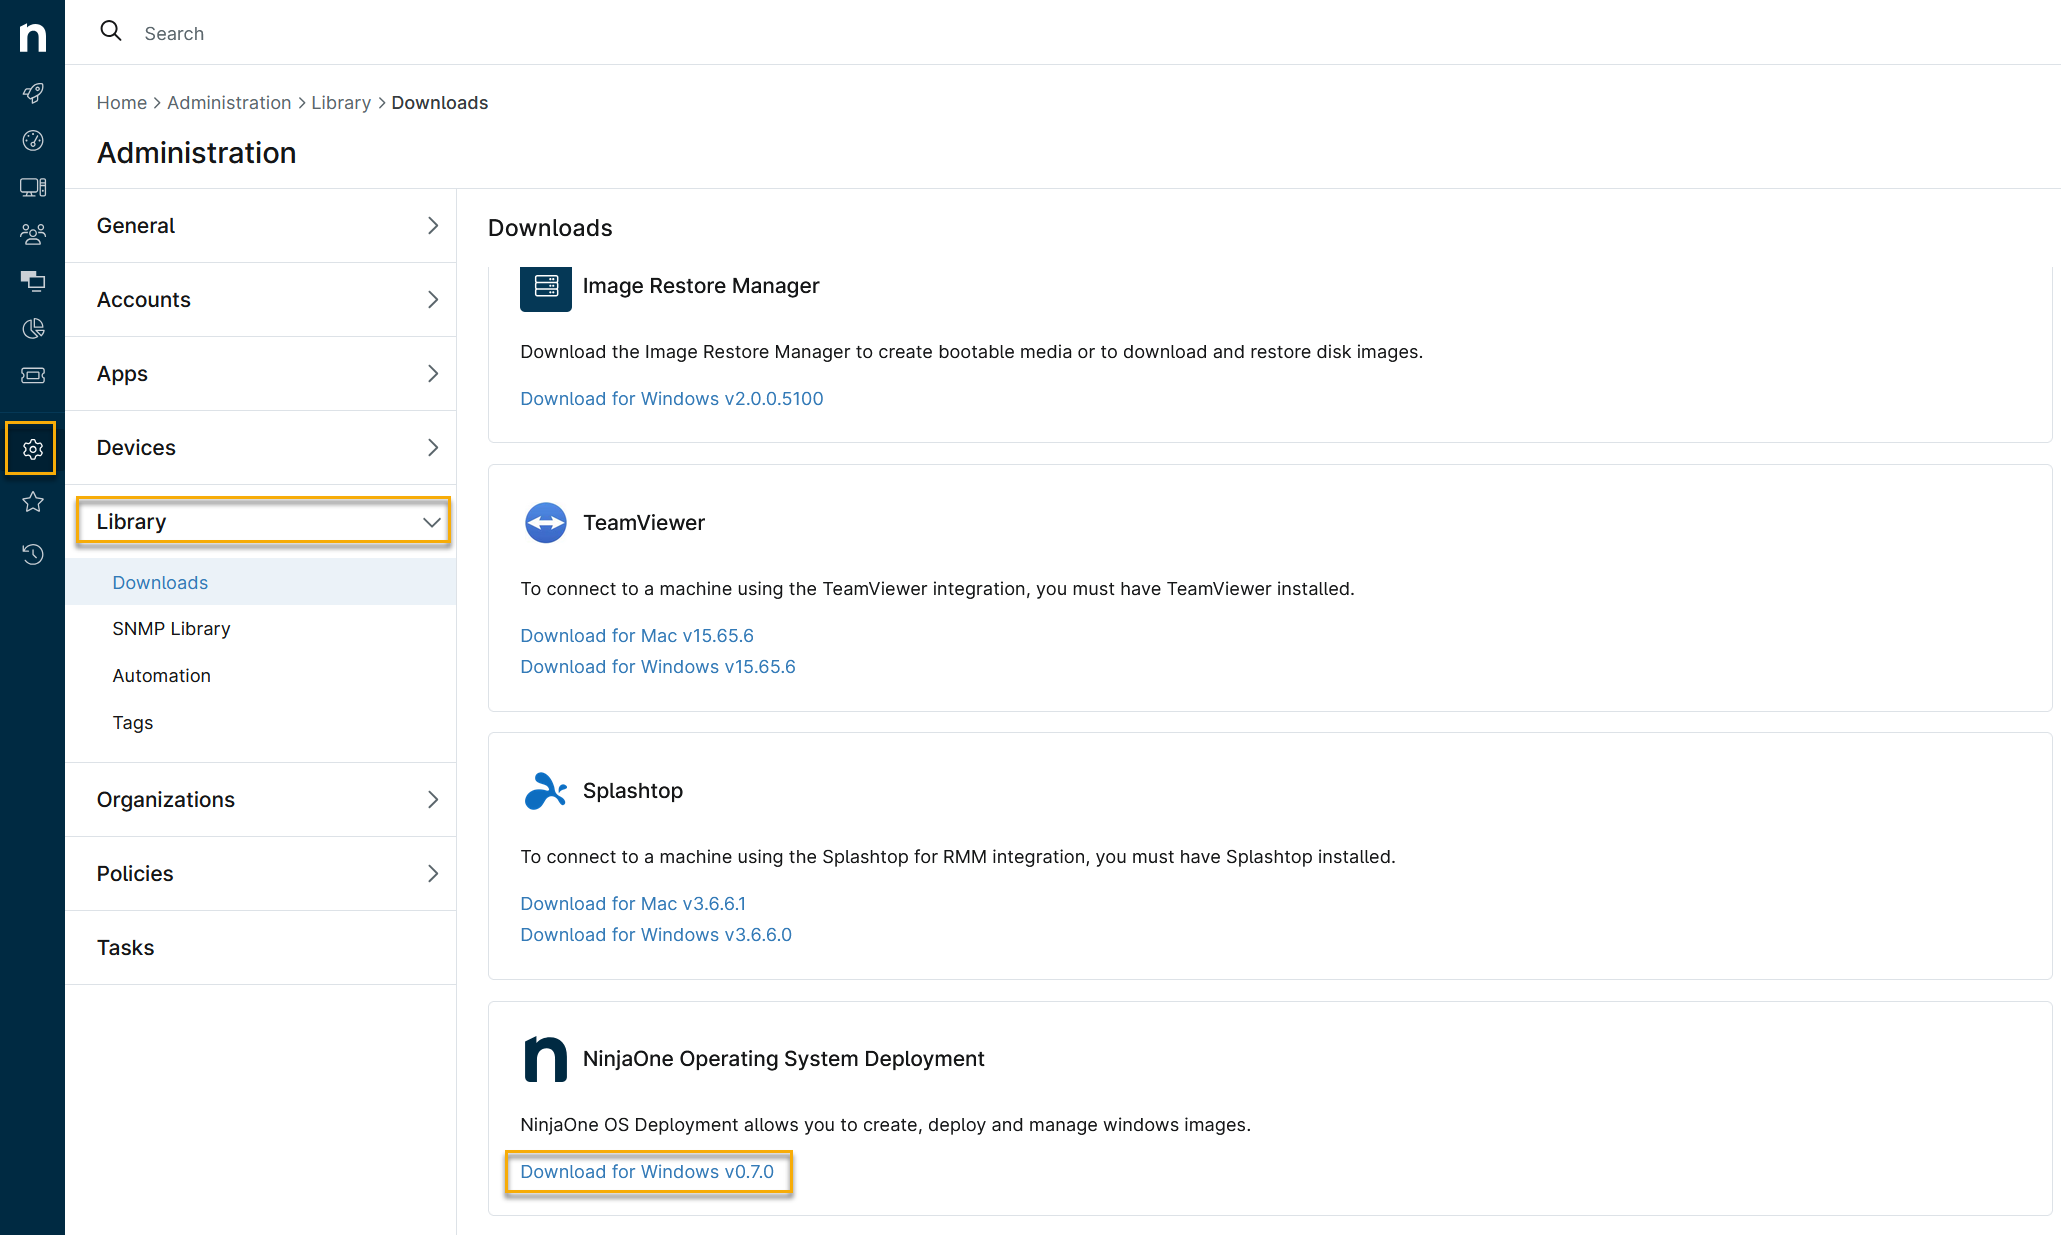
- In NinjaOne, click Administration in the navigation menu, then select Library → Downloads from the flyout menu.
- Scroll to NinjaOne Operating System Deployment.
- Click Download for Windows to begin the download.
Provision Bootable Media
The Windows application creates bootable media that you can use to capture an existing Windows image and deploy it to other machines.
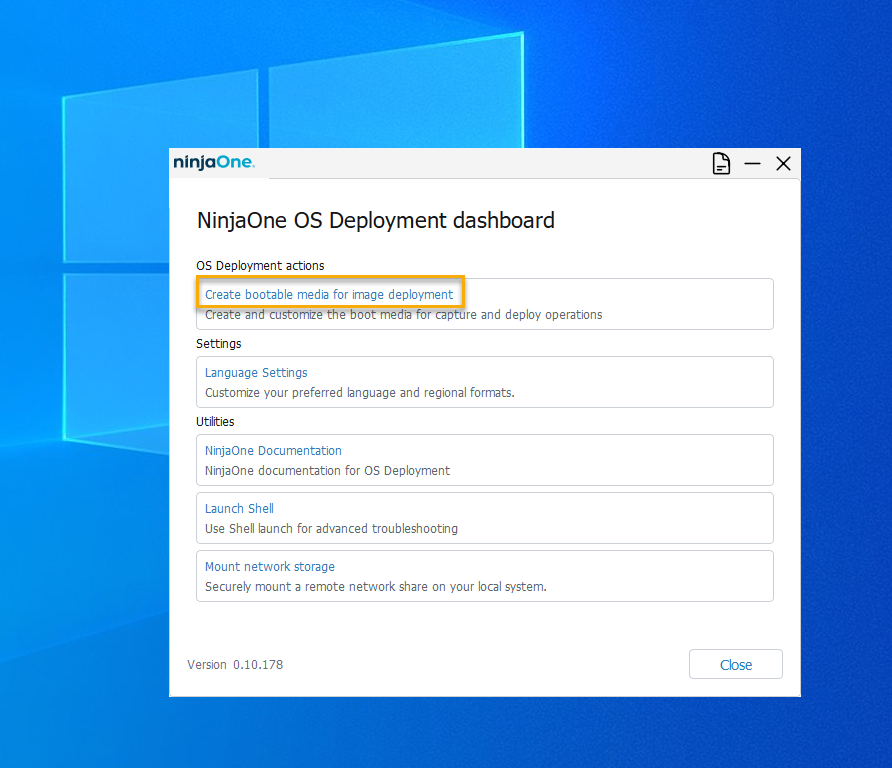
- Run the NinjaOSDeployLauncher executable from any Windows machine.
- Select Create bootable media for image deployment.
- Configure the following options:
- Build type options are WIM, ISO, and USB. Each build type has a different use case:
- Create as WIM: Select this option if you are using a PXE server to capture or deploy your images. This setting will provide a WIM format file you can use to boot from the PXE server.
- Create as ISO: Choose this option if you are loading the OS Deployment tool on a virtual machine to capture and deploy future images.
- Create as USB: Select this option if you want to flash the OS Deployment tool directly to removable media. This format is ideal for deployment without a PXE server, allowing you to load the OS Deployment tool on each machine you are provisioning individually.
- In Location to save boot media, select a storage location for the file (or select the removable media if creating a USB), then click Create.
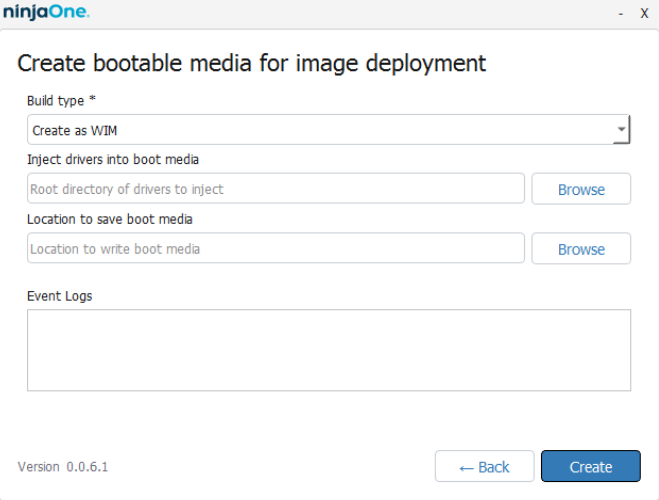
Image Capture
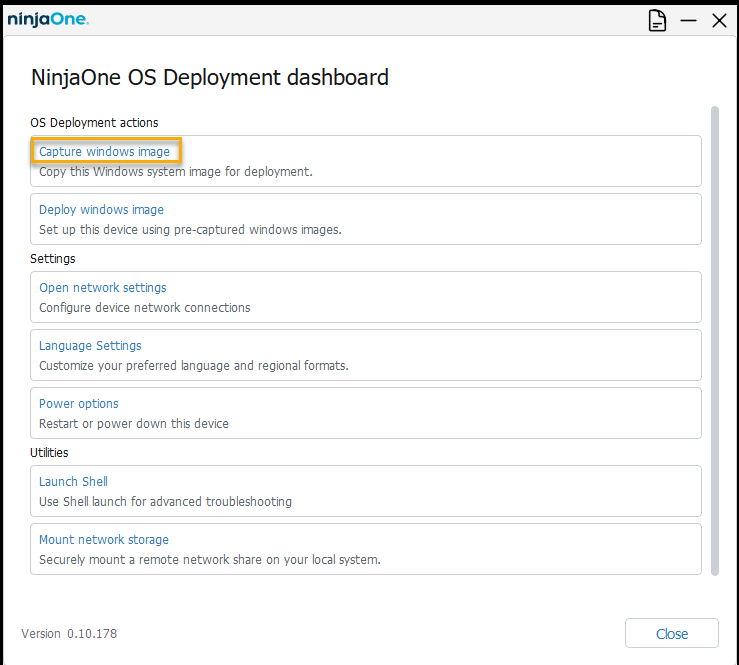
- On the Windows machine you wish to capture an image of, boot the machine to the bootable media created in the Provision Bootable Media section above. You may need to adjust the machine's boot order so that the hard disk is not the first bootable device.
- Once the OS Deployment tool has booted, select Capture Windows image.
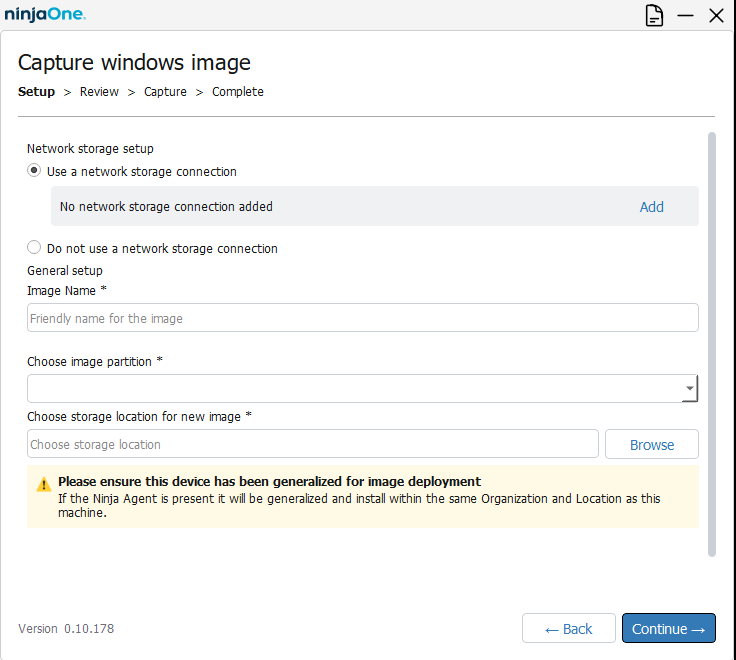
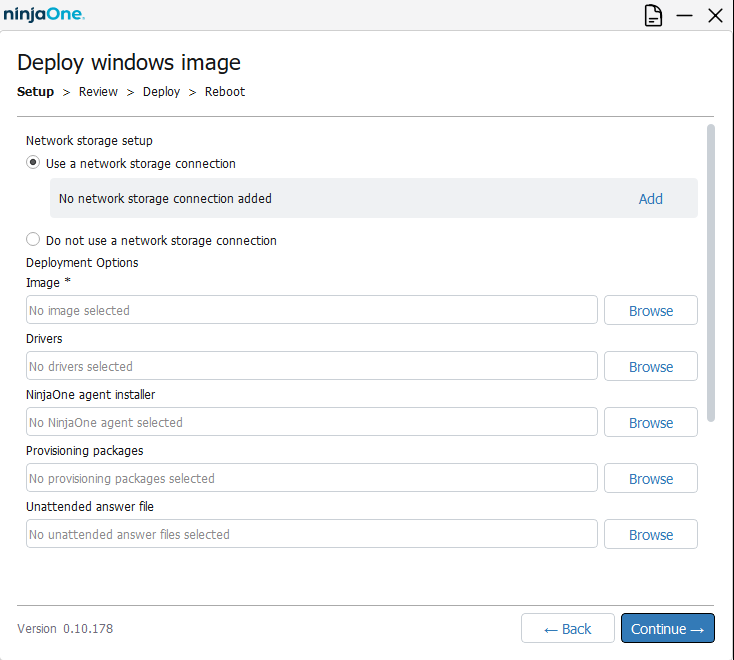
- In Network Storage Setup, select Add and enter the network storage path and credentials used to connect to the network storage. After connecting your network storage, configure the following capture options:
- Image Name: Enter a friendly name to describe the image you are capturing for future deployments.
- Choose Image Partition: Select the disk on which you wish to base the image.
- Choose storage location for new image: Select the directory where you saved your captured image. When you have finished making your selections, click "Continue."
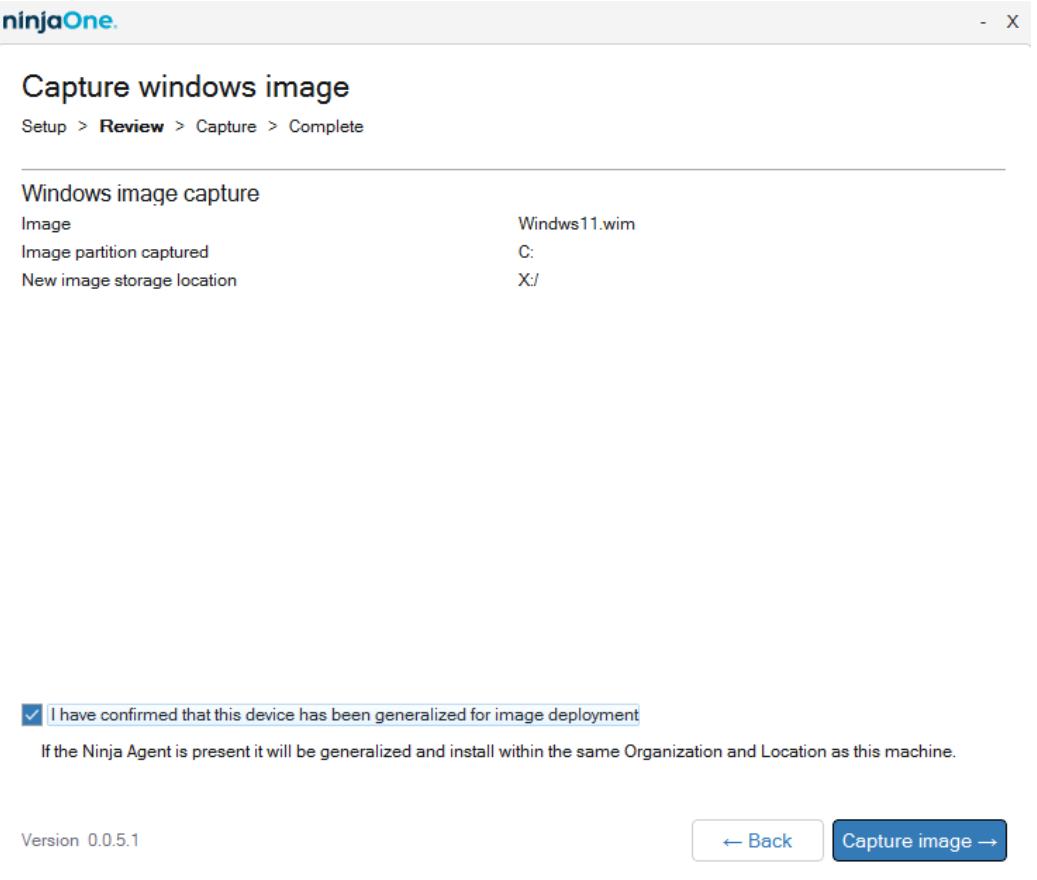
- On the summary screen, verify that the capture details are accurate. Then, select the checkbox to confirm you are using a generalized Windows image and click the Capture Image button.
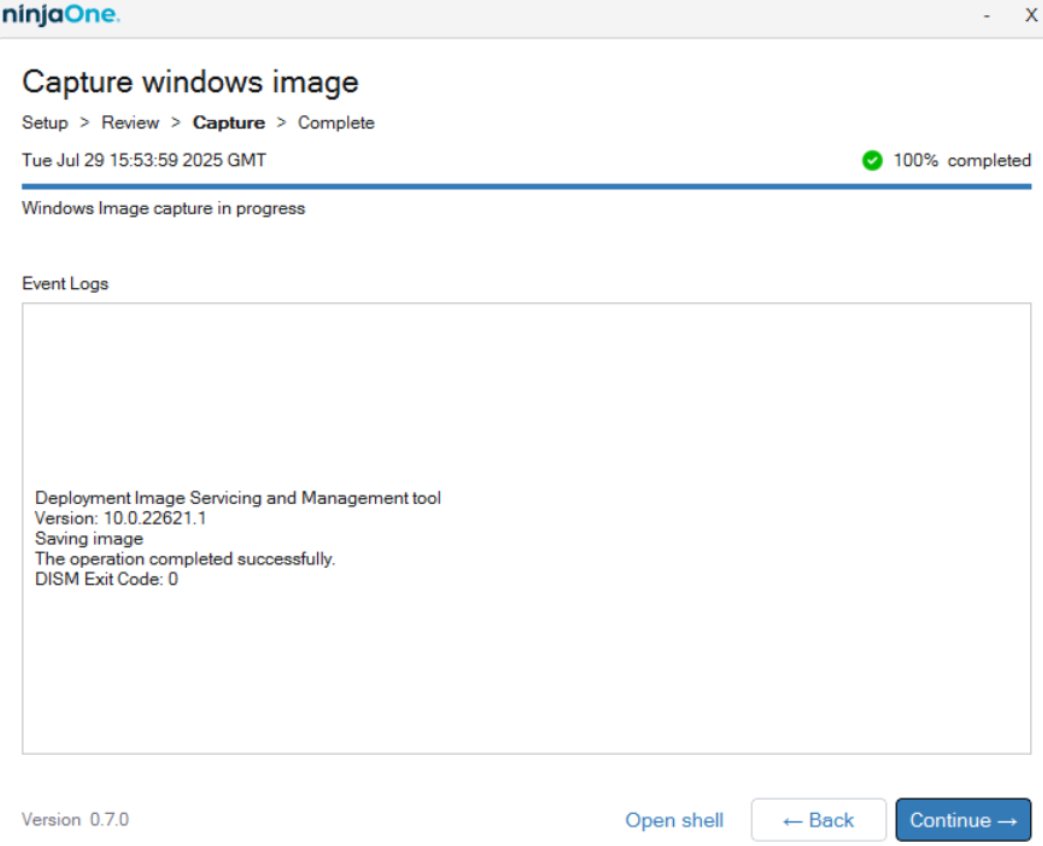
The image capture will commence, and a log will run showing process details.
Deploy the Image
Follow this procedure to deploy the image.
- On the machine to which you are deploying the image, Boot to the Bootable media created in the Provision Bootable Media section above. You may need to adjust the machine's boot order so that the Hard Disk is not the first bootable device.
- Once the OS Deployment tool has booted, select Deploy Windows image.
- In Network Storage Setup, select Add and enter the network storage path and credentials used to connect to the network storage (where you previously captured the image during the Image Capture portion of this process). After connecting your network storage, configure the following Deployment Options:
- Image (required): Select the image you captured previously.
- Drivers (optional): Select a folder path that holds the unzipped drivers you want to deploy with your image.
- NinjaOne Agent Installer (optional): Add the NinjaOne Agent directly in your deployment.
- Provisioning packages (optional): Add a pre-created provisioning package, which you can create with Windows Configuration Designer (external link), to deploy required applications and settings. For more information, refer to the Additional Resources section of this article.
- Unattended answer file (optional): Add a pre-created unattended answer file, which you can create using various online tools, to automatically configure the device with items such as keyboard layout, language settings, and privacy settings. Refer to Microsoft's Unattended Answer Files article (external link) to learn more.
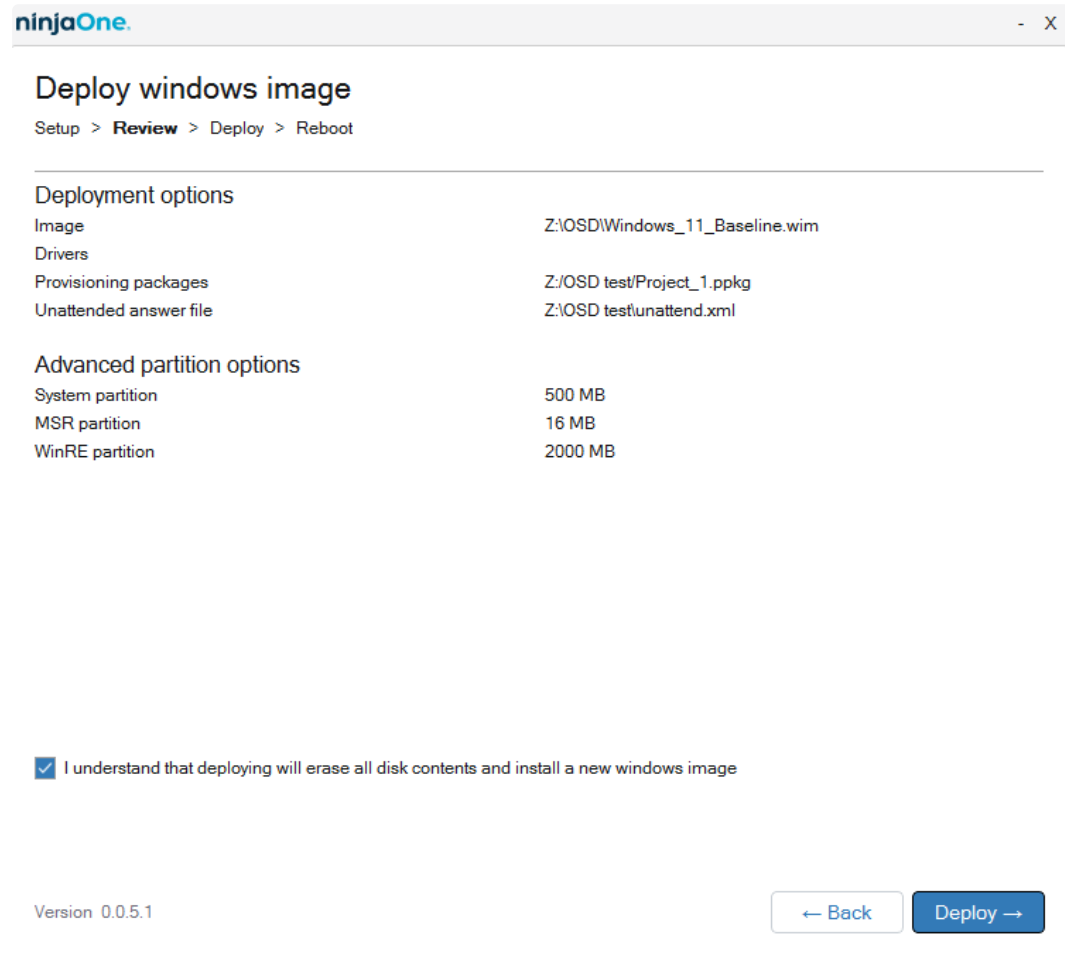
- Review your settings and selections, then select the checkbox stating I understand that deploying will erase all disk contents and install a new Windows image. When ready, click Deploy.
- While the image capture is underway, the log will display steps and the current status. Once complete, the progress bar will reach 100%, with a green check mark.

- Click Reboot to complete the deployment.

Troubleshooting
Log Files
The NinjaOne OS Deployment process generates a log file, which you can access by clicking the page icon in the top-right corner of the screen. You can download the log files and attach them to a support ticket if necessary.

C: Drive Error Workaround
If you encounter the C: drive assignment error described in the Image Capture section above, you can use these workaround instructions:
- Return to the main screen and click Launch Shell.
- Open DISKPART, and list the volumes to identify your OS drive.
- Select the OS drive volume number and enter the following command:
ASSIGN LETTER=C.
The drive will be selectable for capture.
Additional Resources
Refer to these resources for more information:
- For additional tips on using this feature, refer to NinjaOne: OS Deployment Tips and Tricks.
- You can set up optional provisioning packages to include in your deployment with the Windows Deployment Center app. For more information, refer to Microsoft Learn: Install Windows Configuration Designer (external link).
- Unattended answer files can perform tasks typically completed during a machine's initial setup, such as selecting region, keyboard layout, and privacy options. We are currently exploring our own utility to assist in creating these files. For now, however, we are using this third-party site, which provides excellent assistance, for testing. For more information, refer to Microsoft Learn: Answer files (unattend.xml) (external link)