Topic
This article describes the patch management features available for Linux endpoints managed by NinjaOne. It also explains how to activate, configure, and view patching activity.
Environment
- NinjaOne Patching
- Linux (all supported distributions)
Description
NinjaOne Patch Management empowers you to create patching policies that automatically scan for and apply new software patches for your Linux endpoints.
Policies: Linux Patch Management (NinjaOne Inc. 01:42)
Select a topic to continue.
- System Considerations
- Activating Patch Management
- Configuring Patch Management Settings
- Viewing Patches at the Device Level
- Release Date Information
System Considerations
Review the following system requirements and usage notes before managing patches on Linux devices.
- The device must have Python 3 installed to support patching functionality.
- NinjaOne needs a minimum of 100 MB of available disk space to scan for and apply patches. If the device does not have the required space, you will receive an activity notification that the disk is full and the scan and apply cannot take place. The NinjaOne agent evaluates free space by analyzing the following top-level directories on the device:
- /
- /opt
- /var
- /boot
- /home
- Linux patching supports all Linux distributions that the NinjaOne agent supports. For more information, refer to NinjaOne Endpoint Management: Linux Agent System Requirements and OS Support.
- NinjaOne displays patches in the Devices → Patching tab. You can view all activities and errors on the System Activities page. Refer to NinjaOne NMS: Device Dashboard Navigation and Management for more information.
Activating Patch Management
To activate patching for your Linux endpoints, perform the following steps:
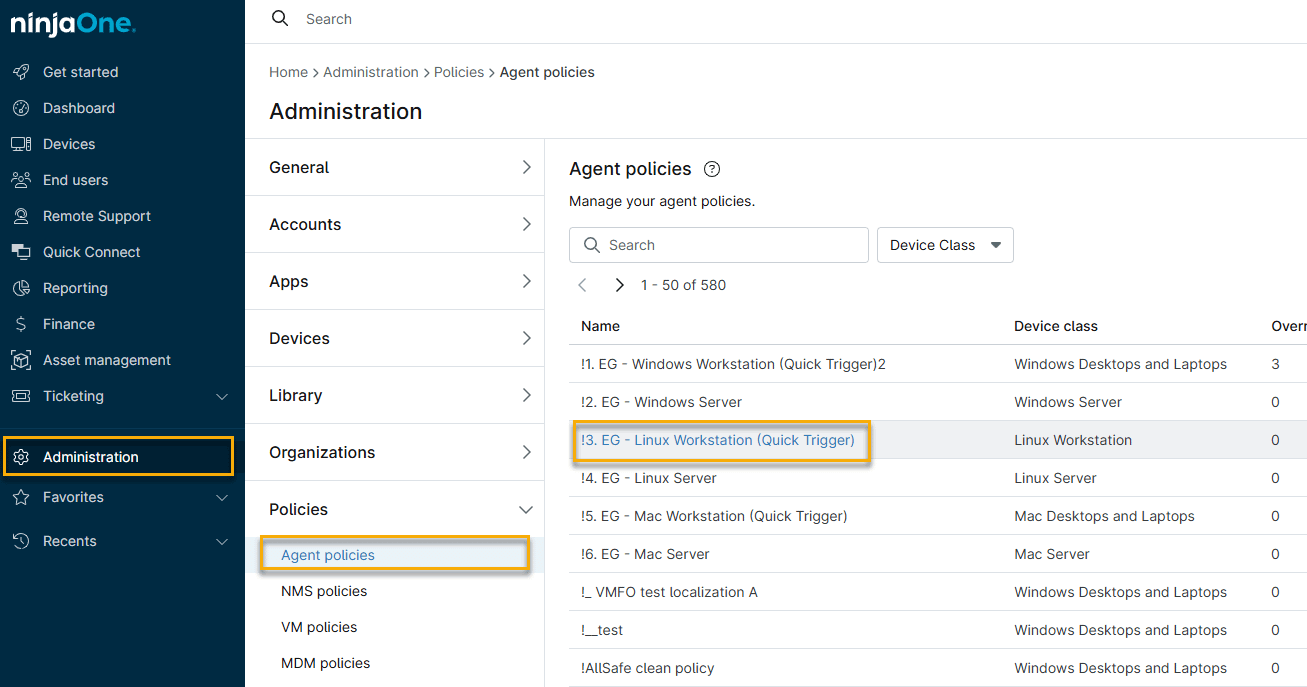
- In NinjaOne, click Administration → Policies, then choose a Linux policy from the Agent policies list.
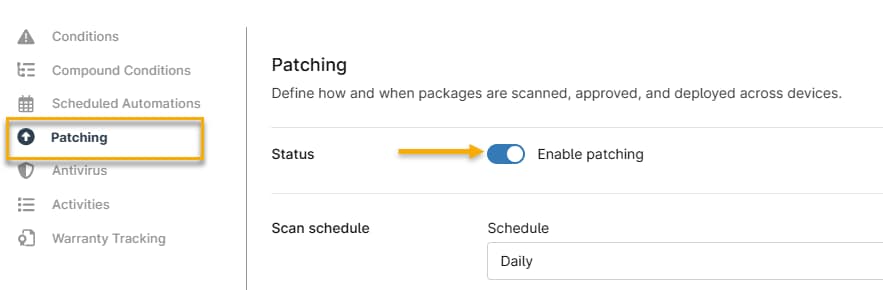
- The policy's management page will open. Click the Patching option, then activate the Status toggle. Changes are not applied to devices until you save the policy.
Configuring Patch Management Settings
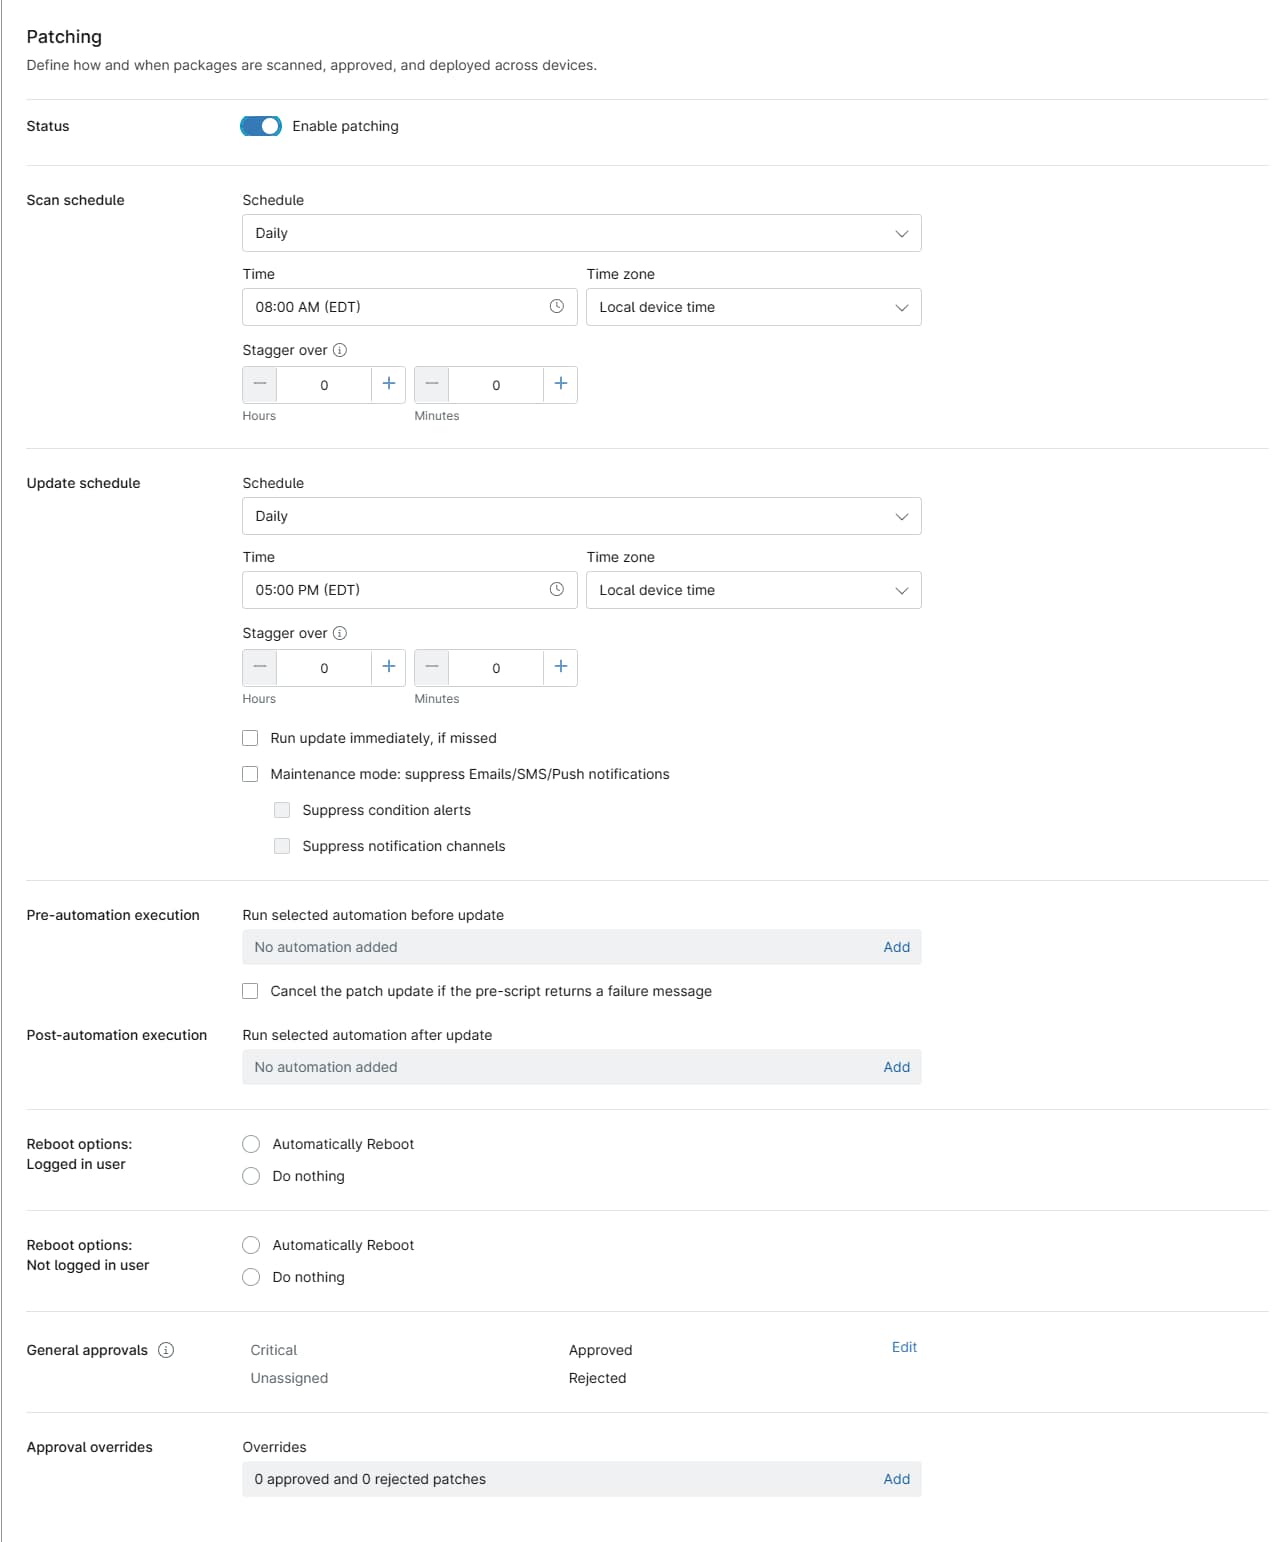
Patch management options include schedules for scanning and patching, software installation and maintenance. When you finish your configuration, click Save to apply the new settings.
Patching Settings Explained
Use the table below to learn more about each setting.
| Setting | Description |
|---|---|
| Scan schedule | This parameter set determines when the device will scan for available new patches.
|
| Update schedule | These settings specify when NinjaOne should apply the updates it finds when scanning.
|
| Pre-automation execution and Post-automation execution | This setting lets you add automations that will run before (pre) or after (post) patch installation.
Click Add to select automations from the Automation Library. Refer to NinjaOne Policies: Scheduled Automations to learn more. Select the Cancel the patch update if the pre-script returns a failure message checkbox to automatically cancel the patching job if the pre-script fails. |
| Reboot options | These settings let you specify reboot behavior after NinjaOne patches a device. You can configure settings for both logged-in and logged-out users.
|
| General approvals | In this section, you can configure approval settings for critical and unassigned patches. Patches associated with a known CVE are critical patches. All other patches are unassigned. |
| Approval overrides | You can set NinjaOne to override your patching policy for specific patches. Click Add to open the Edit approval overrides dialog, then search for the patch name. Use the second drop-down menu to select whether to approve or reject the patch. Examples of scenarios in which patches would appear in the Overrides section:
|
Viewing Patches at the Device Level
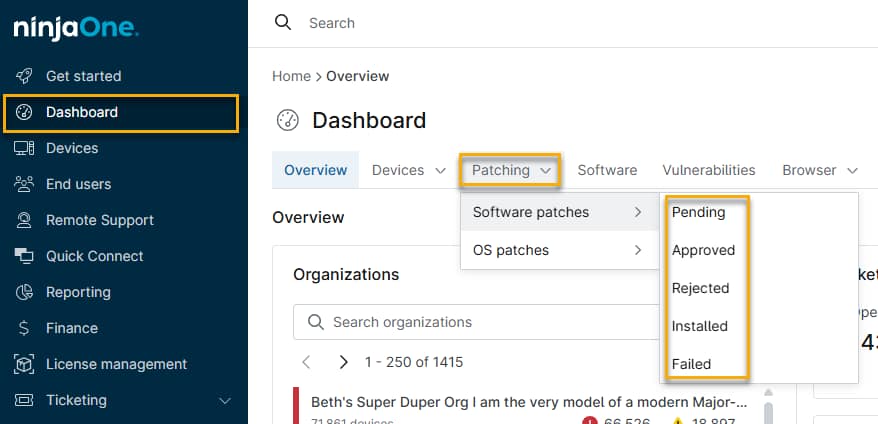
You can view device-specific OS patch information on any Linux device governed by a policy with OS patching activated. To do so, navigate to Dashboard → Patching → OS patches tab. Use the flyout menu to filter by patch status (Pending, Approved, Rejected, Installed, or Failed).
Failed Patch Information
When viewing Failed patches, move your mouse cursor over the Install status column to display a tooltip explaining the reason for the installation failure.
Release Date Information
NinjaOne displays patch release dates in the Patch List's Release Date column. If the vendor does not provide a release date, the patch views will display the date NinjaOne first detected the patch.
Additional Resources
The following articles provide additional context on supported Linux environments, platform maintenance, and policy configuration.