Topic
This article explains how to set NinjaOne as a discovery source in ServiceNow.
Environment
- NinjaOne Integrations
- ServiceNow
Description
According to ServiceNow documentation (external), ServiceNow Discovery is an automated process that continuously scans and identifies all the components within the IT infrastructure. It plays a crucial role in maintaining an accurate and up-to-date CMDB 360 with the information it finds.
Adding NinjaOne as a discovery source allows you to clearly differentiate NinjaOne devices in ServiceNow, which improves configuration management database (CMDB) identification and reconciliation operations.
Before configuring the integration settings in NinjaOne for ServiceNow, you must enable it. If you have not done so already, refer to Enabling the ServiceNow Integration for instructions.
NinjaOne as a Discovery Source
This section explains how to customize the value of the discovery source.
ImportSet. If NinjaOne is available in the ServiceNow discovery source choice list, the NinjaOne CMDB sync will use it.- Log in to your ServiceNow instance.
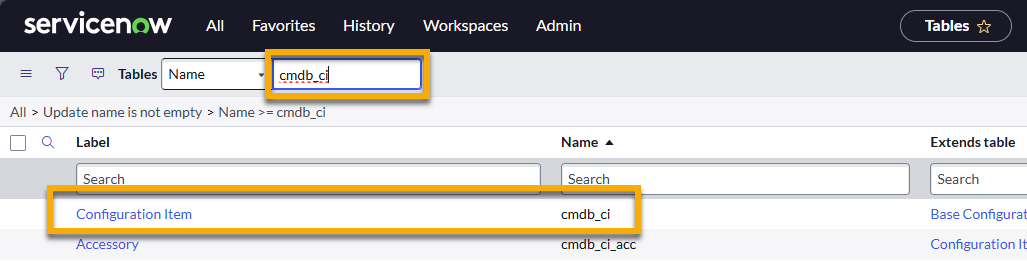
- Enter "System Definition" in the Filter navigator search field.
- Select Tables.

- From the list of tables, find and select cmdb_ci, which will be displayed in the Name column. Click the hyperlink in the Label column to open the table's configuration page.
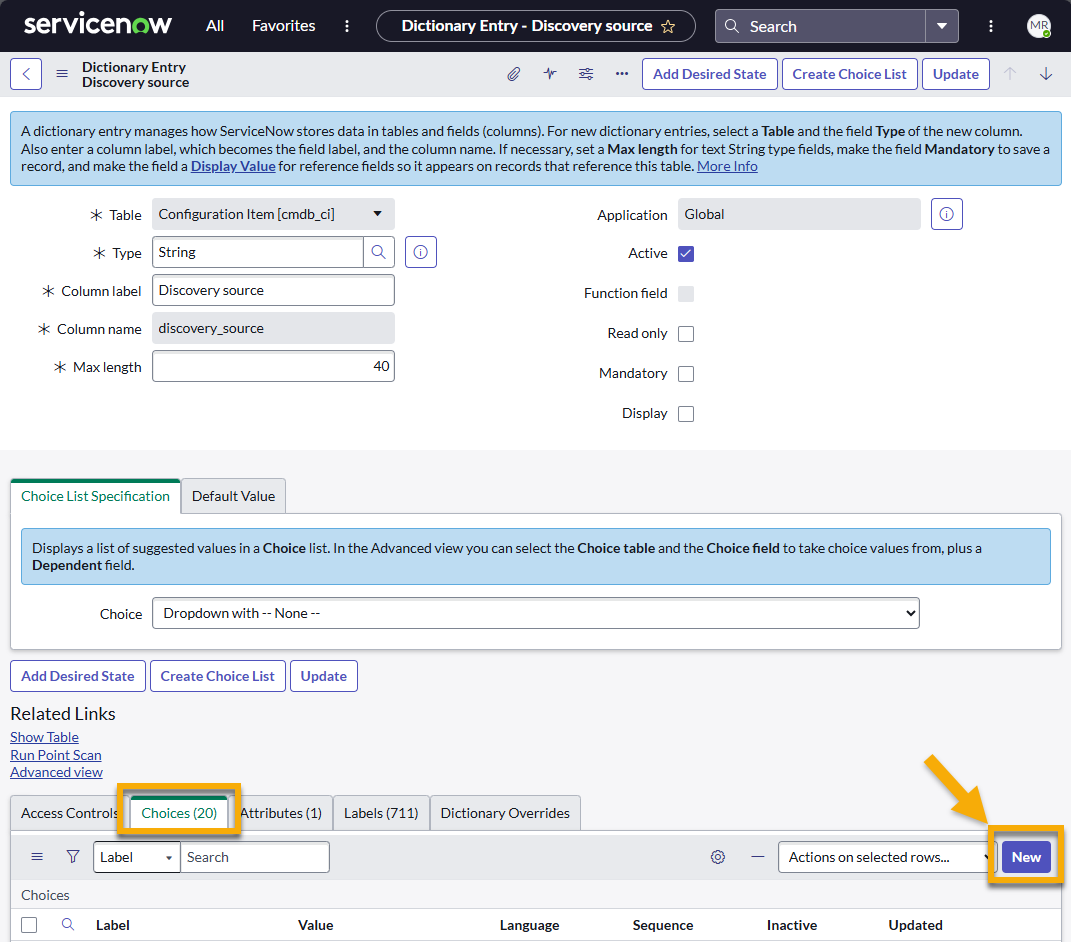
- Change the Table Column search drop-down menu to "Column label" and search for "discovery source." Select the option from the list.

- On the discovery source Dictionary Entry page, open the Choices tab and click New.
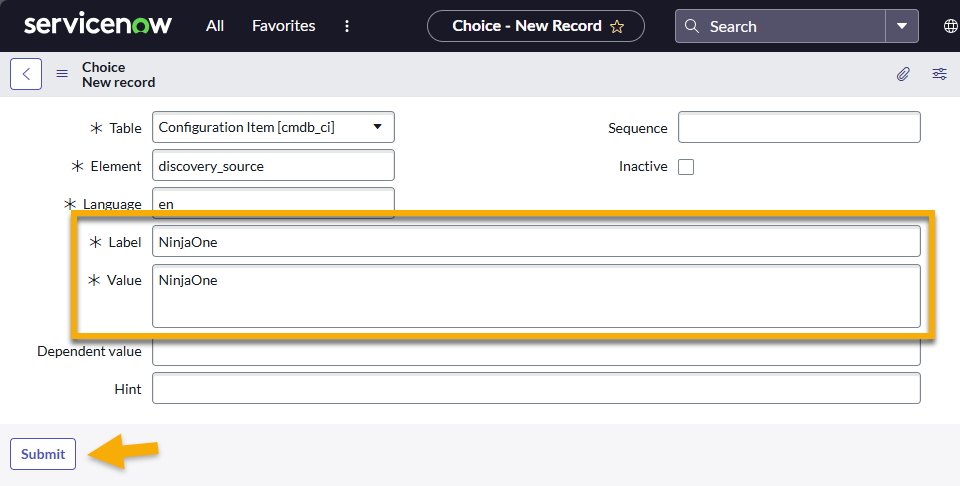
Use the following table to complete the applicable fields.
Field Required Data Label "NinjaOne" Value "NinjaOne" - Click Submit.
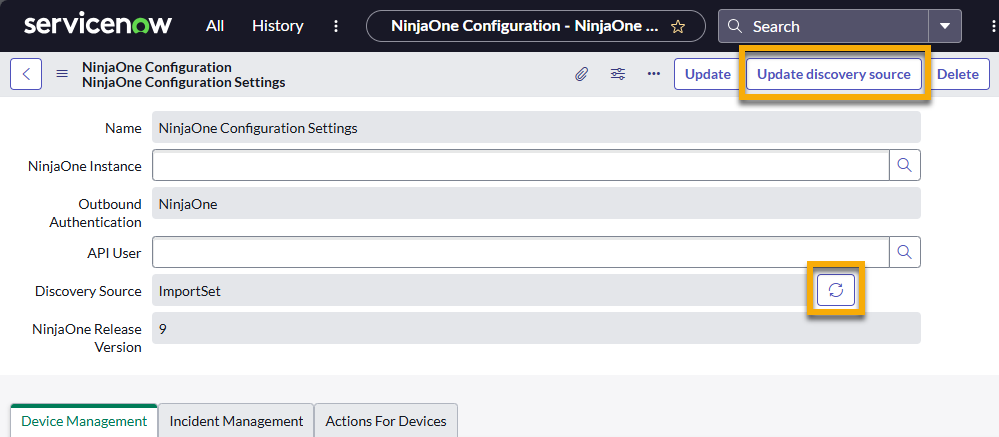
- Navigate to the NinjaOne Configuration Settings page in ServiceNow.

- Refresh the Discovery Source field by clicking either the refresh icon or the Update discovery source button.
Refer to the following external ServiceNow resources to learn more about discovery sources:
- Discovery Configuration Console - ServiceNow (external)
- Discovery Dashboard - ServiceNow (external)
- Discovery configuration - ServiceNow (external)
Additional Resources
To learn more about deploying and leveraging this integration in your environment, refer to the ServiceNow category of the NinjaOne Dojo.