Topic
This article discusses how to use the Knowledge Base feature in NinjaOne Documentation.
Environment
NinjaOne Documentation
Description
This article is a guide for using the Knowledge Base tab on the system and organization dashboards. The Knowledge Base feature empowers you to create a wiki, or database, of all the necessary documents for an organization or global use.
Want to learn more about NinjaOne Documentation? Check out our video library.
Topic
Select a category to learn more:
- Technician Permissions
- Global Knowledge Base Navigation
- Organizational Knowledge Base
- Use Microsoft Word with NinjaOne's Knowledge Base
- Add Documents to the Knowledge Base
- Download, Edit, Share, Move, or Archive Documents
- Delete Documents and Folders
- Knowledge Base Activity Logs
- Additional Resources
Technician Permissions
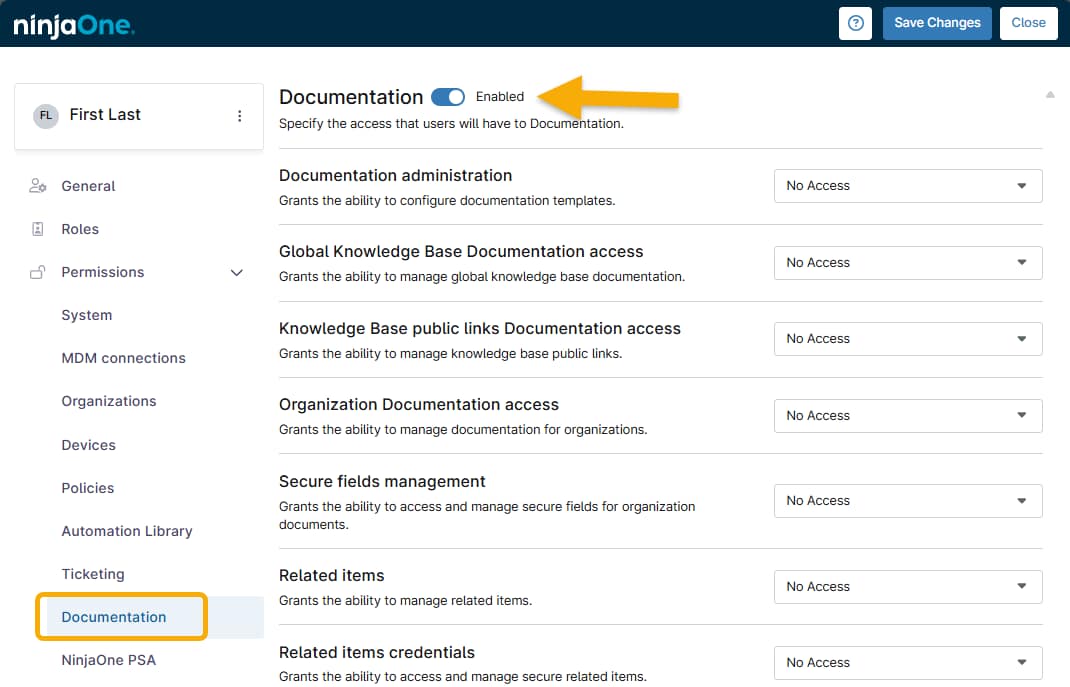
Technicians must have the appropriate permission to access the Knowledge Base. You can manage these permissions in the technician account or role editor in the Documentation section. Be sure to activate the Enabled toggle so you can select options from the drop-down menus.
The following permissions affect the Knowledge Base:
- Global Knowledge Base Documentation access
- Knowledge Base public links Documentation access
- Organization Documentation access
- Sharing Global Knowledge Base folders with end users
- Restrict Knowledge Base folder access
- Documentation export access
Global Knowledge Base Navigation
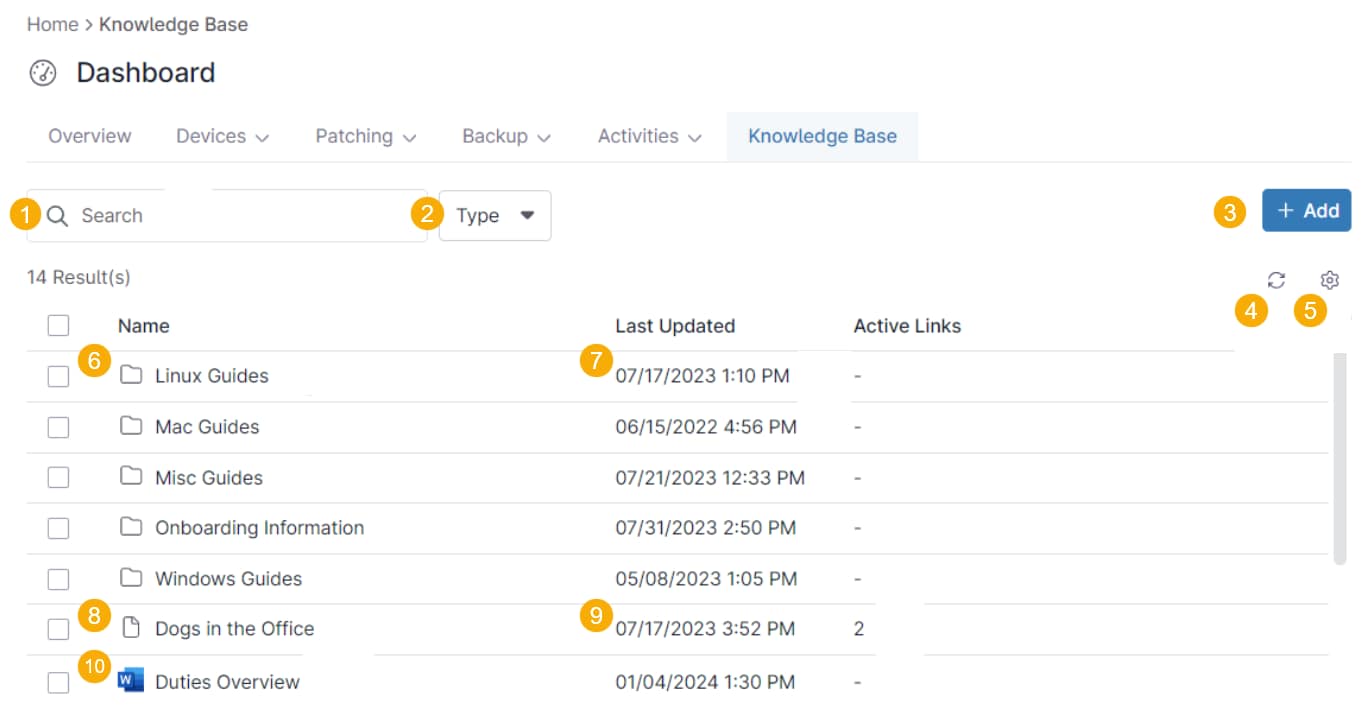
You can navigate the global Knowledge Base from the Knowledge Base tab on the system dashboard. Refer to the table following Figure 2 for a brief explanation of each highlighted feature.
| Number | Description |
|---|---|
| 1 | Search the full content of any document natively created within the knowledge base, even if it's within a folder. This action will pull data from both the document's title and content. This feature does not perform full-content searches on documents uploaded from other applications; it will only search for their filenames. |
| 2 | Filter your search by folder or document type. |
| 3 | Create a new folder or document, or upload an existing one. |
| 4 | Click to refresh the table. |
| 5 | Click to modify table settings (sort by, sort direction, column display). |
| 6 | Click to open the folder and view a list of documents within it. |
| 7 | View the time and date the folder or document was created or uploaded. |
| 8 | Click a document name to open the document contents in a separate browser tab. |
| 9 | If a number is present, public links have been created and are available for sharing. Click the link icon to view the links and their expiration dates, create new links, delete or edit existing links, or copy the links to share. Refer to NinjaOne Documentation Tool: Public and Shared Links for more information. |
When you create or upload a document to the Knowledge Base, an icon appears next to its filename to indicate the document type. If you created a document from within the Knowledge Base, the icon looks like a blank sheet of paper. Figure 3 provides examples of the Word document, Portable Document Format (PDF), PowerPoint, and Excel document icons.
Organizational Knowledge Base
The Knowledge Base feature in the Documentation section allows you to create a wiki of all the necessary documents you have for an organization or globally. This section contains files and folders that can be either NinjaOne templates or Microsoft documents (Word, PowerPoint, Excel).
Use Microsoft Word with NinjaOne's Knowledge Base
NinjaOne's integration with Microsoft Word for Knowledge Base documentation empowers technicians with the appropriate permissions to edit Word documents within NinjaOne.
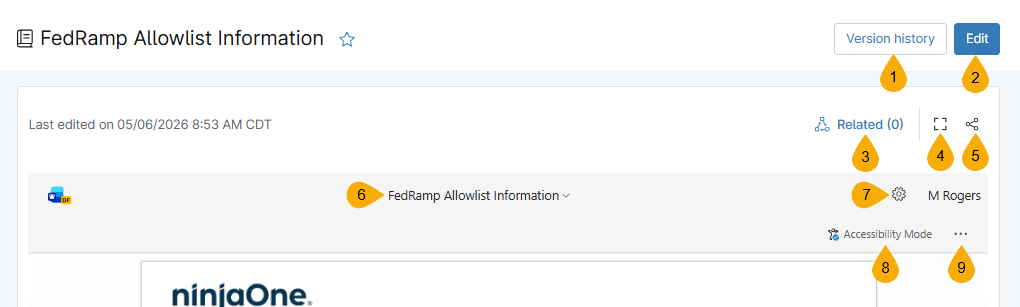
You can easily identify Word documents by the icon next to the document title. If a user has the document open in edit mode, the label Updating will appear next to the document title, and a monogram on the document indicates that another user is present and actively updating it.
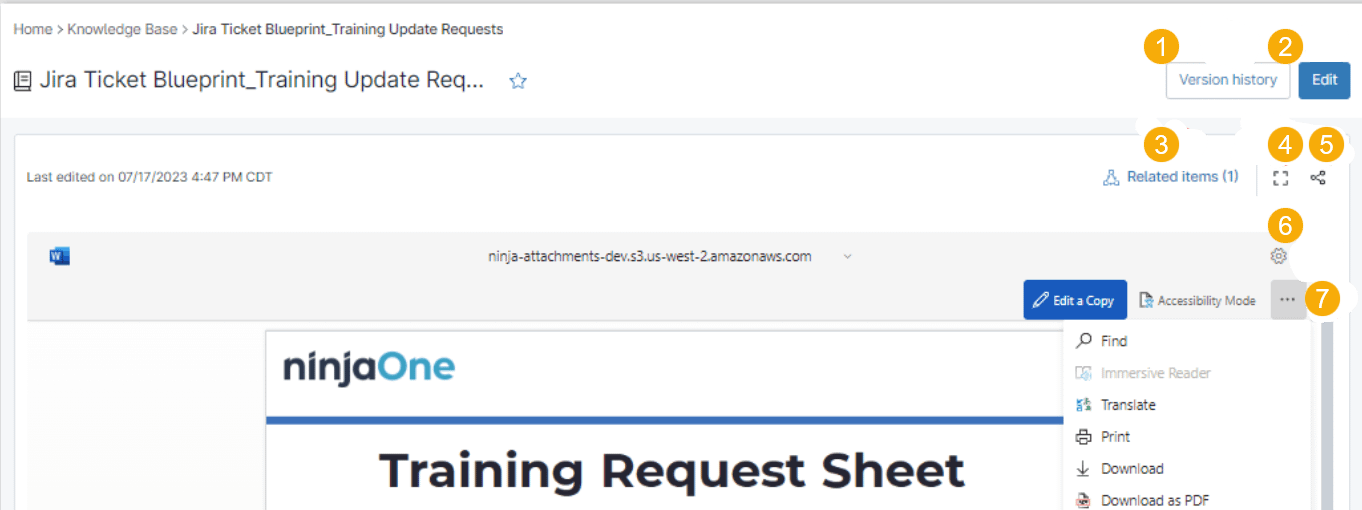
Clicking the title opens a copy of the document and its related items on a new page. Refer to the following table to learn more about the various options presented on the page.
| Number | Name | Description |
|---|---|---|
| 1 | Version history | This field shows the date and time of all revisions to the document and the name of the technician who made them. If you delete a log from the version history, this action does not undo the revision, but it restricts technicians from restoring the previous version. When you select a log in the version history dialog, you can view the previous version of the document and restore it; the Version history button changes to Restore version. |
| 2 | Edit | Modify the document in Microsoft Word Web mode. |
| 3 | Related | Add or view related items. Refer to NinjaOne Documentation: Device Notes and Related Items for more information. |
| 4 | Expand | Enlarge the document to the size of the screen. |
| 5 | Share | View or create shared links. |
| 6 | File name | View the file name and document type. |
7 | Settings | Update your accessibility preferences. |
| 8 | More | Expand to view additional options for documentation management. |
Add Documents to the Knowledge Base
You can use this section to add documents and folders to either the global or organization knowledge base.
Add a Folder
Folders will appear grouped at the beginning of a list, followed by documents organized alphabetically.
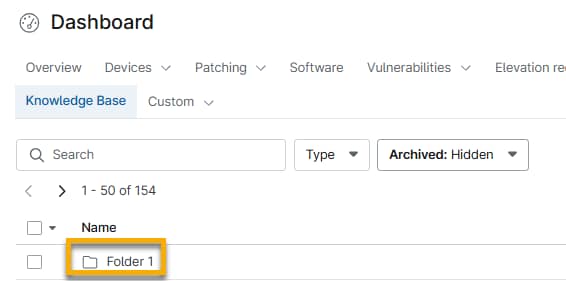
- Navigate to Dashboard → Knowledge Base, click +Add and then select New Folder.
- Enter a name for the folder and then click Create.
Add a Document Outside a Folder
To add a document that is not attached to a folder, perform the following steps.
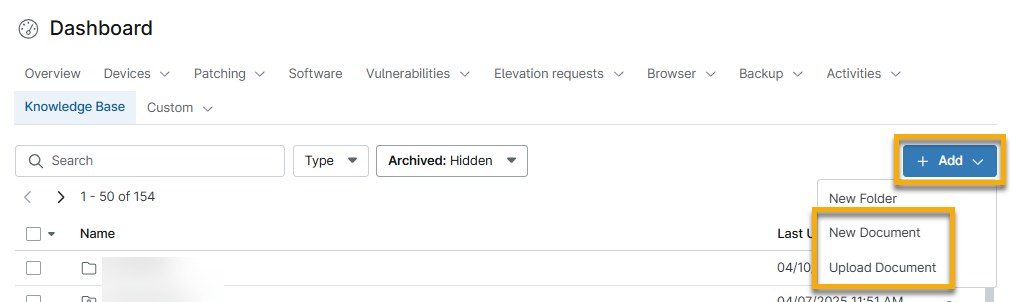
- Navigate to Dashboard → Knowledge Base.
- Click Add and then select New Document or Upload Document.
- If you selected Upload Document, the File Explorer will appear. Select the document from your computer to complete the process.
- If you selected New Document, the document editor will appear. Provide a title for the document and enter the content into the provided WYSIWYG editor. Use the toolbar to customize your document.
- Click Save to complete the process and add the document to your Knowledge Base library.
Add a Document Within a Folder
- Navigate to Dashboard → Knowledge Base.
- Click the name of a folder to open it.
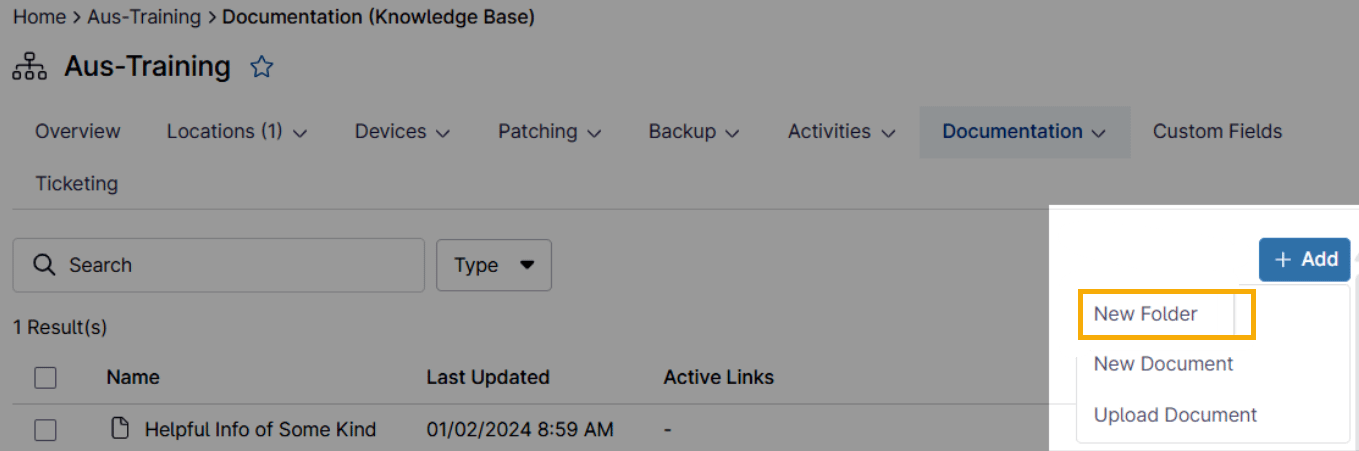
- Click +Add and then select New Document or Upload Document.
- Follow Steps 3–5 in the Add a Document Outside a Folder section to continue.
Download, Edit, Share, Move, or Archive Documents
When downloading or editing a document, you cannot download documents that were created from the NinjaOne WYSIWYG. You also cannot edit PDFs uploaded from a computer, but you can highlight or add text blocks to the document.
Click the actions menu icon and select the applicable option.
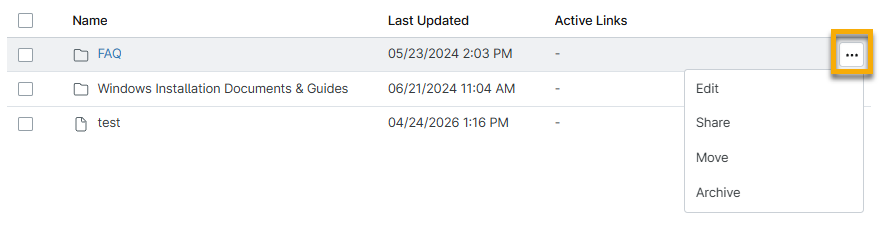
Refer to the following table for a description of each action.
| Actions menu option | Description |
|---|---|
| Download | The file becomes available in your Downloads folder within File Explorer. This option is only available for files that were uploaded to the Knowledge Base. |
| Edit | For folders, update the Name field with the changes and then click Save. For documents, make any changes to the title or contents of the document and then click Save Changes. If you are editing an uploaded document, such as a Word file, then changes will be saved automatically from the new tab. |
| Share | If you have appropriate permissions, you can create a public link for specific documents and share folders with end users. |
| Move | If you have appropriate permissions, you can move folders or files to a different organization or within a different folder in the Global Knowledge Base. |
| Archive | Hide the item from the main list and deactivate sharing options. Once the item is archived, you can either delete it permanently or restore it. Deleting a folder also deletes all files saved within. To see these options, change the Archived filter to Visible and then select the checkbox. |
| Delete | To delete a document, you must first archive it. When the file or folder shows the Archived label, you can select Delete from the actions menu. |
Knowledge Base Activity Logs
Use the Activities → All section of the system or organization dashboard to view events related to the Knowledge Base. NinjaOne will record the following:
- Knowledge Base document created
- Knowledge Base document viewed
- Knowledge Base document updated
- Knowledge Base document moved
- Knowledge Base public temporary token created
- Knowledge Base public link created
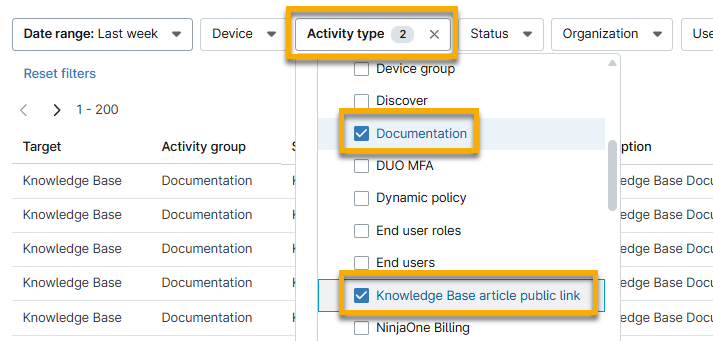
To view these logs, expand the Configuration menu in the Activity type filter and select Documentation or Knowledge Base article public link.
Additional Resources
Refer to NinjaOne Documentation: Resource Catalog to learn more about managing documentation in NinjaOne.