Topic
This article explains how to SCIM for your identity provider (IDP) so you can configure access to NinjaOne directly from your preferred provider portal.
Environment
- NinjaOne Identity Access Management (IAM)
- NinjaOne Integrations
Description
Once you enable and set up Single Sign-On (SSO) in NinjaOne, enable SCIM provisioning to automate the process of managing user accounts and access rights across systems, ensuring efficient and accurate user provisioning and deprovisioning.
Index
Prerequisites
Ensure you complete the following tasks before configuring SCIM in NinjaOne.
- You must first configure Security Assertion Markup Language (SAML) between your Identity Provider and NinjaOne. For more information, refer to NinjaOne Identity Access Management (IAM): About IDP-Initiated Security Assertion Markup Language (SAML).
- Review the user and group assignments in your SSO application. These are the users and groups that SCIM will synchronize into NinjaOne.
- Determine which users in your IDP will be designated as technicians and which will be designated as end users.
Configure SCIM in NinjaOne
To configure SCIM in NinjaOne, perform the following steps:
- Log in to NinjaOne as a system administrator.
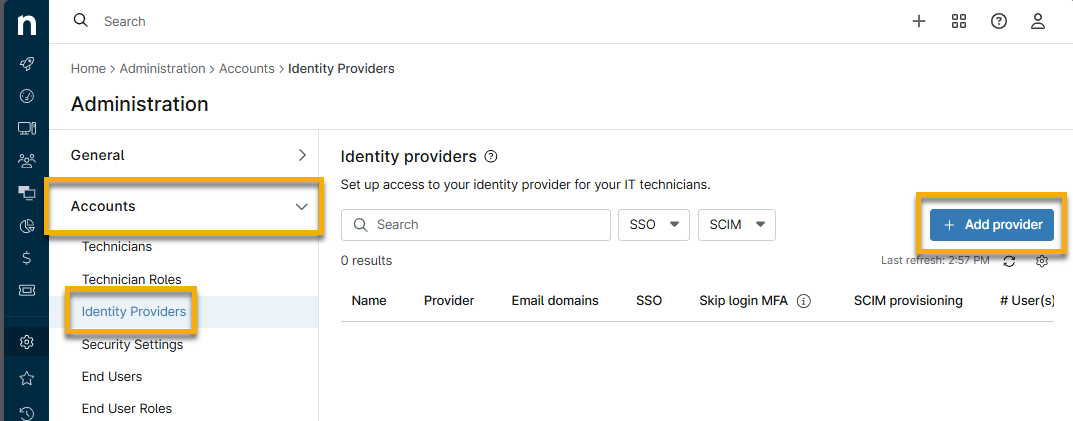
- Navigate to Administration → Accounts → Identity Providers. Click Add provider.
- Create and entry for your provider of choice. Refer to Login Security: Configure Single Sign-On in NinjaOne for instructions.
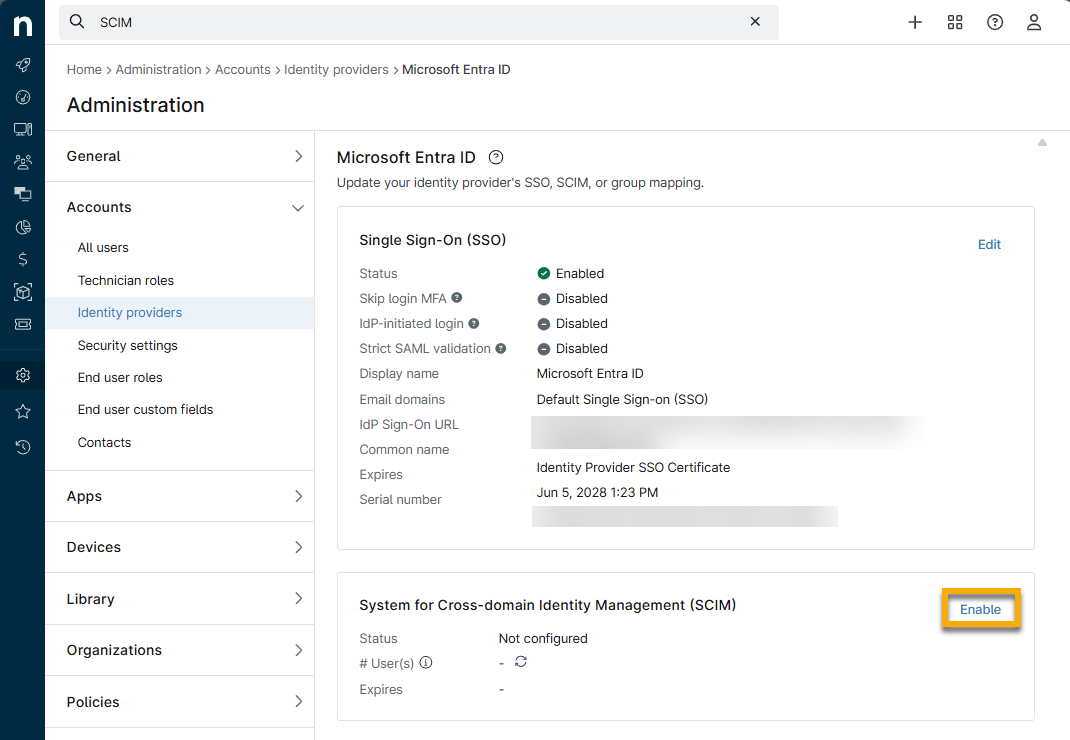
- Once you create the IDP, open the details page to edit it.
- Click Enable for the System for Cross-domain Identity Management (SCIM) widget.
- Activate the Enable SCIM provisioning toggle switch to enable SCIM.
- Follow the prompts to copy the data, then paste it into your IDP's site to authenticate to the endpoint. Copy and store the token in a secure place, as it will only be displayed once.
Your IDP may request an organization ID. To obtain this data, refer to NinjaOne Platform: How to Find an Organization ID.
Additional Resources
Refer to the following resources to learn more about Identity Access Management processes in NinjaOne: