Topic
This article describes how to automatically assign critical information about target endpoints to the NinjaOne agent during deployment.
Environment
NinjaOne Endpoint Management
Description
You can use alphanumeric tokens with a specialized "generic" agent installer when deploying the NinjaOne agent to Windows, Linux, and macOS endpoints. The tokens represent each agent's server, organization, location, and role.
How to Deploy the NinjaOne Agent (NinjaOne, Inc., 07:10:00)
Video Chapters
- 0:00 Dedicated Installer Generation
- 2:30 Tokenized Installer (Mass Migrations)
- 4:16 Revoking Tokens
- 5:08 Leveraging Tokens in a Script
- 6:32 AD and Intune Deployment
Index
- How Automatic Tokenization Works
- Managing the Installer in NinjaOne
- Revoking Tokens
- Viewing Installer Details
- Additional Resources
How Automatic Tokenization Works
Automatic tokenization automatically generates a token for every combination of location and organization. This process will continue as you add new organizations and locations. This approach simplifies script-based installations, speeds up mass deployments, and offers multiple advantages over traditional workflows. For example:
- The generic installer supports scripted deployment by accepting a token (for example, via a command-line parameter) to assign the target server, organization, location, and role. It integrates easily with existing deployment scripts.
- Unlike OS-specific installers that use static directories, the token-compatible installer supports dynamic installation paths based on the organization.
- The installer is hosted at a persistent URL that always provides the latest agent version, eliminating the need to update scripts when new versions are released.
If automatic tokenization is deactivated, NinjaOne will no longer automatically create tokens for new locations and organizations, but will still generate tokens when a new device is added, based on the selections made during the device addition process. While the generation is still "automatic," the user must add a device to create the token.
This difference is key. With automatic tokenization active, tokens are created proactively for all potential combinations without additional user action. With automatic tokenization inactive, NinjaOne only creates tokens as needed during device addition.
Managing the Installer in NinjaOne
The generic installer includes options for uninstall prevention, deduplication, and automatic token creation. You can manage these features from within NinjaOne by navigating to Administration → General → Settings → Agent Installer.
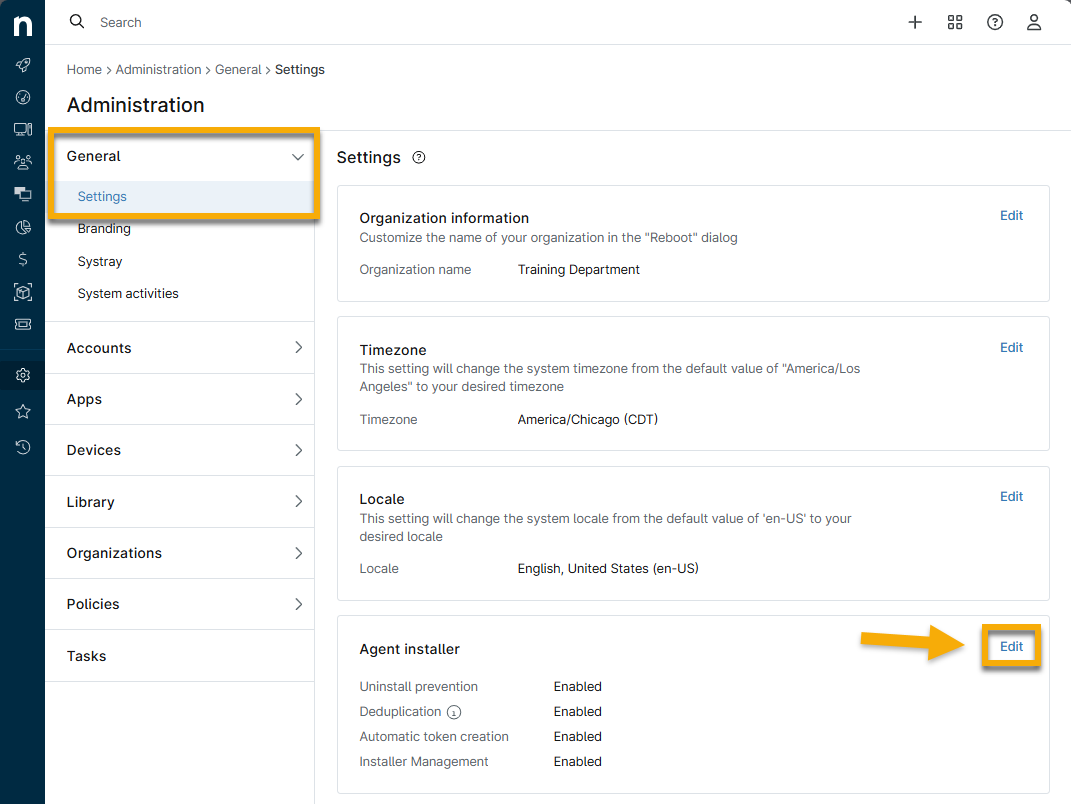
The Agent installer pane enables you to configure these settings:
- Uninstall prevention: When active, end users cannot uninstall the NinjaOne agent from endpoints where it is present.
- Agent deduplication: Enable deduplication to detect and automatically merge duplicate device entries found in NinjaOne during deployment.
- Automatic token creation: To automatically create generic agent tokens for all of your NinjaOne Organizations and Locations, ensure that this option is not deactivated.
- Installer Management: Activate this setting to show the Agent Installers feature on dashboard pages.
Revoking Tokens
You can revoke tokens from a single device or many devices at once.
Revoking a Single Token
To revoke a single token:
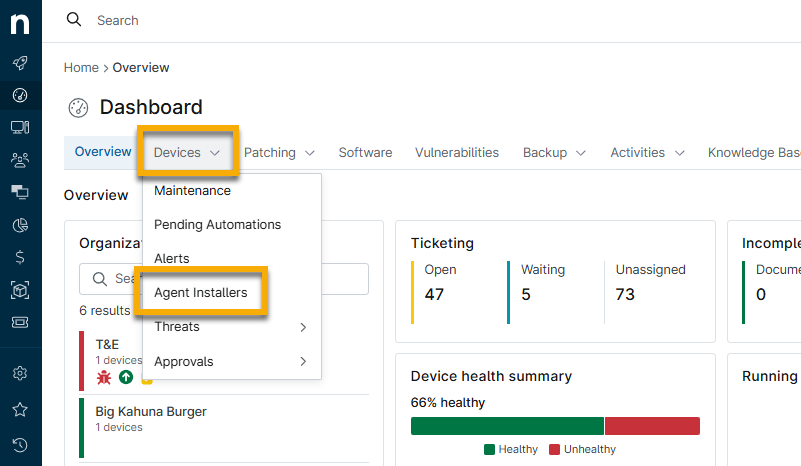
- In NinjaOne, access the dashboard for the selected organization or system.
- Open the Devices tab and select Agent Installers.
- In the Agent Installers table, move your cursor over the entry for the device you want to revoke, then click the gear icon and select Revoke from the drop-down menu.
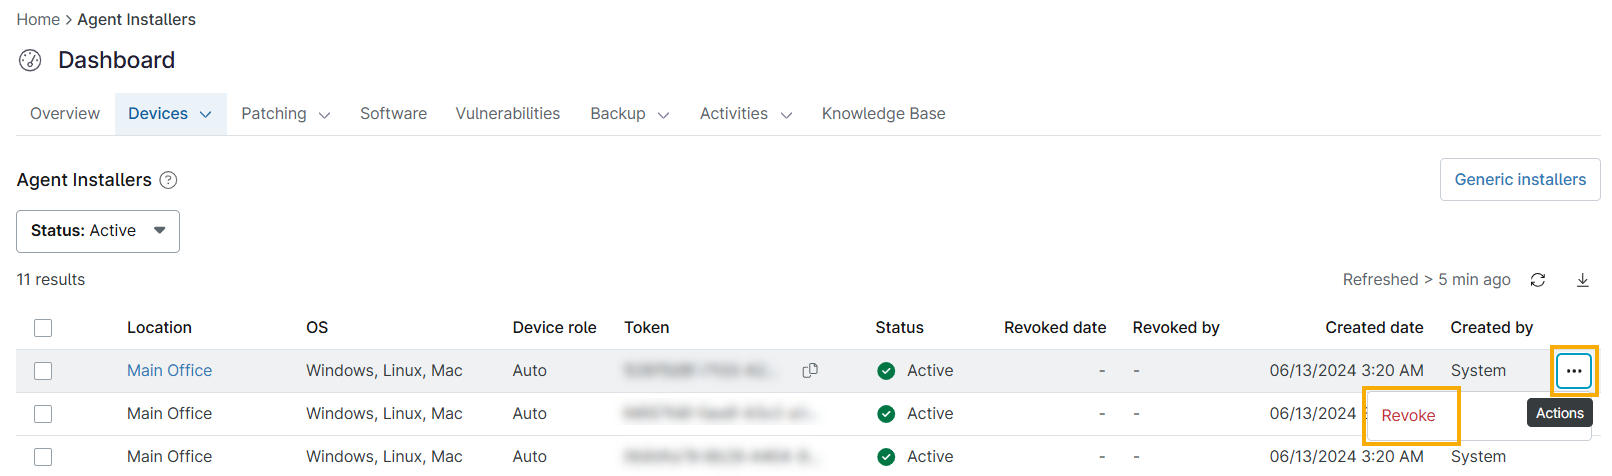
Once you've revoked access for one or more devices:
- Agent Installer table entries for revoked devices will be deactivated.
- The installer's Status column will report it as Inactive.
- The Revoked date and Revoked by columns will populate with the date the revocation took place and the ID of the user who performed the action
- The NinjaOne Activities log will record an entry containing "Activity: Org Updated → Agent Installer Revoked."
Revoking Multiple Tokens
To revoke multiple tokens:
- In NinjaOne, access the dashboard for the selected organization or system.
- Open the Devices tab and select Agent Installers.
- In the Agent Installers table, select the checkboxes for each device you want to revoke.
- Click Revoke.
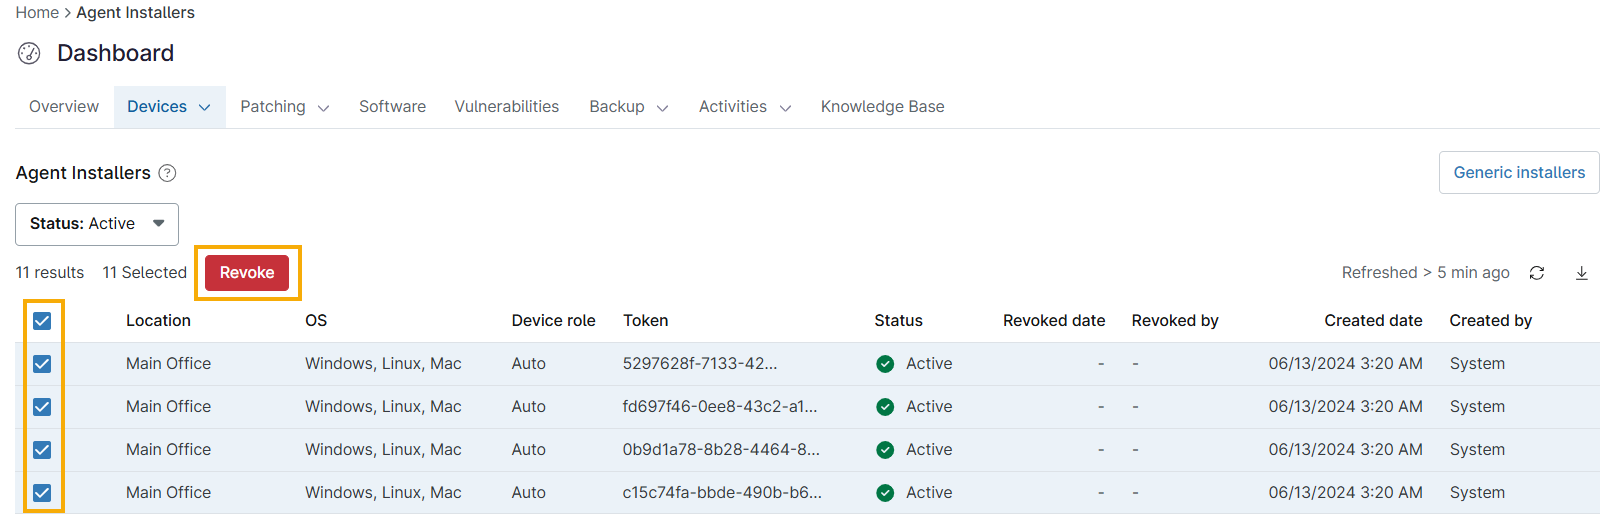
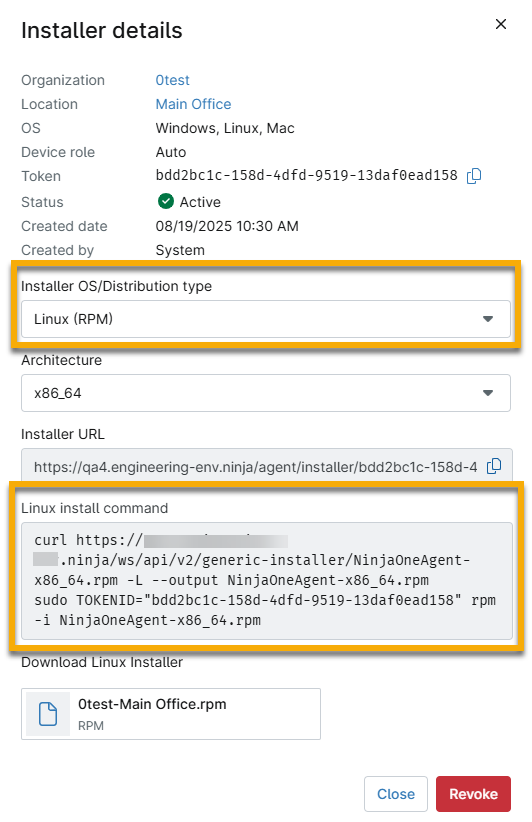
Viewing Installer Details and Obtaining the Install Command
To view the details for installers assigned to a particular organization or system, perform the following steps:
- In NinjaOne, access the dashboard for the selected organization or system.
- Open the Devices tab and select Agent Installers.
- Click the value shown in the Token column for the installer you want to review.
The Installer details window will open, displaying information similar to the example shown in the following Figure.
With the token Installer details window open, you can select a new operating system or distribution type, which will generate a URL, command, and download file that you can use to install the token.
Additional Resources
To learn how to deploy the NinjaOne agent to supported endpoints, refer to the following articles: