Topic
This guide provides instructions for enabling and setting up the NinjaOne Documentation feature. Once enabled, refer to NinjaOne Documentation: Resource Catalog for more information and best practices.
Environment
NinjaOne Documentation
Description
NinjaOne Documentation empowers you to chronicle, standardize, and use contextual information about your managed IT environments directly in NinjaOne.
Index
Select a category to learn more:
- Enable NinjaOne Documentation
- Manage Documentation Templates
- Import History
- Documentation Checklists
- Public Links History
- Shared Links Administration
- End User Roles
- TOTP
Enable NinjaOne Documentation
To use the NinjaOne Documentation feature, you must enable it in the console. To do so, perform the following steps:
- Navigate to Administration → Apps → Installed and click NinjaOne Documentation.
- Click Enable.

Manage Documentation Templates
You will use the NinjaOne Documentation application to create and manage templates, create checklists, review import history, view public and shared links, manage access for end user roles, and enable or disable time-based one-time passwords (TOTP).
Select a category to learn more about the Documentation tab in the NinjaOne Documentation application:
- Import Document(s) from CSV
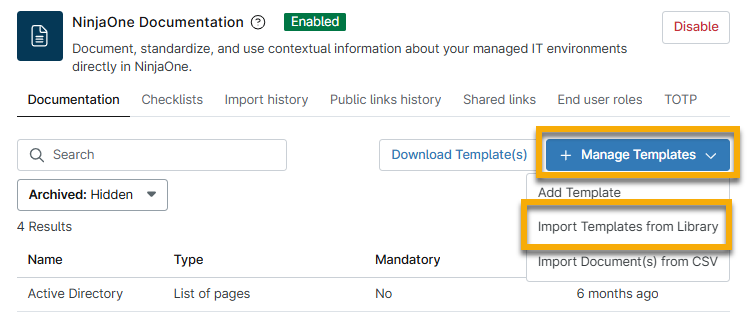
- Import Templates From Library
- Create a Document Template
- Archive or Delete Document Templates
Import Documents from CSV
You can download created templates in NinjaOne Documentation and then import them into other environments or documentation tools. For more information, refer to
- In the Default Templates configuration modal, select all checkboxes for the templates you would like to add and then click Save.
- Use the search field to find templates by keyword or scroll through the list of available templates.
- You can edit a template before adding it: move your cursor over the row and click the ellipsis menu button to see the Edit option.
- When you click edit, the Create document template modal opens. For instructions on managing this data, see the following section of this article: Create a Document Template.

Create a Document Template
Use the Add Template option to create a document from scratch.
- Navigate to Administration → Apps → Documentation. Click Manage Templates and then select Add template.

Use the table below to determine how to complete the fields.
Field Description Template name Give the template a unique identifier. Description Clarify the purpose of the document. List of Pages The template supports multiple documents, similar to a folder. Mandatory Require the form to be filled out in an organization. Available to all technicians This box should be selected by default. If you clear the field, a new drop-down menu will appear below, where you can select one or more technician roles to grant access. Custom Fields Add custom fields and UI elements. - Open the Custom fields tab and click Add item to add custom fields and UI elements to the template. To learn more about custom fields, refer to NinjaOne Custom Fields: Resource Catalog.
- Field: Select a field type from the drop-list and use the Label field to create a name/description for it. The Name field automatically updates to reflect the input in the Label field. When you click Create, additional fields populate to allow further configuration. Adding a tooltip provides an information bubble that users can hover their mouse over to see helpful information.
- UI Element: Select a field type from the drop-list and use the Reference Name field to create a unique identifier for it.
- Drag elements up and down within a template to change the display order.
- Click Save when finished.
The documentation template is now visible and ready for use.
Archive or Delete Document Templates
To delete a document template, hover your cursor over the applicable row and then click the ellipsis button that appears on the right side. You must first archive a document before you can delete it, so click Archive.
To view archived templates, make sure the filter option is set to "Visible." Hover your cursor over the row and click the ellipsis button to either restore the template or delete permanently.
When you select Delete, you will be notified whether the template is being used by any organization documents. If you choose to continue, verify your identity through MFA to confirm. You cannot restore deleted templates.
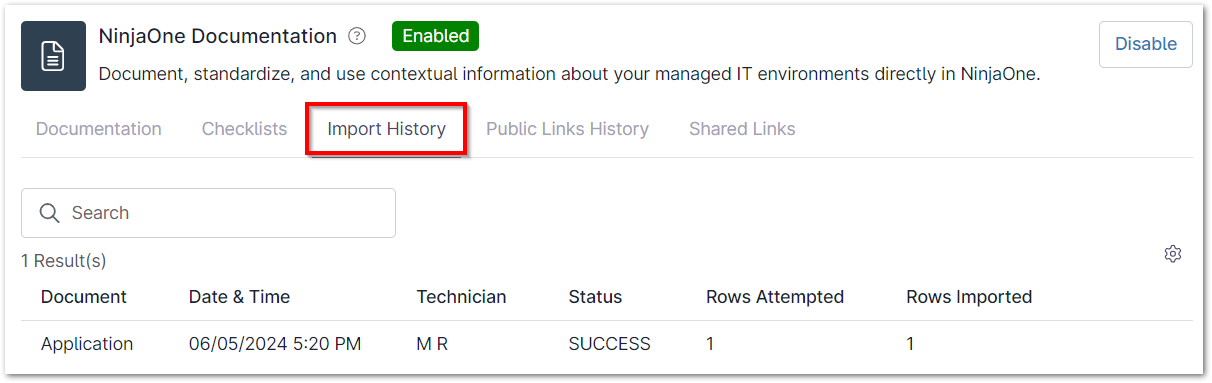
Import History
The Import History will show a list of documents which have been imported
Documentation Checklists
Checklists are a type of documentation that NinjaOne technicians can create and manage from the NinjaOne Documentation application. Once added to the NinjaOne Documentation application, the checklist(s) can be added to the Documentation > Checklists tab on the organization dashboard (see

Shared Links Administration
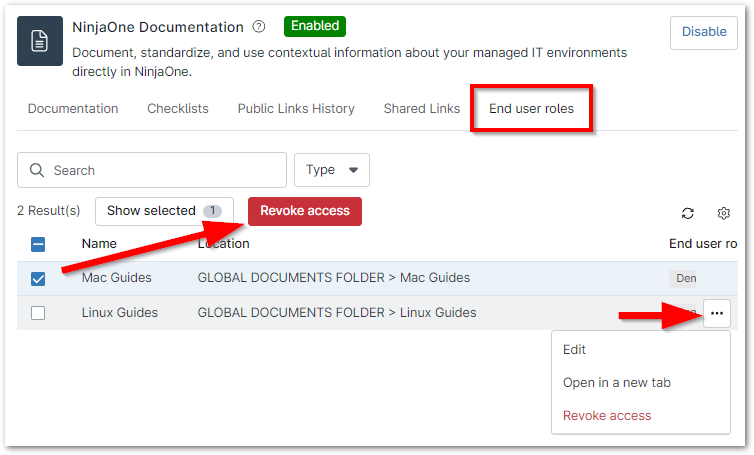
End User Roles
TOTP
System administrators can allow technicians to share Time-based one-time passwords (TOTP) codes for Apps & Services, Knowledge Base, and Checklists.
There are two parts to TOTP codes:
- TOTP Secret — this is used to generate a one-time code based on the current time.
- TOTP Code — this is the code generated by the secret that is revealed after providing MFA authentication. This code allows logins credentials to be shared with only intended recipients while securing the data from others.
Learn more at TOTP Codes.