Topic
Locations can be used as a way to further sort the devices under an organization—some examples include when an organization has more than one office location, department, floor, etc. where devices may be located.
Environment
NinjaOne organization editor
Index
- Creating a New Location
- Editing or Deleting an Existing Location
- Moving Existing Devices to a New Location
- Adding New Devices to a Specific Location
- Viewing Devices by Location
Creating a New Location
- Open an organization editor (Administration → Organization), select the Locations tab and click Add Location.
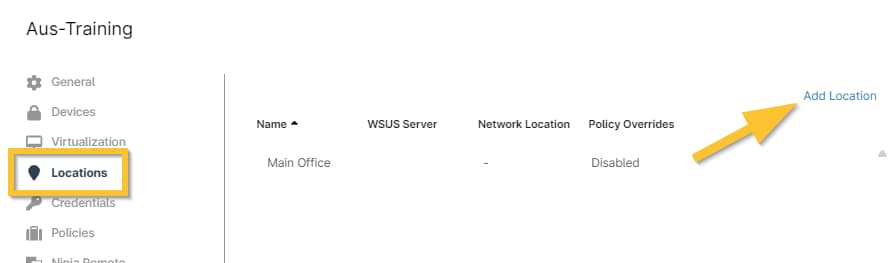
Figure 1: NinjaOne → Administration → Organizations → editor → Locations → Add Location
The Add Location configuration modal displays with the General tab open by default.
- Enter a name for the location, as well as an optional address and description (if desired). Important Note: Each location for an organization must have a unique name. If you attempt to add an organization with the same name of an existing organization, the incompliant field turns red (see screenshot above) and prevents completion of the process.
- Use the subsections below to configure WSUS, Backup, and Policy tab settings for the location.
- Click Save in the bottom right corner of the window to finish adding the new location.
WSUS Patching Server Location
If you have a WSUS server configured for the organization (see: Windows Patch Management and WSUS Server Setup), you will also see the WSUS tab at the top of the location editor, allowing you to specify how you would like to configure the server. Please use the referenced documentation for instructions.
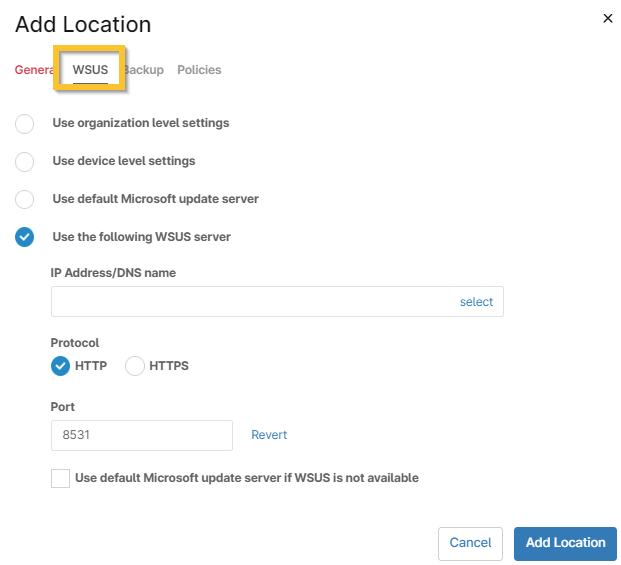
Figure 2: NinjaOne organization editor → Add Location modal → WSUS
Backup Location
The Backup tab provides the option to back up Network Attached Storage (NAS) shares to protect data that does not reside on agent machines, or to remove a default network storage location altogether. For more information about NAS Backups, see: NinjaOne Backup: Network Storage.
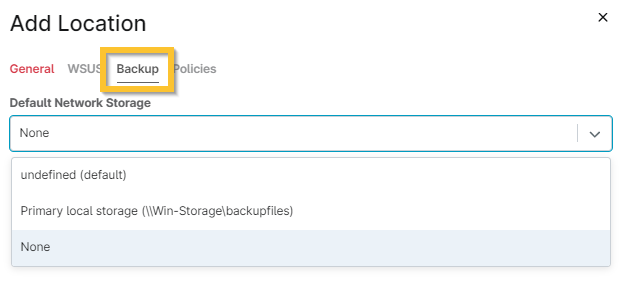
Figure 3: NinjaOne organization editor → Add Location modal → Backup
Policies by Location
Policies can be set by device location, which allows you to use different policies under the same organization and provides another level of granularity and control over how endpoints are managed.
Under an organizational policy, technicians can apply specific rules and overrides that may be required by different locations in that organization — such as patching schedules, conditions monitored, or other location-specific actions.
For an extra level of control, policies can be overridden under the Settings tab on the device dashboard.
Deleted policies log an activity to notate when a user disables them.
Users can edit a location's policy by clicking edit/delete from the location list in the organization editor.

Figure 4: NinjaOne organization editor → Add Location modal → Policies
When the policies for the location are enabled, this data is reflected in the Policy Overrides column.
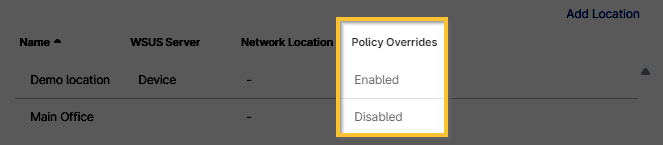
Figure 5: NinjaOne organization editor → Locations → Policy Overrides column
When a policy is changed, all devices under that location reflect the assignment on the device dashboard under the Settings tab (unless the policy was overridden at the device level):
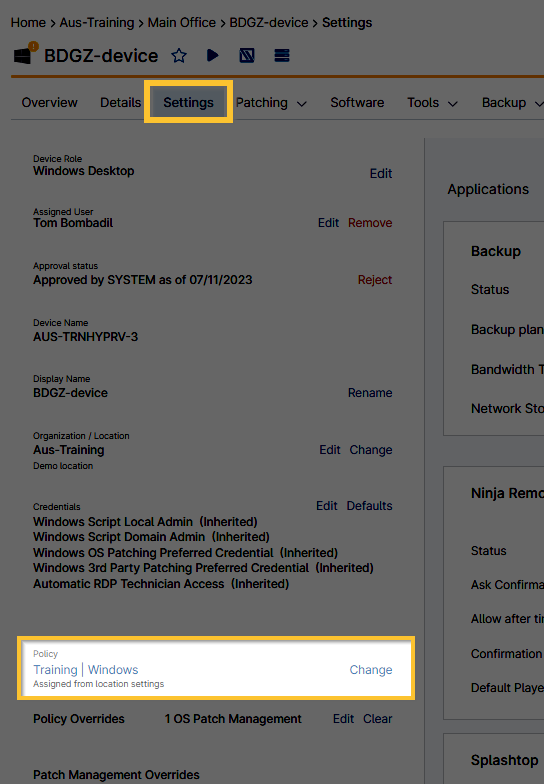
Figure 6: NinjaOne → Device dashboard → Settings → Policy data
Editing or Deleting an Existing Location
When editing a location, you can change any of the data within, including WSUS, backup, and policies.
If a user disables policies by location, saves and closes the editor, then enables policies by location again, all policies reflect their default status (i.e., they return to the state before they were enabled the first time).
- Open an organization editor (Administration → Organization), and select the Locations tab.
- Move your cursor over the existing location and click Edit or Delete.

Figure 7: NinjaOne organization editor → Locations → Edit
Moving Existing Devices to a New Location
- Click Devices in the left navigation pane and activate the checkbox(es) for the device(s) which you want to migrate to a new location.
- Move your cursor over Configure and click Organization/Location.
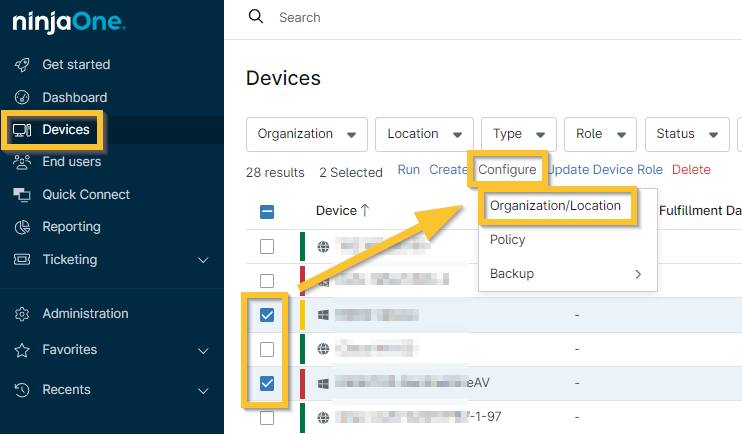
Figure 8: NinjaOne → Devices search grid → Select devices → Configure → Organization/Location
- Select a new organization or location from the modal and then click Save.
Adding New Devices to a Specific Location
The generated installer automatically deploys devices to the specified organization and location when run.
- From anywhere in the NinjaOne console, click the plus sign (+) in the top right corner of the screen and select Device.
- Select which type of device you would like to add.
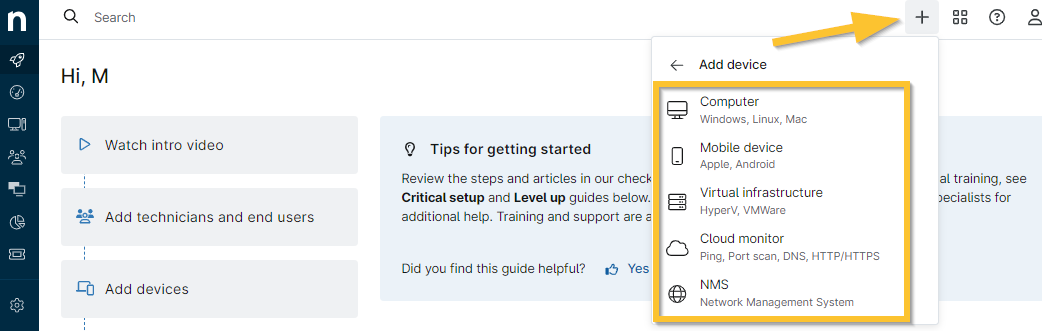
Figure 9: NinjaOne → Add → Device → Select device type
The Add [device type] modal displays.
- Select the organization from the applicable dropdown first to enable the Location field selection. Please note that setting a location is not an option for NMS or virtual infrastructure using this process; however, you can still change the location on the device dashboard under Settings.
Viewing Devices by Location
From the Locations tab on the organization dashboard, you can take action on devices at that location, view ticket summary, device health, running actions, and event logs.
- Navigate to the organization dashboard, and move your cursor over the Location tab.
- Select the location from drop-list.
- Move your cursor over a device name to see action options. These actions can also be taken from the main organization dashboard.

Figure 10: NinjaOne → Organization dashboard → Locations → Device actions
Additional Resources
For a list of frequently asked questions about locations, please see: Locations: FAQ