Topic
This article describes third-party patching features available for Apple macOS endpoints managed by NinjaOne. The article also explains how to activate, configure, and view patching activity.
Environment
- NinjaOne Patching
- Apple macOS
Description
Third-party software patching enables you to manage software updates automatically for multiple third-party software products.
Select a topic to continue:
- Activating Patch Management
- Configuring Patch Management on the Software Patching Page
- Settings Tab Options Explained
- Software Tab Settings
- Viewing Patch Scan and Installation Attempts
- Manually Scanning for or Applying Updates
- Current Products Supported
Activating Patch Management
To enable third-party patching for a macOS endpoint policy, perform the following steps:
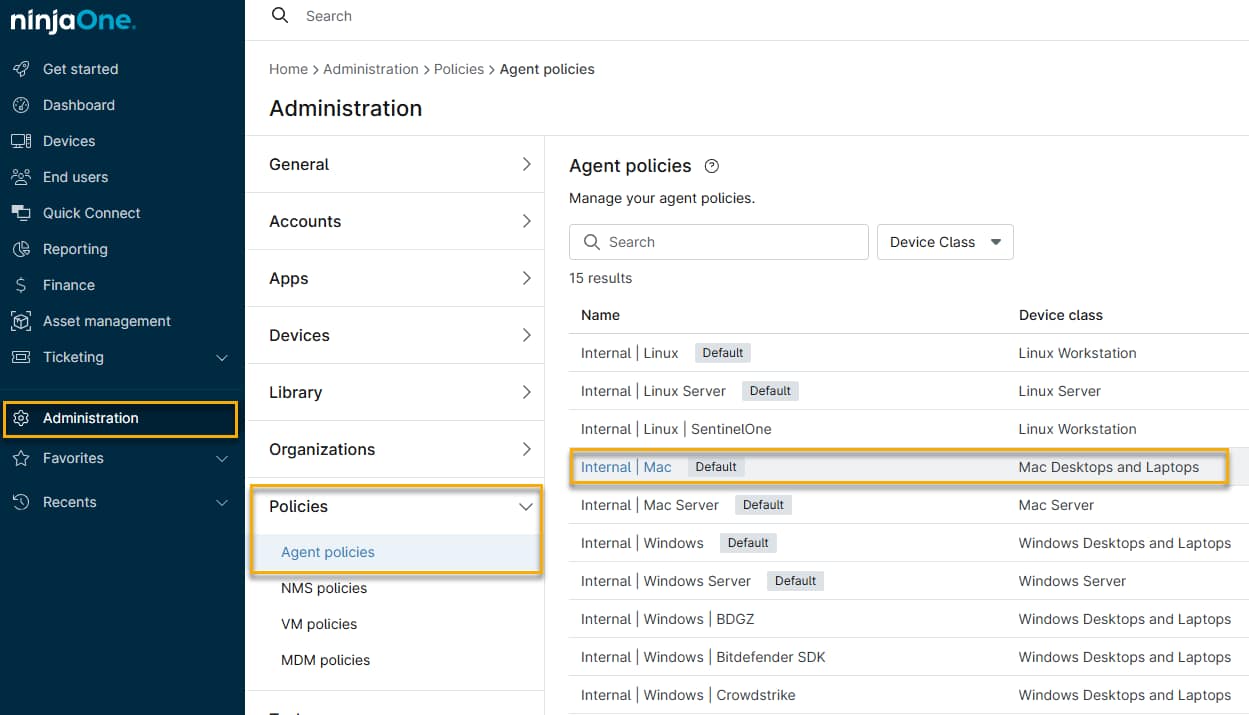
- In NinjaOne, click Administration, then click Policies → Agent policies from the expanded options and select your macOS policy from the list.
- The policy's management page will open. Click the Software patching option, then click the Status toggle switch.
Configuring Patch Management on the Software Patching Page
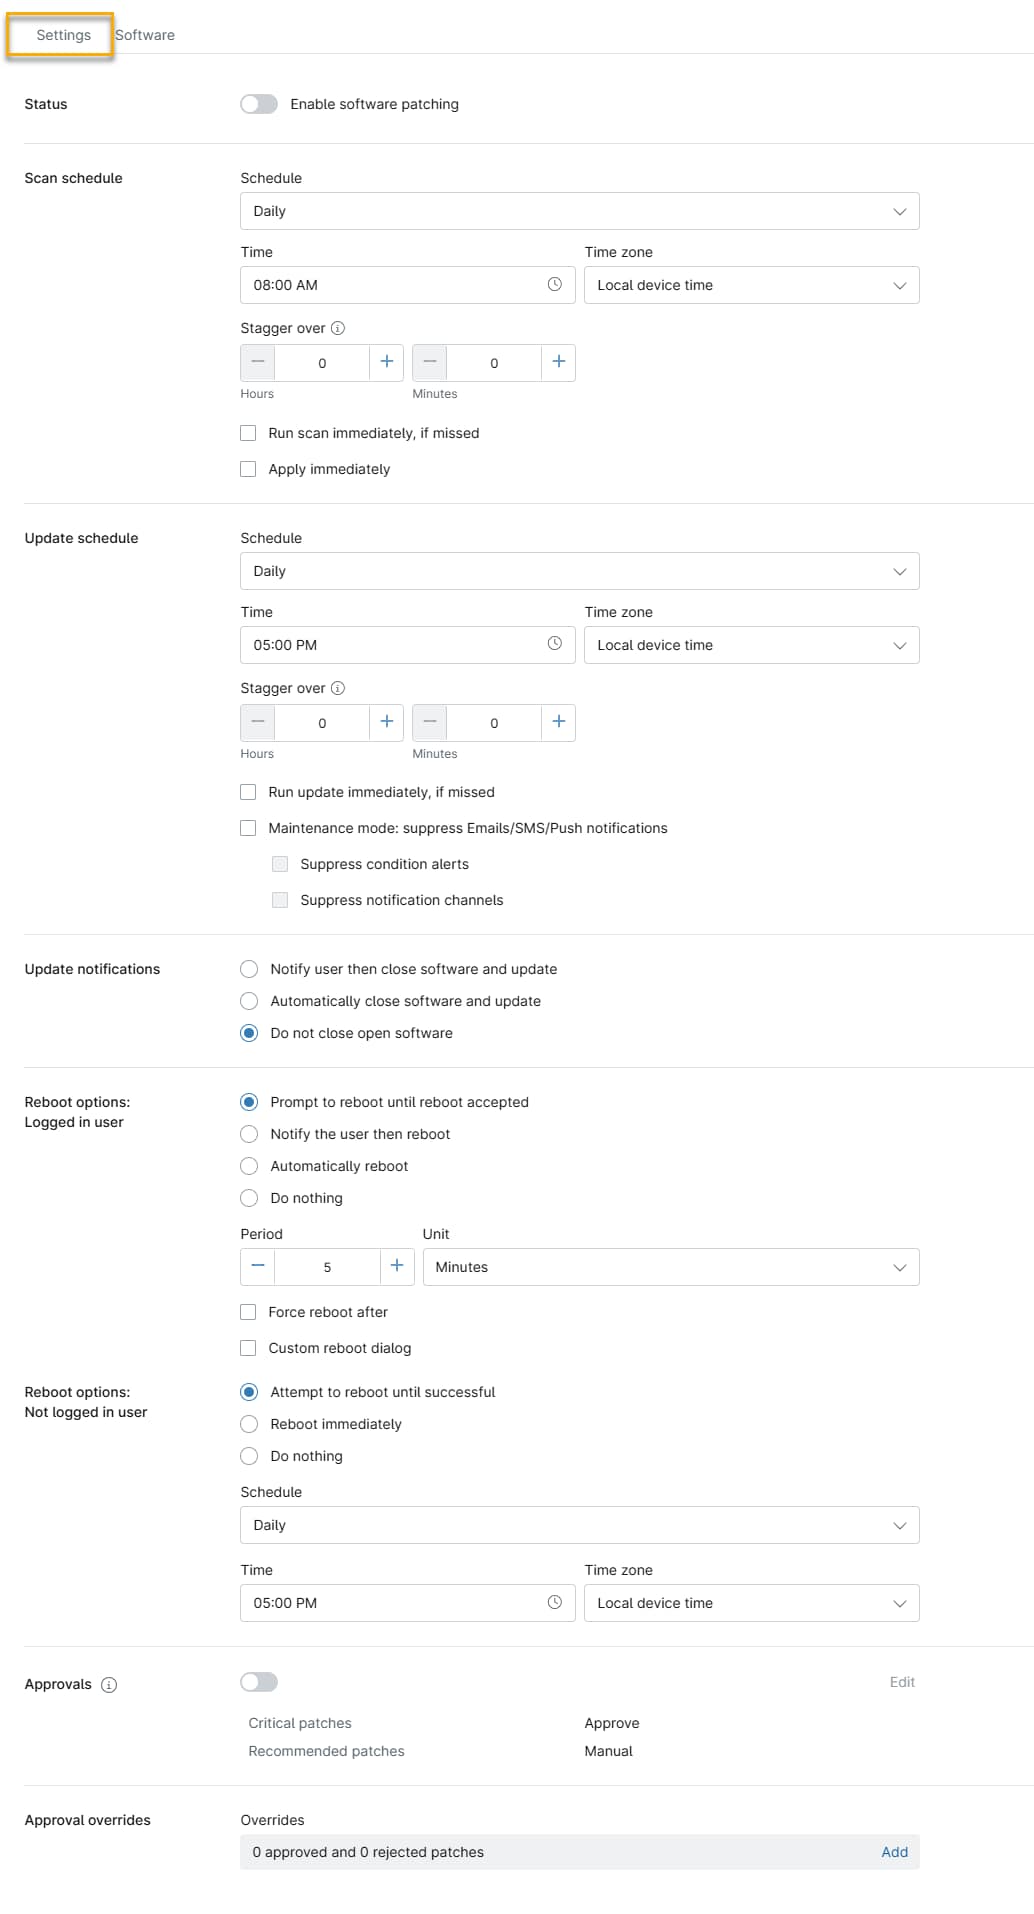
Use the Settings tab to configure your third-party patching settings.
Settings Tab Options Explained
You can configure the following software patch management parameters:
| Setting | Description |
|---|---|
| Scan schedule | This parameter set determines when the device will scan for available new patches.
|
| Update schedule | These settings specify when NinjaOne should apply the updates it finds when scanning.
|
| Update notifications | Choose how NinjaOne notifies users when the system needs to update software that cannot be patched in the background. The current setting will show as a link in this section. Click the link for the following additional options:
Applications must be closed to apply an update fully. If an application is still open when NinjaOne attempts to install an update, the installation will fail, and the following error will appear in the activity log: "One or more products failed to update due to application running state." Closing an open application can result in the loss of any unsaved data. When selecting an automatic close option, we recommend scheduling updates during off-peak hours, when users are less likely to actively use their systems. |
| Reboot options | These settings let you specify reboot behavior after NinjaOne patches a device. You can configure settings for both logged-in and logged-out users. If an end user interacts with a reboot prompt, NinjaOne will display an activity in the Device's Activity feed. Refer to Device and System Activity Notification Feed for more information. Reboot options: Logged-in user: Here you can configure the following settings:
Reboot options: Not logged in user: Here you can configure the following settings:
|
| Approvals | In this section, you can configure approval settings for all NinjaOne software not listed on the Software tab. Click the Edit link to automatically approve, reject, or require manual approval for Critical and Recommended patches. Refer to NinjaOne Dashboards: Software Inventory for more information. |
| Approval overrides | Here, you can set NinjaOne to override your patching policy for specific patches. Click the link to open the Overrides list, then search for the patch name. Use the second drop-down menu to select whether to approve or reject the patch. Examples of scenarios in which patches would appear in the Overrides section:
|
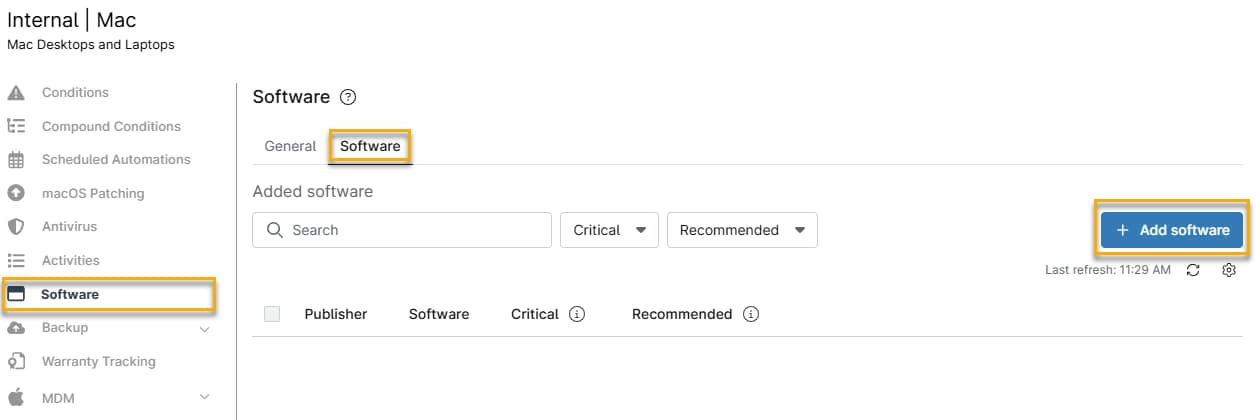
Software Tab Settings
The Software tab is where you can select the software you would like to include in NinjaOne's third-party patching. It is located next to the General tab on the Software patching page, as shown in Figure 4. From here, you can also configure approval settings for critical and recommended patches.
Adding Software to the Scheduled Patching List
When you activate software patching for a product, NinjaOne downloads all updates for that product on the machines affected by the policy. Those updates remain downloaded as long as third-party software patching is activated for that product.
- On the Software patching page, click the Software tab, then click Add software.
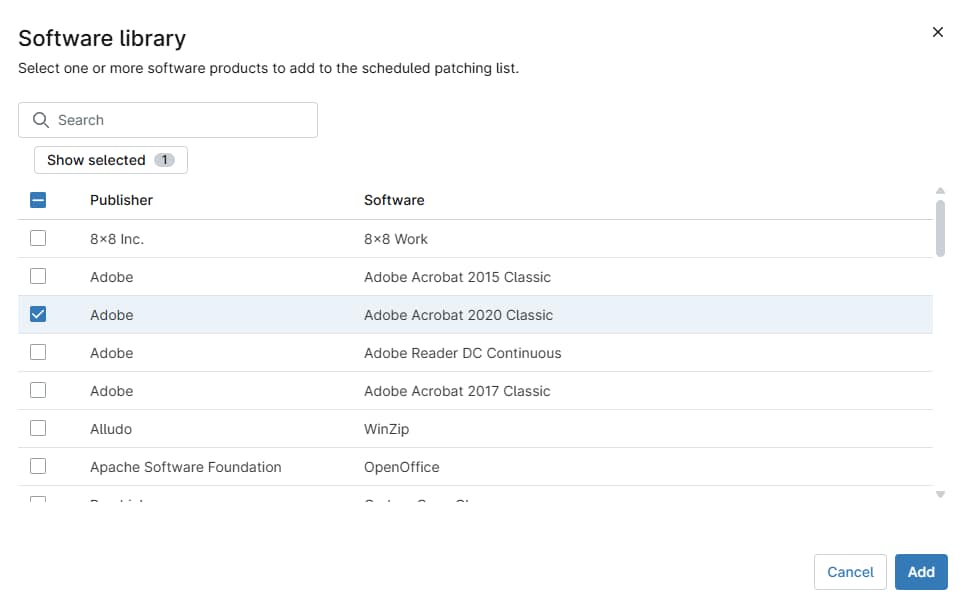
- The Software library page will open. This page provides a list of available third-party applications. Select the checkbox next to the software titles you wish to install, then click Add. For publishers with multiple products, type the publisher's name into the search bar to find and view all titles.
- Your added software will now appear in the Software tab.
Software Patching Settings
This process lets you edit individual patch settings for installed third-party applications. There are two patch types: Critical and Recommended, and four behaviors for each patch type:
- Default: The software will use the settings configured in the Approvals section on the General tab.
- Approve: NinjaOne automatically approves all patches for the next update cycle.
- Manual: Patches in this category appear in a "pending" state, requiring manual approval or rejection (either for individual devices or for the entire policy).
- Reject: NinjaOne automatically rejects all patches for that category.
Editing Software Patching Behaviors
- In the Software tab, select the checkbox for the software you want to edit, then click the Edit button when it appears.
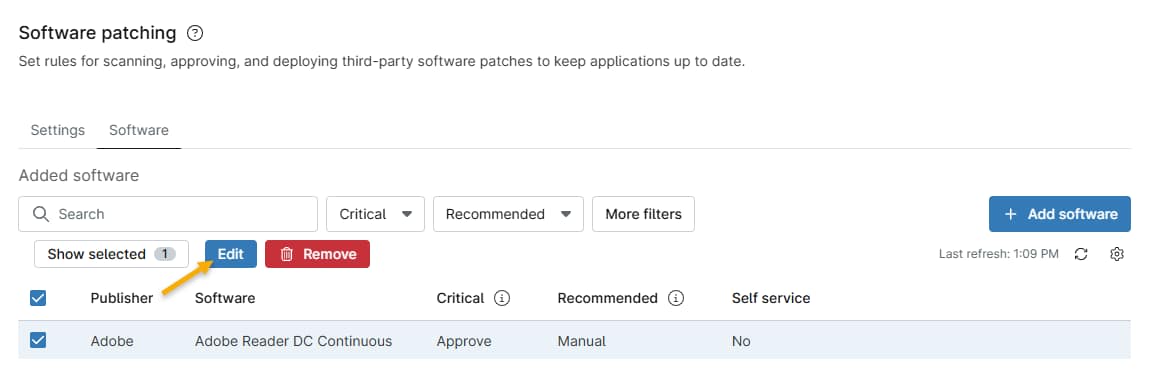
- The Edit software dialog box will open. Use the Critical patches and Recommended patches drop-down menus to select the patching behavior. Use the Enable self service drop-down menu to make the application available to assigned end user device owners in their custom NinjaOne instances. Refer to
Figure 7: The Edit software dialog box (click to enlarge) Viewing Patch Scan and Installation Attempts
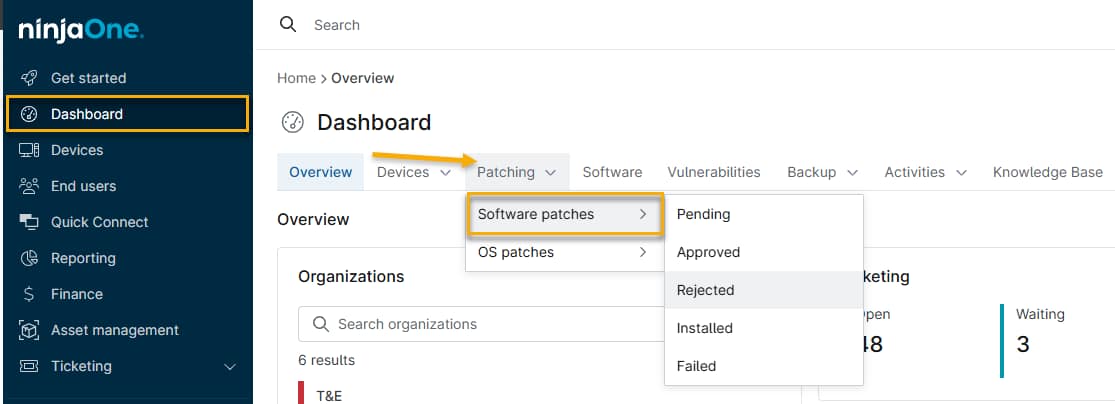
You can view patches found and patches installed in the Overview dashboard. Navigate to Dashboard → Patching → Software patches, then choose a patch status. You can choose Pending, Approved, Rejected, Installed, or Failed.
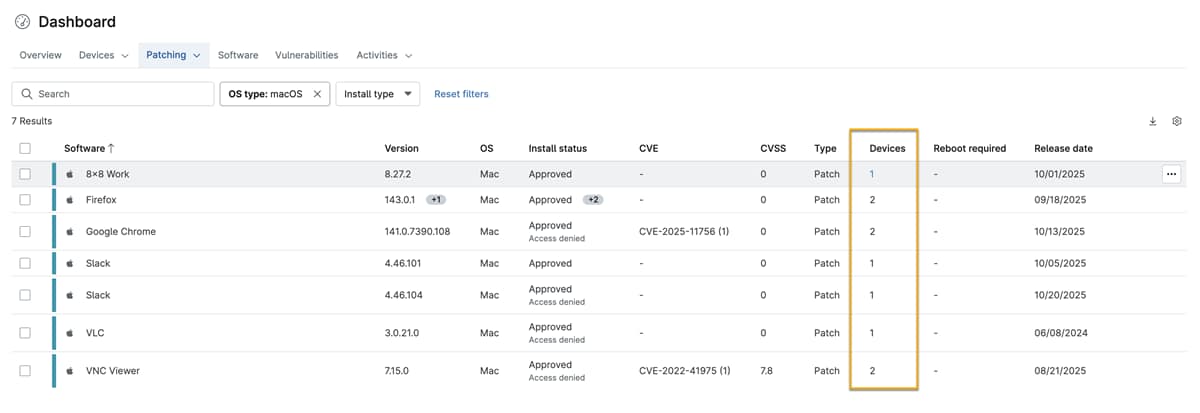
Figure 8: Dashboard → Patching tab → Software patches (click to enlarge) Viewing Devices by Patch Status
If you are viewing the software patches at the System or Organization dashboard level, you can click the number in the Devices column to generate a list of the devices to which the patch status applies. For example, for a patch in the Approved tab, clicking the number shows the devices for which it is approved but not yet installed.
Figure 9: Devices by patch status (click to enlarge) Manually Scanning for or Applying Updates
Scanning For and Updating Software on a Single Device
You can run a patch scan or update cycle on demand from any device's dashboard.
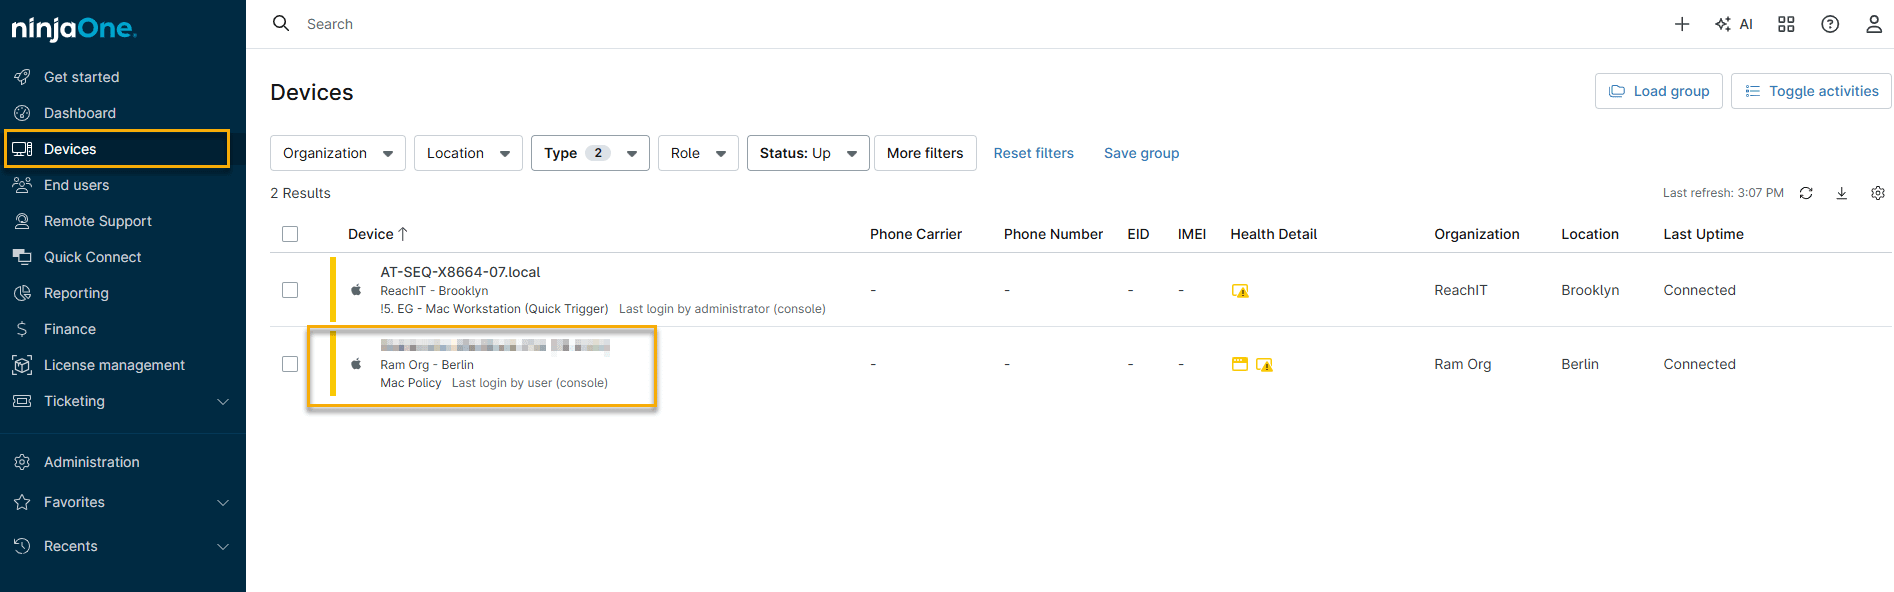
- In NinjaOne, click Devices, then click the device from the search grid.
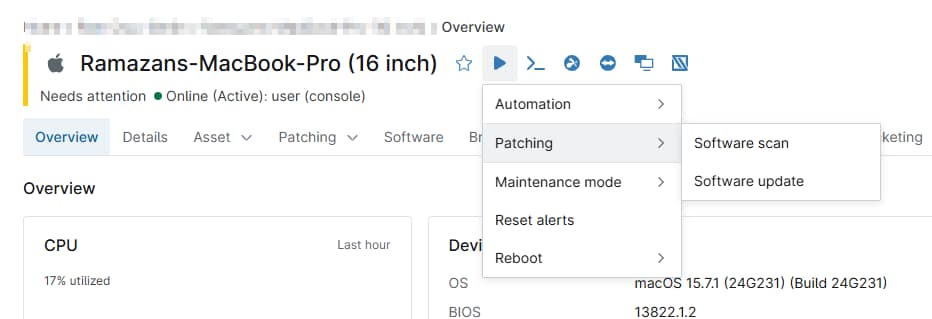
Figure 10: The Devices search grid (click to enlarge) Place your cursor over the play icon in the action bar, select Patching, then choose Software scan or Software update.
Figure 11: Play icon → Patching → Software scan and update (click to enlarge) Scanning For and Updating Software on Multiple Devices
You can run a patch scan or update cycle on multiple devices at the same time.
- Navigate to the Devices search grid, as shown in Figure 10 above.
- Select the checkboxes for the devices. NinjaOne will display new options.
- Navigate to Run → Patching → Software scan, or Software update.
Figure 12: Run → Patching → Software scan and update (click to enlarge) These options appear only if software patch management is activated for the policy governing the device, as described in the Activating Patch Management section above, and the device is online.
Current Products Supported
This table lists the current products that NinjaOne Third-party patching supports for macOS:
Manufacturer Software 8x8 Inc. 8x8 Work Adobe Adobe Acrobat 2015 Classic Adobe Adobe Acrobat 2017 Classic Adobe Adobe Acrobat 2020 Classic Adobe Adobe Acrobat DC Continuous Alludo WinZip Anthropic Claude Apache Software Foundation OpenOffice Audacity Audacity BareBones Software BBEdit 15 Bombich Carbon Copy Cloner Box, Inc. Box Sync Brave Brave Browser Cisco Systems, Inc. Webex Citrix Systems, Inc. GoToMeeting Dbeaver Corporation Dbeaver CE Dbeaver Corporation Dbeaver EE DeepL GmbH DeepL Discord Inc Discord Docker Inc Docker Document Foundation, The LibreOffice DrawIo Ltd DrawIo Dropbox Dropbox Evernote Corporation Evernote Garmin Garmin BaseCamp Google Google Chrome Google Google Drive Iterate GmbH Cyberduck KongInc Insomnia MacPaw The Unarchiver Microsoft Excel Microsoft Microsoft Edge Microsoft Microsoft Teams Microsoft OneDrive Microsoft OneNote Microsoft Outlook Microsoft PowerPoint Microsoft Visual Studio Code Microsoft Word Mozilla Firefox Mozilla Thunderbird Objective Development Little Snitch OpenAI ChatGPT Opera Software ASA Opera Piriform Ltd CCleaner Postman Postman RealVNC Ltd VNC Server RealVNC Ltd VNC Viewer Slack Technologies Slack Stairwell Inception Forwarder TeamViewer TeamViewer VideoLAN VLC Vivaldi LLC Vivaldi Wireshark Foundation Wireshark Zabbix Zabbix Agent Zoom Video Communications Zoom Client