Topic
This article explains how to activate and use the NinjaOne IT Asset Management feature.
Environment
NinjaOne IT Asset Management (ITAM)
Description
NinjaOne ITAM extends the NinjaOne platform so you can track and manage the lifecycle of any item you want within NinjaOne.
Select a category to learn more:
- Activate the Product
- Configure the Asset Fields
- Configure the Entity Relationships
- Configure Unmanaged Roles
- Grant Technicians Access to the Product
- Manage Assets from the NinjaOne Dashboards
- Using ITAM with the API
- Additional Resources
Activate the Product
To use this feature, you must manually enable it. Perform the following steps:
- In NinjaOne, navigate to Administration → Apps → Installed and select NinjaOne IT Asset Management.
- Click Enable.
Configure the Asset Fields
Once NinjaOne ITAM is activated, three tabs will appear in the app.
Open the Asset fields tab and then click Edit to configure the default settings. This data is tracked for all managed assets.
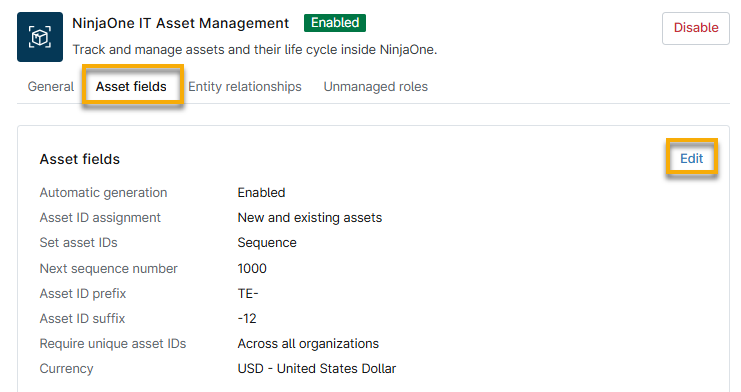
In the General section, select the default currency that your assets will use.
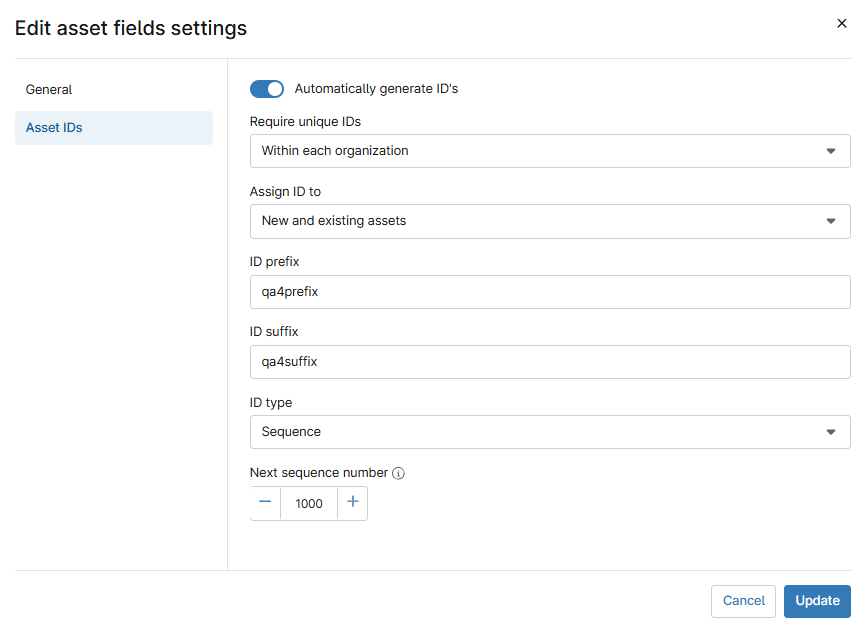
Then, open the Asset IDs tab to configure identification settings for your assets. You can automatically generate identification numbers, prefixes, and suffixes for new and existing assets. If the ID type is set to Sequence, the Next sequence number value sets the starting point for generating the next ID if no existing ID exceeds the current value.
Once you have created your asset ID, you can use that data to create a hyperlink to navigate directly to that device's dashboard. To create the URL, add your domain and the asset ID to the following example URL:
https://<domain>/#/assetManagement/search?assetId=<Asset ID Field><domain> and <Asset ID Field> text with your custom data. The following Figure 3 shows an illustration of the domain and Asset ID, so the URL should look like the following:https://qa6...-env.ninja/#/assetManagement/search?assetId=prx463sfx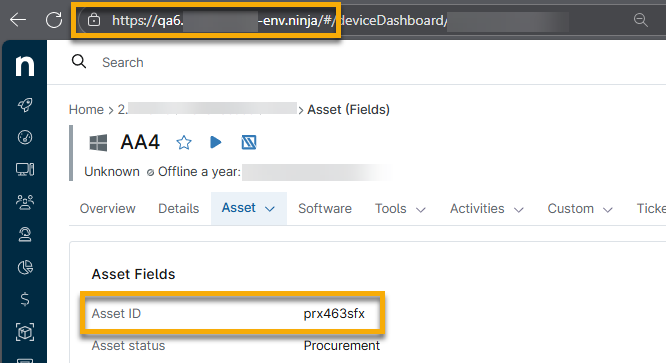
Configure the Entity Relationships
You can use NinjaOne ITAM to create global entity-to-entity relationships, which provide the ability to extend the functionality of a traditional database through connections between assets.
About Entity Relationships
Entity relationships use configuration items (CIs) to denote the device, component, or other table entry that could be related to another device, component, or entry. You may notice CIs referred to as "entities" by other applications.
In this context, a relationship is a type of connection between devices that is typically directional, which means the relationship has a source and a target. You can use relationships to monitor the following reports:
- Impact analysis
- Root cause analysis
- Change management
- Service mapping
NinjaOne provides the following relationship types by default:
| Relationship Type | Description or Purpose |
|---|---|
| Depends on; Used by | This indicates that a CI depends on another to function (App → Database). |
| Runs on; Hosts | This indicates that a CI runs on another CI (App → Server or VM → Host). |
| Connected to | This is a generic connection, often used for networking hardware. |
| Contained in; Contains | This indicates that a CI is part of a larger CI (VM → Cluster, File → Folder). |
| Backs up; Backed up by | This defines the data backup or recovery relationship. |
| Monitored by; Monitors | This indicates a CI is being monitored (App → Monitoring Tool). |
| Installed on; Installs | This shows deployment (Software → Machine). |
| Owned by; Owns | This links CI to an owner, such as a person, team, or department. |
| Connected via | This describes a CI connected through a specific path or medium, which could be a cable. |
| Part of; Has Part | This is used in hardware to show a component structure (Disk → Server). |
| Impacts; Impacted by | This defines service dependencies for impact analysis. |
| Requires; Required by | This is similar to depends on, used in service design. |
| Relates to | This is a catch-all for non-hierarchical associations. |
| Accessed by; Accesses | This shows user or system access to a CI (User → System). |
| Deployed on | This indicates that a CI is deployed on another CI (Docker container → Kubernetes node). |
| Supports; Supported by | This indicates support structure or fallback (Primary server → Secondary server). |
| Replaces; Replaced by | The CIs have been retired and replaced by a new CI. |
Create a Custom Entity Relationship
You can create custom relationships to define or add custom capabilities. You will provide the capability and then build the out-of-the-box functionality within the tool.
Creating an entity relationship in the NinjaOne ITAM app will make the relationship accessible on the dashboards, where you can define relationships and entity types for specific organizations and devices. Refer to the section Manage Assets from the NinjaOne Dashboards within this article for more information.
To create an entity relationship, perform the following steps:
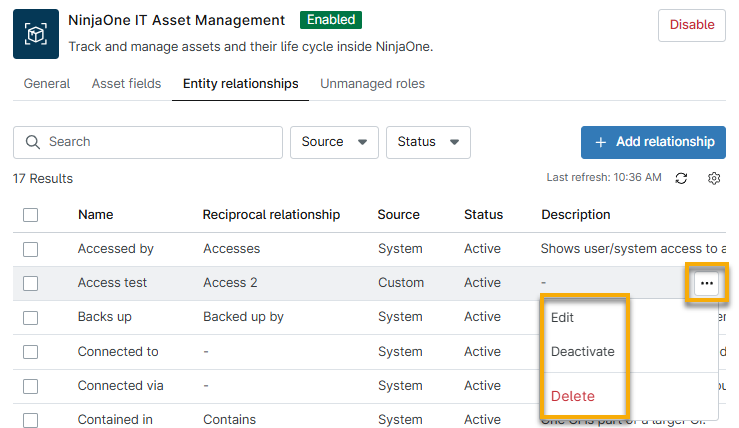
- Open the Entity relationships tab and click Add relationship.
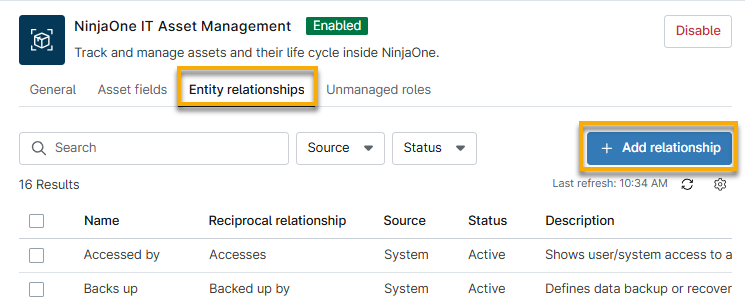
The Add relationship configuration dialog appears.
- Assign the Relationship name a unique identifier.
- When you select the Includes a reciprocal relationship checkbox, an additional field appears for Reciprocal relationship name. Assign the Reciprocal relationship name a unique identifier.
- In the Description field, explain how to use the relationship type.
- Click Add.
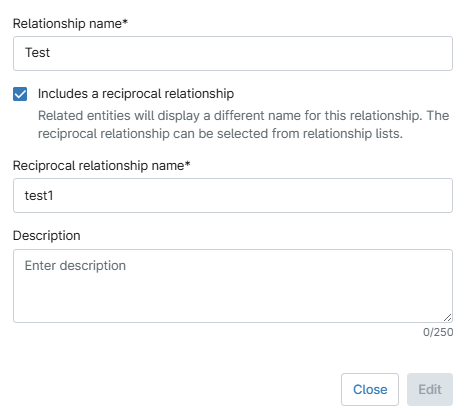
- To edit, deactivate, or delete the custom relationship, move your mouse cursor over the row and click the actions menu.
Configure Unmanaged Roles
When configuring unmanaged roles and custom fields, you can optionally import data from a pre-configured library of common asset types to aid in setting up the unmanaged device.
- Open the Unmanaged roles tab and click Import.
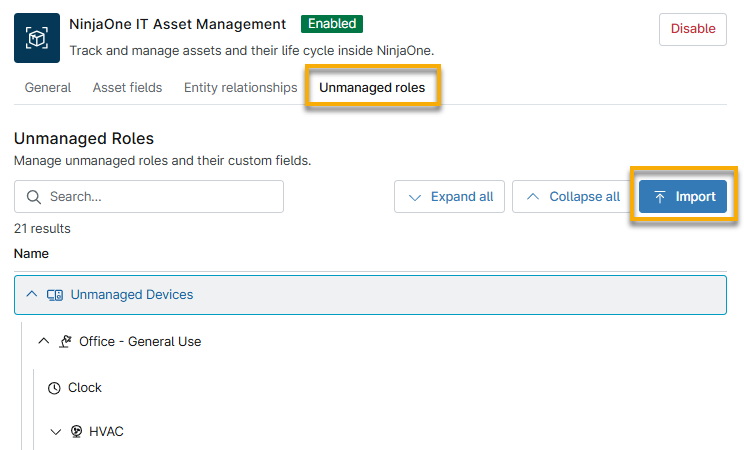
- Click the applicable buttons to expand and show or collapse and hide all category items, or click the arrows next to the category name.
- Click the category name that you would like to import. This import will include all items contained in the category, along with any associated custom fields and tabs.
- Click Continue.

- Select a destination folder for the new category. To create a new folder, select the top category for Unmanaged Devices.
- Click Import.
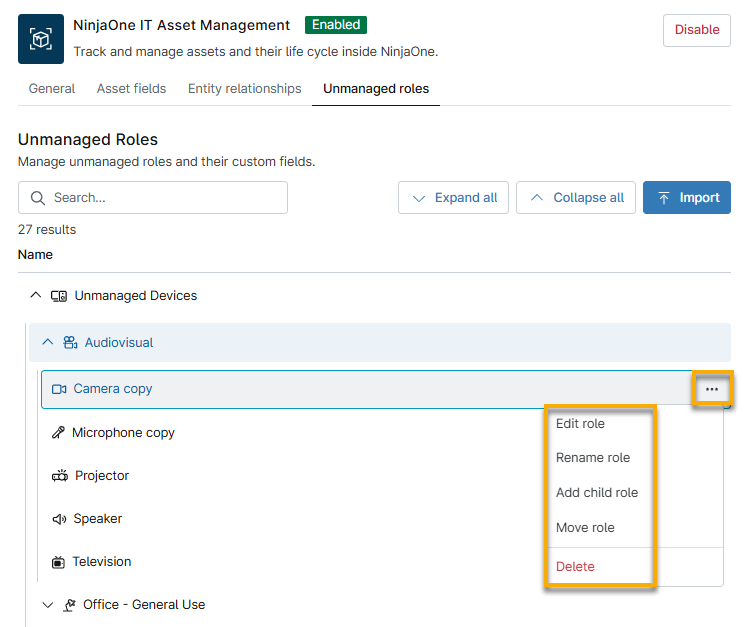
The new category appears in the specified location in the Unmanaged Roles table in the ITAM application and at Administration → Devices → Roles. You can further manage roles by moving your mouse cursor over the row and clicking the actions menu. You can only delete the category folder after deleting all of its child categories. To learn more about working with unmanaged device roles in NinjaOne, refer to
Grant Technicians Access to the Product
For more information about managing licenses, refer to
- The Asset → Fields page allows you to view and update basic device information. Click the edit icon to change the data. This information will be tracked on the Devices search page.
- For more information about managing licenses, refer to NinjaOne Endpoint Management: Software Licenses.
- For more information about managing asset relations, refer to NinjaOne IT Asset Management (ITAM): Manage Asset Relationships.
Using ITAM with the API
You can use the following endpoints to gather ITAM information for staged or decommissioned devices. Refer to NinjaOne Documentation: Public API to learn more about the API tool.
GET /v2/devicesGET /v2/devices-detailed
Additional Resources
Refer to the following resources to learn more about the NinjaOne ITAM feature: