
Topic
This article explains how to configure your ticketing boards in NinjaOne.
Environment
NinjaOne Ticketing
Description
This feature allows users to create new custom statuses that display as children of existing system statuses (New, Open, Waiting, Paused, Resolved, Closed). You can assign these custom statuses to any ticket and apply them to board conditions, board filters, and automations.
Index
Select a topic to learn more:
Custom Ticketing Statuses
Use the status of the ticket to communicate the progress of the ticket (pending, testing, backlogged, and more).
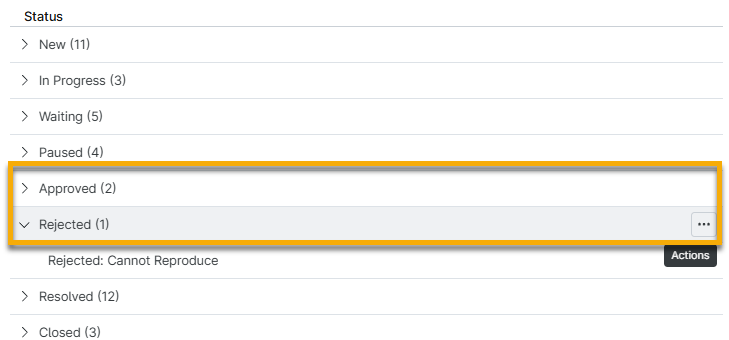
If there is a number next to the status name, this indicates that custom statuses have been added; click the arrow to expand the section and view new statuses.
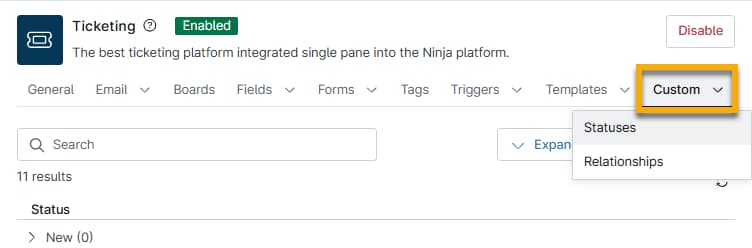
To manage custom statuses, open the Custom → Status tab on the NinjaOne Ticketing configuration page; move your mouse cursor over the status to view customization options.
- If the status is at the beginning of the list or the primary level, you have the following options:
- Edit status: Change the display name and notification options.
- Add custom status: Create a secondary status.
- If the status is nested or at the secondary level, you have the following options:
- Edit status: Change the display name and notification options.
- Delete: Erase the status.

Automatic Transition for Resolved Tickets
The Resolved setting for Custom → Status works differently from other custom statuses; you must also select an option for Automatic transition for resolved tickets and Transition time for resolved tickets. The data for the Automatic transition for resolved tickets drop-down menu is dependent on the custom configurations for Closed statuses.

Ticketing Approval Workflow
NinjaOne Ticketing provides a default Approved and Rejected status, which you can use to build custom approval and rejection workflows and sort your tickets.
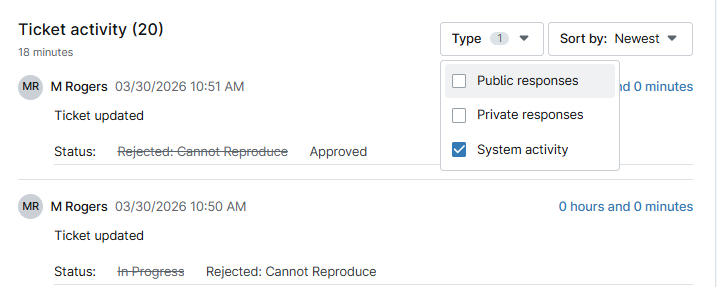
When a ticket is approved or rejected, a notification will display in the Ticket activity section as a System activity.
SLA Targets Met by Status
Use the SLA targets met by status drop-down menu to define when a ticket meets the selected service level agreement (SLA). When you change the status of a ticket, the Response target or Resolution target will update in the Service level agreement section on the ticket page.

Refer to NinjaOne Ticketing: Service Level Agreements (SLA) to learn more about SLAs in NinjaOne.
Custom Ticketing Relationships
Use ticketing relationships when linking tickets or assigning parent tickets on the ticketing boards.
You must activate the Ticket Relations permission for technicians to access the setting for custom ticket relationships. Refer to our NinjaOne Ticketing: Technician and User Permissions article for more information.
To create a custom relationship for linked tickets, perform the following steps:
- Open the Custom → Relationships tab on the NinjaOne Ticketing configuration page and click Add relationship.

- Give the Relationship name a unique identifier and optionally add a description.
- Click Add.
You can deactivate or change the name and description of relationships that you added in the system. You can only deactivate the native relationships that are tagged as System.

Additional Resources
Refer to NinjaOne Ticketing: Resource Catalog to learn more about NinjaOne Ticketing.