Topic
This article describes how to work with organizations in NinjaOne.
Environment
NinjaOne Endpoint Management
Description
Organizations let you configure the customers, departments, and components you onboard and manage with NinjaOne. They are the shells in which you assign policies, other settings, and locations to devices.
Index
- Creating a New Organization
- Configuring Organization Settings
- Importing Organizations
- Displaying Organization Data
- Editing Organizations
- Copying an Organization
- Finding the Organization ID
Creating a New Organization
Follow these steps to create a new Organization in NinjaOne:
- From any page in the NinjaOne console, click the + icon, then select Organization from the drop-down menu.

- Name the Organization, provide an optional description, and configure the time window during which to receive alerts. When finished, click the Save button.
Configuring Organization Settings
The navigation pane on the organization configuration page contains a list of tabs you can use to set up your organization according to your needs. Depending on the features and integrations enabled, the tabs shown may vary from those shown in the following screenshots.
Configuration Tab Explanations
Use this table to learn about the configuration options in each tab.
| Tab | Purpose |
|---|---|
| General |
|
| Devices |
|
| Virtualization |
|
| Locations |
|
| Cache | Create and manage organization cache servers. For more information, refer to NinjaOne Patch Management: Patch Caching |
| Credentials | Add credentials to the Organization's credential store. Set the default credentials for devices within the Organization. Refer to NinjaOne Organizations: Credential Exchange for more information. |
| Network Storage | Configure and edit network storage and backup paths. Check out NinjaOne Backup: Network Storage to discover more. |
| Policies | The Policies option in the Organization editor has multiple tabs:
|
| NinjaOne Remote |
|
| Splashtop | Splashtop is a remote connection tool for screen sharing that features a lightweight agent and highly secure encryption. For more information, refer to the Splashtop: Setup Guide. |
| Backup | Enable the backup engine and configure device deployment. To discover more, read Ninja Data Protection: Setup Guide. |
| End Users | Add and manage end users in the Organization so they can remotely access their devices. To find out more, refer to End User Sharing and Device Access. |
| Patching | Add a WSUS server for the Organization to use with OS patching. Refer to Policies: Windows Patch Management and WSUS Server Setup to learn more. |
| Documentation | Add devices that will function as Documentation delegates. Read NinjaOne Documentation: Apps and Services for additional information. |
| Contacts | Import known contacts for this Organization. |
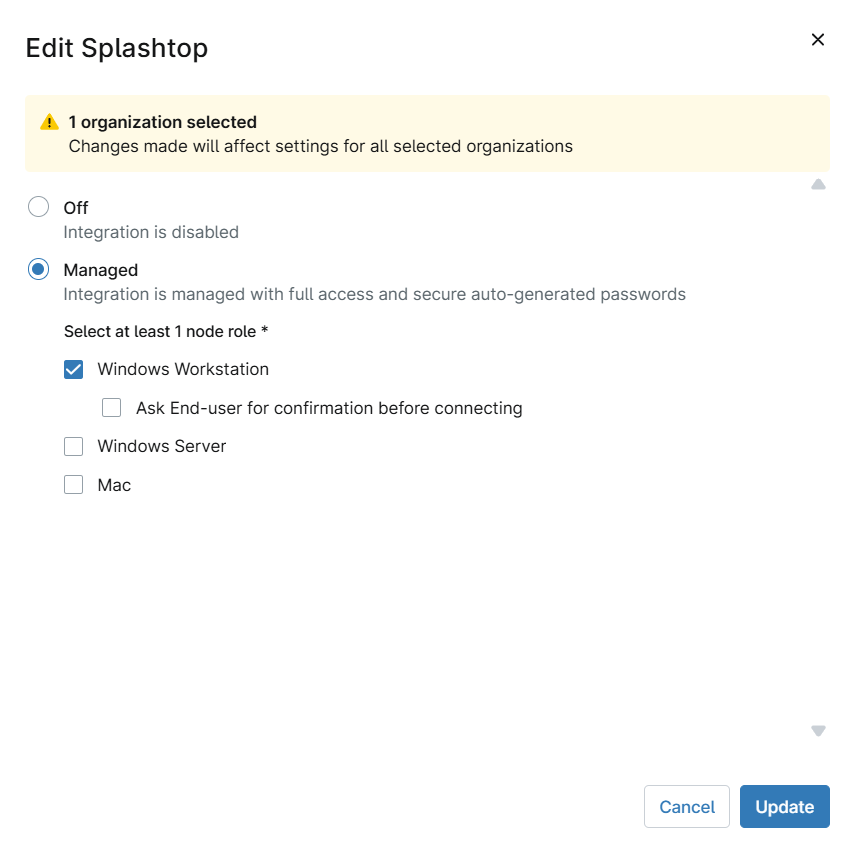
Additional Remote Access Settings
If Remote Access is active, you can choose which device types can use the remote access tool (Windows Workstation, Windows Server, or macOS) and whether to require end user confirmation to connect.
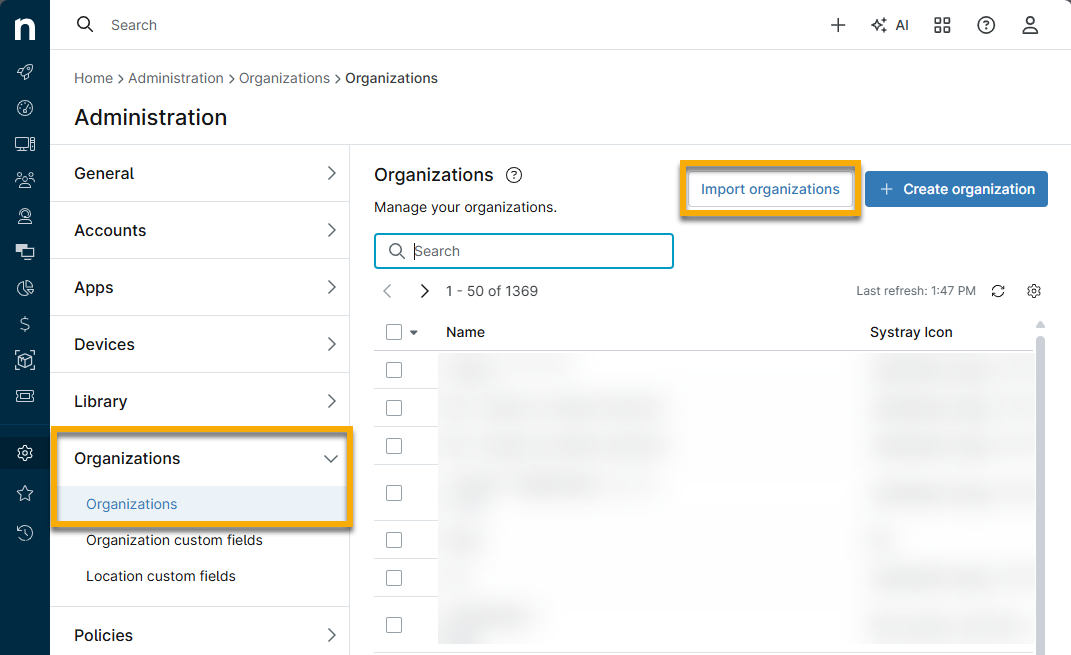
Importing Organizations
To import organizations, perform the following steps:
- Navigate to Administration → Organizations and click Import Organizations.
- On an Excel spreadsheet, enter all organization names you would like to add to NinjaOne into a single column. Copy the column data.
- In NinjaOne, paste the column data into the designated field on the Import Organizations modal.

If you want the new organizations to copy settings from an existing organization, select the existing organization from the drop-down menu. The copied data will apply to all organizations being imported. If you do not make a selection, the imported organizations will not have any settings configured.
Displaying Organization Data
You can control which columns display data in the Organizations tab in Administration. Click the gear icon to add or remove columns.
- Select which columns to add/remove from the Columns drop-down menu.
- Click and drag columns to change the display order.
- Click the X icon next to a column name to remove it.
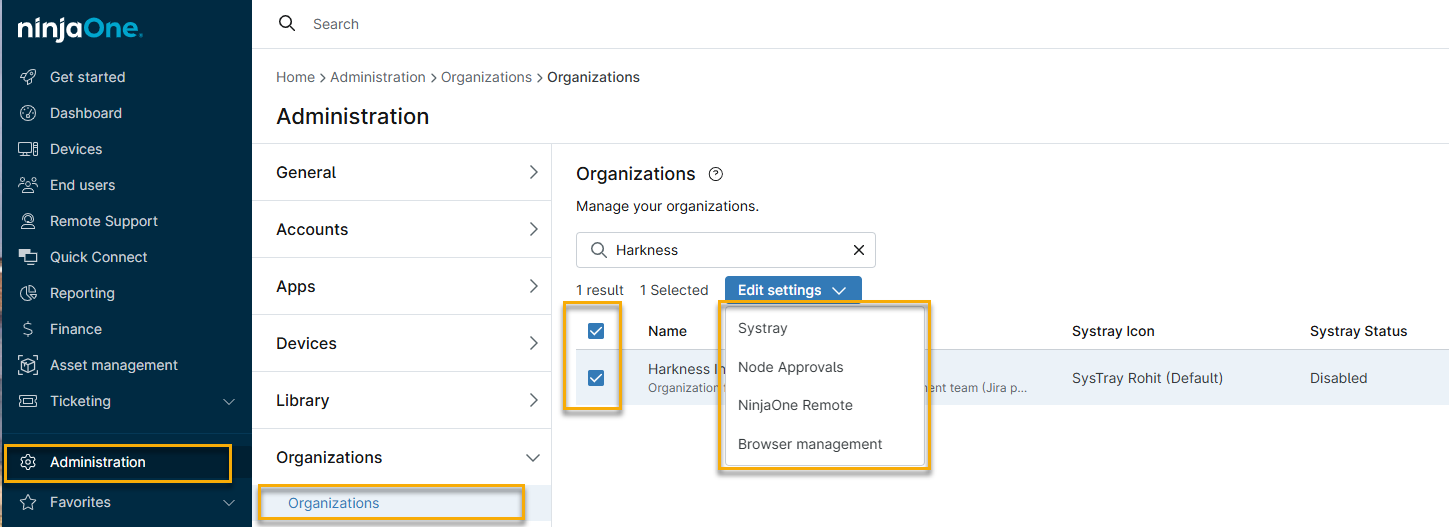
Editing Organizations
Technicians with system administrator privileges set to "Update" for Organization access can edit multiple organization settings simultaneously. This feature enables configuration for remote access provider settings across organizations for Splashtop and NinjaOne Remote.
You can edit an individual organization or (with the correct permissions) multiple organizations at once.
- To edit a single organization, click the organization name in Administration → Organizations.
- To edit settings for one or more organizations, follow these steps:
- In the Organizations List, select the checkboxes next to the organization that need updating, then click the Edit settings drop-down menu. menu.
- Select an option from the drop-down list, perform your configuration changes, then click the Update button.
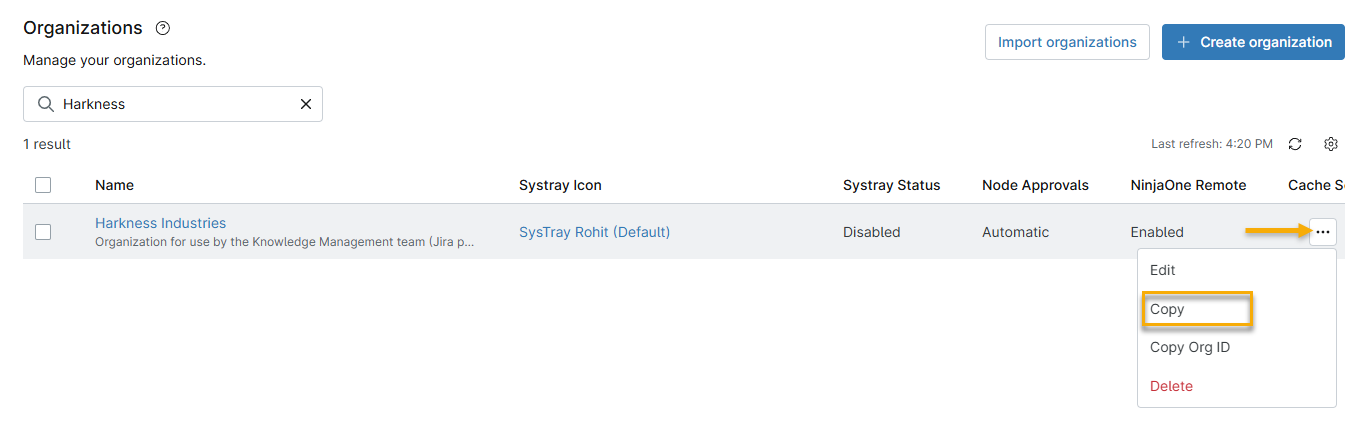
Copying an Organization
To copy an organization and all of its conifgurations, perform the following steps:
- Navigate to Administration → Organizations, place your mouse cursor over an organization, then choose Copy from the drop-down menu when it appears.
- Click Copy, then rename the new Organization and select which settings to duplicate. Click Save to finish.
Finding the Organization ID
Some processes or integrations in NinjaOne may require the organization ID:
- In Administration → Organizations, move your cursor over the organization name.
- Click the ellipsis icon in the row and select Copy Org ID.
Deleting an Organization
To delete an organization, perform the following steps:
- Navigate to Administration → Organizations, place your mouse cursor over an organization, and then choose Delete from the drop-down menu when it appears.
- The system will show an alert message warning that you cannot undo the Organization deletion. Enter your email to confirm the deletion.