Topic
System administrators and technicians with the appropriate permissions can set a schedule for reports to be distributed daily, weekly, and monthly.
Environment
NinjaOne platform
Description
Schedule a Report
- Click Reporting in the left side navigation pane and then open the Schedules tab at the top of the page.
- Click Create on the right side of the page.

The Create New Schedule modal displays with the Schedule tab open by default. - Give the new schedule a name and description (optional). Choose the language and frequency with which the report schedule should repeat. If needed, choose a number of occurrences or a date after which the schedule should end.
Repeat Option Description Daily Select how many days will go by between occurrences.

Weekly Select the day(s) of the week that the report will occur on and how many weeks will go by between occurrences.

Monthly Select the day of the month the report will occur and how many months will go by between occurrences.


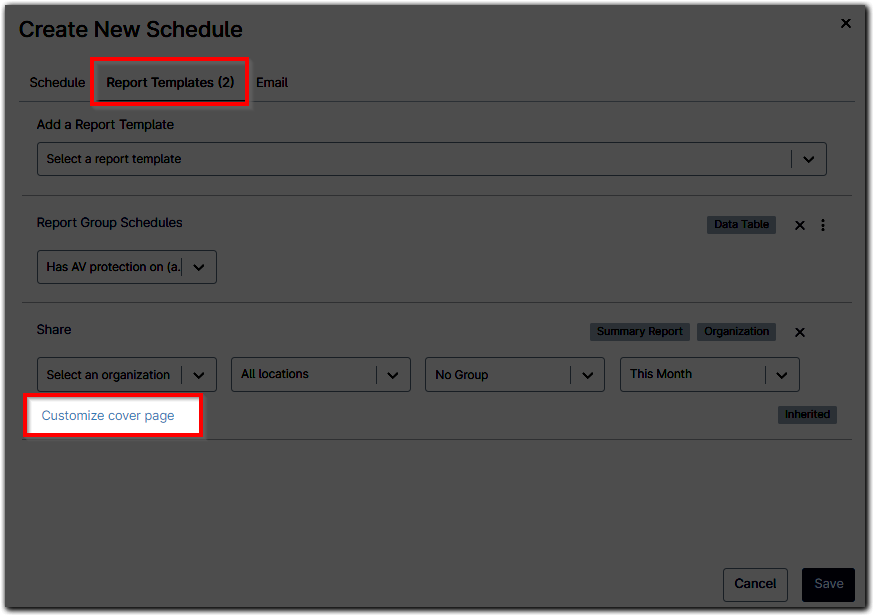
- Next, open the Reports tab and choose the report template(s) that should be included in this schedule.
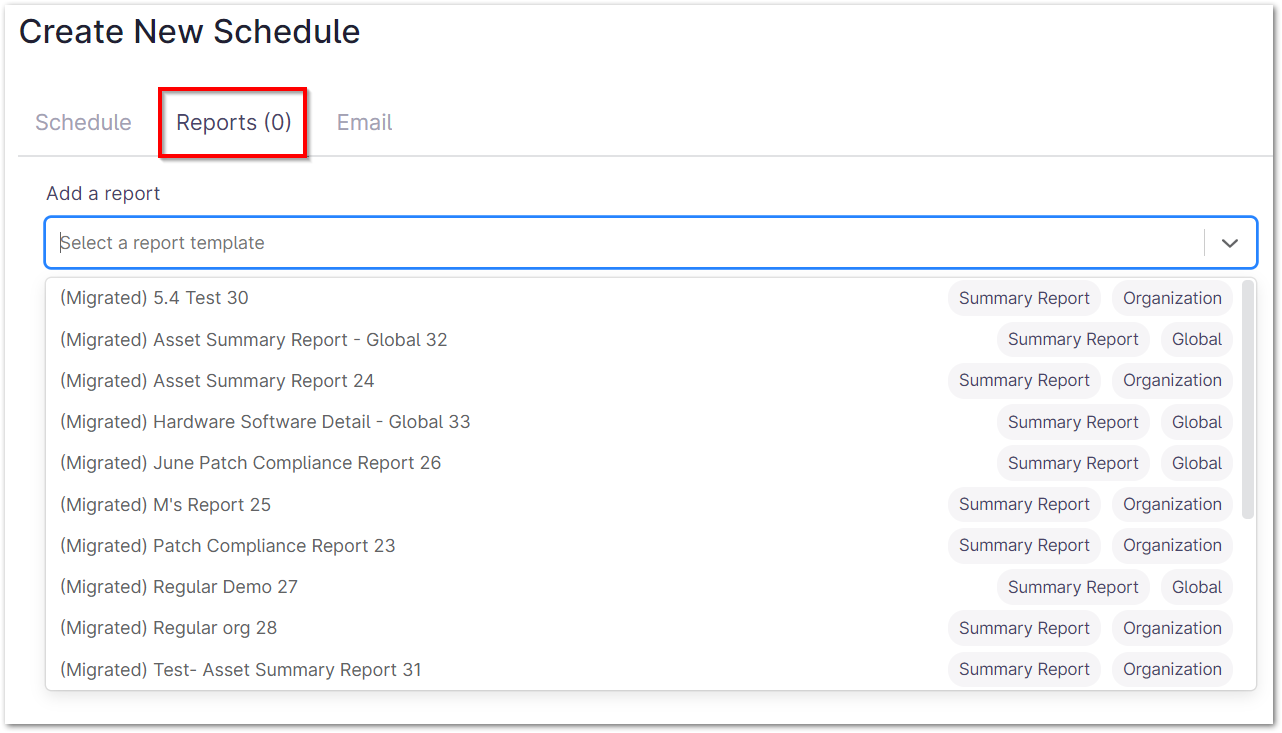
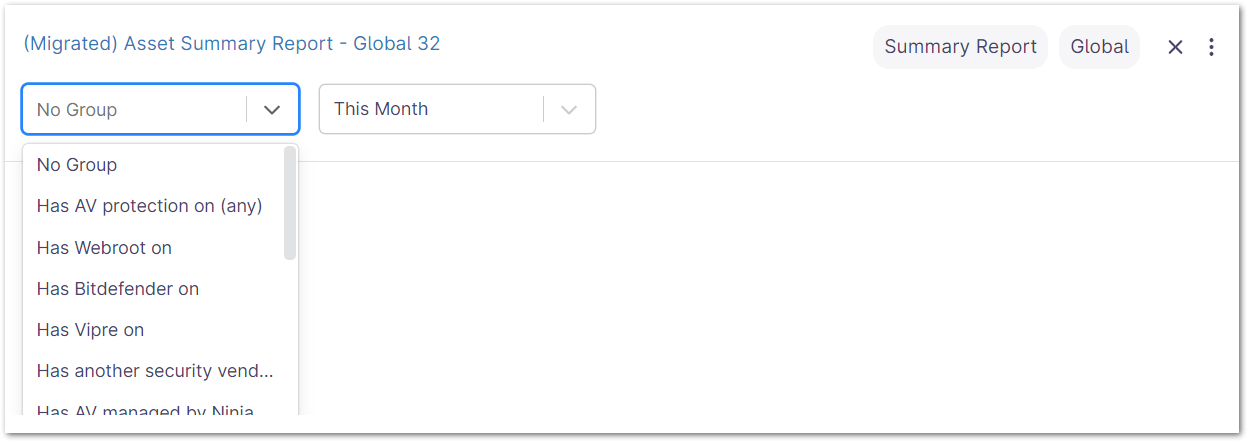
- Data Table templates need to have a group selected for the report.
- Global templates need to have a group and scope selected for the report.
- Organization templates need to have a scope and organization selected for the report. Optionally, a group and location can be selected as well.

- When selections are made from the dropdowns as shown in the screenshots above, the report will reflect data that meets the selected criteria. This may result in no data. Important Note: Click the ellipses icon to the right of a report to view or generate a copy of the report with the selected settings.

- When creating or editing a report schedule, the option to customize the cover page displays after you have selected the report template. Cover pages are customizable within the report schedule configurator, but not for ad hoc downloads. This option is available for only Summary Report templates.
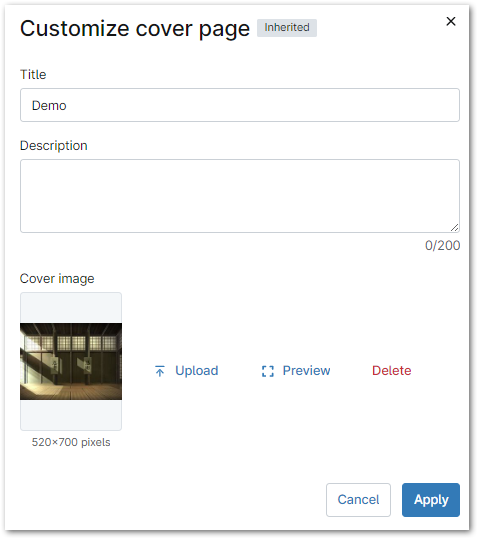
- Clicking this button opens a modal that allows the user to override the current title, description and cover image of that report template. The cover image will use the image uploaded to Reporting > Settings by default; use the Upload button to override this setting.
- Clicking this button opens a modal that allows the user to override the current title, description and cover image of that report template. The cover image will use the image uploaded to Reporting > Settings by default; use the Upload button to override this setting.
- Finally, open the Email tab to add recipients and customize the subject and message for the email housing the report. Once the schedule has been configured properly, click Save.
 Important Note: Recipients may be either a NinjaOne technician account or an email address. To add a standalone email address, type the address into the Recipients field and then press Enter on your keyboard.
Managing Report Schedules
- Once a schedule has been created, it can be easily disabled/re-enabled by hovering over the row, clicking the ellipsis button, and then selecting Enable/Disable; note that you cannot enable a schedule that has not been claimed. Disabling a schedule can be used to put it on "pause."
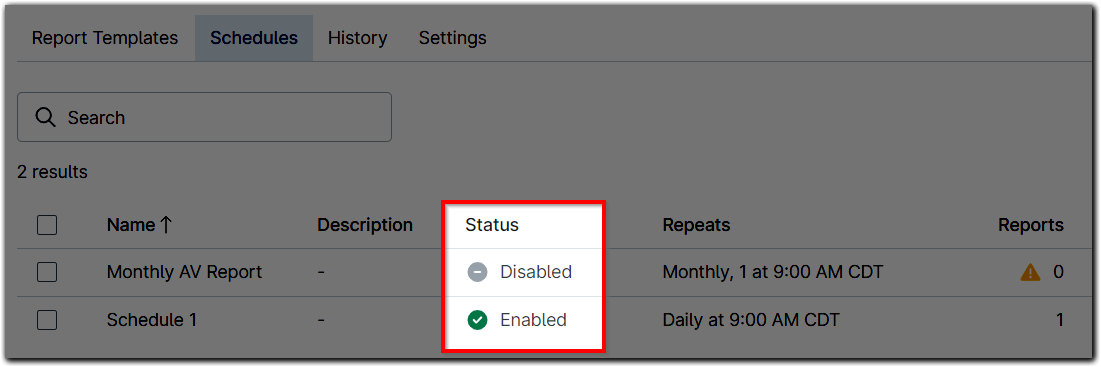 Important Note: When you disable a schedule, this data is displayed on the Reporting dashboard for that report. Disabled schedules show a "0" under the Schedules column of the Report Templates tab; you can still view and delete these reports, but they will not be delivered to a recipient.
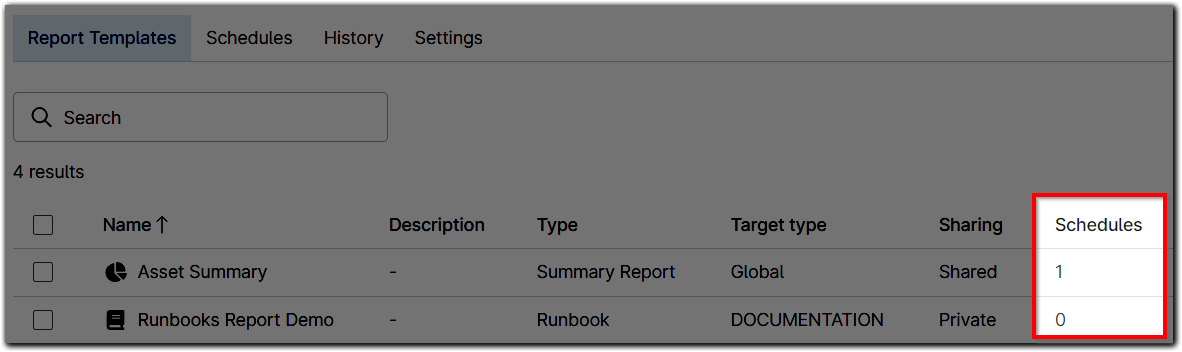
- Options to edit, copy, or delete the schedule are also available under the ellipsis icon on the right. You can also delete a schedule by activating its checkbox and then clicking Delete at the top of the table. Multiple schedules can be disabled or enabled in bulk, if the selected schedules all have matching statuses.

- If the Reports column shows a yellow triangle icon, this means that the report assigned to the schedule has been deleted. You can edit the schedule to add a different report, or delete the schedule. Please note that you cannot update these schedules if the Status is disabled due to ownership (see below).

Scheduled Report Ownership
When a technician account is deleted from NinjaOne, all scheduled reports created by that technician will be disabled. If this happens, the Status column will also display a tooltip next to the Disabled toggle switch alerting to the fact that the schedule cannot be re-enabled until it has been claimed. 
Only system administrators can claim ownership of a scheduled report. To claim ownership, click the scheduled report name hyperlink to open the Edit Schedule modal, then click Claim Ownership in the bottom left corner.
