Topic
This article describes the operating system (OS) patch management features available for Microsoft Windows endpoints managed by NinjaOne. It also explains how to activate, configure, and view patching activity.
Environment
- NinjaOne Patching
- Microsoft Windows
Description
NinjaOne Patch Management allows you to create patching policies that automatically scan for and apply new OS patches for your Windows endpoints.
Windows Patch Management (NinjaOne, Inc., 01:36)
Select a topic to continue.
- Important Considerations
- Activating Windows Patch Management
- Configuring OS Patching Settings
- Approval and Override Settings
- Viewing OS Patch Scan and Installation Attempts
- Configuring a WSUS Server to Use with Windows Patching
Important Considerations
Older Microsoft Windows Versions
Due to Microsoft discontinuing an outdated Windows Update service endpoint, Windows Vista and many versions of Windows 7 and Windows Server 2008 do not support NinjaOne Patch Management.
You can update devices running Windows 7 SP1, Windows Server 2008 R2 SP1, and Windows Server 2008 SP2 to work with NinjaOne Patch Management. Refer to Windows Update SHA-1-Based Endpoints Discontinued for Older Windows Devices (external link) for more information about updating older Windows versions for compatibility with NinjaOne Patch Management.
System Messaging and Option Gating
When OS patching is activated, a message stating, "Some settings are managed by your organization," may appear locally on the machine's Windows updater.
When OS patching is activated, the Give me updates for other Microsoft products when I update Windows option may be unavailable in Windows Update settings on local machines. You can manage updates for Microsoft products through the third-party patching (3PP) tool. Refer to
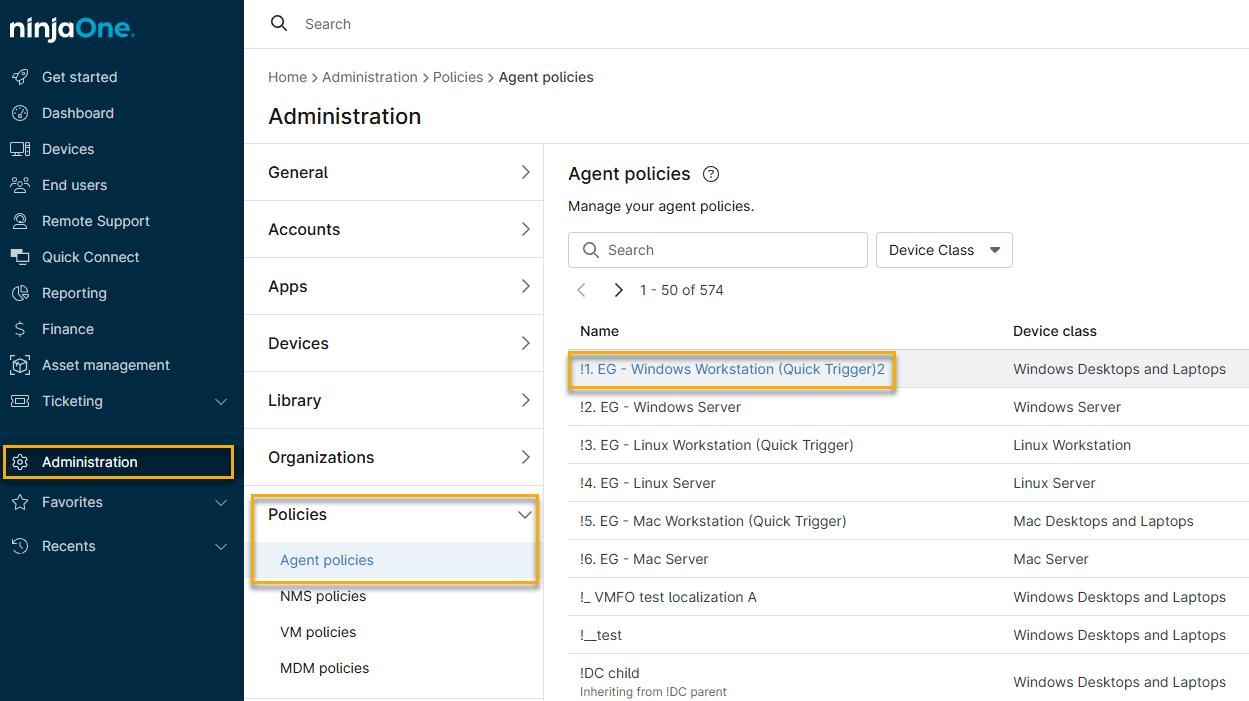
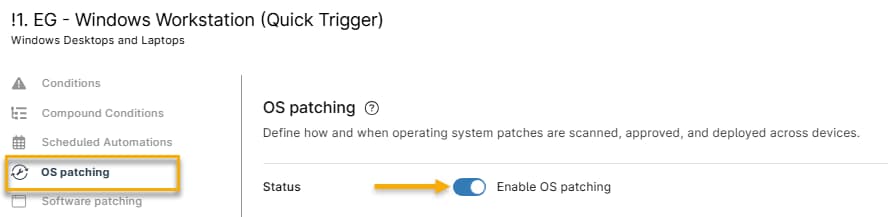
- The policy configuration page will open. Click the OS Patching option, then activate the Status toggle. NinjaOne does not apply changes until you save the policy.
- Configure OS patching settings, then click Save. Refer to the Configuring OS Patching Settings section of this article for more information.
- After saving, NinjaOne will push a custom executable named NinjaOrbit.exe to all endpoints in the policy, which controls patch management for those machines.
- After the endpoint devices install the custom executable, they will run a silent scan. NinjaOne will not generate activity feed entries for this initial silent scan.
Configuring OS Patching Settings
The settings in the upper portion of the OS Patching page include configuration options for scanning, patching, and running automations before and after updates. When you finish your configuration, click Save to apply the new settings. The following table describes each setting.
Use the table below to learn more about each setting.
| Setting | Description |
|---|---|
| Mode | NinjaOne offers two modes for Windows patch management:
If you set your policy to Configure Windows Update settings through NinjaOne, NinjaOne cannot install patch updates on the device. |
| Scan and Update schedules | These parameter sets determine when the device will scan for available new patches, and when it will apply those updates.
|
| Pre-automation and Post-automation execution | This setting lets you add automations that will run before (pre) or after (post) patch installation.
Click Add to select automations from the Automation Library. Refer to NinjaOne Policies: Scheduled Automations to learn more. Select Cancel the patch update if the pre-script returns a failure message to cancel the patching job automatically if the pre-script fails. |
| Update notifications | Choose how NinjaOne notifies users when it needs to update software that it cannot patch in the background. The current setting will show as a link in this section. Click the link for the following additional options:
|
| Reboot options: Logged-in user | These settings let you specify reboot behavior and prompting for users who are logged into a newly patched device:
If an end user interacts with a reboot prompt, NinjaOne will display an activity in the activity feed. Refer to Device and System Activity Notification Feed for more information. |
| Reboot options: No logged-in user | These settings let you specify reboot and prompting behavior for newly patched devices with no users logged in:
|
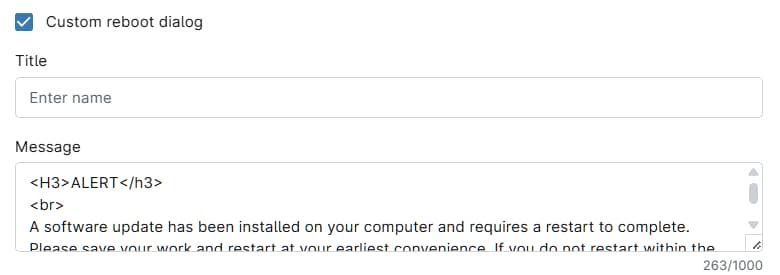
Creating a Custom Reboot Prompt
If you select Custom Reboot Dialog when configuring settings for Reboot options: Logged-in user, NinjaOne will open a Custom reboot dialog window, allowing you to enter a title for your prompt and a custom reboot request message. You can format this message by using HTML tags.
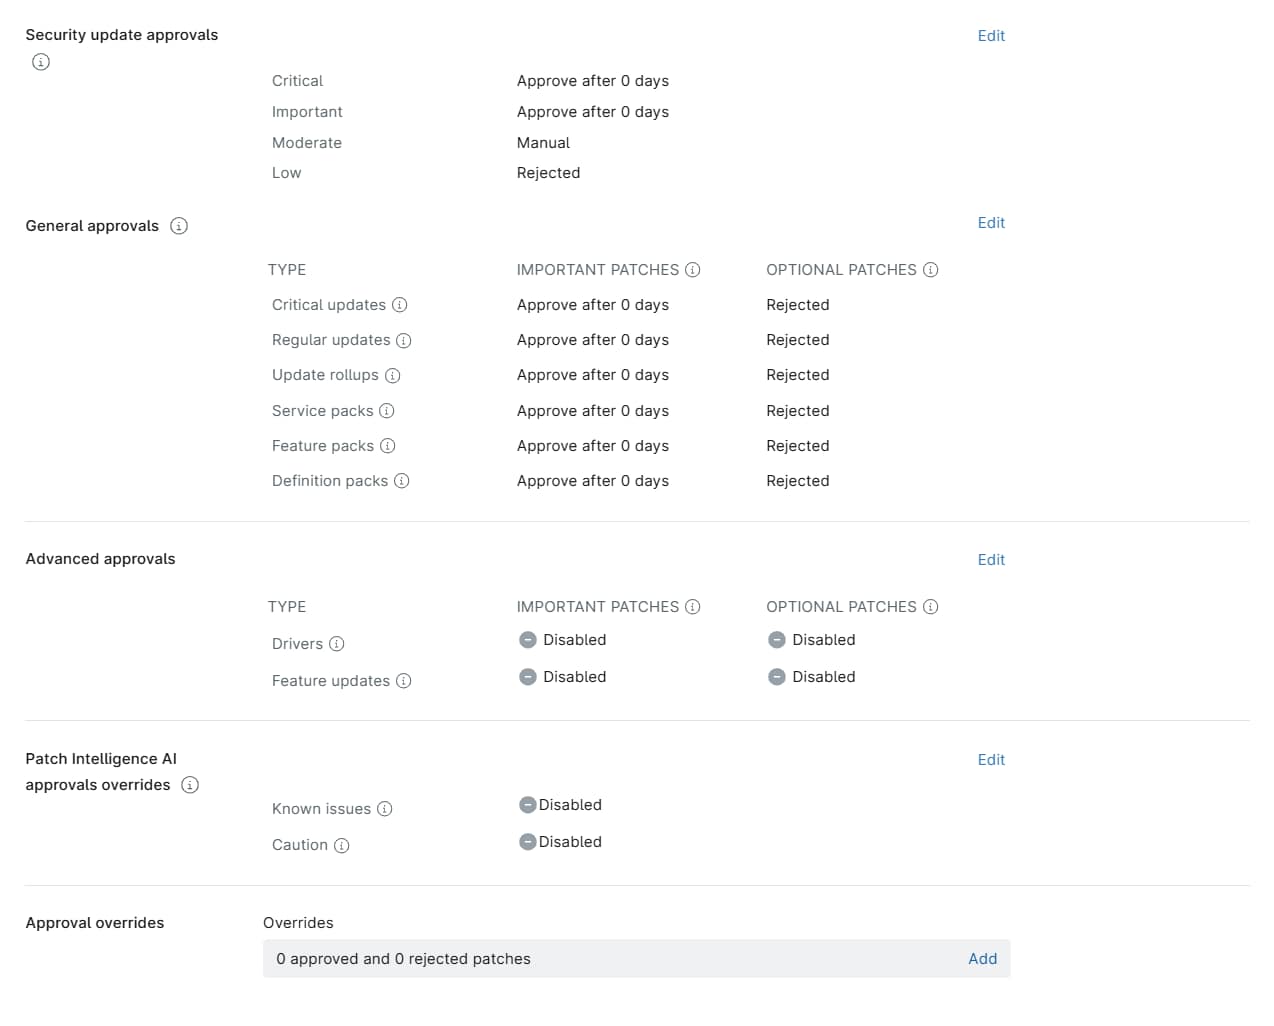
Approval and Override Settings
The settings in the lower portion of the OS Patching page include options to:
- Set automatic approvals for security updates and general updates.
- Set advanced update approval states for device drivers and Windows features.
- Activate Patch Intelligence AI approval overrides.
- Add approval overrides to the patching policy.
Approval Setting Options
Each patch type has the following approval options: Approve, Manual, and Reject.
- Approve: This option automatically approves all patches for that category for installation in the next update cycle.
- Manual: When found, patches in this category will appear pending, requiring manual approval or rejection (either for the device or the entire policy).
- Reject: This option automatically rejects all patches for that category, so NinjaOne will not install them on the device.
Use the table below to learn more about each setting.
| Setting | Description |
|---|---|
| Security update approvals | Configure approval settings for product-specific, security-related vulnerabilities. Microsoft categorizes security vulnerabilities in its security bulletin as Critical, Important, Moderate, or Low. We recommend applying Critical and Important fixes immediately. For Moderate fixes, we advise reading the related KB before patching. Click Edit to set NinjaOne to approve, reject, or require manual patch approval automatically. |
| General approvals | Configure approval settings for bugs that are not security-related by Microsoft-designated category. Refer to Microsoft's article on software update terminology (external link) for more information. Click Edit to set the following parameters:
|
| Advanced approvals | Activate and set approval status for device drivers and Windows feature updates. Click Edit in this section to activate or deactivate advanced approvals.
We recommend the following settings, unless your use case requires a different configuration:
As an alternate method for deploying feature updates, you can install the following custom script: Custom Script: Upgrade Windows 10 Build. |
| Patch Intelligence AI approvals overrides | Activate approval status changes for patches that the Patch Intelligence AI considers known issues, or for patches with a Caution status. Refer to NinjaOne Patching: Patch Intelligence AI to learn more. |
| Approval overrides | Set NinjaOne to override your patching policy for specific patches. Click Add to open the Edit approval overrides window, then search for the patch name. Use the second drop-down menu to select whether to approve or reject the patch. Examples of scenarios in which patches would appear in the Overrides section:
Patches with statuses you choose to override appear in the Overrides section. Click Add in the Overrides field to add and remove overrides as necessary. Use caution when viewing the patching policy's Overrides page with filters in place. If you use a filter and then click the Clear All button, this action will clear all overrides (both rejected and approved), not just the ones that are filtered. |
Viewing OS Patch Scan and Installation Attempts
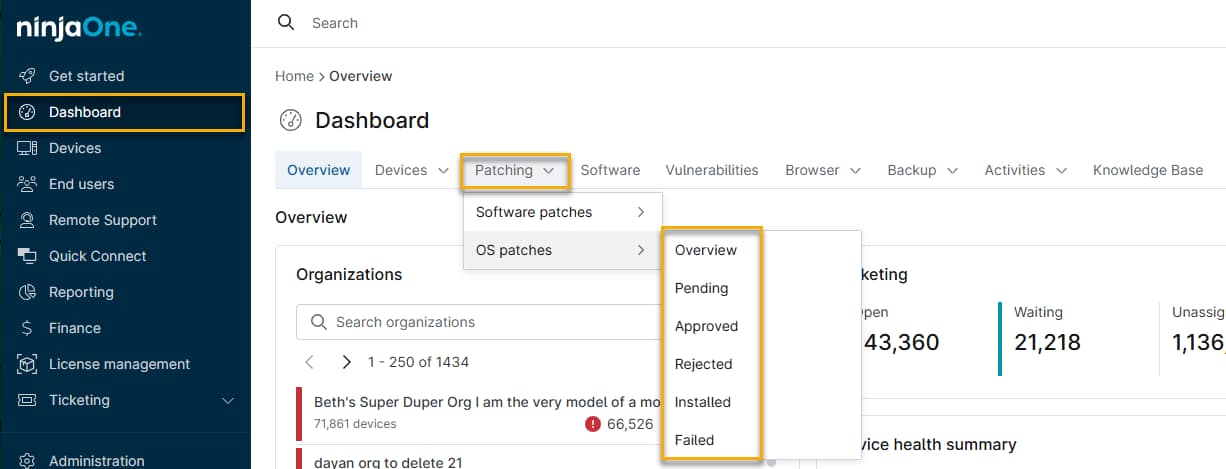
You can view patches found and patches installed in Dashboard → Patching → OS patches. Use the flyout menu to filter by patch status (Pending, Approved, Rejected, Installed, or Failed).
After a patch attempts to install during an update cycle, NinjaOne logs it in the OS patches tab of the dashboard as either Installed or Failed.
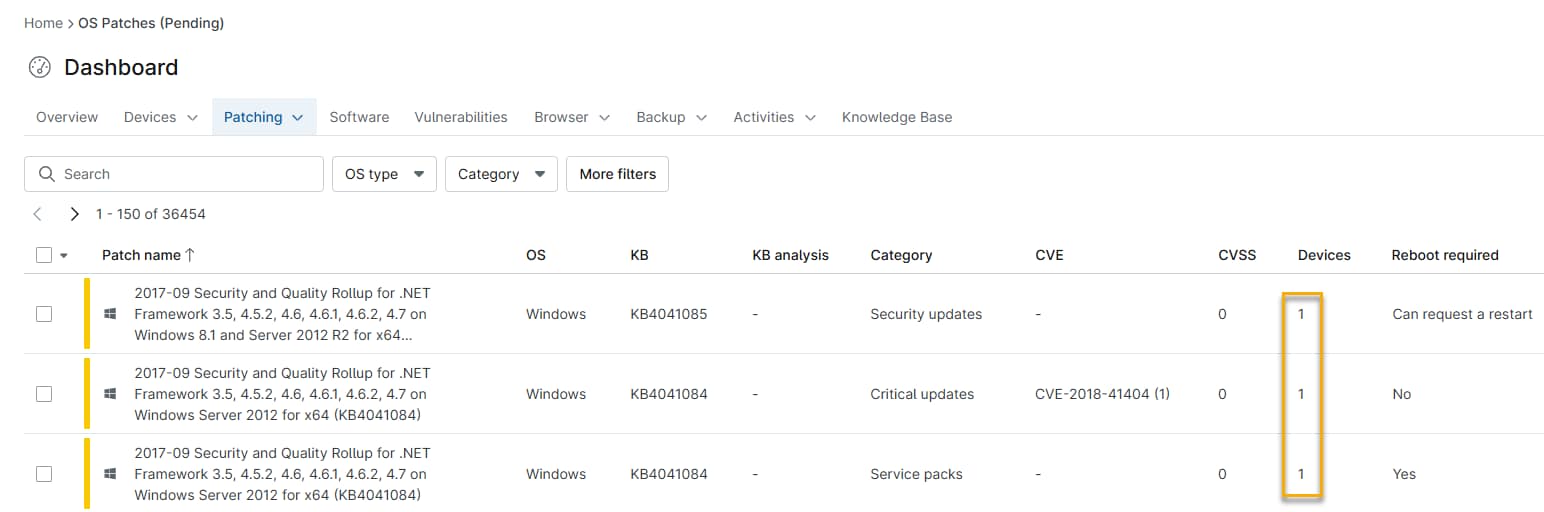
Viewing Applicable Devices for a Patch
At the System or Organization dashboard level, you can click the number in the Devices column to generate a list of the devices to which the patch status applies. For example, clicking the number for a patch in the Approved tab shows the devices for which NinjaOne has approved it, but not yet installed it.
Configuring a WSUS Server to Use with Windows Patching
A Windows Server Update Services (WSUS) server can help to reduce the network traffic associated with patching.
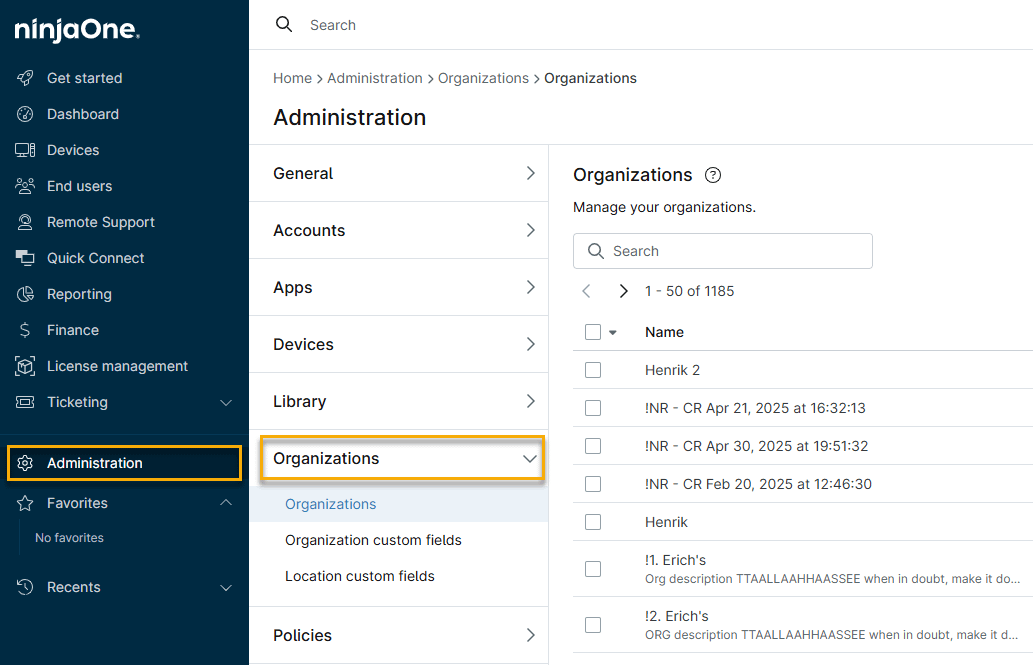
- In NinjaOne, click Administration → Organizations, then choose an organization from the list.
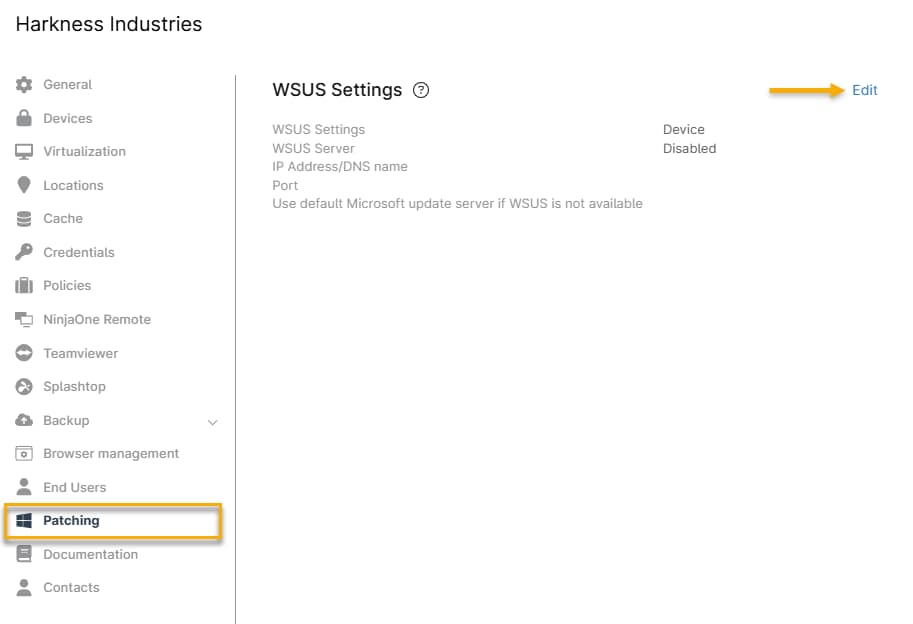
- Click the Patching configuration tab, then click Edit.
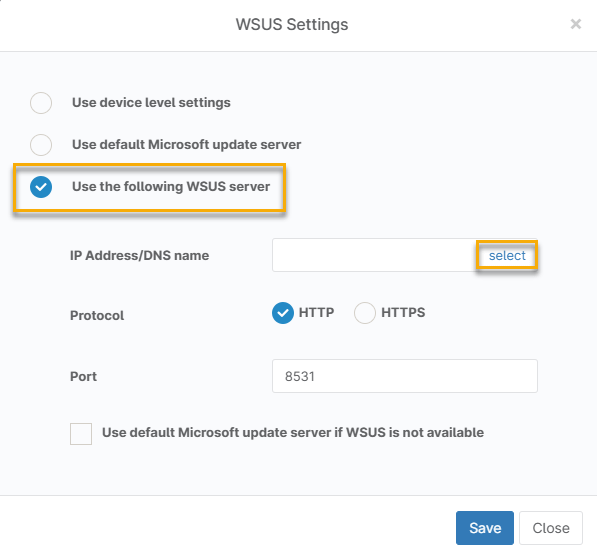
- The WSUS Settings window opens. Click Use the following WSUS server, then use theIP Address/DNS name field to target the server. This action resets the current registry keys in WindowsUpdate and inputs the WSUS server.
- If the NinjaOne Agent is installed on the WSUS server: Click Select, then choose the WSUS server from the list.
- If the NinjaOne Agent is not installed on the WSUS server: enter its IP address or DNS name.
- Configure your protocol and port, then select whether you would like to use Microsoft's default update server if WSUS is not reachable for patching. When finished, click Save. Your newly configured WSUS settings will show in the UI.
Enabling the WSUS Server per Location
You can set up WSUS servers at different locations to optimize bandwidth and service delivery speed.
- In the Organization editor, click the Locations tab, then click Add Location.
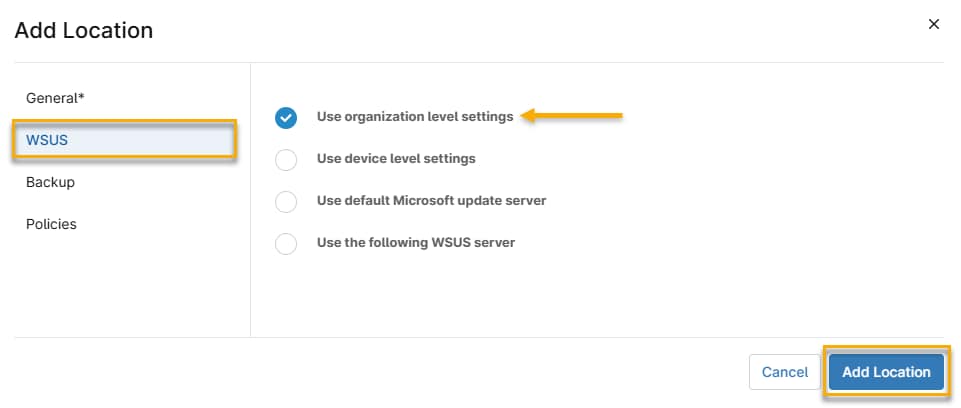
In the Add Location window, select WSUS, then click Use organization level settings. The server will use the WSUS settings you previously configured.
Using Other Location-Based WSUS Server Settings
You can set device-specific settings for a WSUS server at another location.
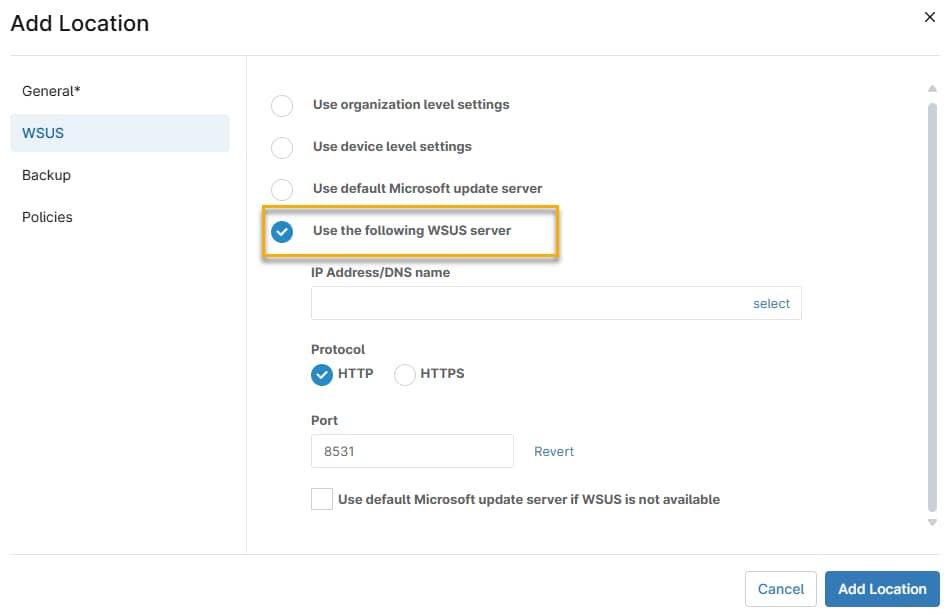
- Use default Microsoft update server: Click this selection to use the default Microsoft update server. If you choose this option, NinjaOne will reset the existing settings and ensure the device uses the cloud for patching. NinjaOne will not patch devices through a WSUS server.
- Use the following WSUS server: Select this option to configure these settings for the location. When chosen, additional settings open in the Add Location window. Configure the IP Address/DNS Name, Protocol, and Port. Select the Use default update server if WSUS is not available checkbox to receive updates directly from Microsoft if NinjaOne cannot reach your WSUS server.