Topic
This article explains how to set up System for Cross-domain Identity Management (SCIM) for your Okta integration in NinjaOne for user provisioning.
Environment
- NinjaOne Integrations
- Okta
Description
Integrating Okta with NinjaOne via SCIM allows you to automatically create, delete, and provision technicians and end users within NinjaOne. This article serves as a starting point for SCIM configuration with NinjaOne. Configuration is dependent on your specific Okta setup, so we recommend reviewing the Additional Resources section to find related processes.
For more details on the concepts behind lifecycle management with SCIM and Okta, refer to Understanding SCIM | Okta Developer (external link).
Index
Select a category to learn more:
- Pre-requisites
- Enable SCIM in Okta with the Okta OIN Application
- Map Attributes Between NinjaOne and Okta
- Create NinjaOne Technician Accounts
- Assign End Users to a NinjaOne Organization
- Assign Users and Groups to SCIM Provisioning
- Configure Group to Role Mapping in NinjaOne
- Additional Resources
Pre-requisites
Before you can integrate Okta login for NinjaOne, you must create the identity provider (IdP) in NinjaOne and enable SCIM. For instructions, refer to Configuring NinjaOne SAML in Okta. Then, proceed to the next section of this article.
Enable SCIM in Okta with the Okta OIN Application
To enable SCIM in Okta, perform the following steps:
- Log in to your Okta Admin account.
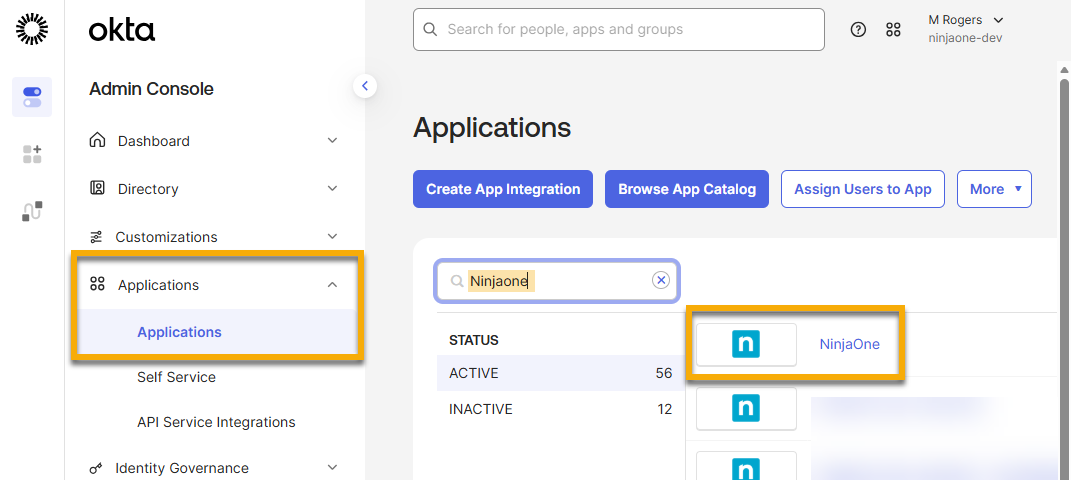
- Open the menu in the top left corner of the page. In the left navigation pane, expand Applications and click the Applications tab.
The Applications page displays.
- Select the NinjaOne application.
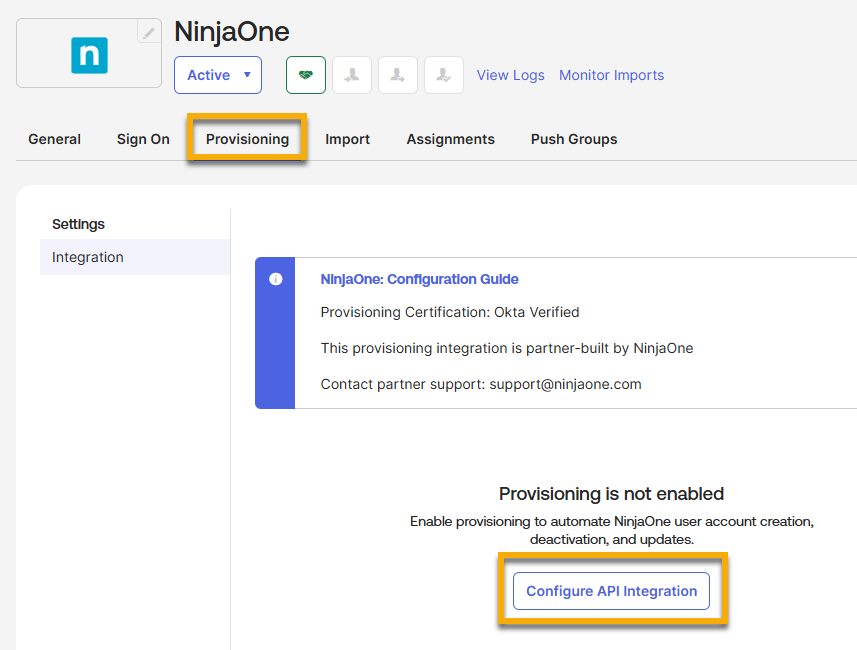
- Open the Provisioning tab and click Configure API Integration.
- Open a new browser tab and use it to sign in to NinjaOne as a system administrator.
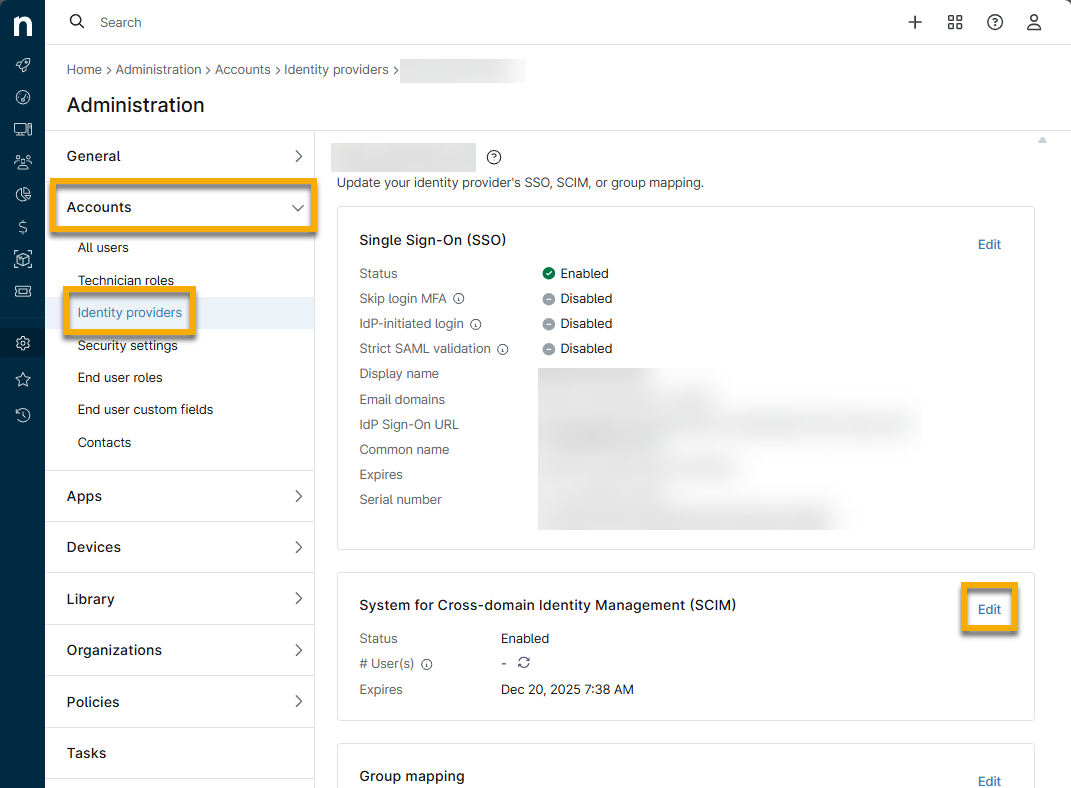
- Navigate to Administration → Accounts → Identity Providers and select the IdP that you created for Okta as a prerequisite to this process.
- Click Edit in the System for Cross-domain Identity Management widget.
- In the Configure SCIM modal, click the toggle switch to enable SCIM provisioning.
- Click Generate token.

- Click the paper icon to copy the SCIM secret token. Return to the Okta admin console.

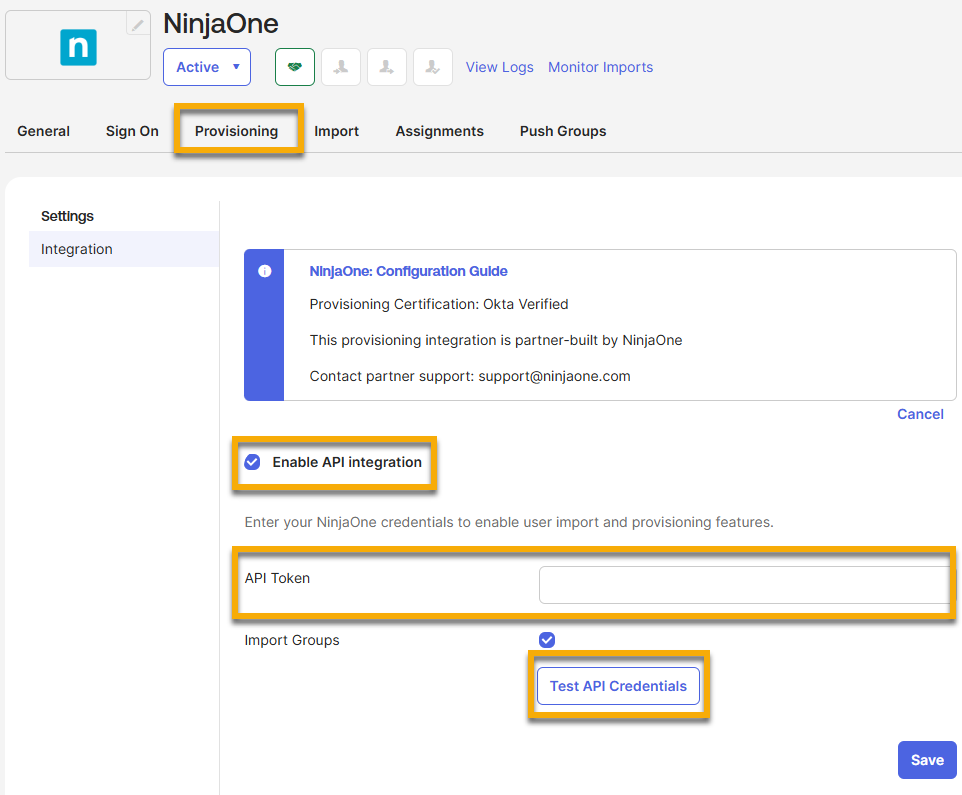
- From your previous location on the Okta Admin Console (NinjaOne application → Provisioning), paste the secret token into the API Token field. Click Test API Credentials and then Save when successfully verified. The Provisioning tab will reload and display user provisioning settings.
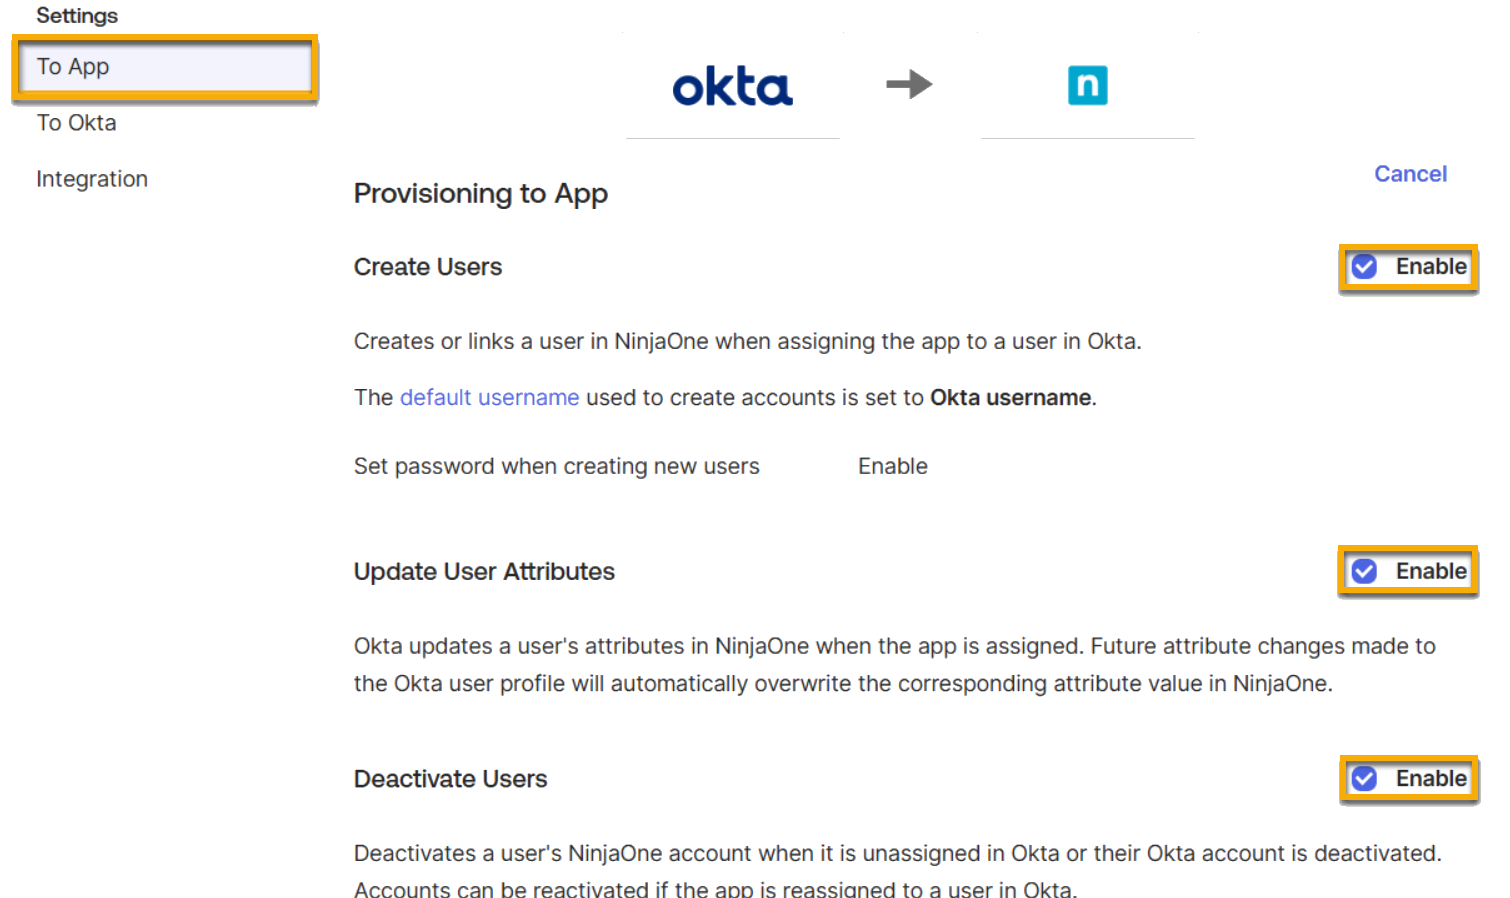
- Click the To App section that has been added to the Provisioning tab. Click Edit and then click Enable for the following options:
- Create Users
- Update User Attributes
- Deactivate Users
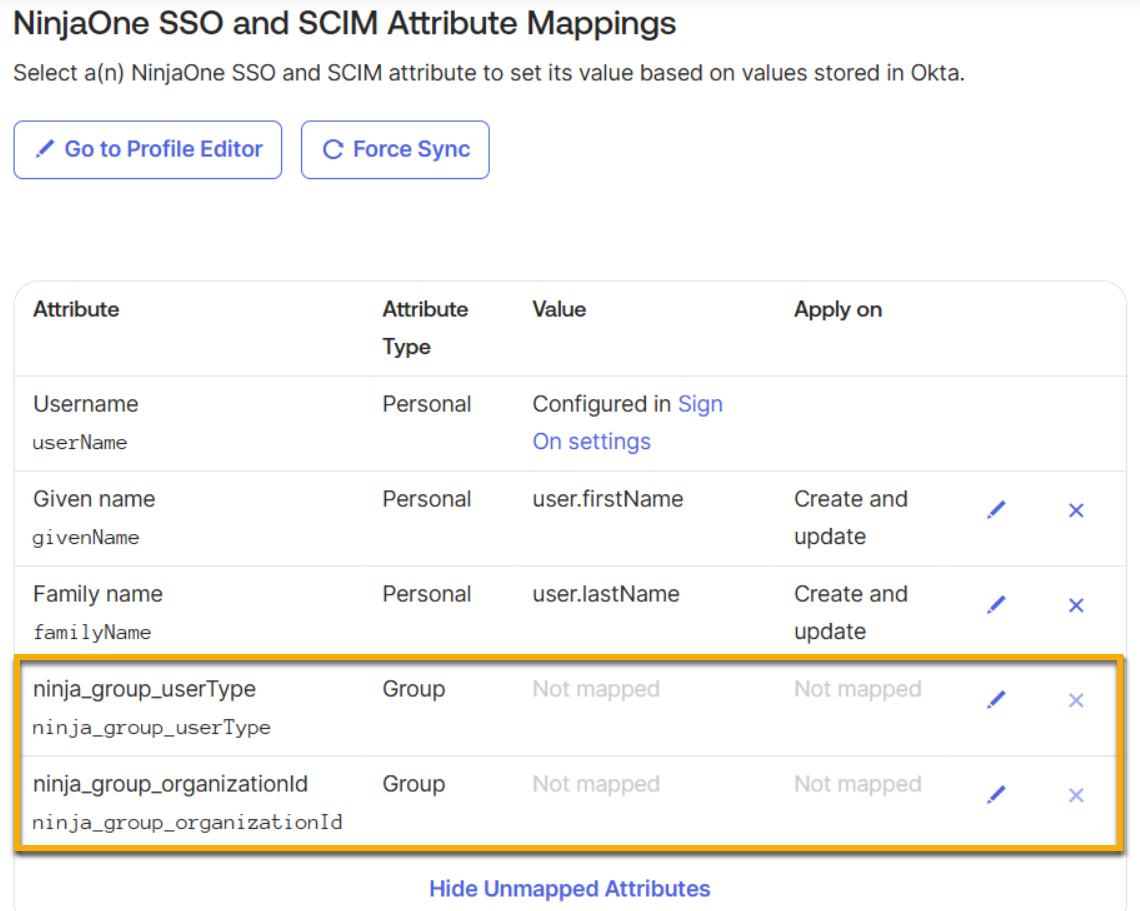
- Scroll down to the NinjaOne App Attribute Mappings section and click Show Unmapped Attributes. Proceed to the next section to configure the user attributes.
Map Attributes Between NinjaOne and Okta
You can use attributes to set the NinjaOne username, first name, last name, and email address. Additionally, you can use them to create technician accounts and map end users to specific NinjaOne organizations.
Find the ninja_group_userType and ninja_group_organizationId attributes in the Unmapped Attributes list. You may need to click Show Unmapped Attributes to find these attributes. You do not need to create them.
Create NinjaOne Technician Accounts
If you are creating technician accounts, you must assign a value to the ninja_group_userType attribute. Accounts missing an accepted attribute value will be automatically created as end users.
The userType attribute has two accepted values:
- Set the attribute to "technician" to create a technician account.
- Set the attribute to "endUser" (case sensitive) to create an end-user account.
To map the ninja_group_userType attribute, perform the following steps:
- Click the pencil icon to edit the attribute.
Select an option from the Attribute value drop-down menu that meets your organization's needs.
Attribute Value Definition or Purpose Same value for all users Assign all users to the NinjaOne Okta app who are of the same type. Map from Okta Profile Create an end-user or technician account based on the value of the selected profile attribute. Expression Create an end user or technician based on the output of your custom Okta expression. For more information, refer to Okta Expression Language overview guide | Okta Developer (external link). - Select Create and update for the Apply on field.
- We recommend inserting multiple test users into the Preview field to confirm that your attribute mapping produces the desired output.
- Click Save.

Assign End Users to a NinjaOne Organization
If you are assigning end-user accounts to a specific NinjaOne organization or multiple NinjaOne organizations, you must assign a value to the ninja_group_organization attribute. Accounts missing an accepted attribute value will be automatically created as global end users.
The ninja_group_organization attribute has two accepted values:
- Set the attribute to "All" to create a global end user.
- Set the attribute to "<your organization ID>" to assign a user to the corresponding NinjaOne organization.
If you need help finding the organization ID in NinjaOne, refer to NinjaOne Platform: How to Find an Organization ID.
To map the organization attribute, perform the following steps:
- Click the pencil icon to edit the attribute.
- Select an option from the Attribute value drop-down menu that meets your organization's needs.
| Attribute Value | Definition or Purpose |
|---|---|
| Same value for all users | Assign all users to the same NinjaOne organization. |
| Map from Okta Profile | Assign an end user to an organization based on the value of the selected profile attribute. |
| Expression | Assign an end user or technician based on the output of your custom Okta expression. For more information, refer to Okta Expression Language overview guide | Okta Developer (external link). |
- Select Create and update for the Apply on field. We recommend that you insert multiple test users into the Preview field to confirm your attribute mapping has the desired output.
- Click Save.
Assign Users and Groups to SCIM Provisioning
To assign users and groups to SCIM provisioning, perform the following steps:
- In Okta, navigate to the NinjaOne SSO/SCIM application.
- Open the Assignments tab and select the applicable option from the Assign drop-down menu. During the assignment, you will have the option to override your attribute mappings and set the user type and organization ID. If you are assigning a group, this change will affect all members of the group.

- Click Save. The user provisioning process will begin.
Configure Group to Role Mapping in NinjaOne
Optionally, you can configure NinjaOne roles to be assigned automatically to members of a specific Okta group via Group Mapping. To do so, perform the following steps:
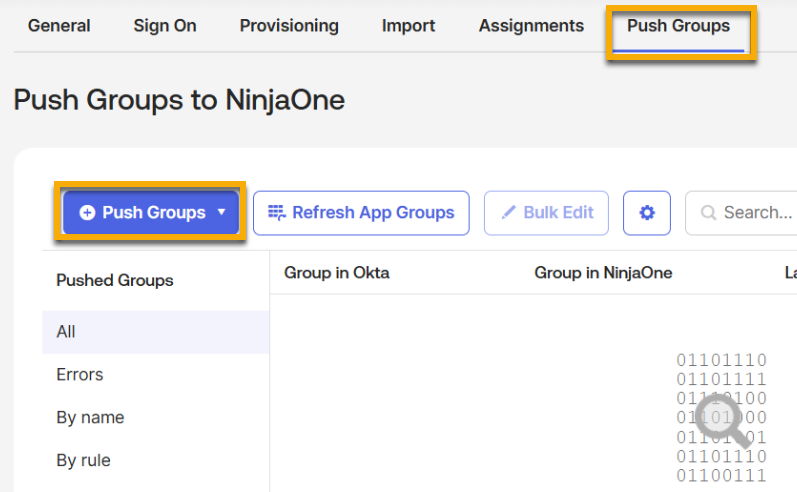
- In Okta, open the Push Groups tab in the Ninja SSO and SCIM application. Click Push Groups to set the target groups.
- Set the action to Create Group and save. This action can take up to an hour to complete.
- Log in to NinjaOne as a system administrator.
- Navigate to Administration → Accounts → Identity Provider.
- Select the Okta OIN IdP.
- Next to Group Mapping, click Edit.
- Choose roles from the drop-down menu to associate with the groups that you synchronized with Okta, if any. The menu will include both end-user roles and technician roles. The User Type assigned to the user in Okta determines which roles will be assigned to each user. If you need to create new roles, refer to User Roles and Permissions for instructions.
Additional Resources
Refer to the following resources to learn more about Identity Access Management (IAM) processes in NinjaOne: