Topic
This guide goes over how to set up the Accelo integration if you have an existing Accelo account. If you do not yet have an Accelo account, please see Accelo: Setup with a new account.
Environment
NinjaOne and Accelo integration
Description
- Setting up Accelo with an Existing Account
- Configuring NinjaOne's Help Request Form Option for Accelo
Setting up Accelo with an Existing Account
- Navigate to Administration > Apps, and then click Add Apps.

- Locate and select Accelo from the list of apps.
- Once added, click Enable.
- Enter your hostname into the text field. This information can be found in the URL field when you log into your Accelo account.
- Click Login with Accelo.
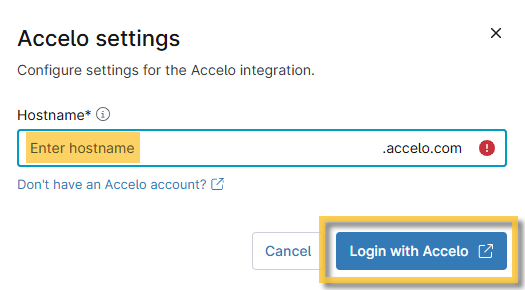
Figure 2: Accelo settings configuration
You are routed to Accelo's site to the Integrations page.
- Under Ticketing Integrations, click on NinjaRMM.
The NinjaRMM connection settings configuration page displays on the right side of the screen. - Click Import to bring your NinjaOne organizations and devices into Accelo.
- Once the import has started, you can return to Ninja.Important Note:The import could take some time depending on your number of devices.
- Click Finish to complete the integration.
You should now see the status: Enabled.
From Accelo, you can also verify the NinjaOne Integration is configured from the Integrations page (Account & Profile → My Integrations).
Configuring NinjaOne's Help Request Form Option for Accelo
NinjaOne's systray icon includes a help request form option, which allows end users to quickly submit requests for help from their machines. The following steps are required if you want to receive these requests in Accelo.
Email Display for the Help Request Form
Help request form submissions always come from the email '[email protected]'. To ensure these requests display properly in Accelo, you need to add that email as a contact within your Accelo environment.
The contact you create needs to be associated with an organization (i.e., "company") in Accelo. The company created does not need to be used aside from housing the contact help request form.
- Navigate to your Accelo dashboard and select Create (+) → Company. If you already have a company with which you would like to associate the contact, click Create (+) → Contact instead.

Figure 3: Accelo platform → Create company
- Designate a name for the new organization at the top of the page.
- In the process of creating the organization, you also have the option to create the contact. Fill out the fields for a new contact or click Link Existing if a contact for '[email protected]' already exists in your Accelo account.

Figure 4: Accelo platform → New company → Link contact
- Click Companies in the left navigation pane and select any company on the list if you wish to add the '[email protected]' contact to additional companies.
- Once the company overview page is open, open the Contacts tab and click Add Contact.
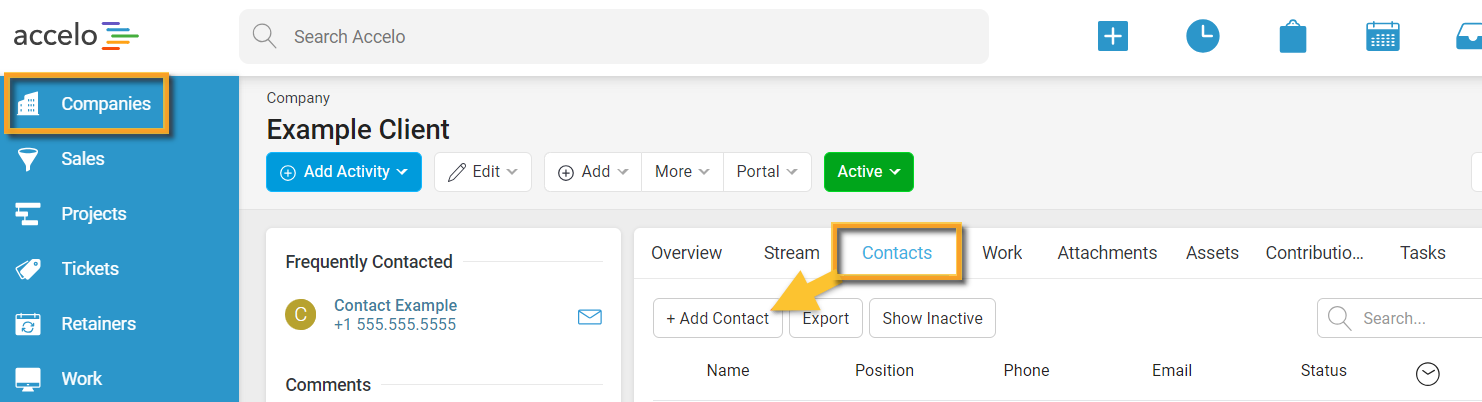
Figure 5: Accelo platform → Companies → Contacts → Add contact
For more information about creating an organization/contact, please see Accelo's documentation.
Email Request by Type
When an email address is added to a request type, any email sent to that address will be created as new requests for the type selected.
- Within Accelo, navigate to Settings (gear icon) → Requests → Types.
The Request Type List table displays to the right. - Click the title for the request type that you want to set up for receiving submissions of help request forms.
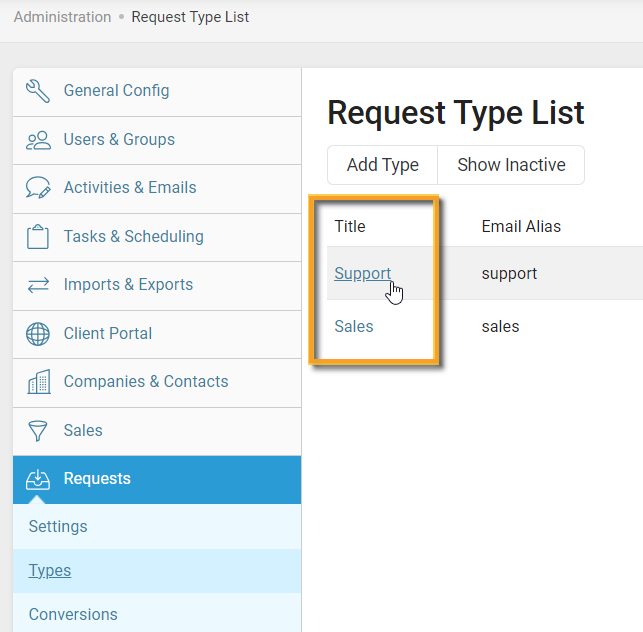
Figure 6: Accelo request type list
- Note the Incoming Capture Address listed, as this will be used in the next set of steps.
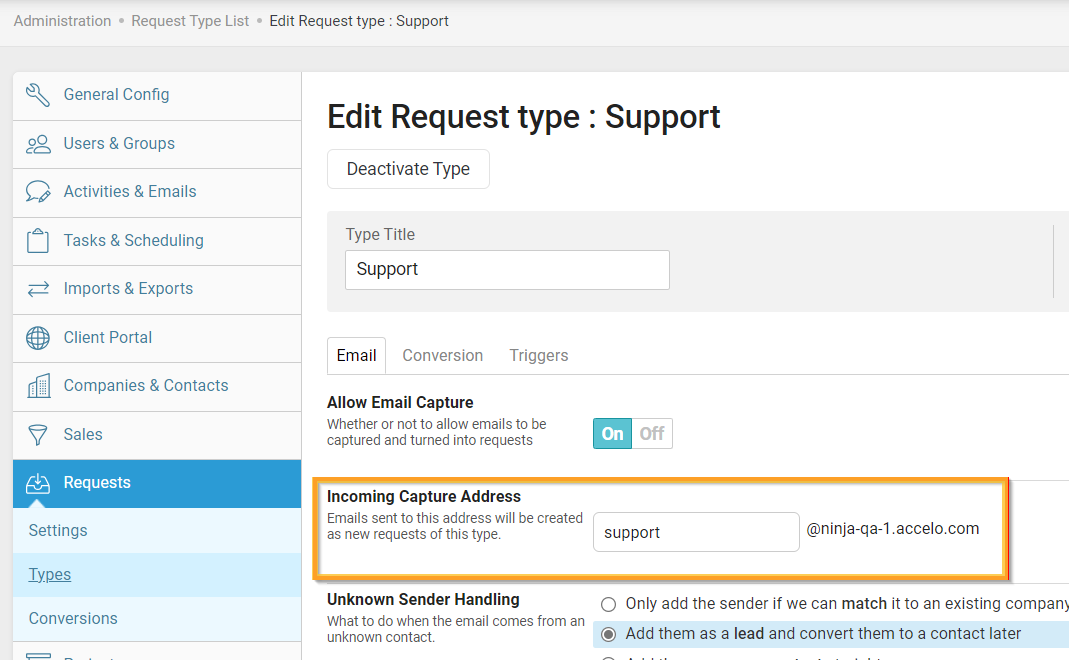
Figure 7: Accelo request type → Incoming Capture Address
Forwarding Rule for Incoming Capture Address
Within your email system, set up a rule to automatically forward help request form submission emails from NinjaOne to the Incoming Capture Address you noted in the steps above.
You should now see help request form submissions come through as alerts in Accelo!