Topic
This guide explains how to set up SMTP (Simple Mail Transfer Protocol) email sending through Microsoft 365 for NinjaOne Ticketing.
Environment
NinjaOne Ticketing
Description
With NinjaOne Ticketing, you can configure Microsoft 365 as the authentication type for SMTP email sending, allowing you to exchange emails between servers.
Select a topic to continue.
Requirements
When configuring NinjaOne Ticketing, the items below must be taken into account to ensure the configuration is successful and you do not receive an authentication error:
- The account from which you send emails must be licensed with at least an Exchange Online Plan 1 License.
- The mailbox must have “Authenticated SMTP” as an allowed email application.
- You must have an administrator account with permissions to give consent to the NinjaOne–SMTP Microsoft 365 Application.
- You must ensure you do not have any conditional access policies that would block NinjaOne from logging into the account.
Configuration
If you have not yet enabled NinjaOne Ticketing, please see NinjaOne Ticketing: Setup and Configuration.
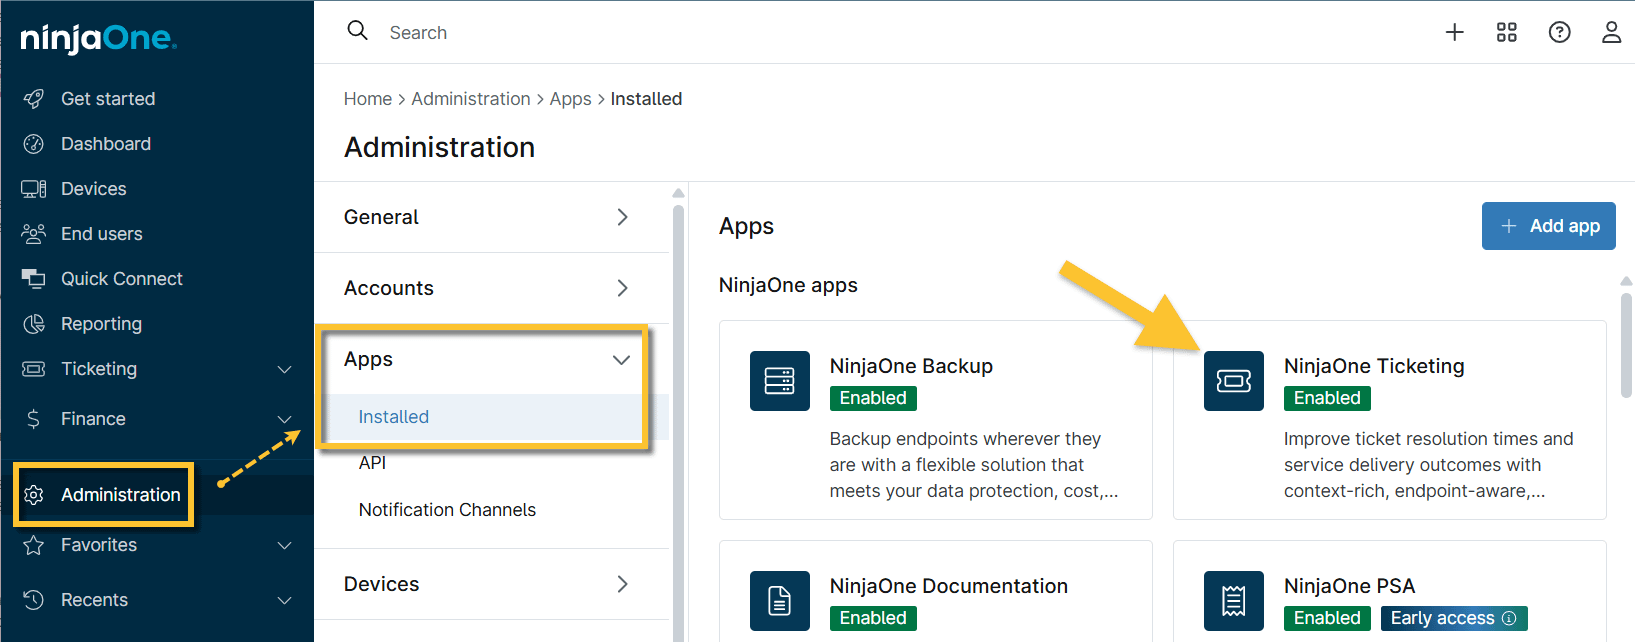
- Click Administration in the left navigation pane and select Apps (Installed), and then click Ticketing.
- On the Ticketing app configuration page, click Edit to the right of "SMTP Email Sending".

- Select "Microsoft 365" from the Authentication Type dropdown and then click Next.
New configuration fields will display on the modal. - Activate the Enabled toggle switch to turn on the outgoing mail server.
- Use the table below to enter the configuration details:
| Field | Data |
|---|---|
| Server | smtp.office365.com (you must use this for your server address) |
| Port | 587 |
Use as reply to email address | Select this checkbox to use the SMTP email address as the reply-to instead of the support email. |
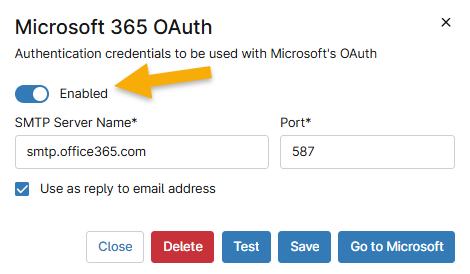
- Click Go to Microsoft.
Microsoftonline.com displays on the same tab. Click the first hyperlink option to sign in with an admin account.
If you do not have administrator privileges, you may need to request access and then approve the application with an administrator account. Then, return to the NinjaOne console and repeat the steps above after approval is granted.- Follow the prompts and then click Accept on the "Permissions requested" page.
Additional Resources
Refer to the following resource(s) to learn more about NinjaOne Ticketing:
- Ticketing Resource Catalog
- NinjaOne Ticketing SMTP Microsoft 365 Troubleshooting: General Rejection Issues
- NinjaOne Ticketing SMTP Microsoft 365 Troubleshooting: Disabled Authenticated SMTP
- NinjaOne Ticketing SMTP Microsoft 365 Troubleshooting: Setup Error when using Branded URLs
- NinjaOne Ticketing SMTP Microsoft 365 Troubleshooting: Emails are Bouncing Back or Undeliverable
- NinjaOne Ticketing SMTP Microsoft 365 Troubleshooting: Conditional Access and Security Issues